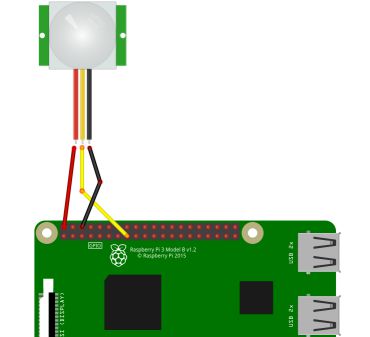
Read the statement by Michael Teeuw here.
{HowTo} turn on/off your monitor (Time based, PIR/Button, App)
-
Thats how i tested and it works like a charm. I just set up a fresh raspbian stretch Desktop.
There was no need to install wiring-pi! the scripts just ran “out of the box”.PIR: https://www.amazon.de/Aukru-HC-SR501-Menschliche-Pyroelektrizität-Bewegungssensor/dp/B00R2U8LLG
-
@MadScientist I went with this one. Only thing is it ain’t pretty so I’m looking to build it in to a nicer enclosure to increase the WAF.
I didn’t try using a ferrite ring, but I’ve got a few kicking around. Maybe worth a go.
-
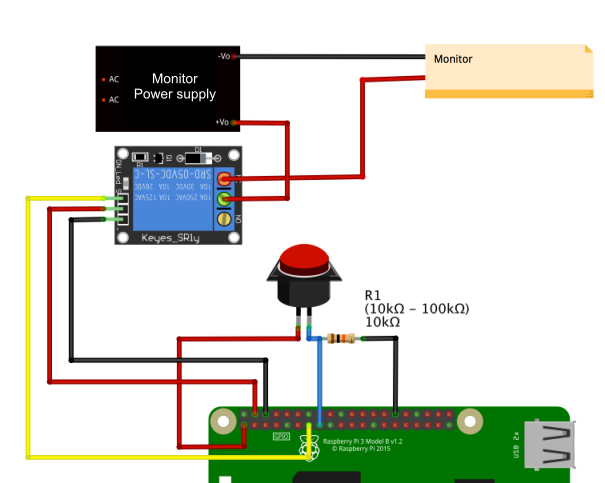
Should say, I’m just switching the ac in for monitor power directly…
-
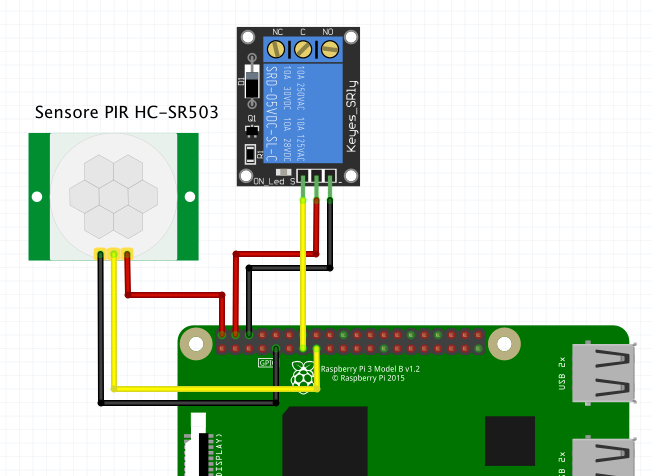
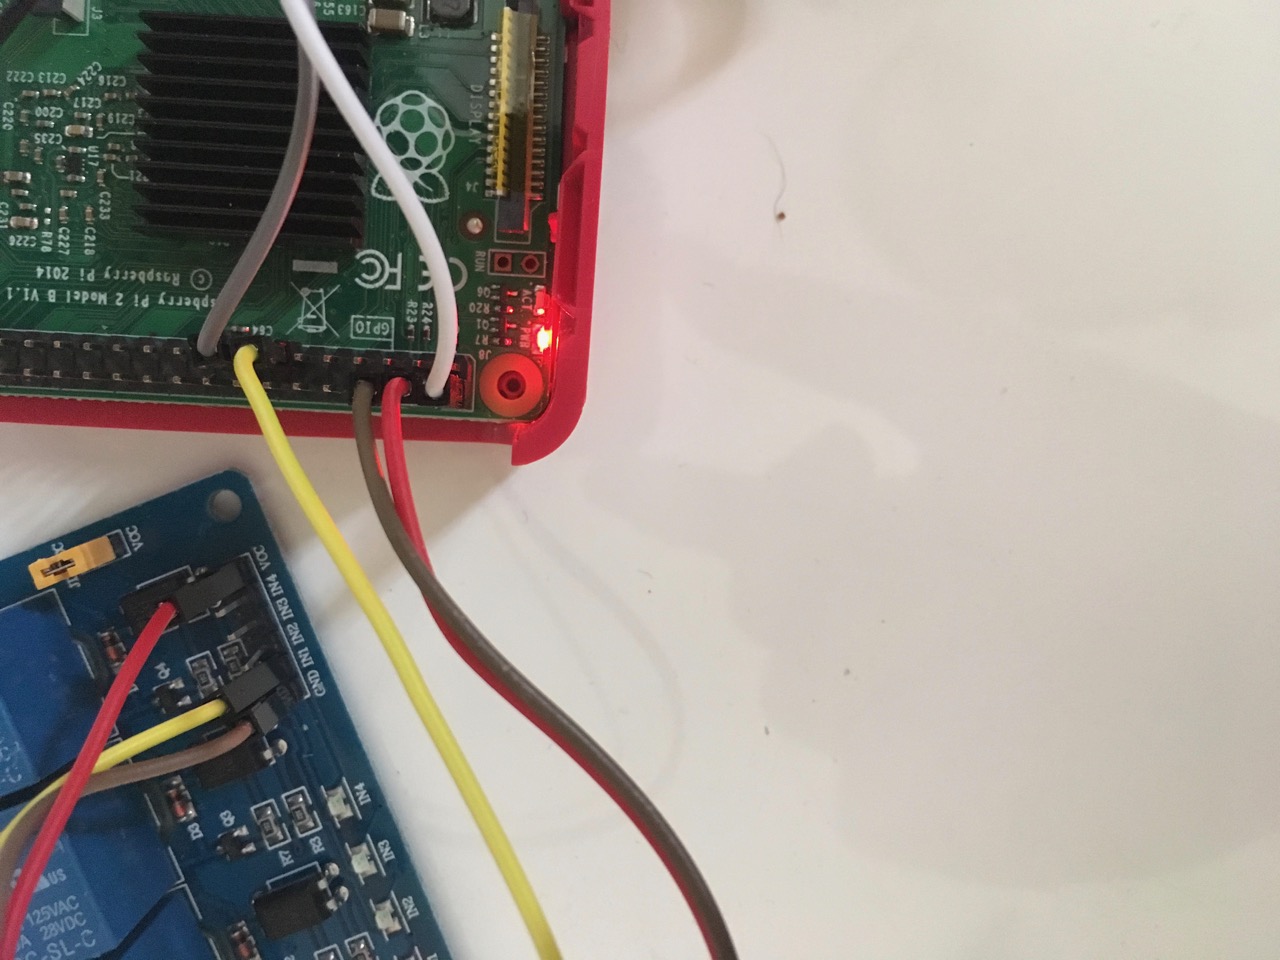
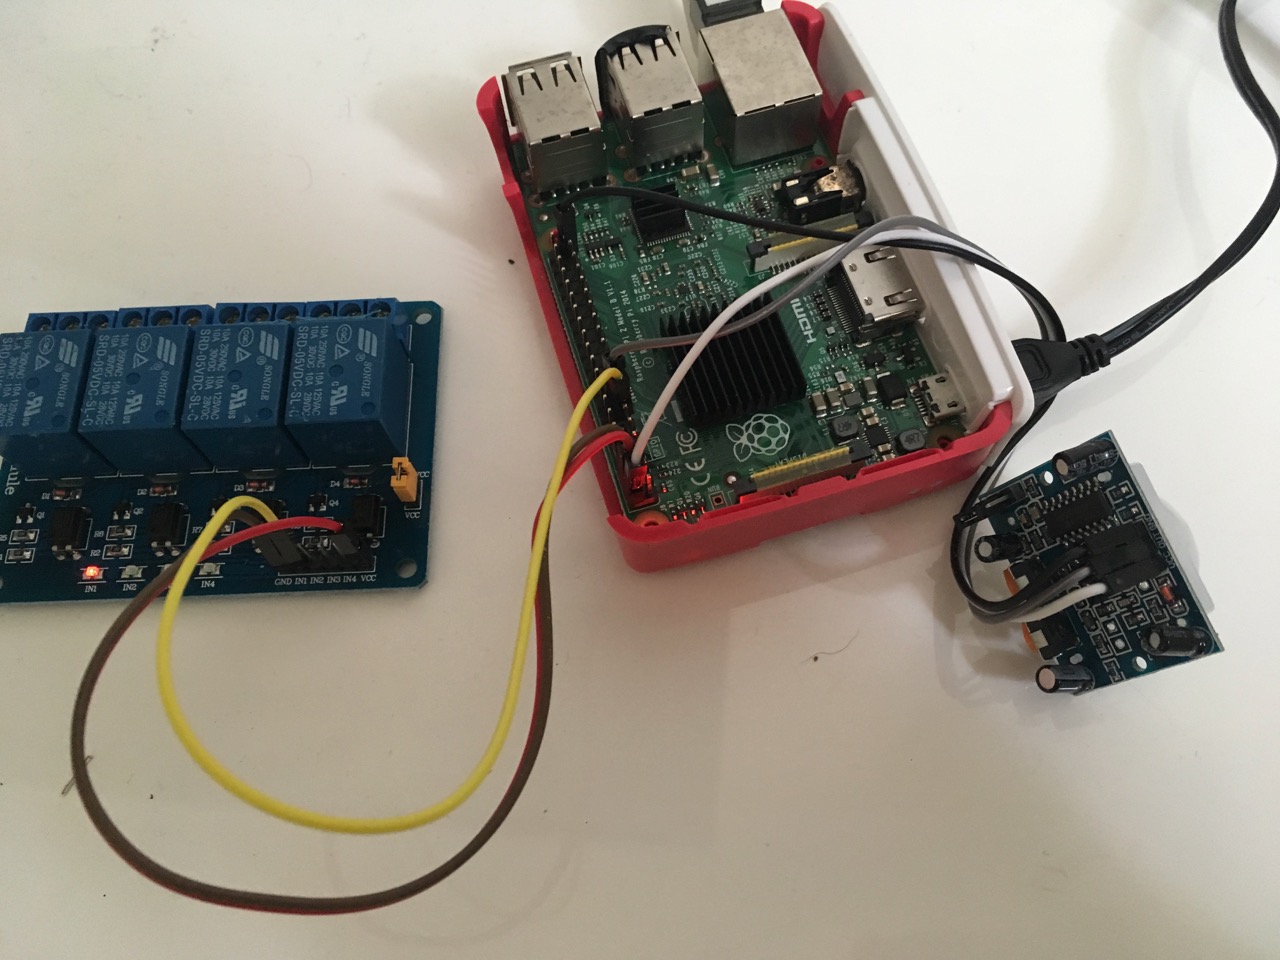
This is how my setup looks like at the moment:

Relay: Black = GND, white = Vcc 3.3V, green = IN
PIR: Black = GND, red = Vcc, green = outGray, blue, puple = ds18b20 temperature sensor.
I actually haven’t had a false trigger yet and the Pi is running for more than an hour now. I will keep it running the whole day. Have a multimeter connected to the relay, set to continuity test, so I should hear a beeping sound every time the relay gets triggered.
-
sounds like a good plan :)
edit:
i also made changes to the scripts so now u were able to end them via “ctrl+c”.
Don’t know if i did everything correct but it works here. :)
I am just electronics technician and no programer ^^ -
I got really excited to see this post when it was shared a few weeks ago. Unfortunately, I have yet to get it to work. I am using a PIR sensor along with Paviro’s module. My issue is that I am using an LG TV which, when the signal is no longer received from the HDMI port, a “no signal” screensaver bounces around. So my goal is to get the screen to just go to black while the raspberry pi does not enter a power-save mode.
I have attempted to use the “screen_off/on” option original provided instead of the “monitor_on/off” but it doesn’t seem to be working properly.
I have tested that the PIR is connected but in my test it keeps teling me that motion is detected when there is no movement. I am doing this through a python script. I am fairly new at this so if anyone can please let me know what else I can provide you to help me get this thing working with the PIR sensor. Thanks.
-
@hoofta Couldn’t you use a relay (like me) but instead of disconnecting the power you just trigger the power on/off button?
-
@MadScientist I am not sure if I could or not. Could you elaborate on how you have yours setup?
-
@hoofta My mirror isn’t done yet but in my case the relay will disconnect the power from the power supply to the LCD. I have no idea what TV you’re using but you could solder 2 wires to the power button of your TV and connect them to a relay, which will be triggered by a PIR motion sensor.
-
@hoofta said in {HowTo} turn on/off your monitor (Time based, PIR/Button, App):
I have attempted to use the “screen_off/on” option original provided instead of the “monitor_on/off” but it doesn’t seem to be working properly.
As described u need to use the “pir.py” script from point 2.2.
But then (and i forgot to write that) u need to change the shell script names in the script or keep the “monitor_on” as name.
Sorry for my english, i hope u understand.So, to help u out:
u already creates the “screen_on.sh” and “screen_off.sh”, right?then u need to change the following lines in the “pir.py” script like this:
def turn_on():
	subprocess.call("sh /home/pi/screen_on.sh", shell=True)

def turn_off():
	subprocess.call("sh /home/pi/screen_off.sh", shell=True)
The idea to connect the power button of the TV to a relay is a good start. So u could save much money.
But then the relay must do an impulse instead of being on or off static.
To do this u could use the normal pir.py script from point 2.2 (without any changes).
But the content of both *.sh files should look like this:nano monitor_on.sh:gpio -g write 27 1 sleep 1 gpio -g write 27 0nano monitor_off.sh:gpio -g write 27 1 sleep 1 gpio -g write 27 0chmod +x monitor_on.sh
chmod +x monitor_off.shConnect the relay with two wires parallel to the power button of your tv.
On the relay use “C” and “NO”
