Read the statement by Michael Teeuw here.
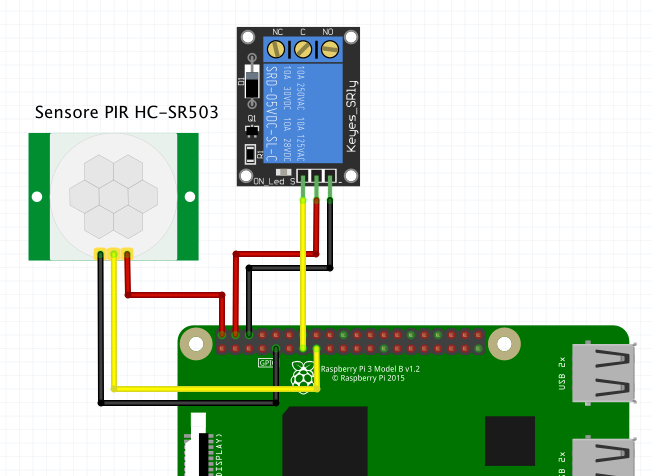
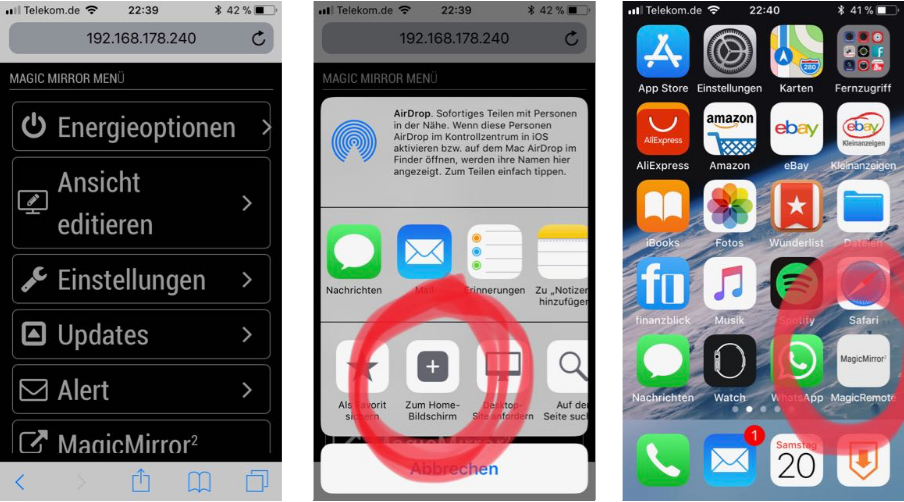
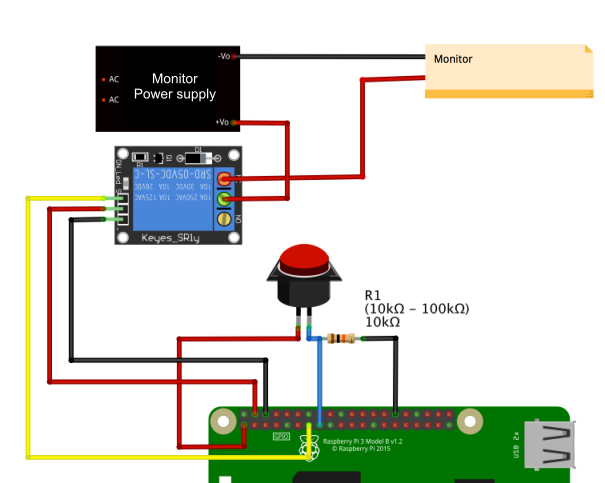
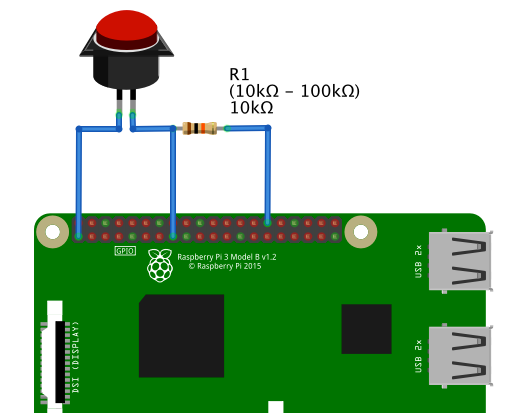
{HowTo} turn on/off your monitor (Time based, PIR/Button, App)
-
@nowayto try my updated fork
https://github.com/sdetweil/MMM-home-presence
a new config parm
  notification:"some_string",  // some_string  can be anything you want.
  default "", //no notification will be sent.. just like normal
this is the notification key that will be sent
the payload will be
true, if at least one of the phones on the list is present
false, if none of the phones in the list are present -
@sdetweil Oh, thank you!
So you modify the module to send notification when it detect one or more presence?
I installed it and configure the notification “string”
Now I have a module that send a virtual notification “string” to other modules.
So now I’m toughing about install MMM-RemoteControl and MMM-ModuleScheduler.When someone is at home ModuleScheduler will receive the “string” and it will send a command to RemoteControl for turning on the display.
And when no one is at home? ModuleSchedule won’t receive any notification so RemoteControl should exec the MONITOROFF commands.
I know it can’t work like this, maybe I’ve lost some steps in my mind.I was also thinking about the electronics I’m using.
Mine is an LCD taken from a digital frame, connected to rasbperry through a lcd controller.
The controller turning off monitor itself when there isn’t hdmi signal for a while and it should stay in stand-by waiting for signal.
My doubts are:- In your opinion, module will send command every 10 seconds, so is this could be a problem?
- Do you have experience if the “MONITORON” “MONITOROFF” commands acts as CEC commands or a simple “turning ON/OFF the raspberry’s video out”?
Because if it work as CEC command… I think it will not work, in my case with an LCD controller
-
@sdetweil noticed another little problem. My phone is connected to wifi but the flag on Home-Presence turn off sometimes, especially when the screen is locked.
I tried to disable the “wifi private address option” on the phone and it seem working well but sometimes the flag goes off so I suppose that, after configuration, the monitor will turn on off itself a lot of times -
@nowayto the home presence module updates the display every interval_ms , the device status could change that often.
currently the notification is sent every time the display updates, regardless of device status
so you would get 30 messages sent per minute (using the sample config, the default is only 100 ms, so 200 times more per minute, 10 times per second)
I think it should only send on change, and can fix that
I do not know how reliable the presence test is, hackers and privacy protection make simple ideas very hard
-
@nowayto I changed the module to only send notification when there is a change
so it is not sending same state over and over …git pull in the module folder and restart MagicMirror
-
Do you have experience if the “MONITORON” “MONITOROFF” commands acts as CEC commands or a simple “turning ON/OFF the raspberry’s video out”?
Because if it work as CEC command… I think it will not work, in my case with an LCD controllerCEC requires some computer processor in the display to handle the commands being sent,
AND it requires a 2 way HDMI port (HDMI 1.3 or above I think)after 2016, all monitors/tvs/displaye to be energystar compliant are required to power off (not standby) after detecting no input signal… SO, if you turn off the HDMI port (what we all did prior to energystar) you get a big screen
NO INPUT until the timeout (15 mins by default)pi3 do NO have the bidi HDMI port, so CEC won’t work there…
and we have ALL been trying to find alternative methods since then
AND the OS versions have been changing the commands used as well… -
@sdetweil So in your opinion my idea Home-Presence+RemoteControl+Scheduler could work?
Or should I have to throw it in the wastebin? :) -
@nowayto i do not know if THAT combination works…
but given a notification, SOME collection should work.
maybe your notification should be USER_PRESENCE (true/false)other modules respond to that
-
@sdetweil
Yes, I knew how CEC work, but in my case I have an LCD controller and I have check his behaviour.Lucky me, when video signal is off, the controller stay in standby with a completely black screen.
This will be perfect, but only if the RemoteControl command will stop or cut-off the video signal, instead of sending a CEC turning off signal.
That was my doubt -
@nowayto use the wrandr/xrandr command to turn off the hdmi port
w = wayland
x = x11depending on the display manager
