MagicMirror Forum

    • Register
    • Login
    • Search
    • Recent
    • Tags
    • Unsolved
    • Solved
    • MagicMirror² Repository
    • Documentation
    • Donate
    • Discord
    1. Home
    2. Robert_K
    3. Best
    • Profile
    • Following 0
    • Followers 2
    • Topics 5
    • Posts 14
    • Best 6
    • Controversial 0
    • Groups 0

    Best posts made by Robert_K

    • Bathroom mirror: "Frameless, thin, gesture and voice controlled"

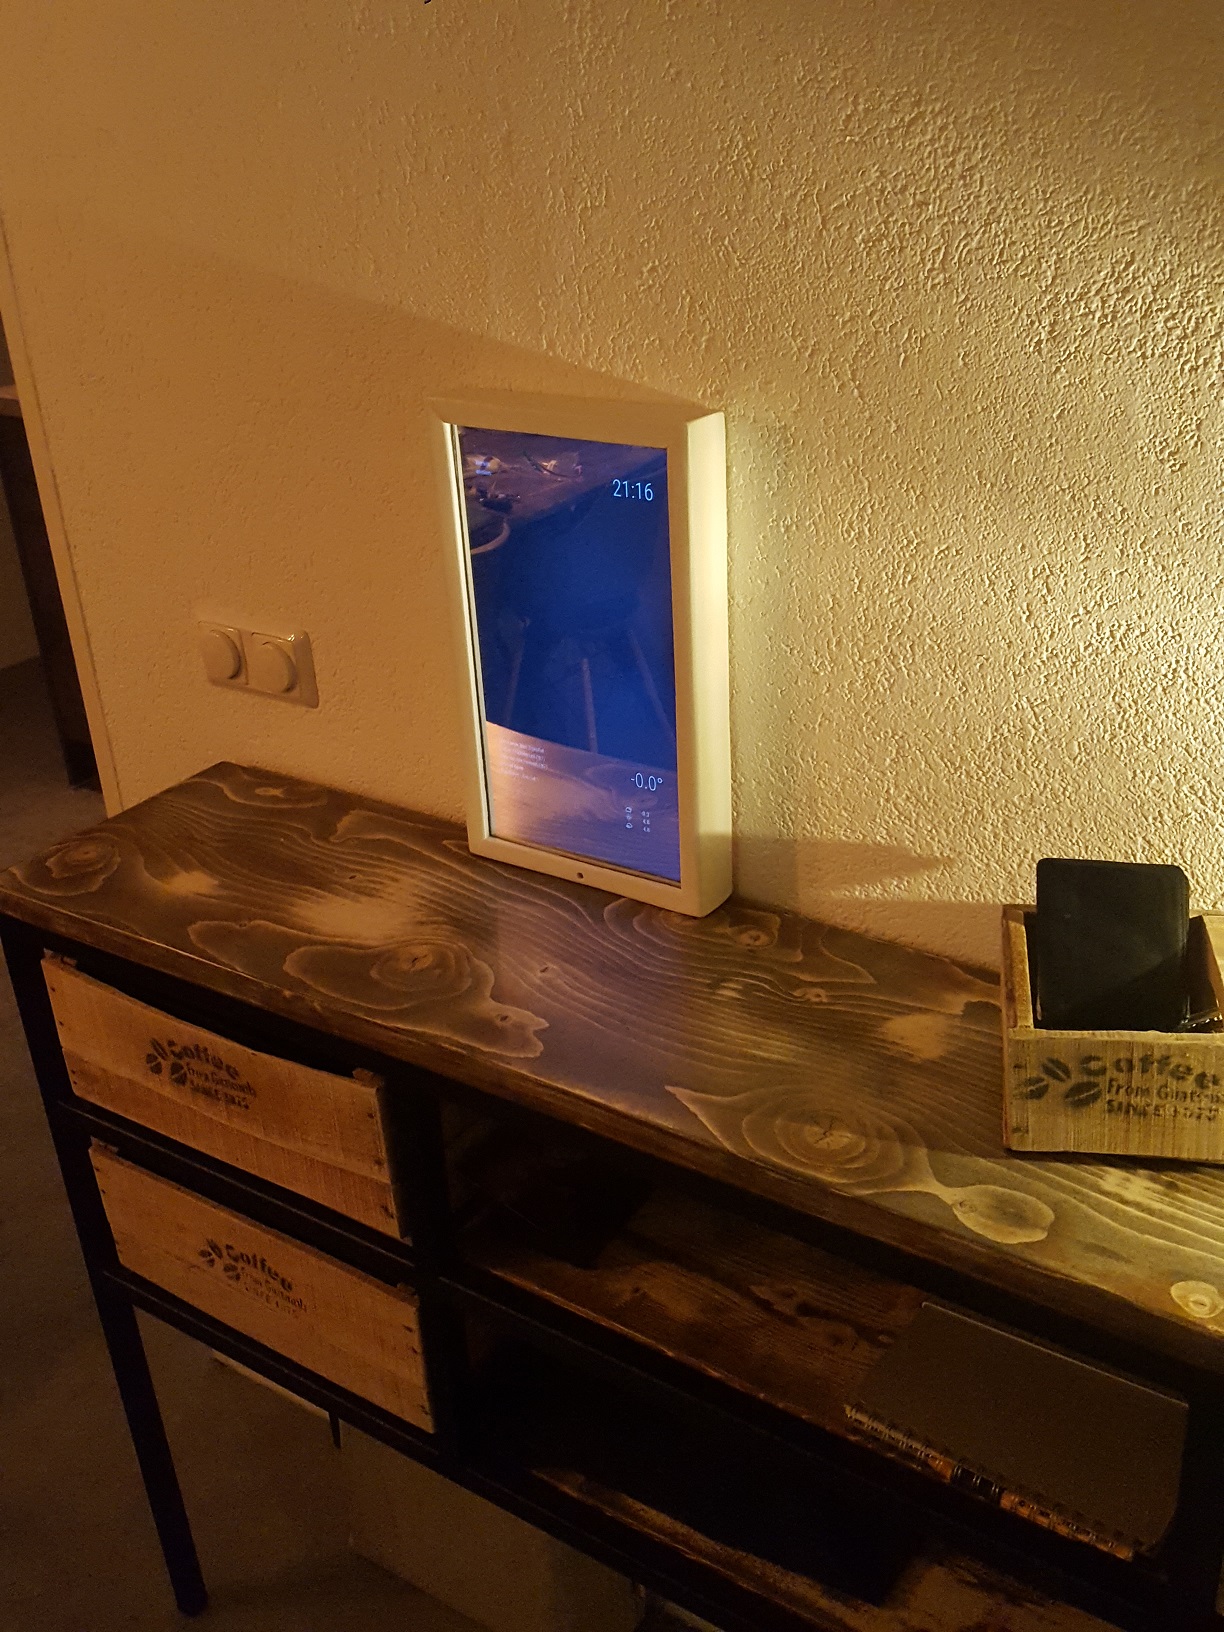
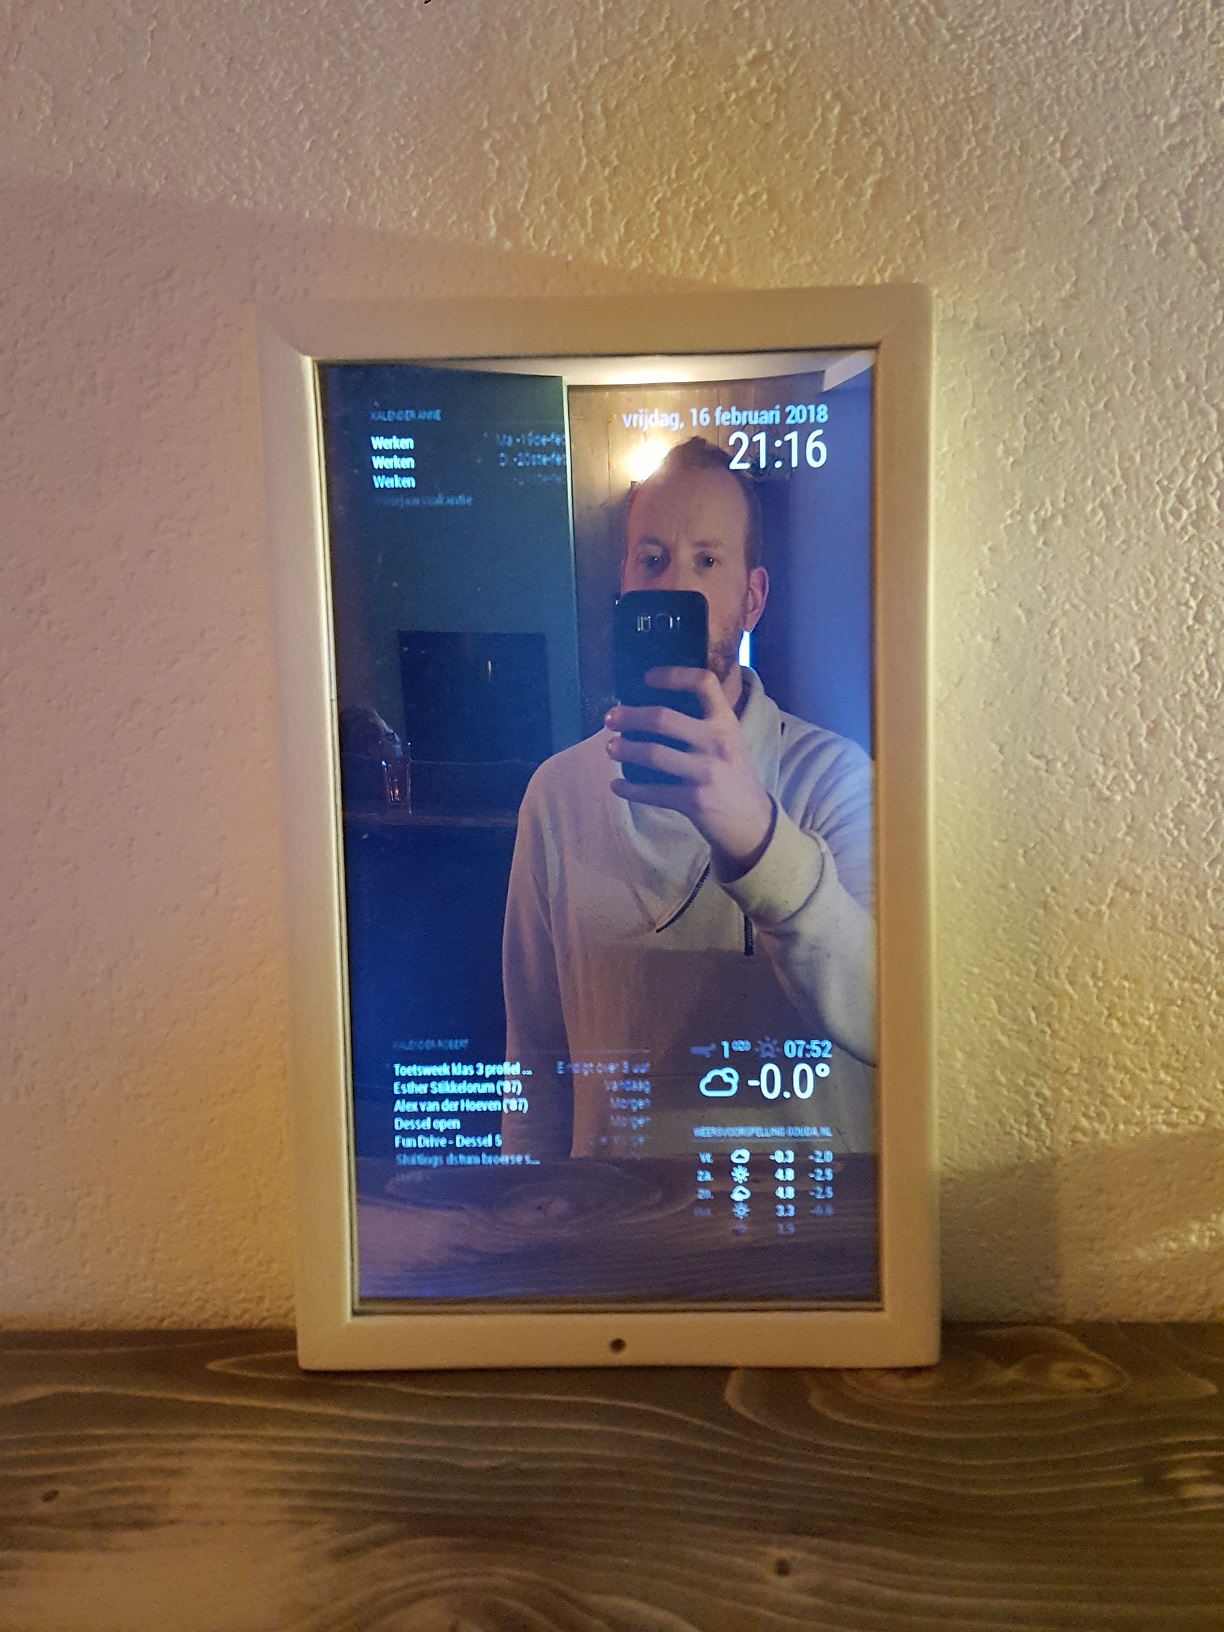
      5 years ago I’ve build my first MagicMirror.

      Since then I’ve always wanted to build a bigger one in our bathroom, after building a couple more mirrors (as I’m a teacher, also together with students) I finally started this project.

      I’ve had a couple of requirements:

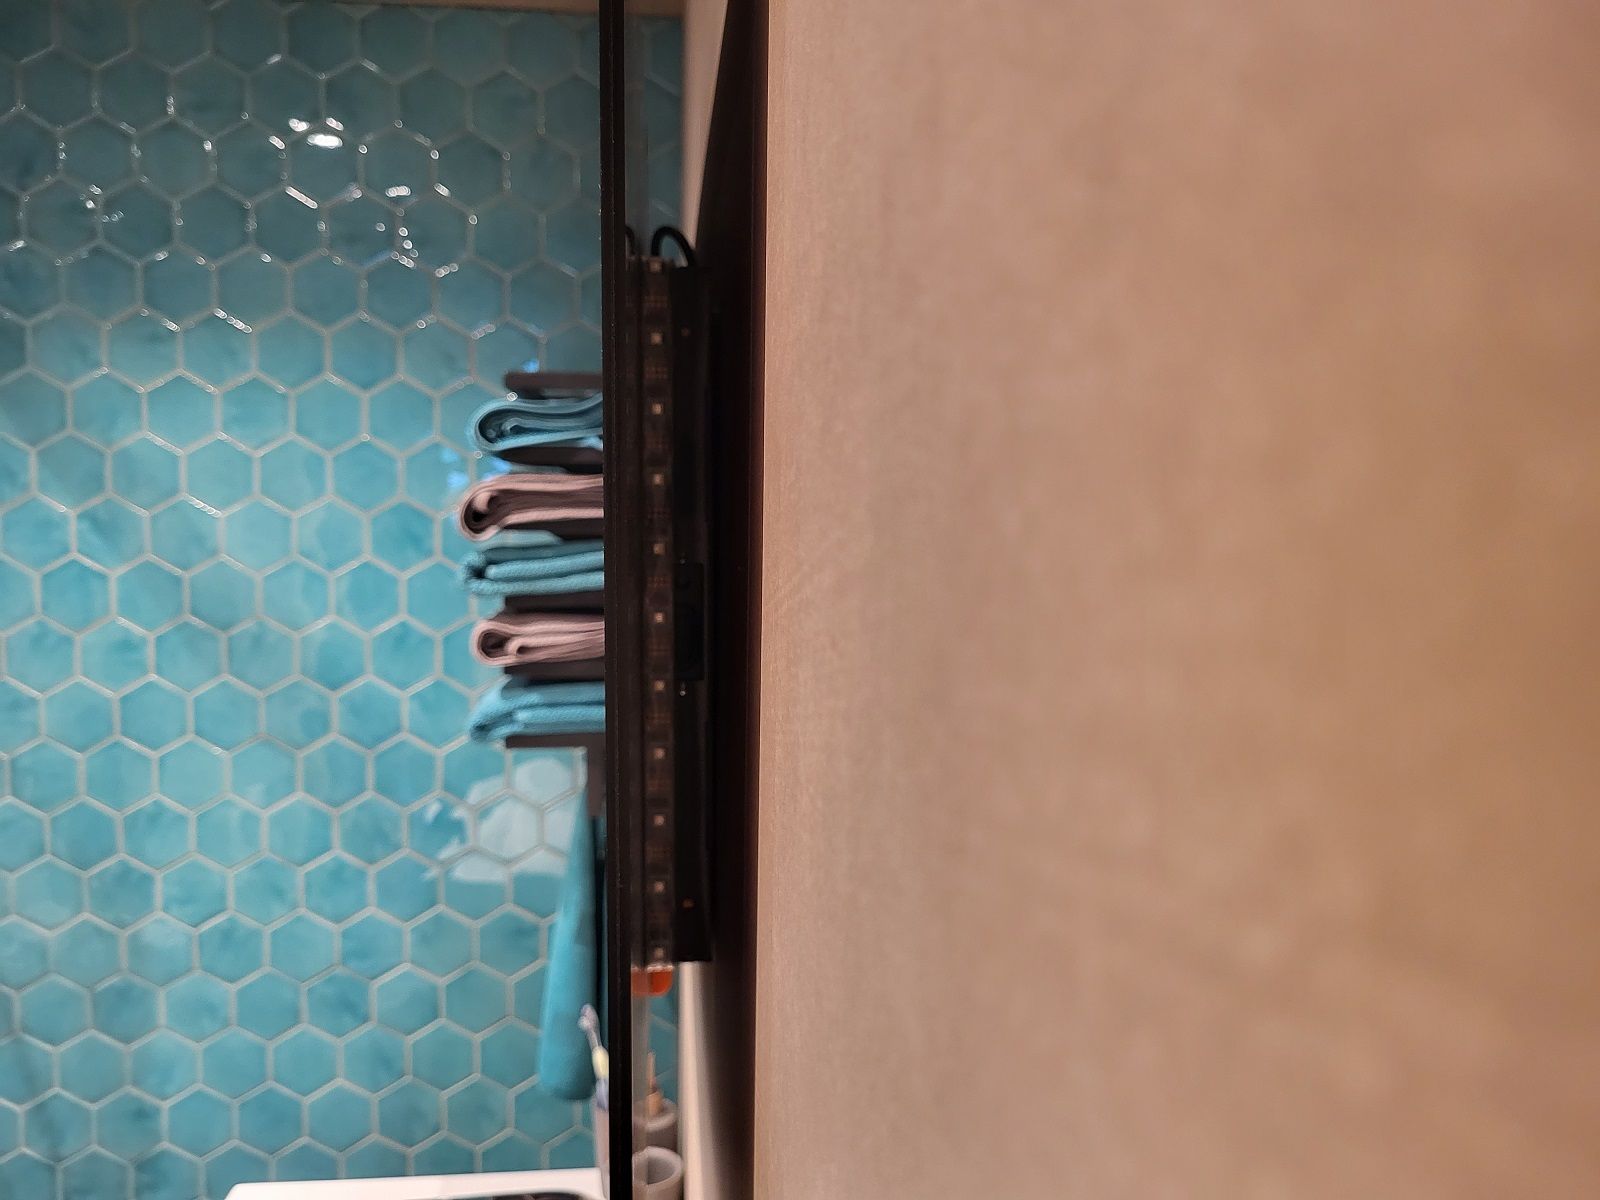
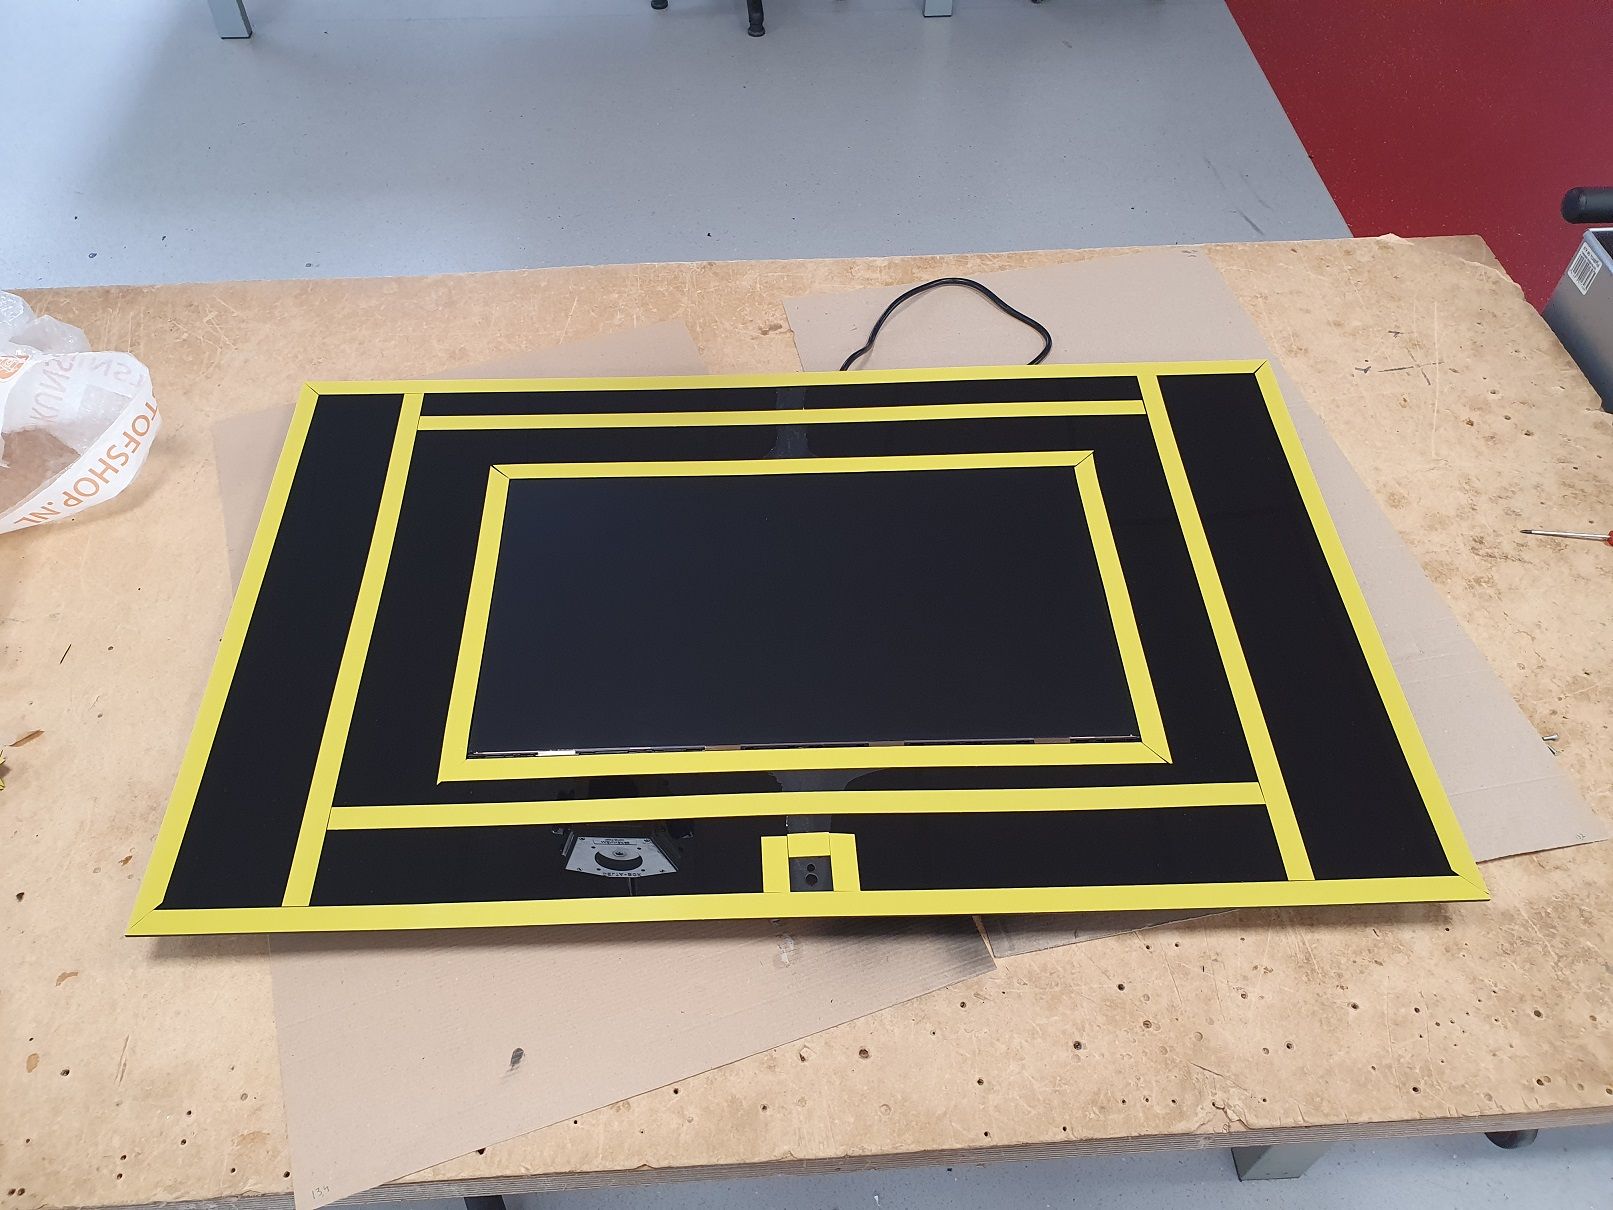
      • It must be thin! (Achieved, as it’s only 36mm thick.)
      • It has to be frameless
      • It has to have a good reflection
      • Gesture and voice controlled
      • Don’t want it to be cluttered with modules, yet show the wanted information

      I’ve started designing it in SolidWorks:
      Solid Works Design on Youtube

      Building the mirror:
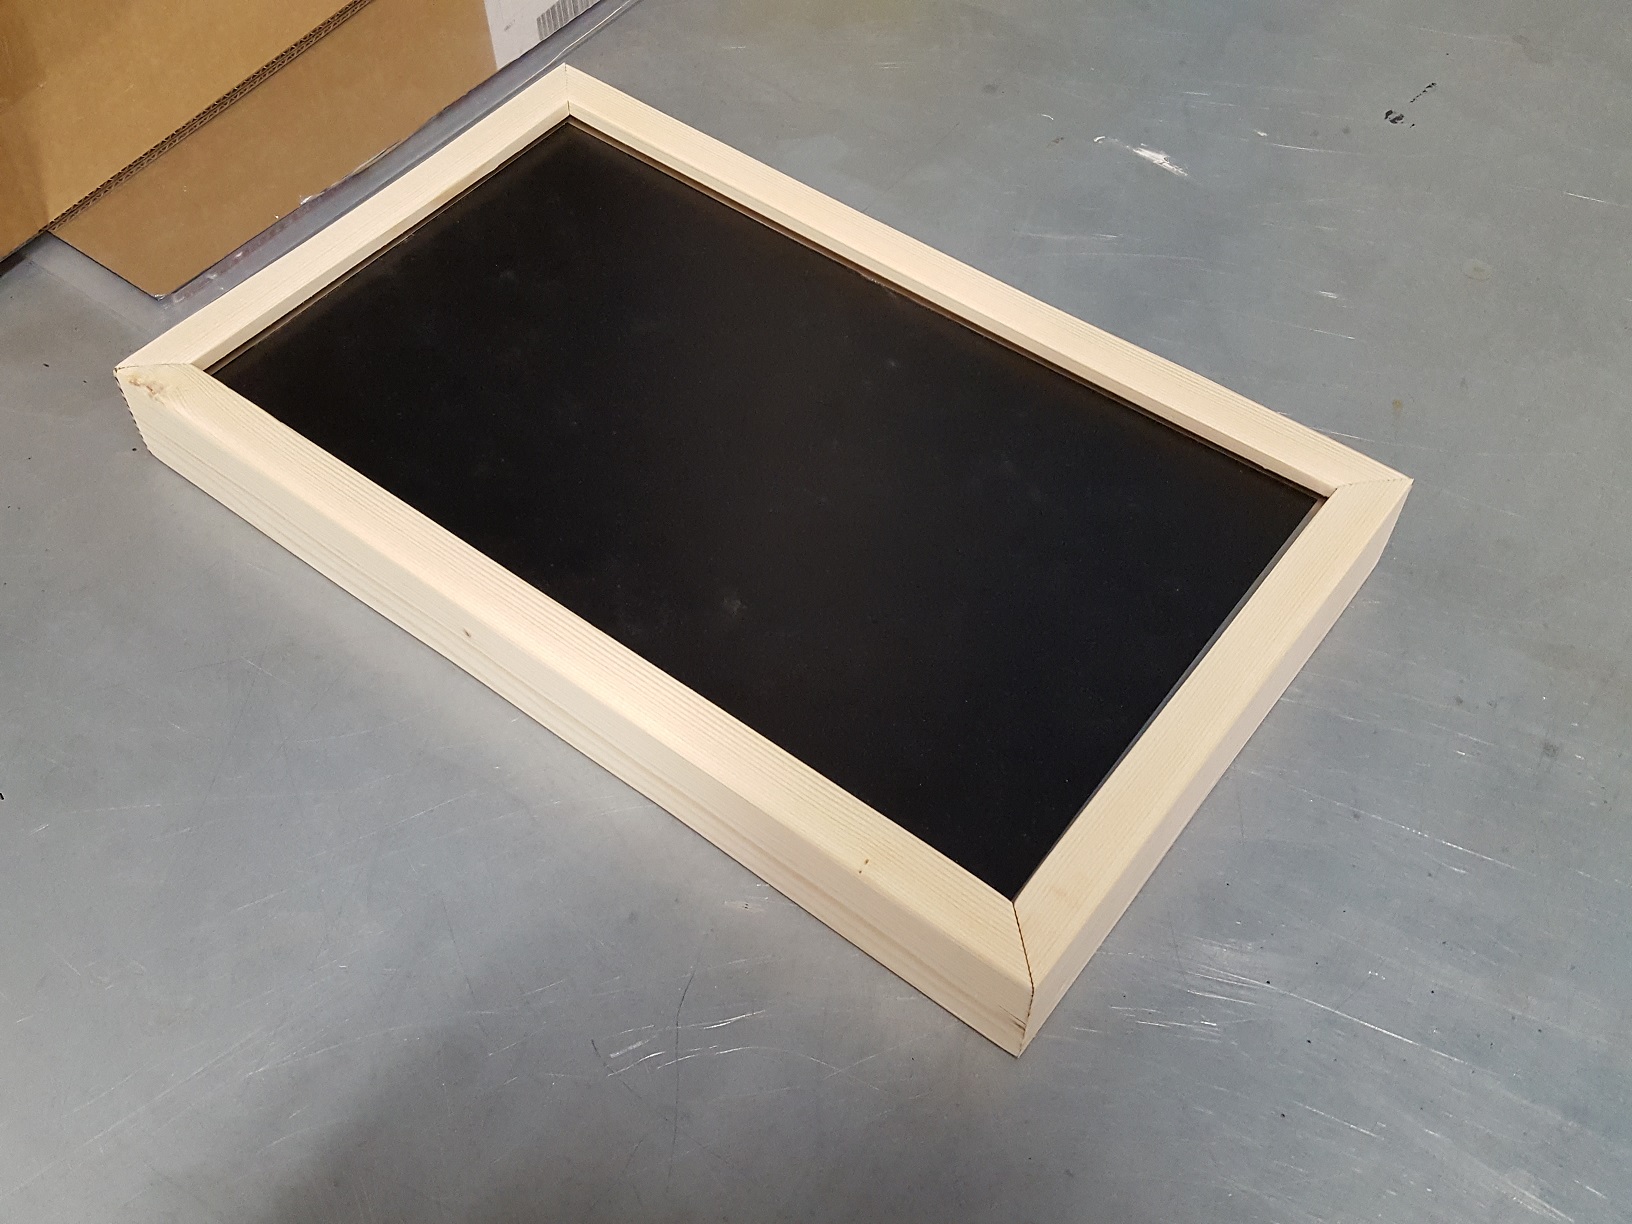
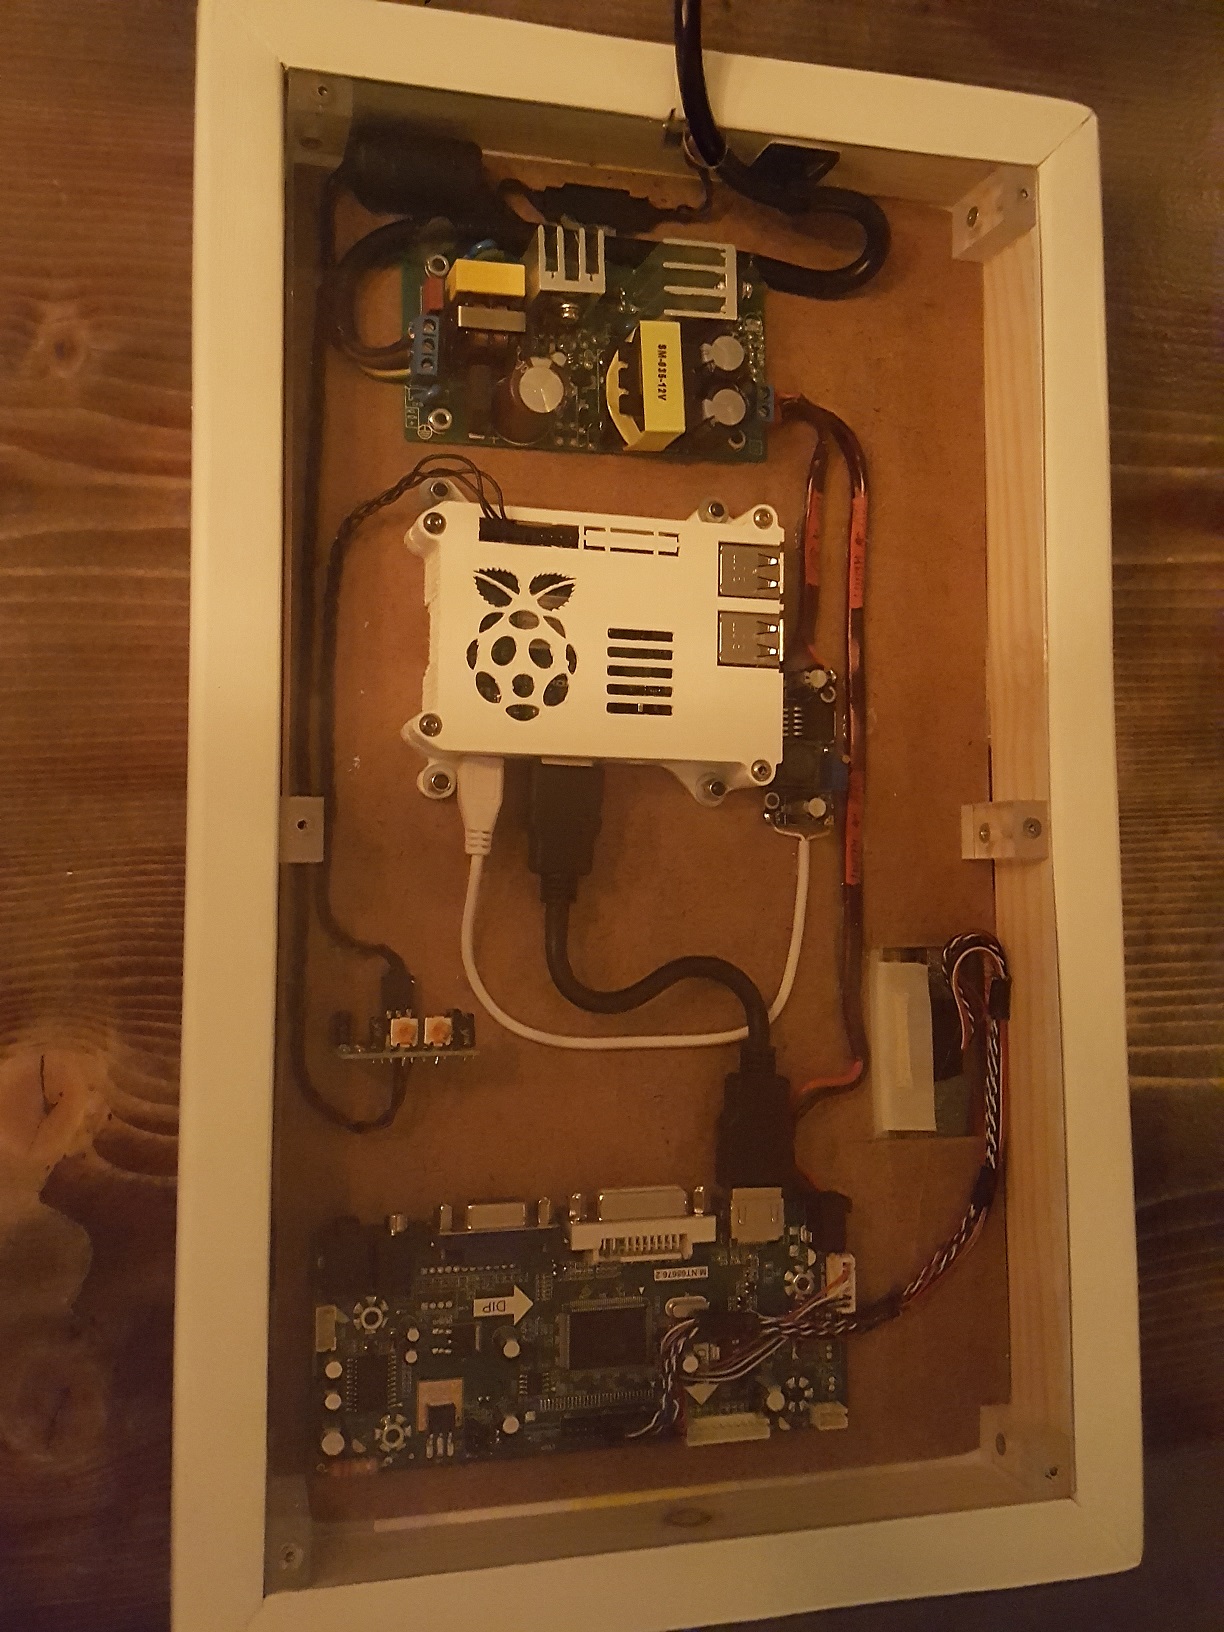
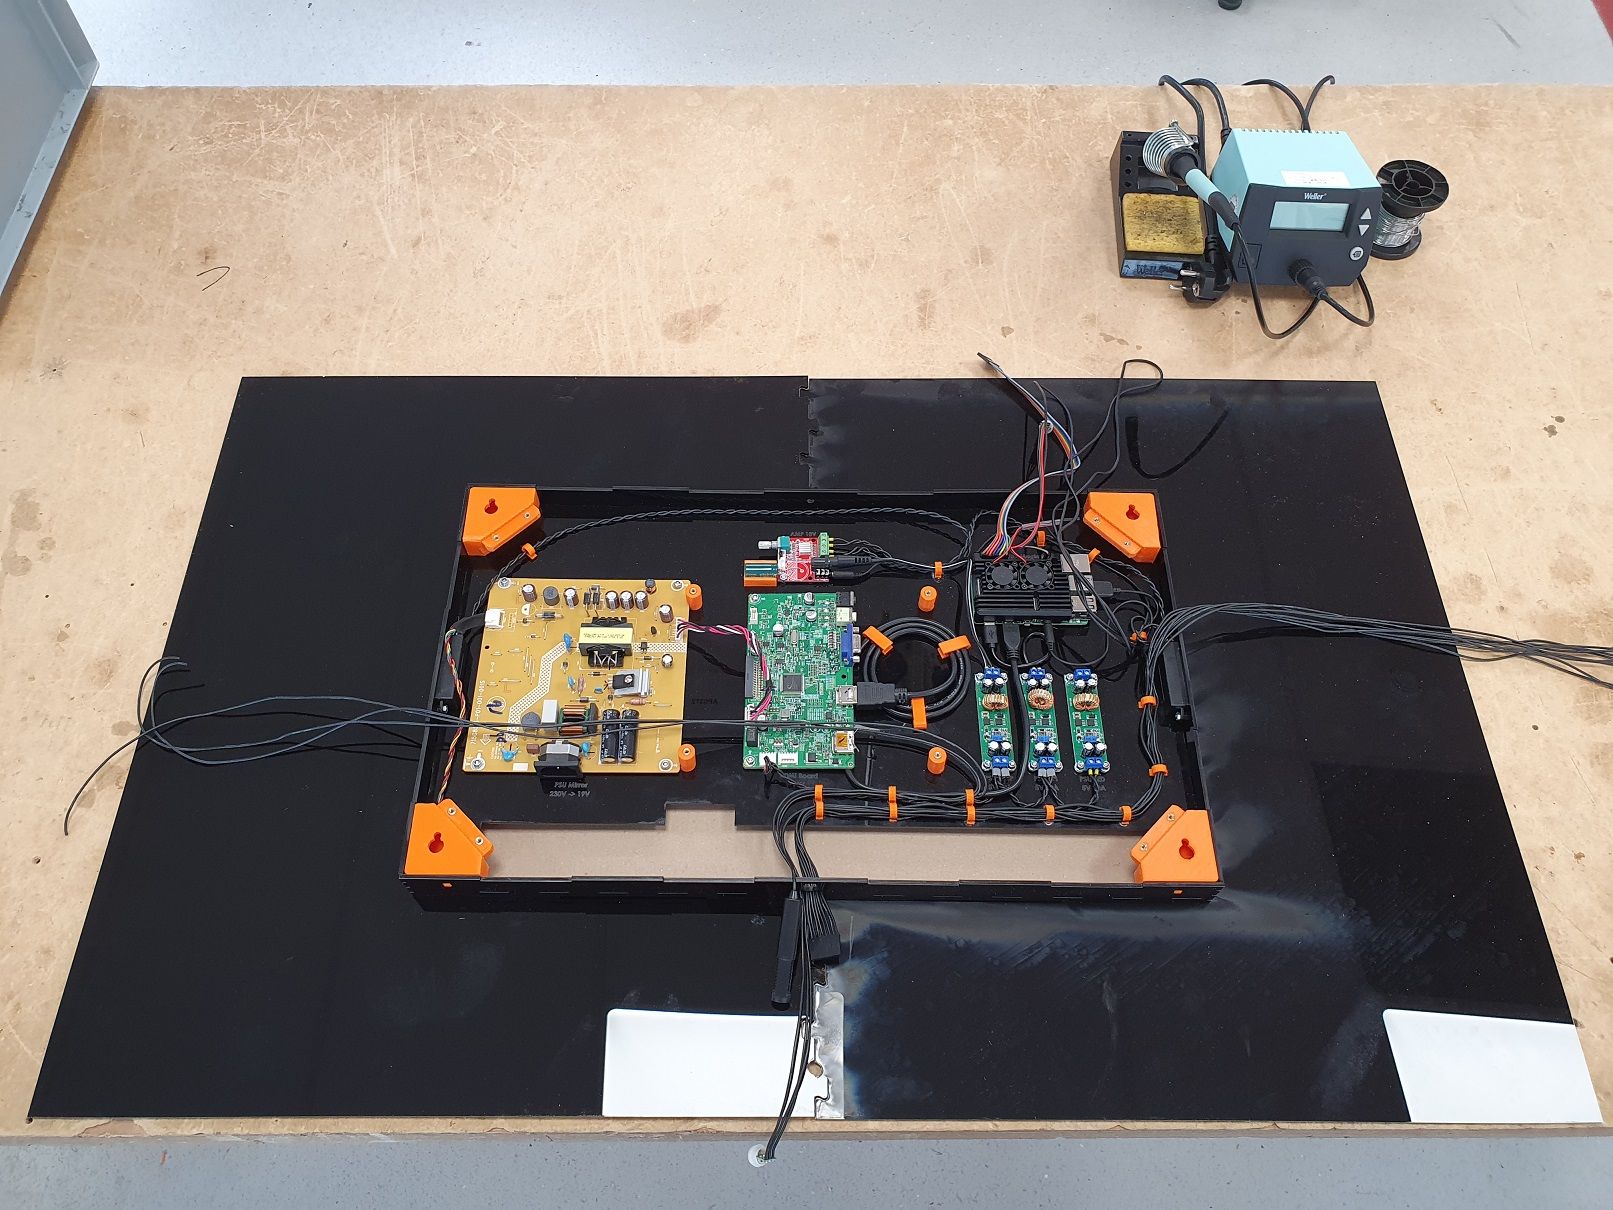
      The frame is made out of black acrylic and uses the disassembled monitor as frame for it’s strength. Also the added electronics ground plate ad’s strenght:
      Bouw mirrir.jpg

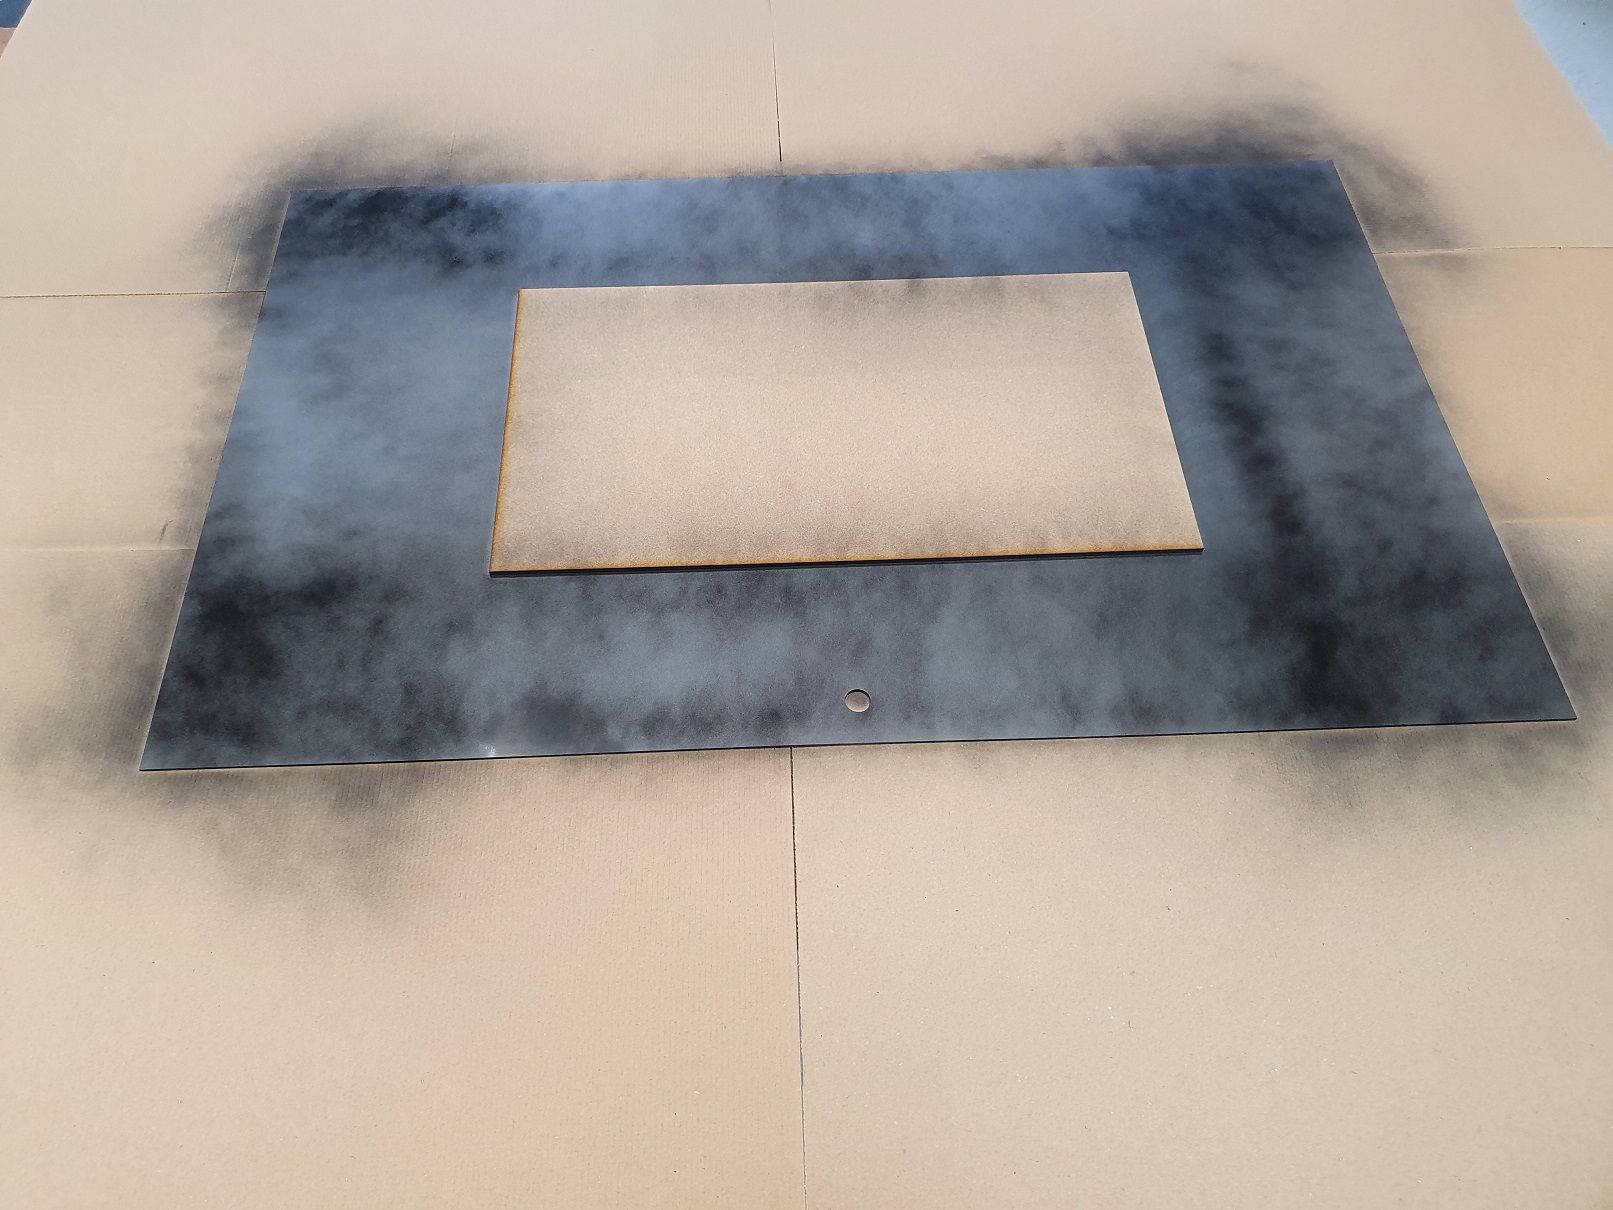
      All the acrilic sheets are joint by different types of finger joints. However The reflection must be perfect (to reach the “wife approval factor” 😉 ). Therefore I’ve painted both the black acrylic as the backside of the mirror glass black. This created an perfect reflection!
      2021-05-10 15.35.05.jpg
      Mirror glass painted.jpg

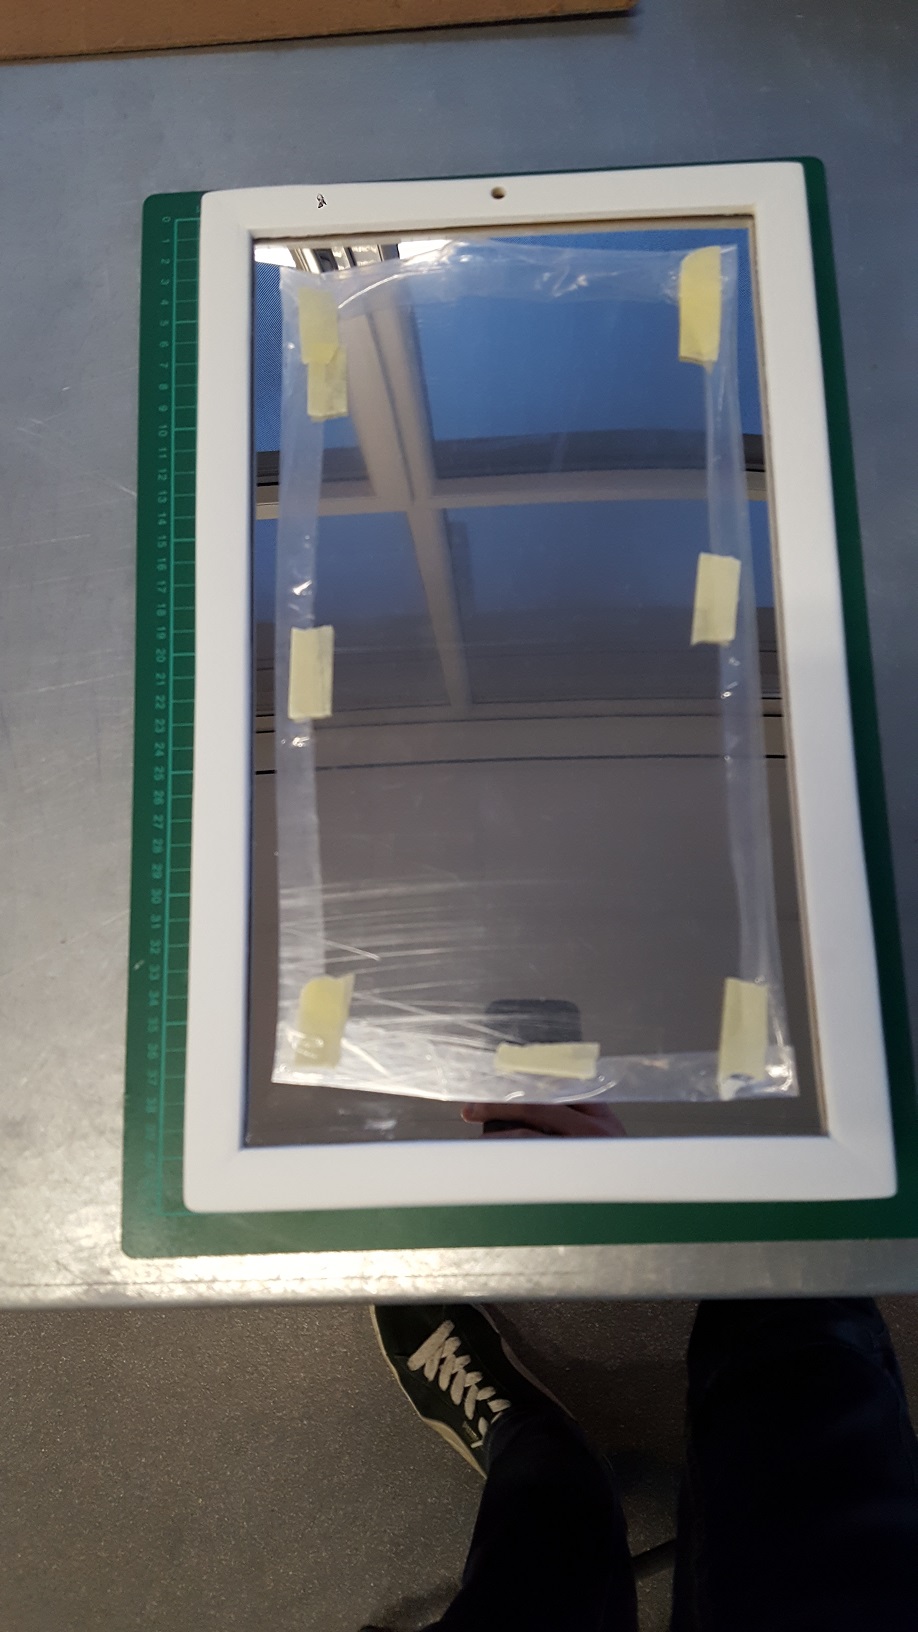
      However the painted parts gave a new challenge in how to connect the mirror glass to the back acrylic frame. Another requirement was a frameless mirror so I had to use some kind of adhesive. I’ve made several test pieces with different glues and tape. Glues where aggressive and started to dissolve the paint or even the silver layer of the mirror glass. So thin adhesive tape did the trick:
      Ready for mirror glass.jpg

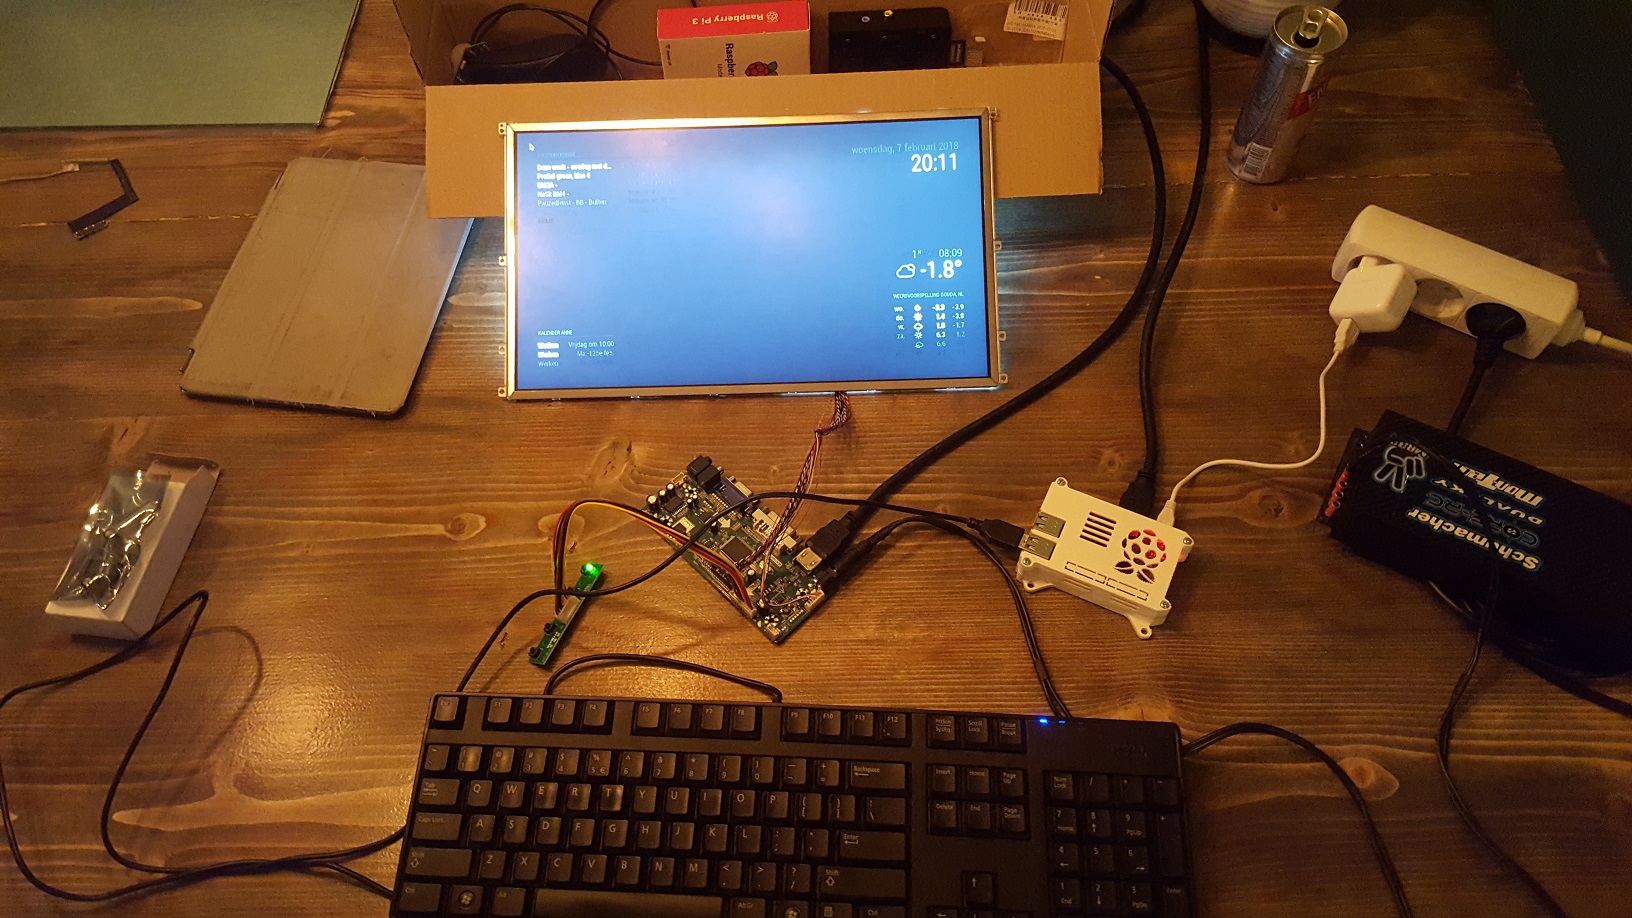
      All the electronics needed to be thin, so I would reach my first requirement. Here’s what the inside of the mirror looks like: From left to right: Monitor power board, Monitor data board. 3 pieces of DC-DC Buck converters with high amp ratings for Backlight, Powering the Pi and (later deleted) amplifier, Raspberry Pi48GB.
      2022-04-18 20.53.31.jpg

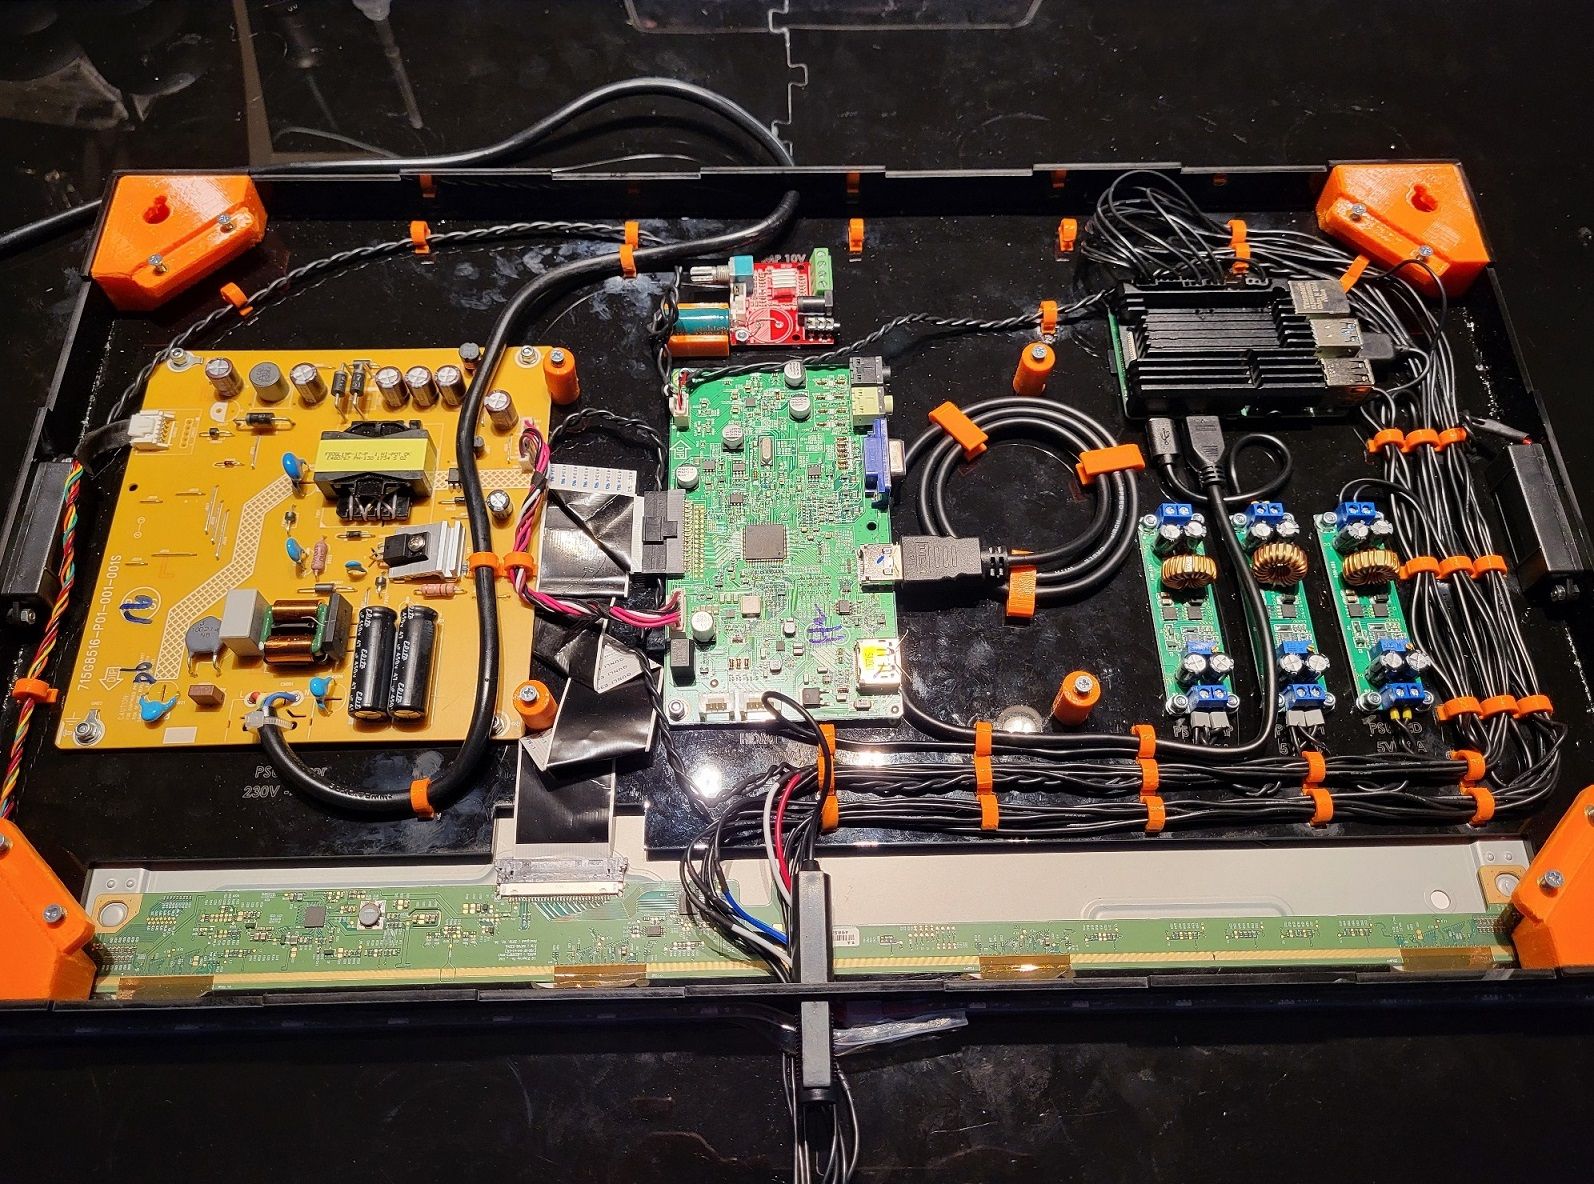
      Some of the pieces are 3D Printed (orange), however they are 3D printed in PTEG as PLA is biodegradable and won’t last long in a damp environment. All the electronics are made waterproof with PlastiDip spray.

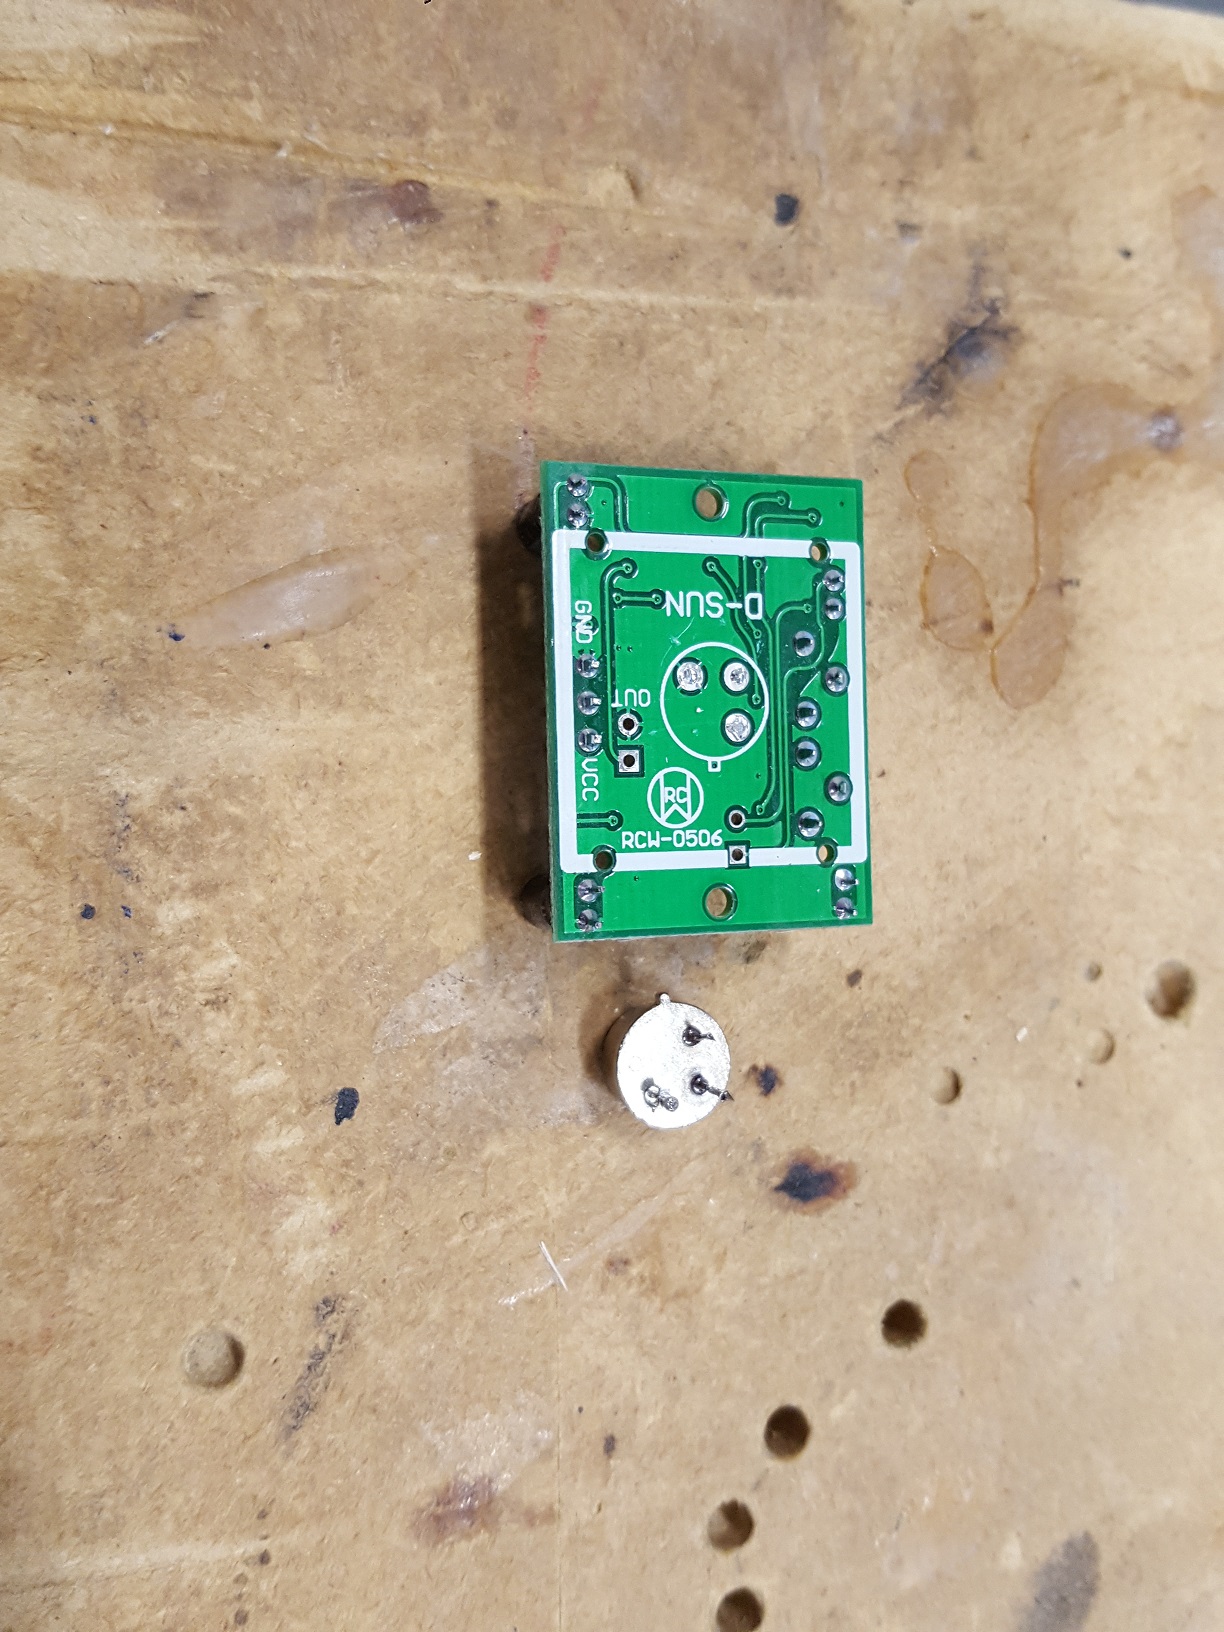
      Programming the mirror gave a lot of challenges. I wanted to use gestures. I’ve tried and tested a lot with a big Flickboard. Even tested it behind acrilic and glass. However, I didn’t test it behind mirror glas, which seemed to not work due to the metallic coating. So I had to switch to a PAJ7620u2 Gesture sensor. And this would need a bigger hole in the mirror which I wouldn’t prefer.
      Cédric Bugsounet made some awesome modules, for example the Google Assistant module. However the past year he has changed the core of it, which would require (re)programming. As it’s a really complex module which needs a lot of external API’s this cost me some time. I’ve also have a Pi-Hole running at my home which blocks the Google Assistant requests, it took some time to discover this.

      Used modules:

      • MMM-Buienradar
      • MMM-Screencast
      • MMM-GoogleAssistant
      • MMM-GroveGestures
      • MMM-Remote-Controle
      • MMM-SmartWebDisplay
      • MMM-RPI-LED
      • MMM-pages
      • MMM-page-indicator
      • EXT-Screen
      • EXT-Pir

      2022-05-12 20.04.15.jpg

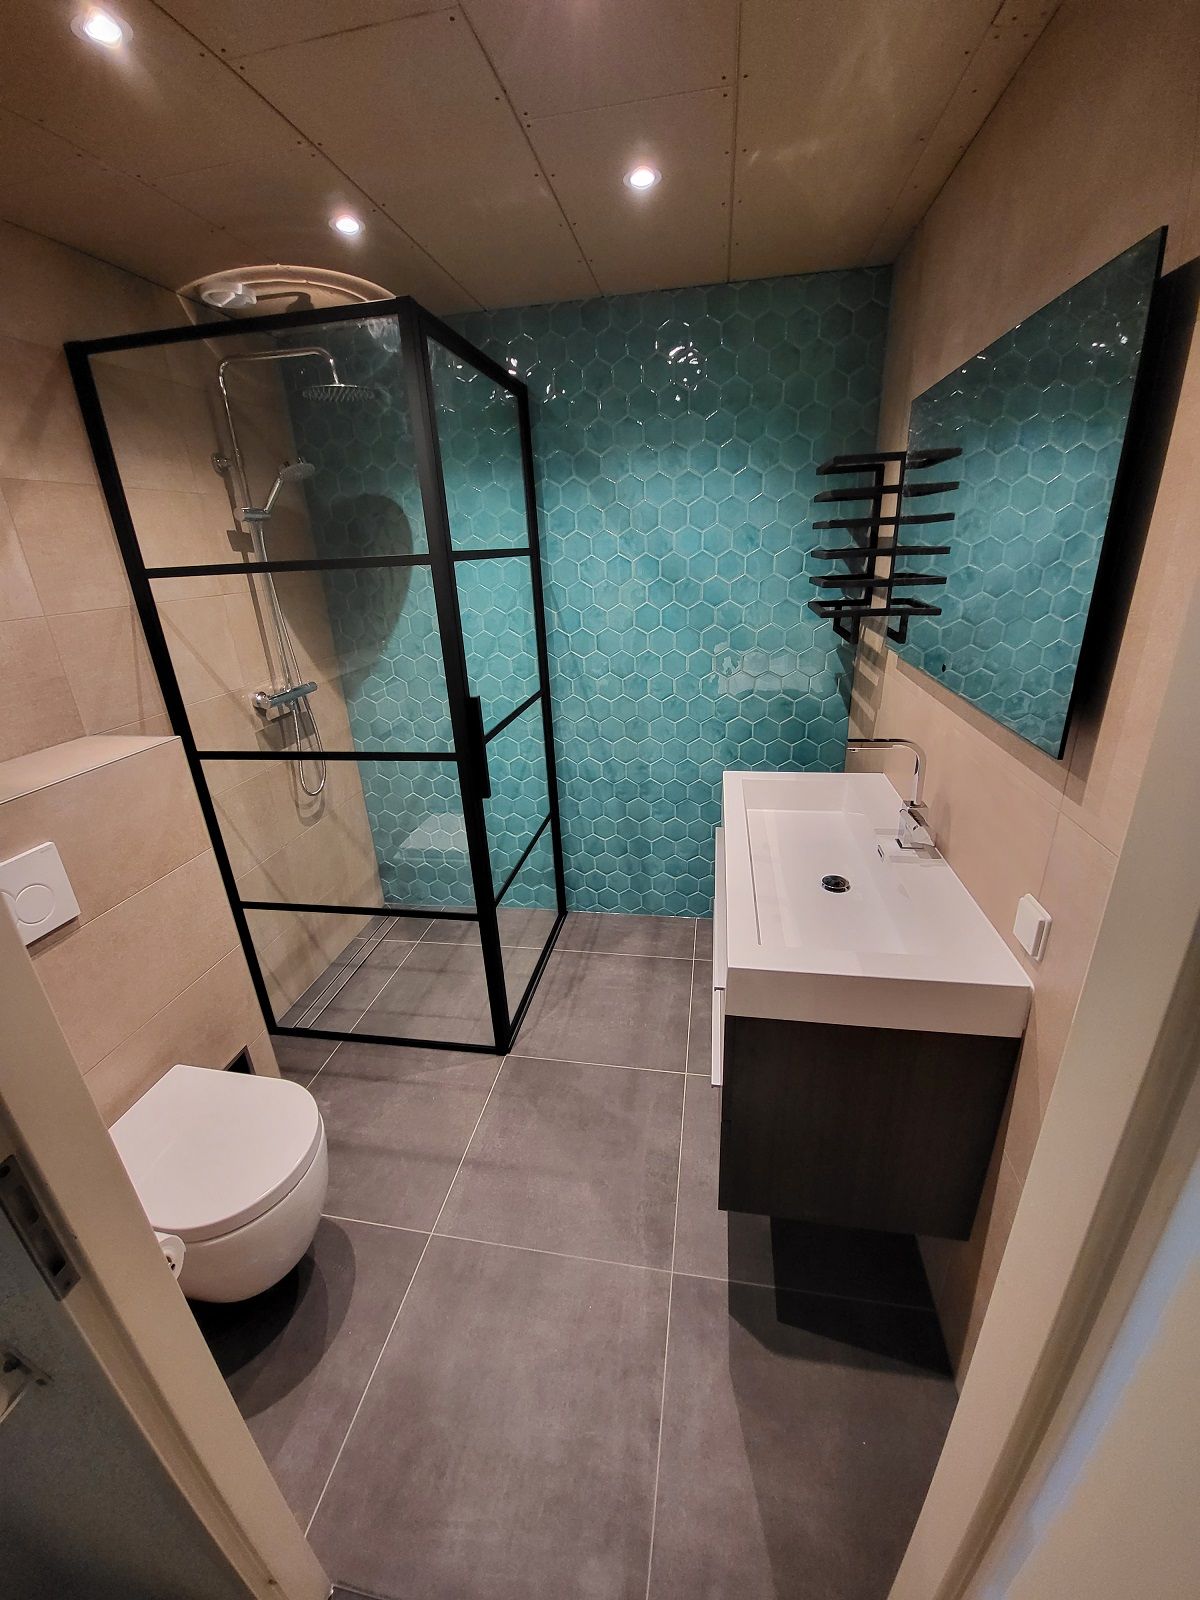
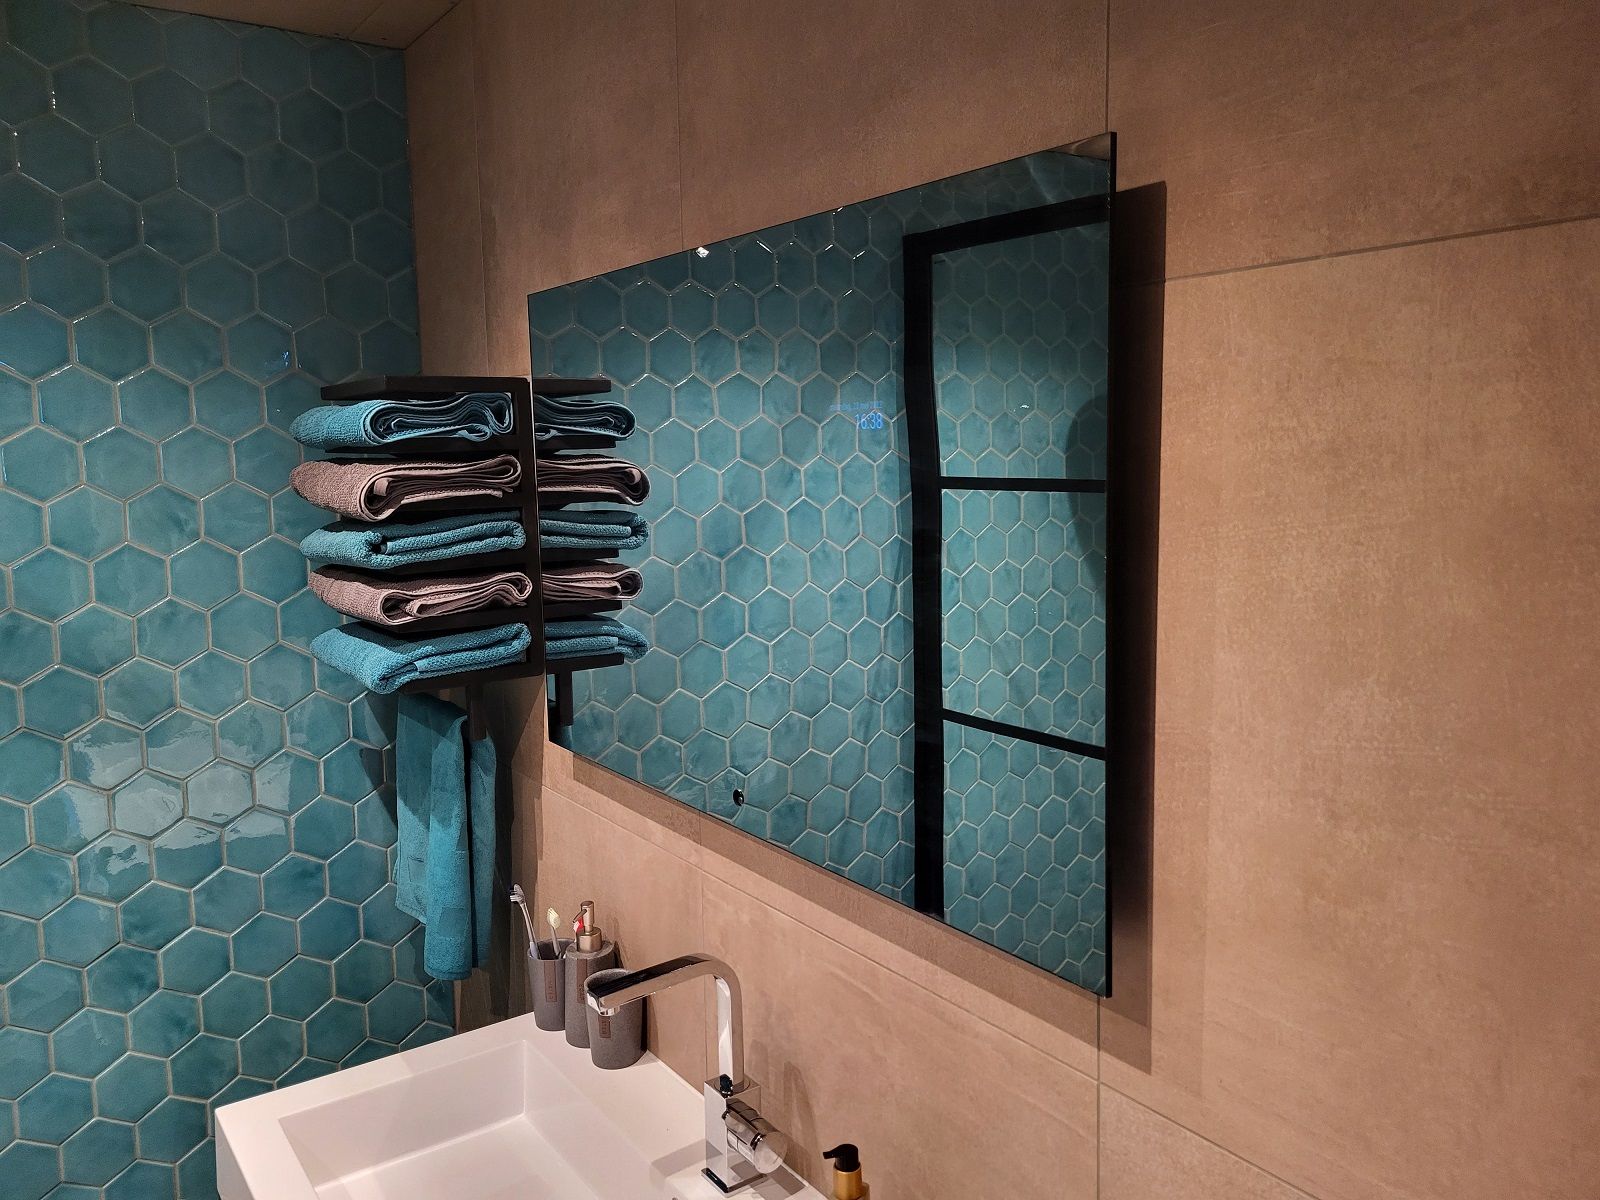
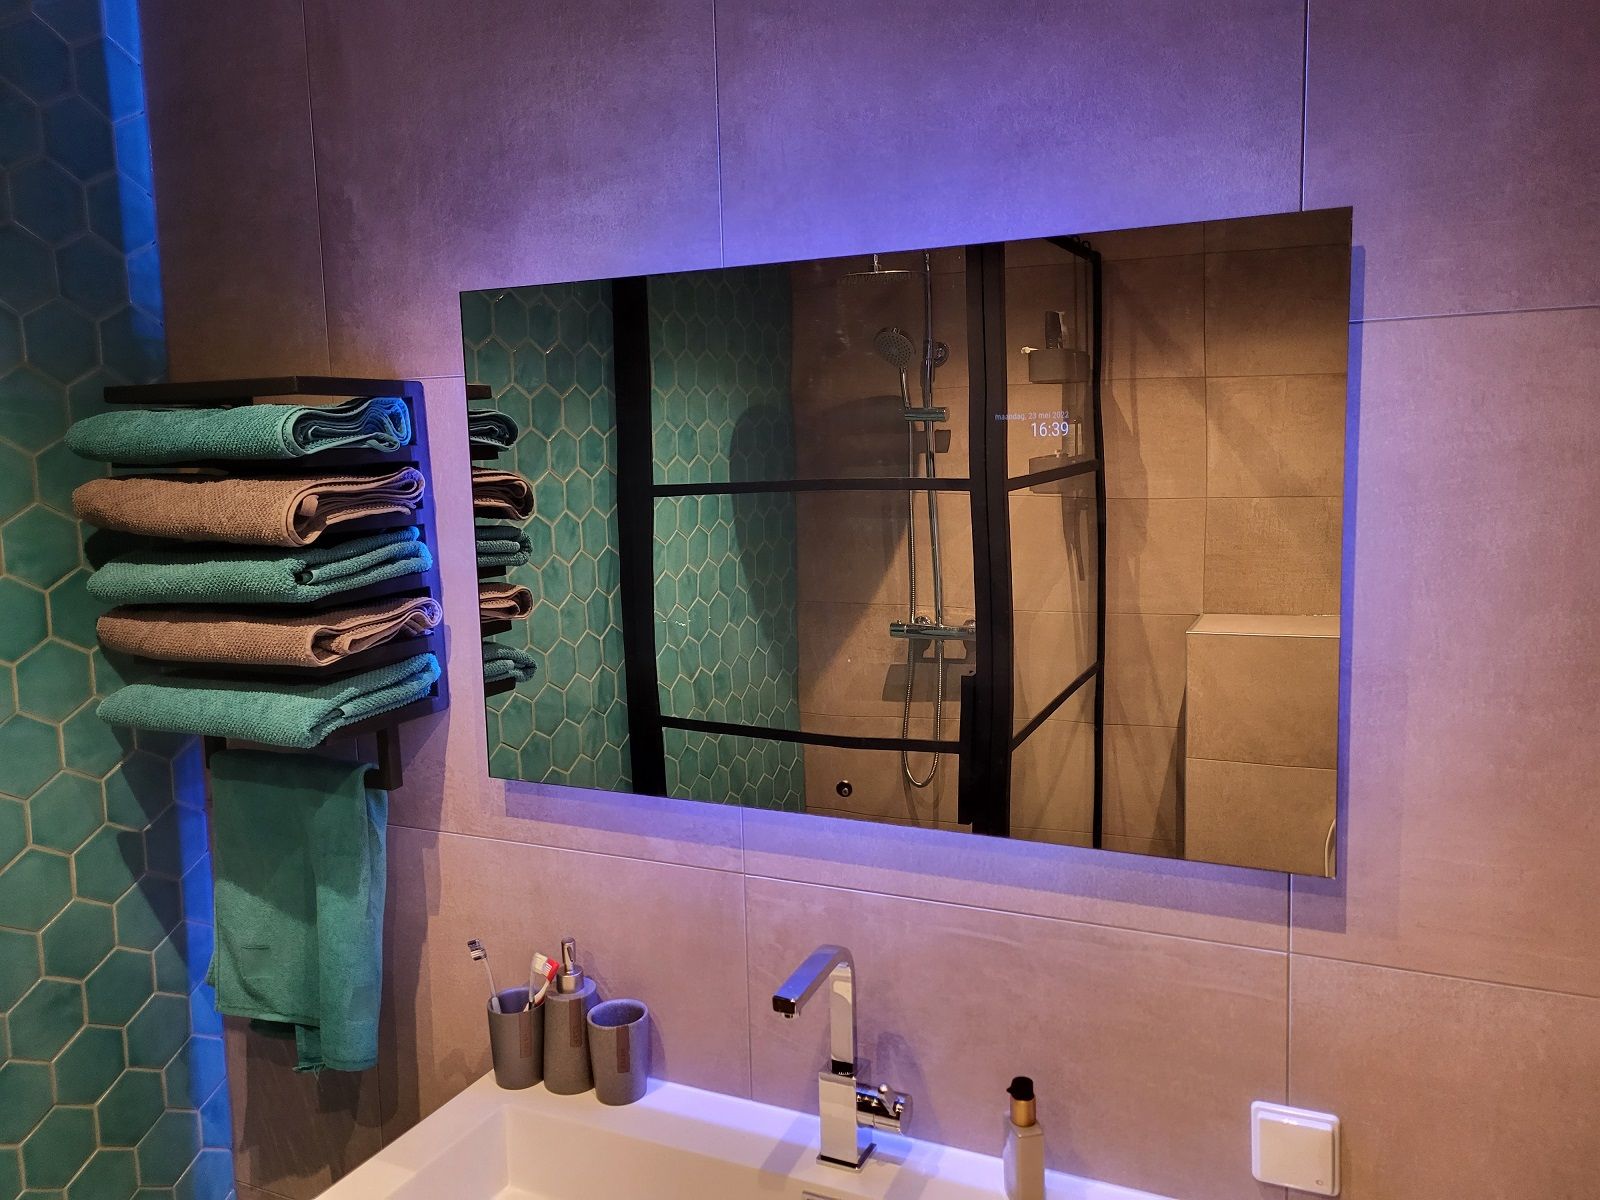
      And this is the final product:
      ⏩ Youtube: Magic Mirror: “Frameless, thin, gesture and voice controlled”⏪

      posted in Show your Mirror
      Robert_K
      Robert_K
    • Small 'Picture frame' MagicMirror (first attempt)

      Scrolling down on Pintrest a Magic Mirror got my interest. After a small conversation at home we decided to first make a small one. When we like it, we could build a bigger one later on.
      So a old 15.6” laptop would provide me with a small ‘picture frame size’ screen. A Raspberry Pi (3) was found on a national trading website (www.marktplaats.nl). Only the electronic parts remained, so Ebay/BangGood/Aliexpress served me well.

      The RPI was in first so I could start programming right away. I have an electrical background, so programming wasn’t the easiest thing to do. Then again I must say there is a lot documented, which was a huge help. After a friend showed me to use PuTTY and WinSCP it all went a lot easier.

      I wanted to make a small and clean mirror with a frame made out of wood, yet thin. I made most of my furniture at home, so wood would fit in quite easy. Also I wanted to have no cables other than the power cable.

      Parts used:

      • Rasperry Pi3 – Model B
      • 230V -> 12V – 3A AC-DC converter
      • 12V -> 5V – 5A DC-DC converter
      • HC-SR510 PIR-Sensor
      • 15cm HDMI cable
      • HDMI – LCD Controller board
      • 3mm thick two-way mirror acrylic

      Build Process:
      0_1519585574625_IMG-20180207-WA0015.jpeg
      Programming

      0_1519585602467_2018-02-08 18.29.41.jpg
      Made a wooden frame. 120cm x 31cm x 5cm - beam is 2cm thick

      0_1519585661338_IMG-20180213-WA0010.jpeg
      It does shimmer like crazy

      0_1519585396668_2018-02-12 17.16.50.jpg
      I had to change the PIR sensor to make it fit in the 5cm high, 2cm thick frame. Soldered the sensor off and put some wires in between

      0_1519585683846_2018-02-16 21.16.11.jpg
      Finished product: “the mirror”. Quit small. Not quite sure if we let it ‘sit’ there or we will hang it.

      0_1519585712806_2018-02-16 21.16.00.jpg
      Finished product: “the magic”. Doesn’t shimmer that much, but that’s due to the mobile phone pic by night and low light.

      0_1519585733821_2018-02-16 21.11.48.jpg
      Finished product: “the brains”. Made an acrylic top plate. Doesn’t do anything more than looking nice.

      Best Regards,

      Robert

      posted in Show your Mirror
      Robert_K
      Robert_K
    • RE: Bathroom mirror: "Frameless, thin, gesture and voice controlled"

      And a couple of pictures. But the Youtube video shows best IMHO.

      20220523_163834.jpg

      20220523_163846.jpg

      20220523_163931.jpg

      Regards Robert

      posted in Show your Mirror
      Robert_K
      Robert_K
    • Calendar Module - Altering event time format

      The Magic Mirror is a bit new for me. But I got all preferred parts working.

      The calendar now shows:
      “event tomorrow 08:00”

      I would like to see:
      event monday 08:00 till 10:00

      My code is as follows:

      		{
      			module: "calendar",
      			header: "Kalender Robert",
      			position: "top_left",
      			config: {
                                      maximumNumberOfDays: 7,
      				maximumEntries: 8,
      				displaySymbol: false,
      				dateFormat: 'ddd-Do-MMM'
      				fullDayEventDateFormat: 'ddd-Do-MMM',
      				urgency: 0,
      				getRelative: 0,
      				timeFormat: 'absolute',
      				calendars: [
      					{
      						symbol: "calendar-check-o ",
      						url: "https://calendar.google.com/calendar/ical/*PRIVATE CODE*/basic.ics"
      					}
      				]
      			}
      

      Can anyone point me in the right direction of changing the time format?

      Best Regards and thanks in advance,

      Robert

      posted in Troubleshooting
      Robert_K
      Robert_K
    • RE: Bathroom mirror: "Frameless, thin, gesture and voice controlled"

      Thank you for the compliment.

      The 3 “devices” are DC-DC converters. They are adjustable. The screen powerbord suplies 19V DC.
      The Pi uses 5V, the LED’s uses 5V (but works better on 4V) and the audio bord uses 9V, however I didn’t use them. Both have a great power output (enought amps)

      The LED’s are WS2801 programable (waterproof) LED’s for which I wrote two python scipts.
      The Gesture module activates these python scripts.

      Regards Robert

      posted in Show your Mirror
      Robert_K
      Robert_K
    • RE: MMM-GroveGestures -> ShellExec "Python script"

      So after some thinkering with the hint I got, I’ve got the code working:

      
      "UP": {
      shellExec: "python /home/pi/ws2801_inschakelen.py",	  
      	     },
      "DOWN": {
      shellExec: "python /home/pi/ws2801_uitschakelen.py",
      			}
      

      Thanks for the help!

      posted in Troubleshooting
      Robert_K
      Robert_K
    • 1 / 1