Read the statement by Michael Teeuw here.
Strip Down Guide for BenQ 28" VA Monitor GC2870H
-
Hi guys,
I just wanted to share a Monitor I find pretty amazing to use with my magic mirror.
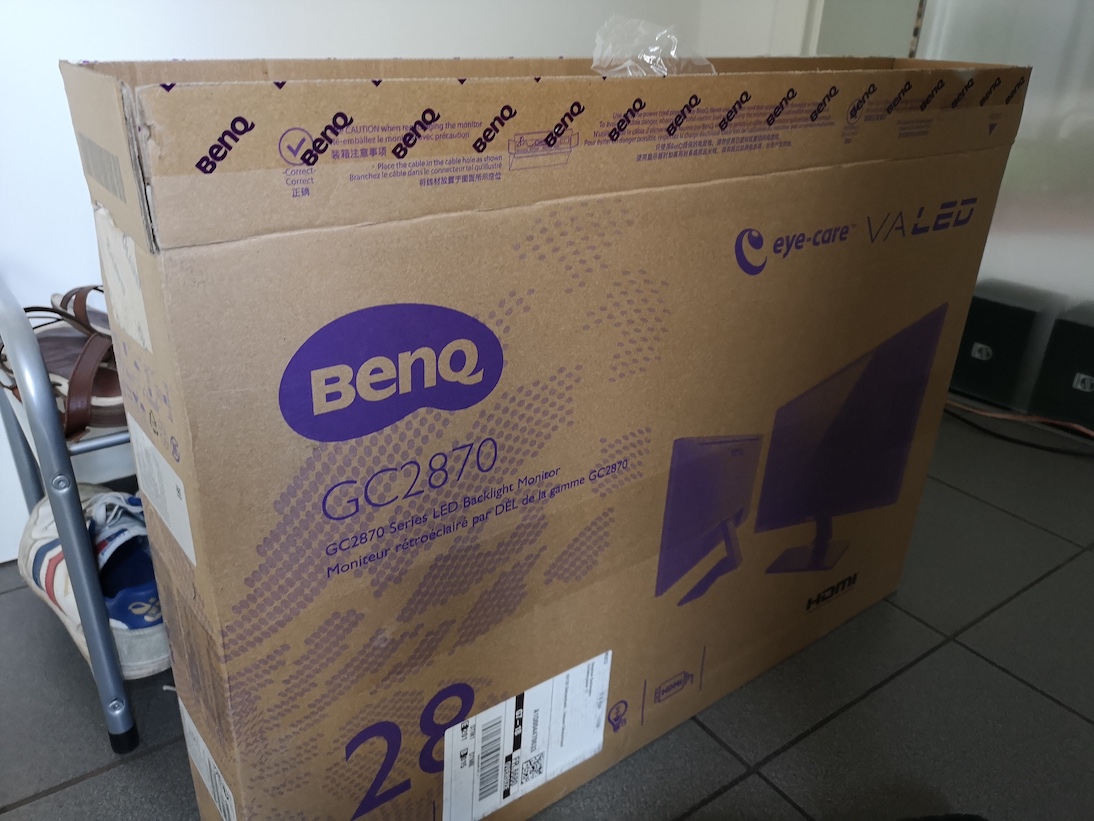
The BenQ GC2870 has 28" and 1920x1080. It is a VA Display and should have an amazing quality. I am only writing this because this display can be stripped down to the bezel it self and the controller board as well as power supply can be easily separated. In case some of you are looking for a nice monitor. I ordered it from amazon for just 160€.
Specs: https://www.benq.de/product/monitor/gc2870h/specifications/
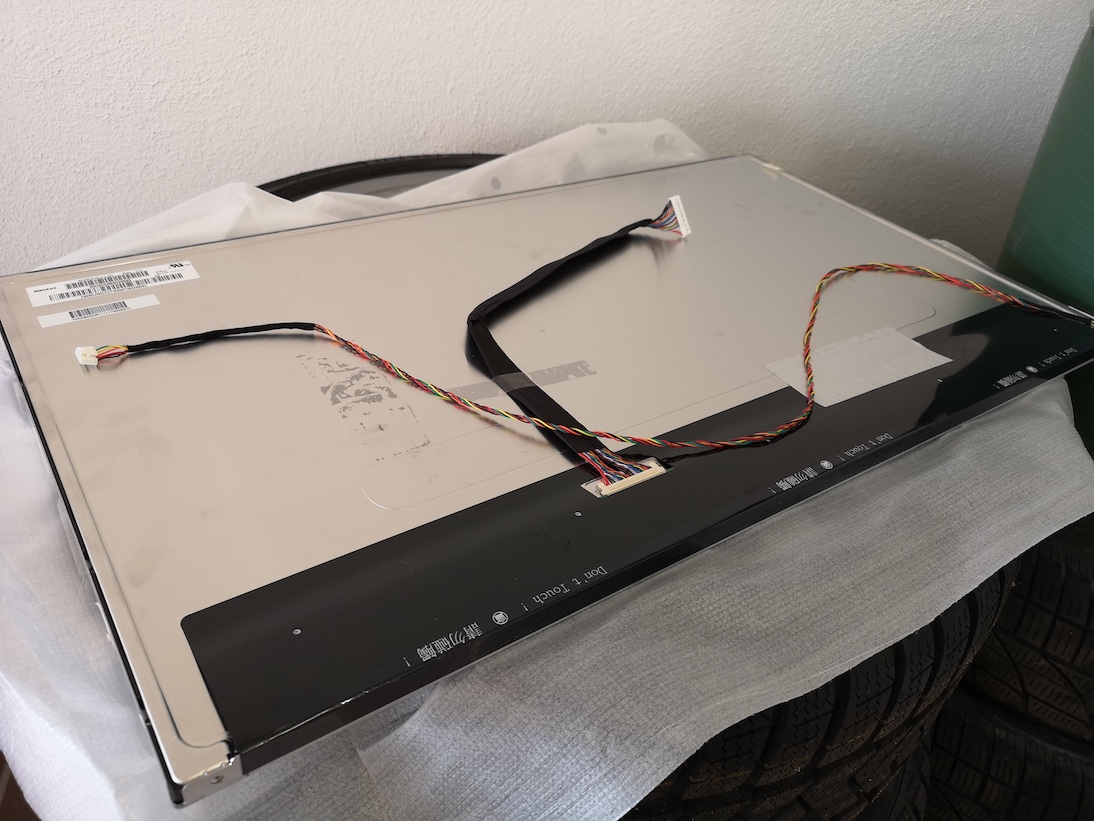
Stripped down picture: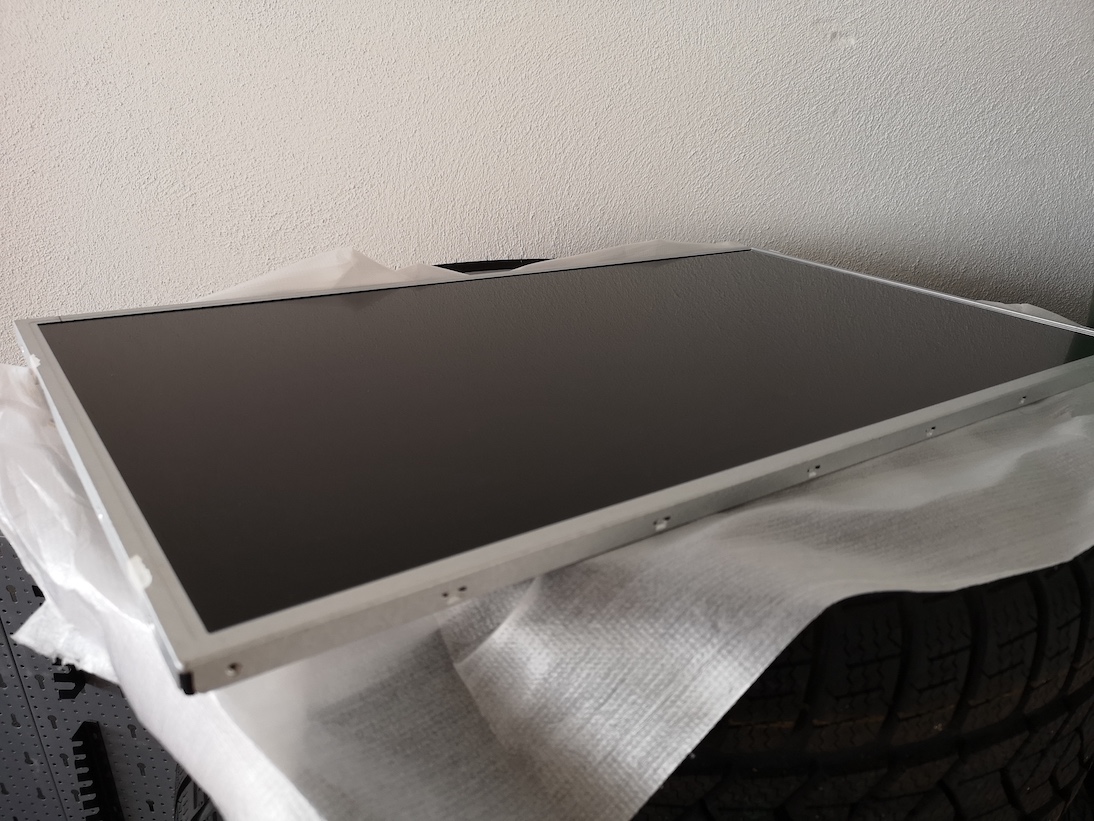
- the bezel has a depth of around 12mm and if you plan to use the casing for the power supply and control board it has a depth of 45mm
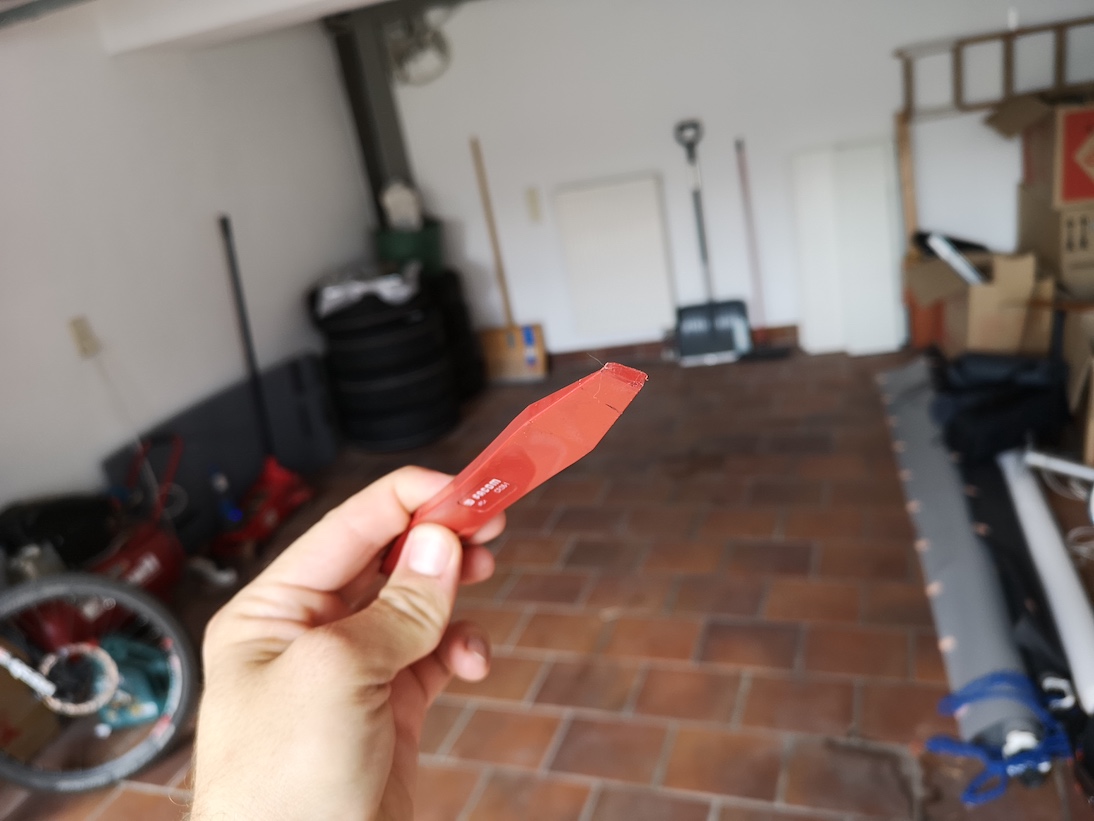
Tools used:
- Automotive Pry (Screwdriver flat should work)
- BenQ GC2870H
That is all you need.
To strip down:
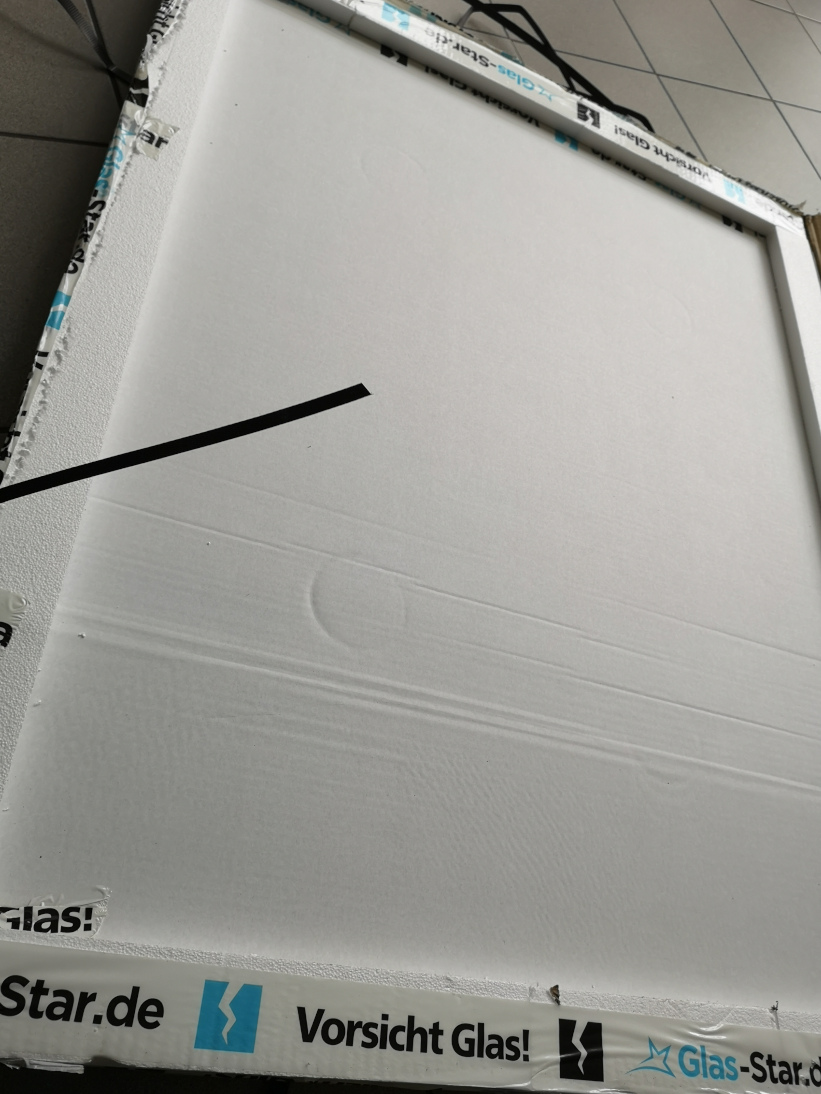
- Take the monitor and start inserting the pry or screwdriver between the edges, it will pop open like this
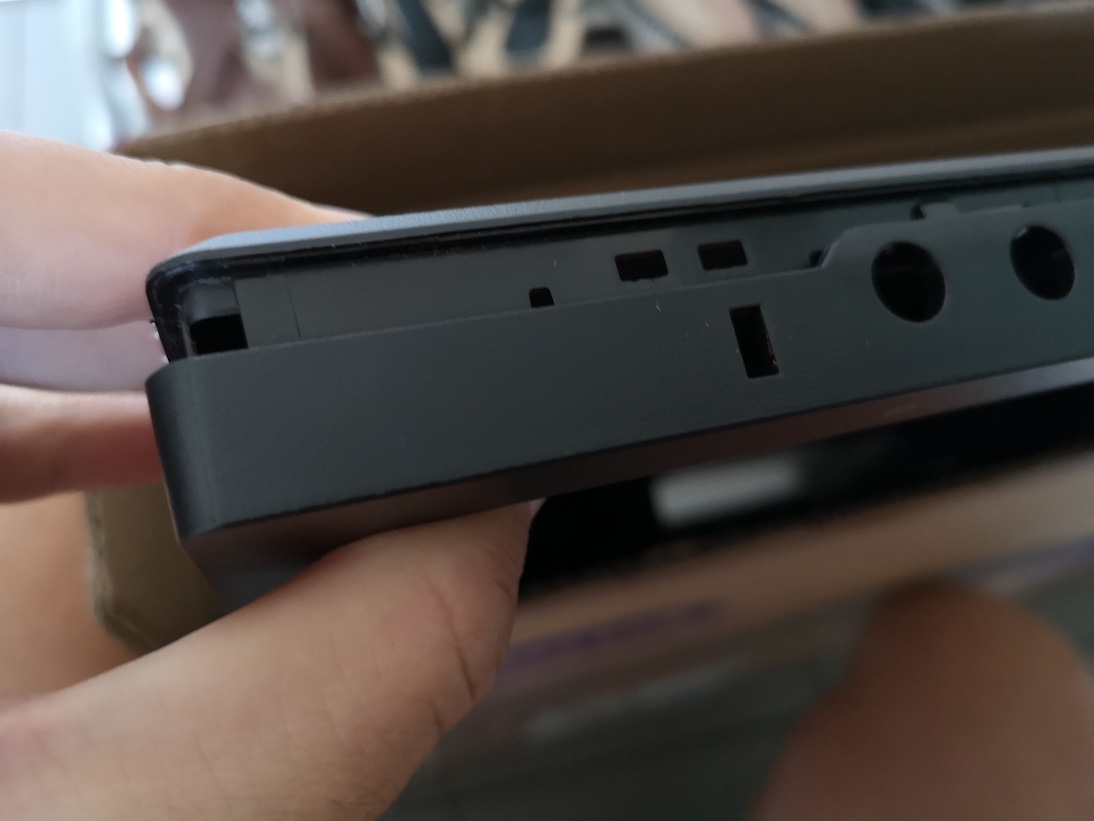
- do this all around all edges, it is incredibly easy and takes at most 5 minutes
- take out the bezel
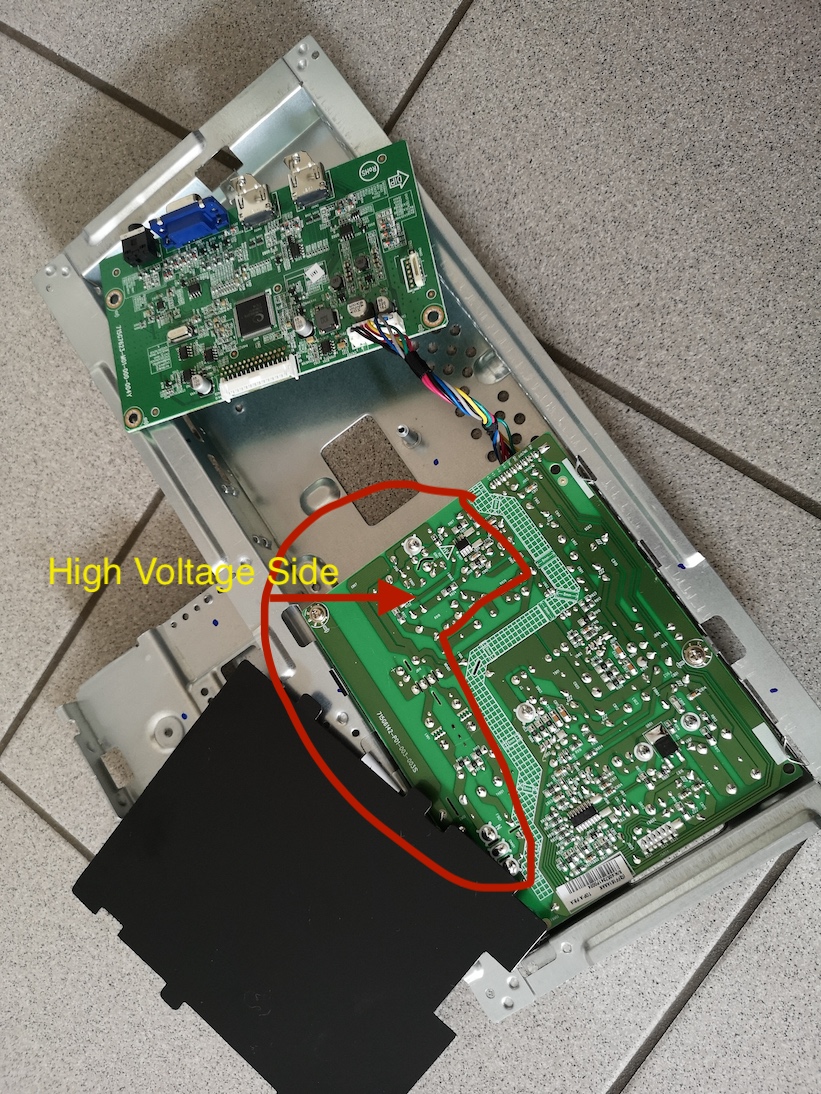
- remove the silver aluminum tape holding the power supply and control board
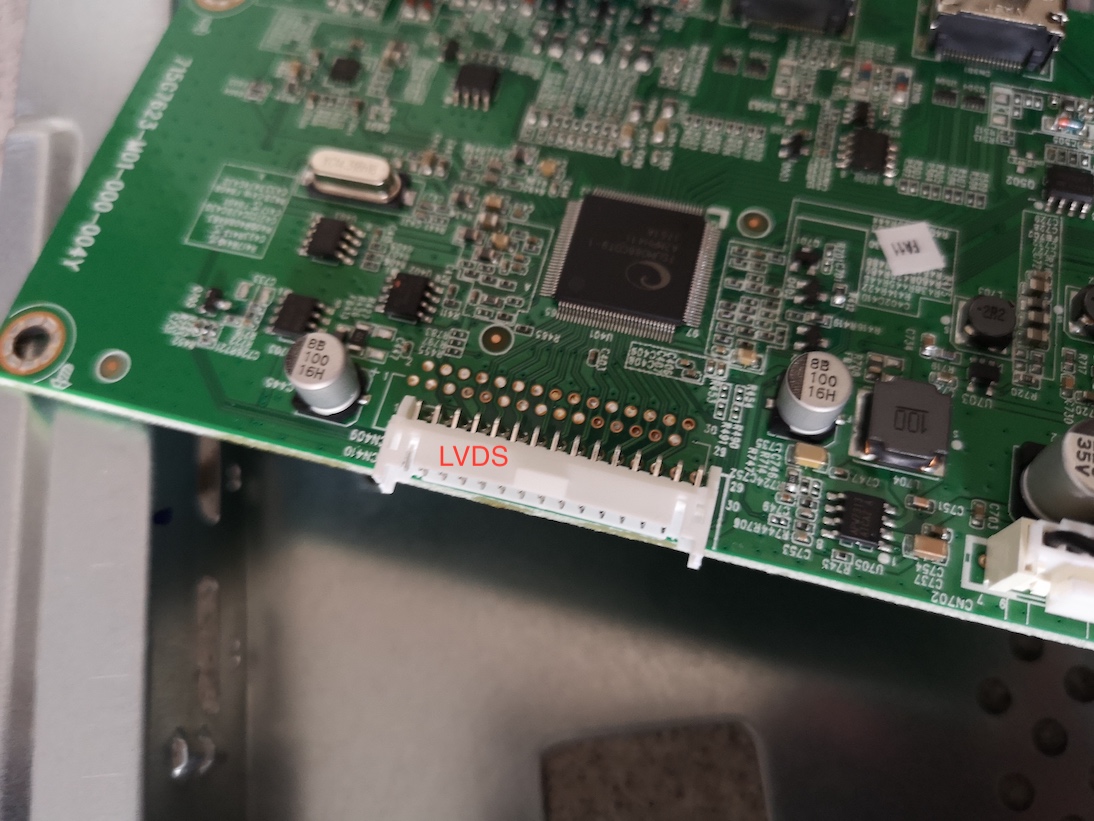
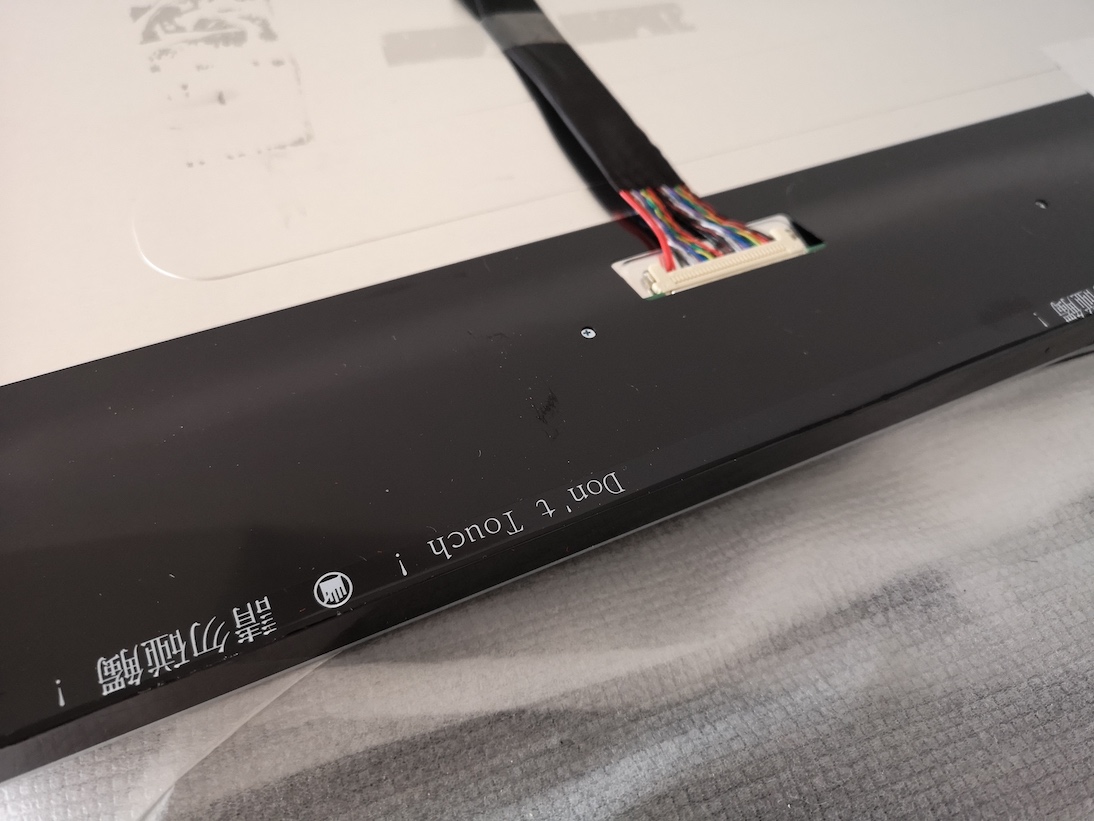
- unplug the LVDS connector
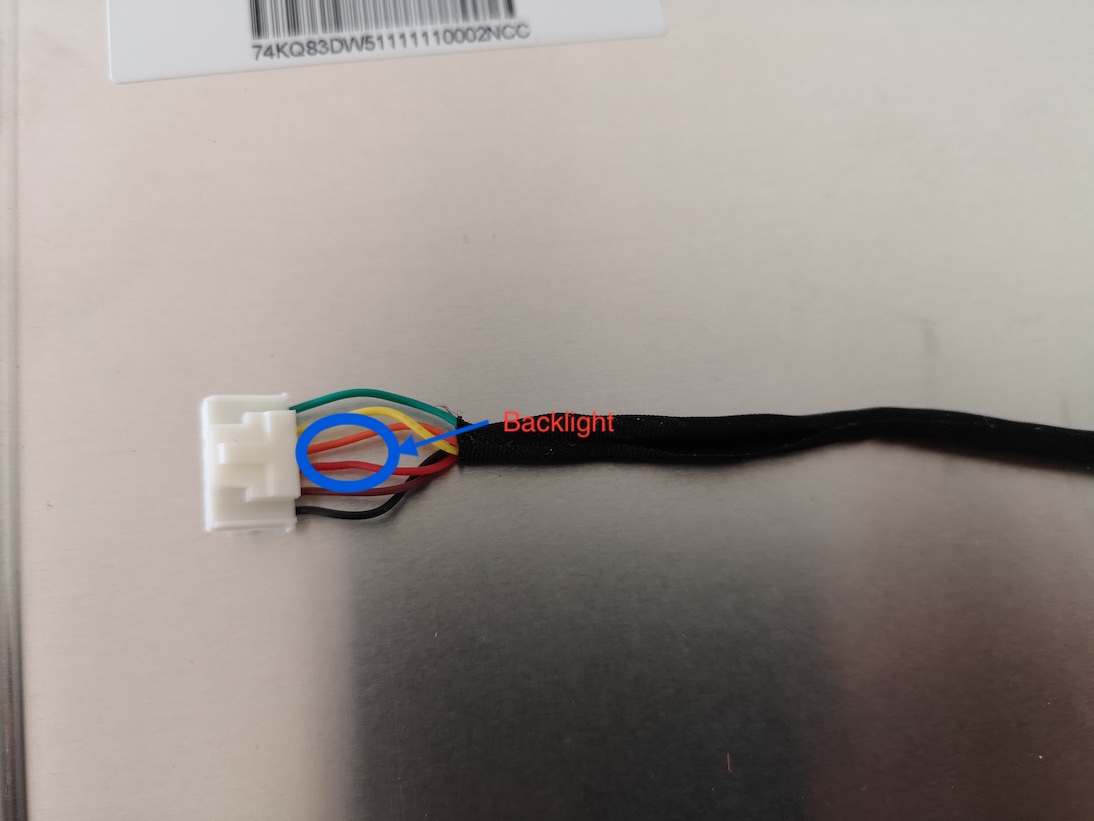
- unplug the backlight connector the circle shows VLED for the backlight
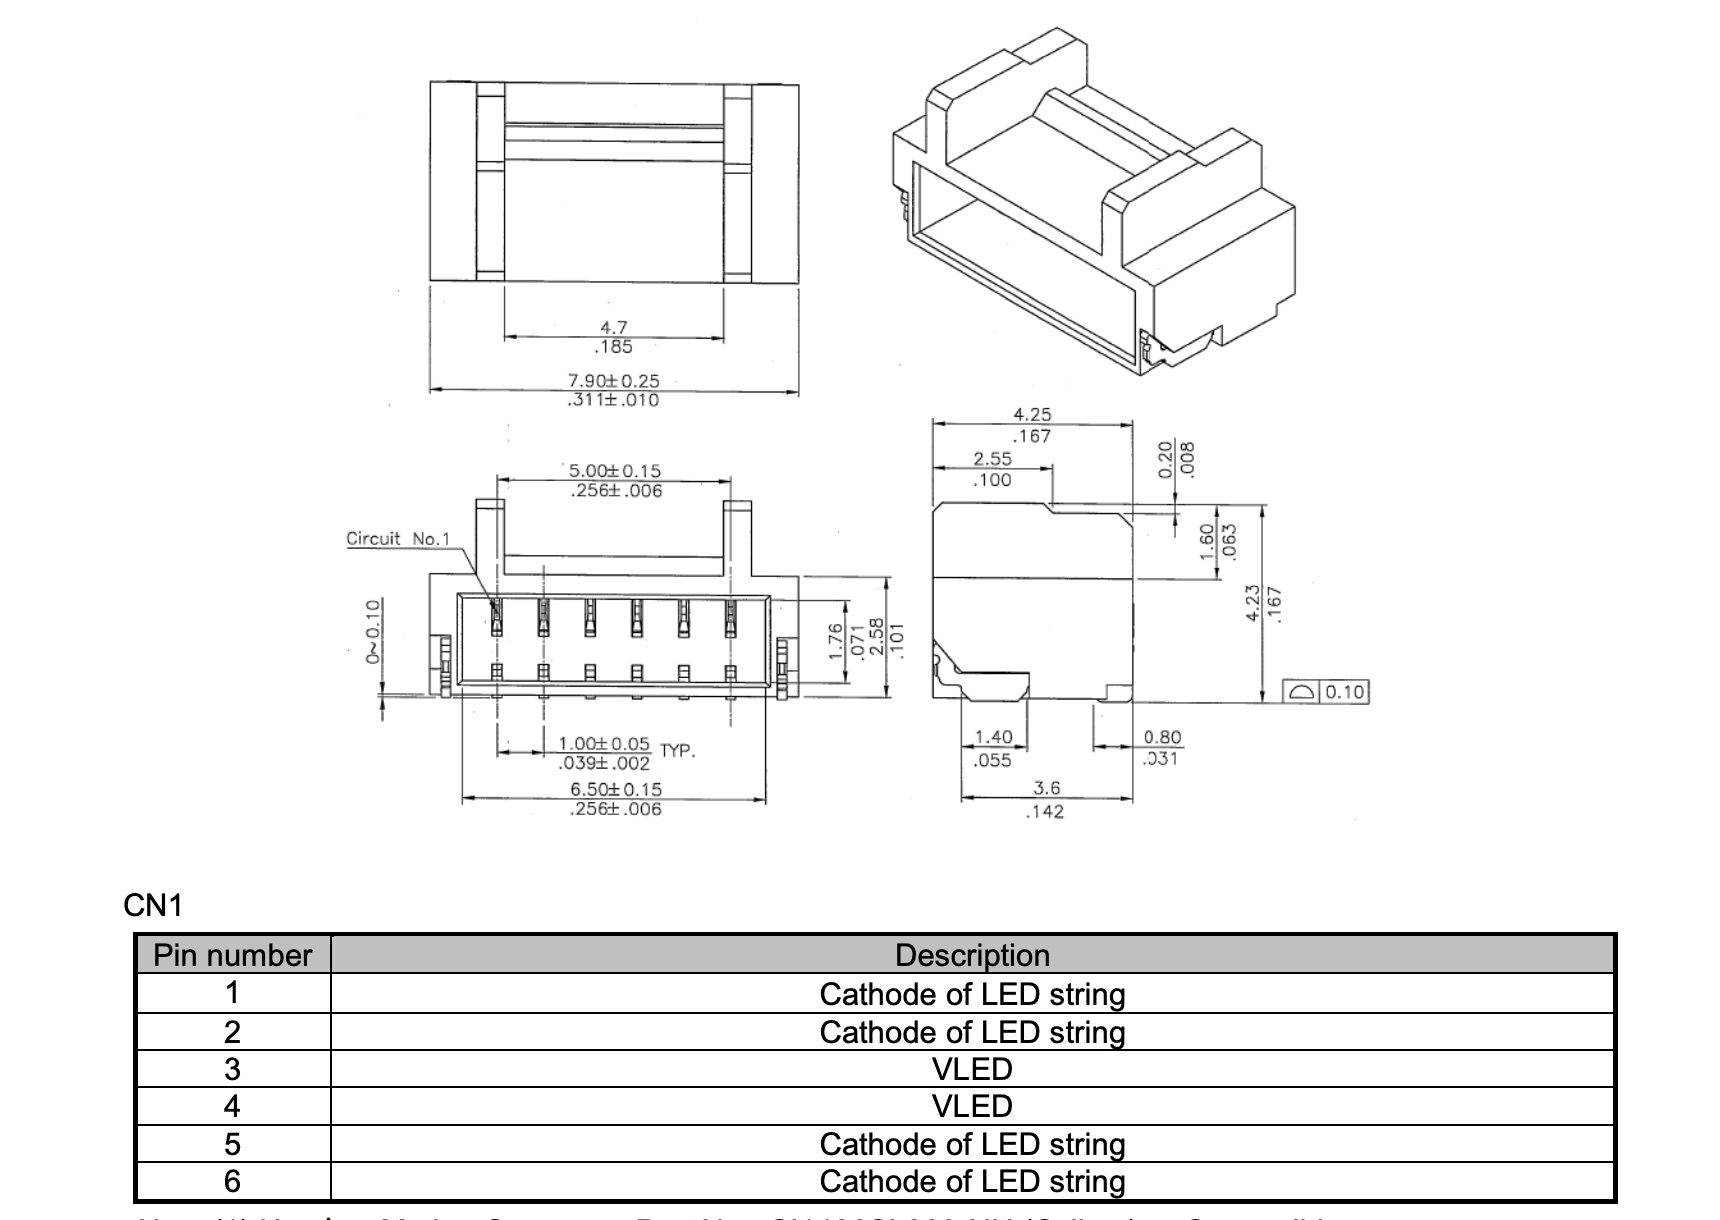
- The bezel used is a M280HKJ-L50. I found an innolux datasheet for the -L30 and according to this, these are the control lines for the backlight:
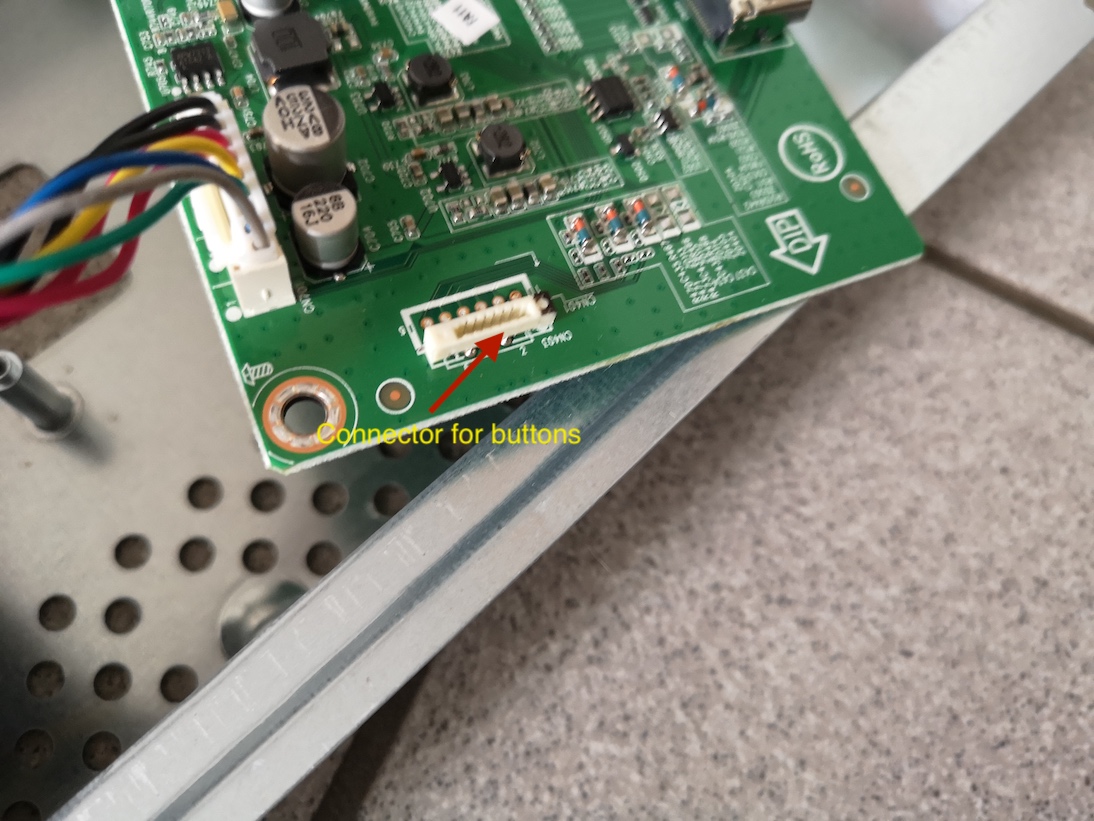
- unplug the connector for the buttons
- now the bezel should be completely separate
- beware not to touch where it says “DO NOT TOUCH” as the control lines for the bezel are attached to the screen:
- you can now remove the control board and, if you want the power supply beware: residue voltage might be in the capacitors, so dont touch soldering points. It might be wise to leave the power supply in and the paper protection attached
 (Source: innolux Panel_CHIMEI_INNOLUX_M280HKJ-L30_0_[DS].pdf)
-
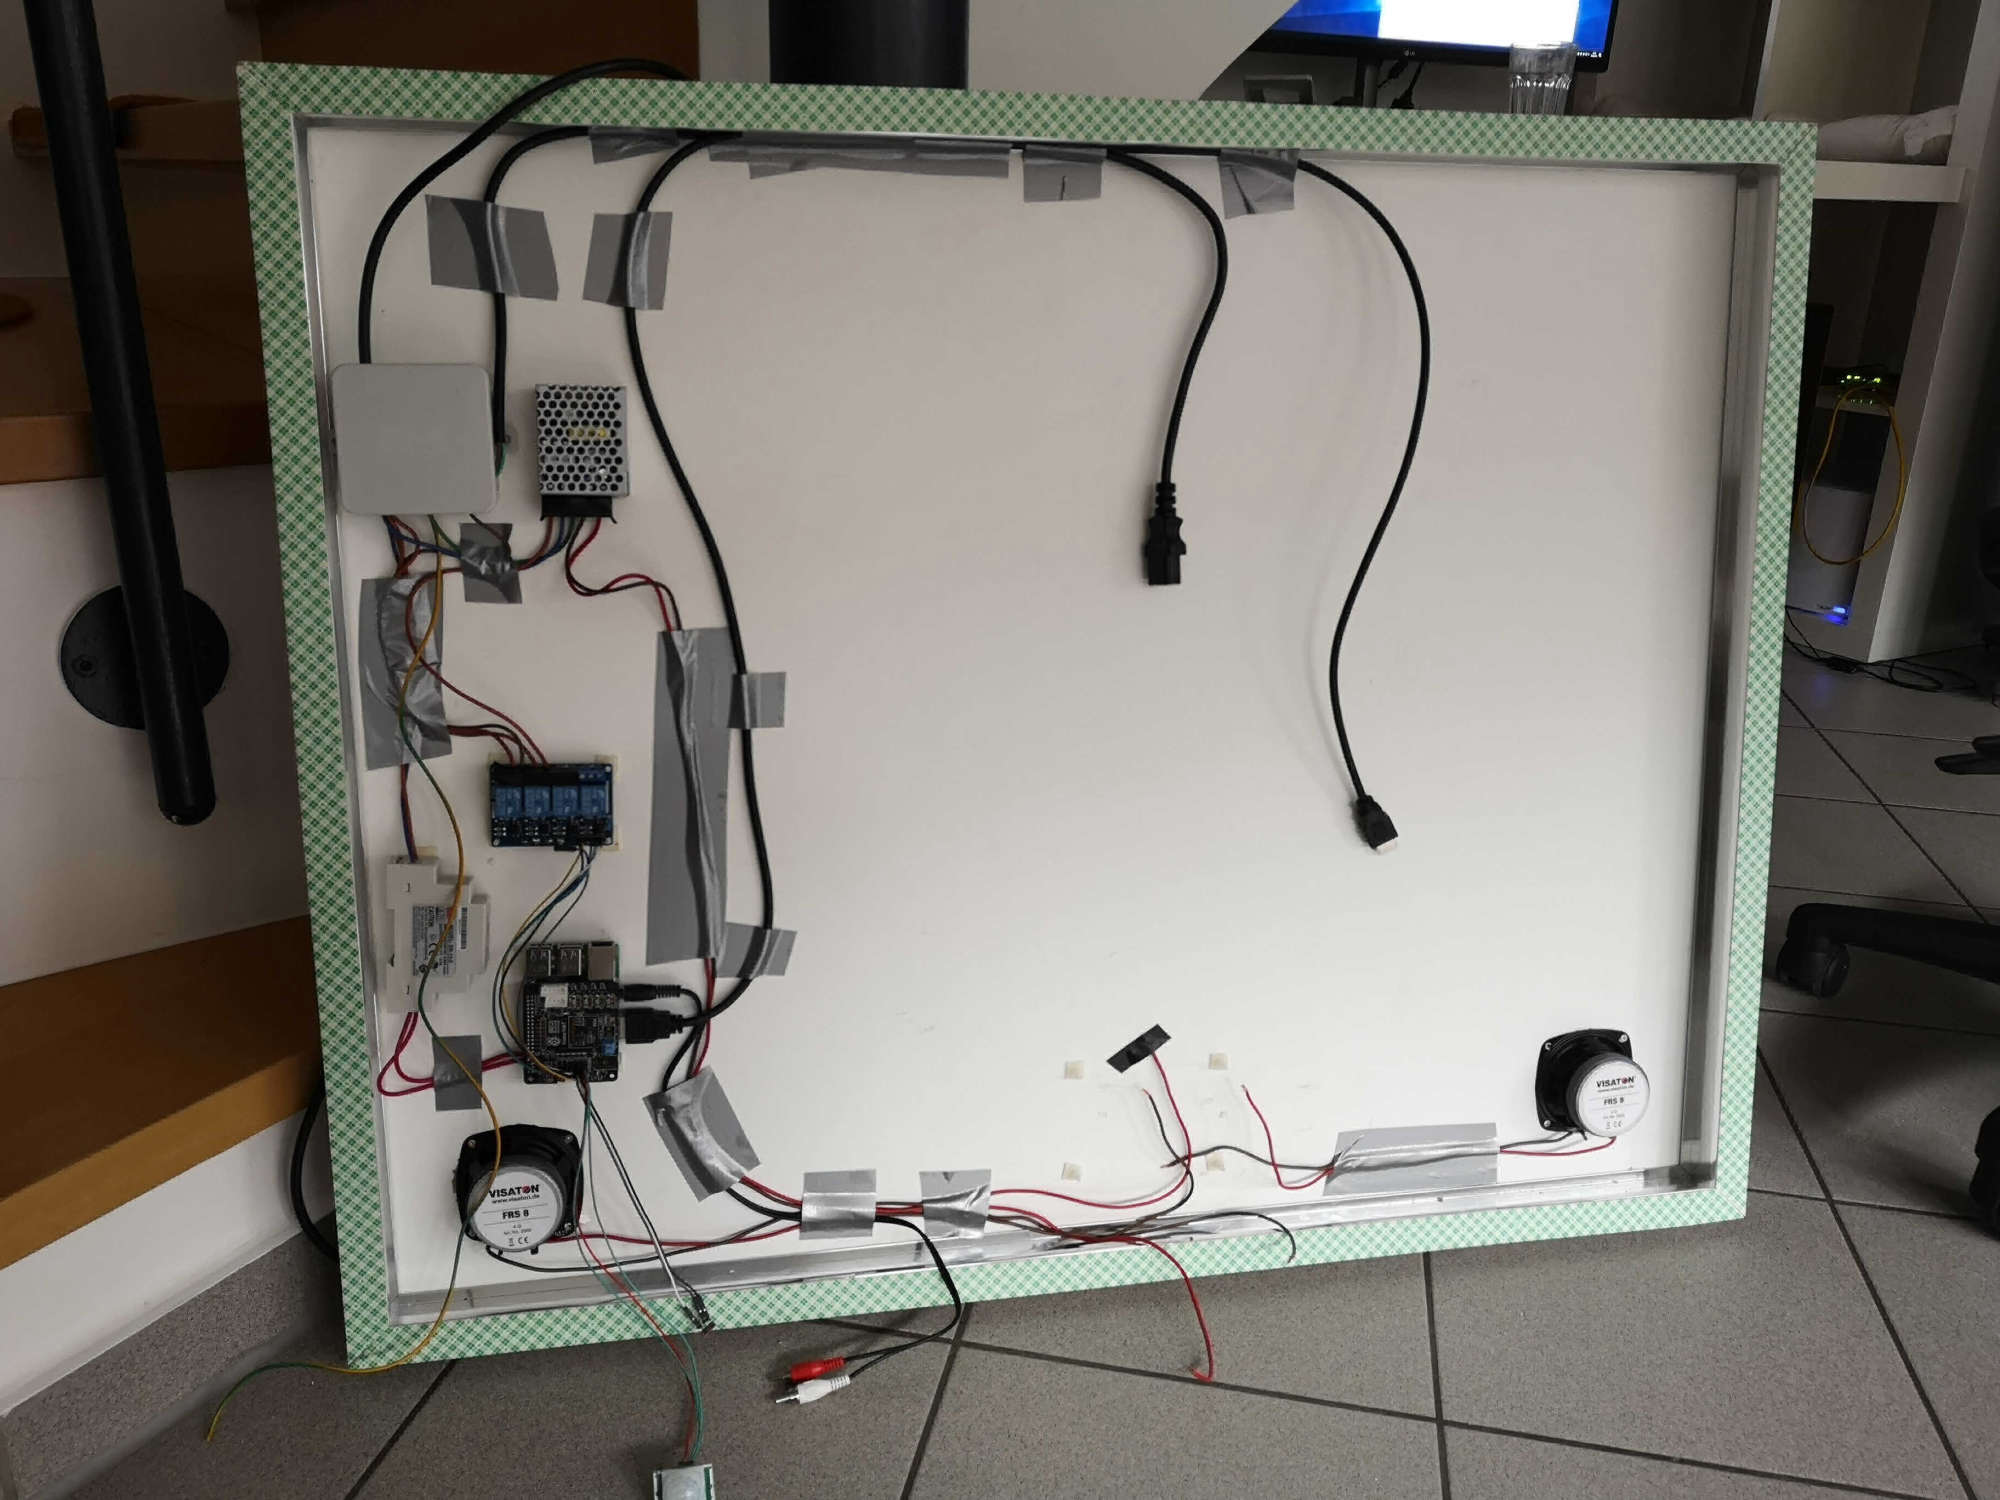
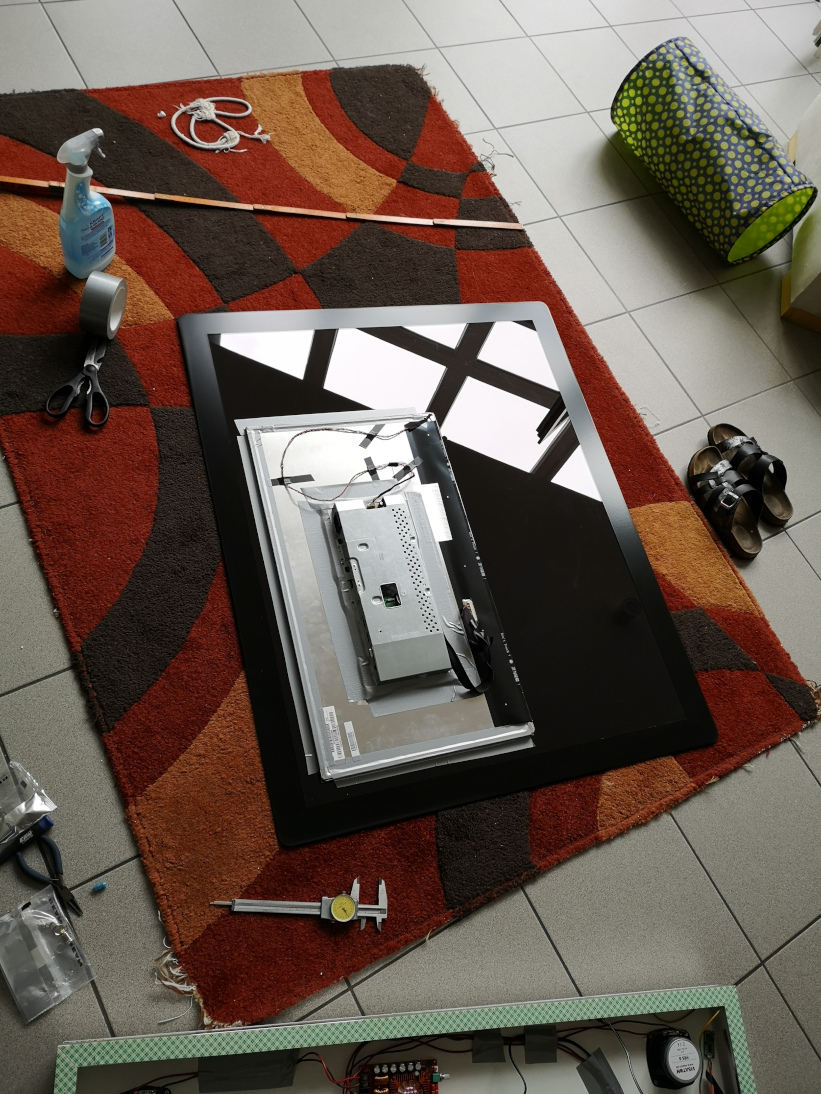
Just in case anyone is interested in what the project looks being almost fully assembled.
Features:
- Stereo Amplifier, 2 Speakers
- Google Voice hat and two Microphones, Google Assistant (MMM-Assistant)
- A2DP Bluetooth Enabled
- Capacitive Touch Button playing local news as a Podcast (MMM-Podcast)
- Landscape Mode for performance
- Meanwell 5V Power Supply
- Meanwell 12V Power Supply
- 28" GC2870VH Monitor
- Nielsen Aluminum Frame (45mm height with 20mm surface to attach two sided tape)
- 3m two sided Tape which is specially made for glueing mirros
- Standard wooden Backplate from hardware store screwed to aluminum frame
- PIR Sensor
The Mirror will be delivered first week of September. And is larger than the aluminium frame to give a clean view.
To Come:
- Casing for PIR Sensor and Cap Touch
- Maybe lighting from the inside
-
This post is deleted! -
Looks very nice so far. Keep us updated with your project.
One question: Have you thought about venting? I don’t see any venting holes or anything that allows the heat to dissipate. -
looks very nice let us updated about progress :)
-
@madscientist initially for the test runs I will install two temperature sensors one in the top and one in the bottom to monitor the temperature. I have considered venting holes in the wooden backplate (bottom and top) or above the monitor in the aluminum frame and the same on the bottom but I would like to avoid that as I don’t know how much light would enter the casing.
-
@maros thank you, I really don’t know id it will all work out, I started this for fun as I was reading about the amazing magicmirror2 project and their community. Two days later I am taking apart a brand new monitor… and now I have been constantly working on it on my days off.
-
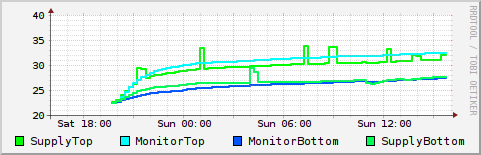
@madscientist So, experiment done. This is the result of 24h continues running. You can see the temperature has not quiet stabilized but the trend is well below anything critical. My guess would be that with a glass cover instead of the wooden frame I used to insulate the power dissipation should be even better.
-
@yep_dd Less than I thought. But also check the temperature of the Pi. In my case the Pi runs at 63°C at 27°C room temperature. With active cooling it’s at ~52°C.
-
@madscientist good idea, I will do that as soon as I have the actual glass. I have a passive heatsink installed already and in landscape mode the pi usage is less than 25-30% at the moment
-
@yep_dd Same here for passive heat sink and usage. I just placed an old 40mm/12V fan in front of the Pi which runs at 5V. It’s hard to hear in an absolute silent environment. I’ve noticed crashes during the hot period in summer, that’s why I use a fan now and it generall runs smoother. I think at some points the Pi got hot enough to throttle.
-
@madscientist that is true… good idea, I have one 5V 40mm fan as spare. Just one question, are you using your MM in portrait or landscape mode?
-
I use it in portrait mode.
-
@madscientist my experience is that in portrait the performance is almost unusable since everything is copied and rotated and I now decided to go landscape.
-
Hi guys,
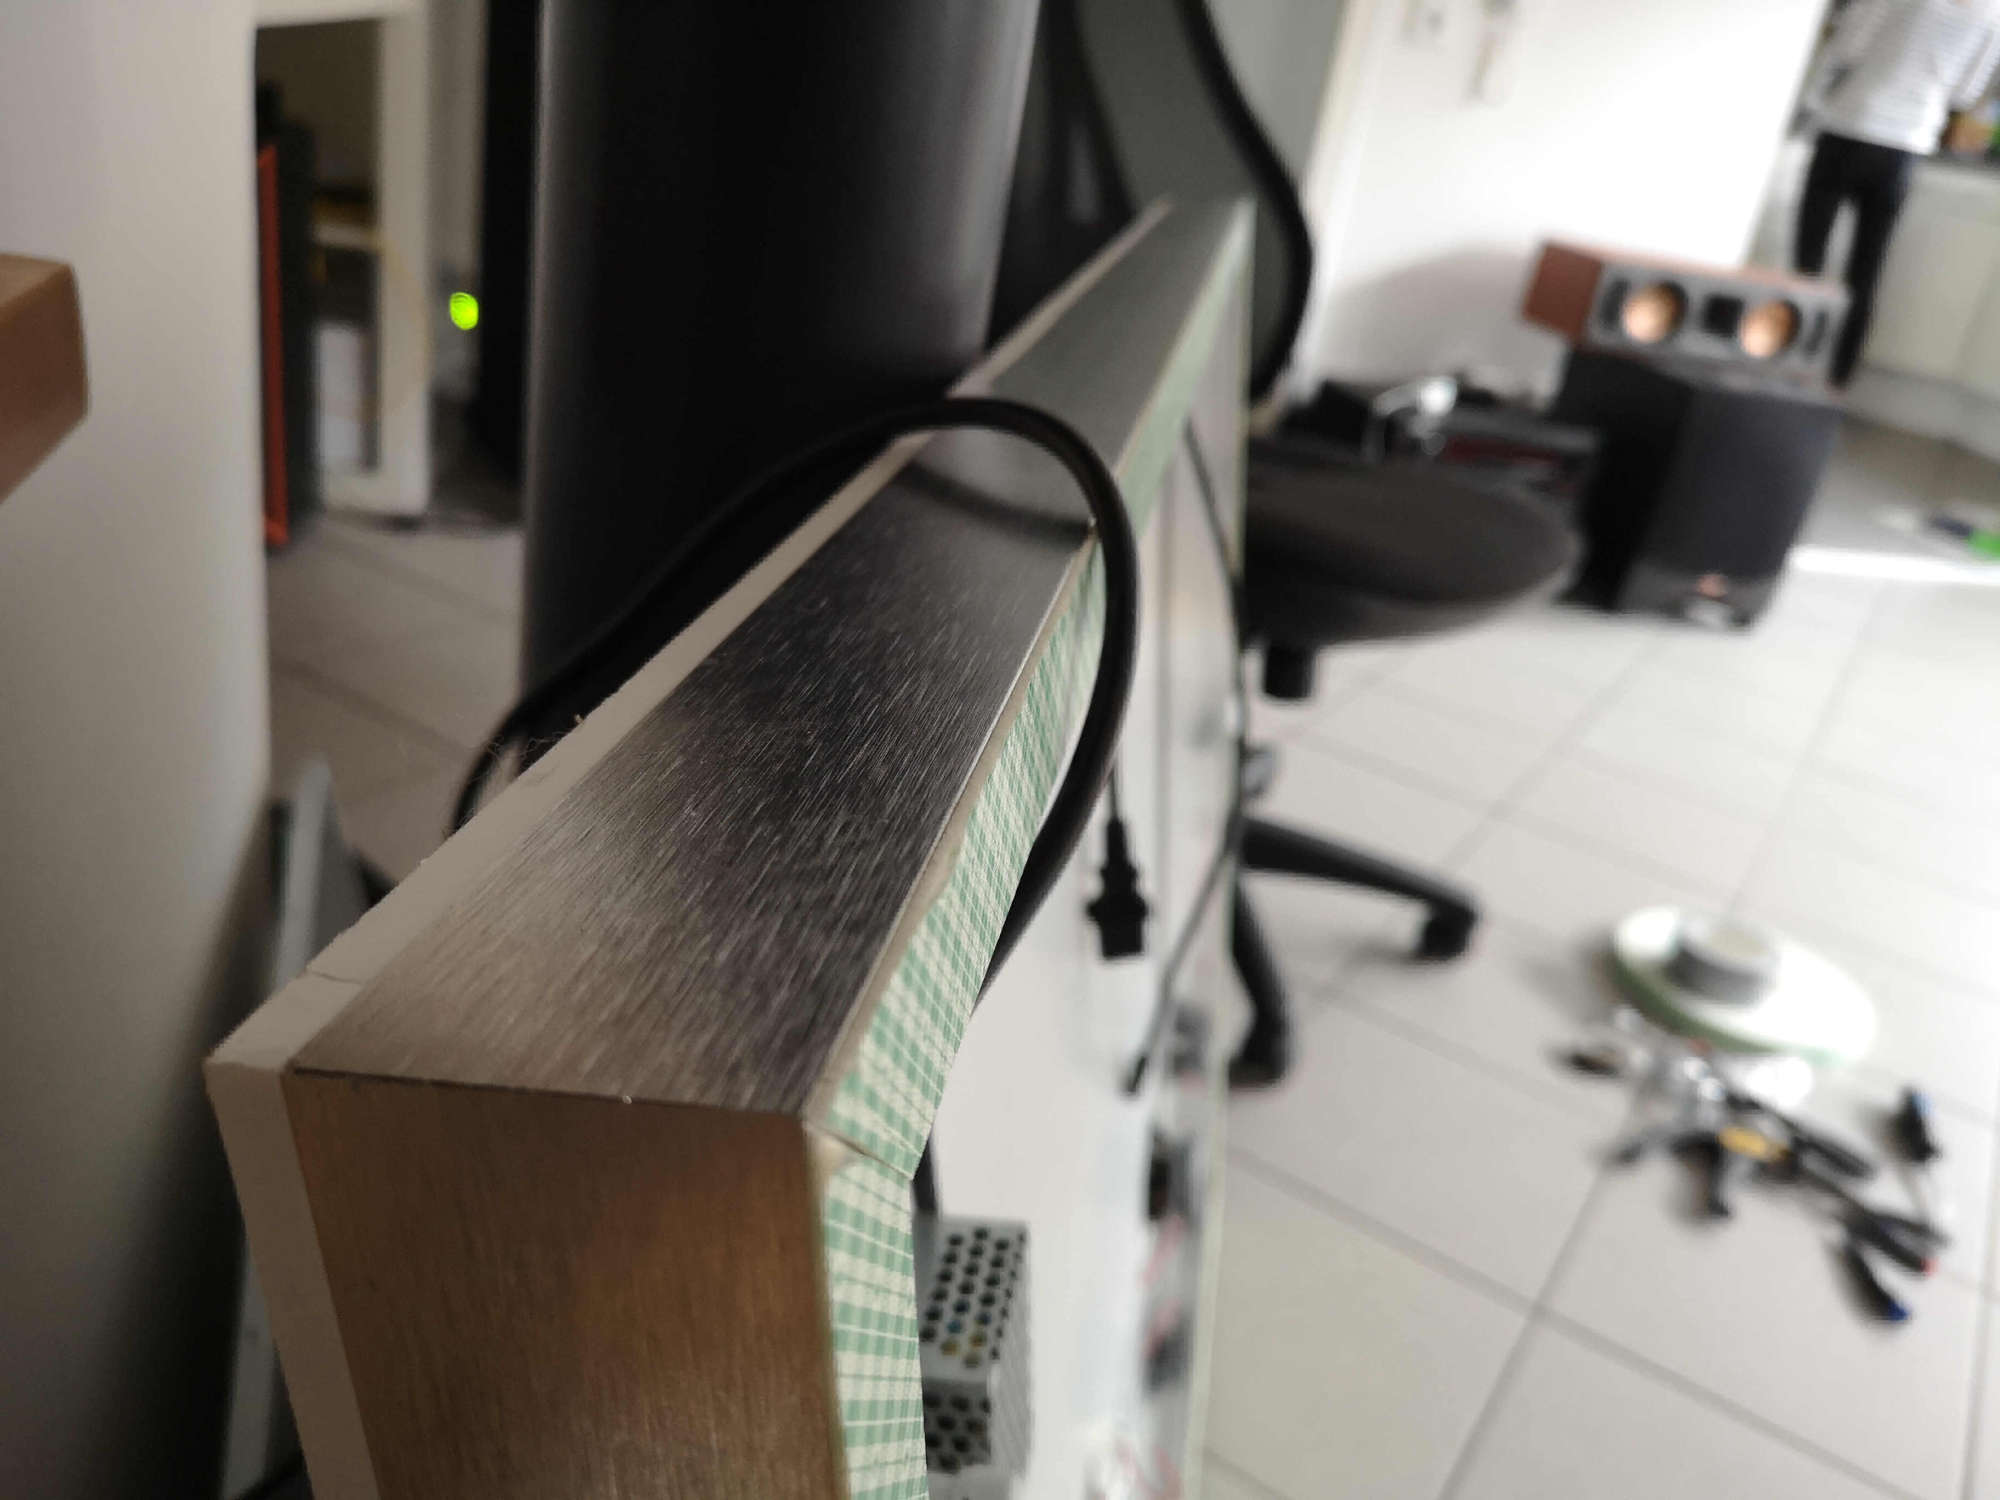
just an update on the mirror. Finally the glas has arrived. I am very happy with the quality and the 50mm edge that has been painted black. There were a few stains on the backside which I had to clean manually.
Overall I am pretty satisfied with the results, but I have to change a few things:
What I am happy with:
- quality of glass (polished and round edges)
- Monitor appearance
- aluminimum frame and design (even though it needs to be changed, see below)
- sound quality
- The quality of the double-sided tape (seems like this is minor, but it is so strong I have no doubt it will hold the glass)
What needs to be changed:
- I changed the PIR Sensor to a radar sensor (RCWL-0516) which works flawlessly behind the glass
- The wooden white background reflects too much sunlight during daytime so I have to get a black one
- The Nielsen frame is 50mm too large. The reason behind that is that they measure the inner length but since I put the mirror on the outside it is 50mm longer. It does look okay, but I want the frame to be more inset. So if anyone wants a Nielsen frame for their project. I give mine away for free or a few € whatever you feel is appropriate it measures 95cmx75cm and can be shipped in small pieces and has the high quality double sided tape attached. I could have also gotten a bigger mirror, but obviously that is too expensive
- the cheap capacitive Sensors from amazon don’t work well behind the glas so I am now getting these MT0.1N-NR. The datasheet looks promising, of course 10x more expensive…
A few impressions:
The package came very well shipped:
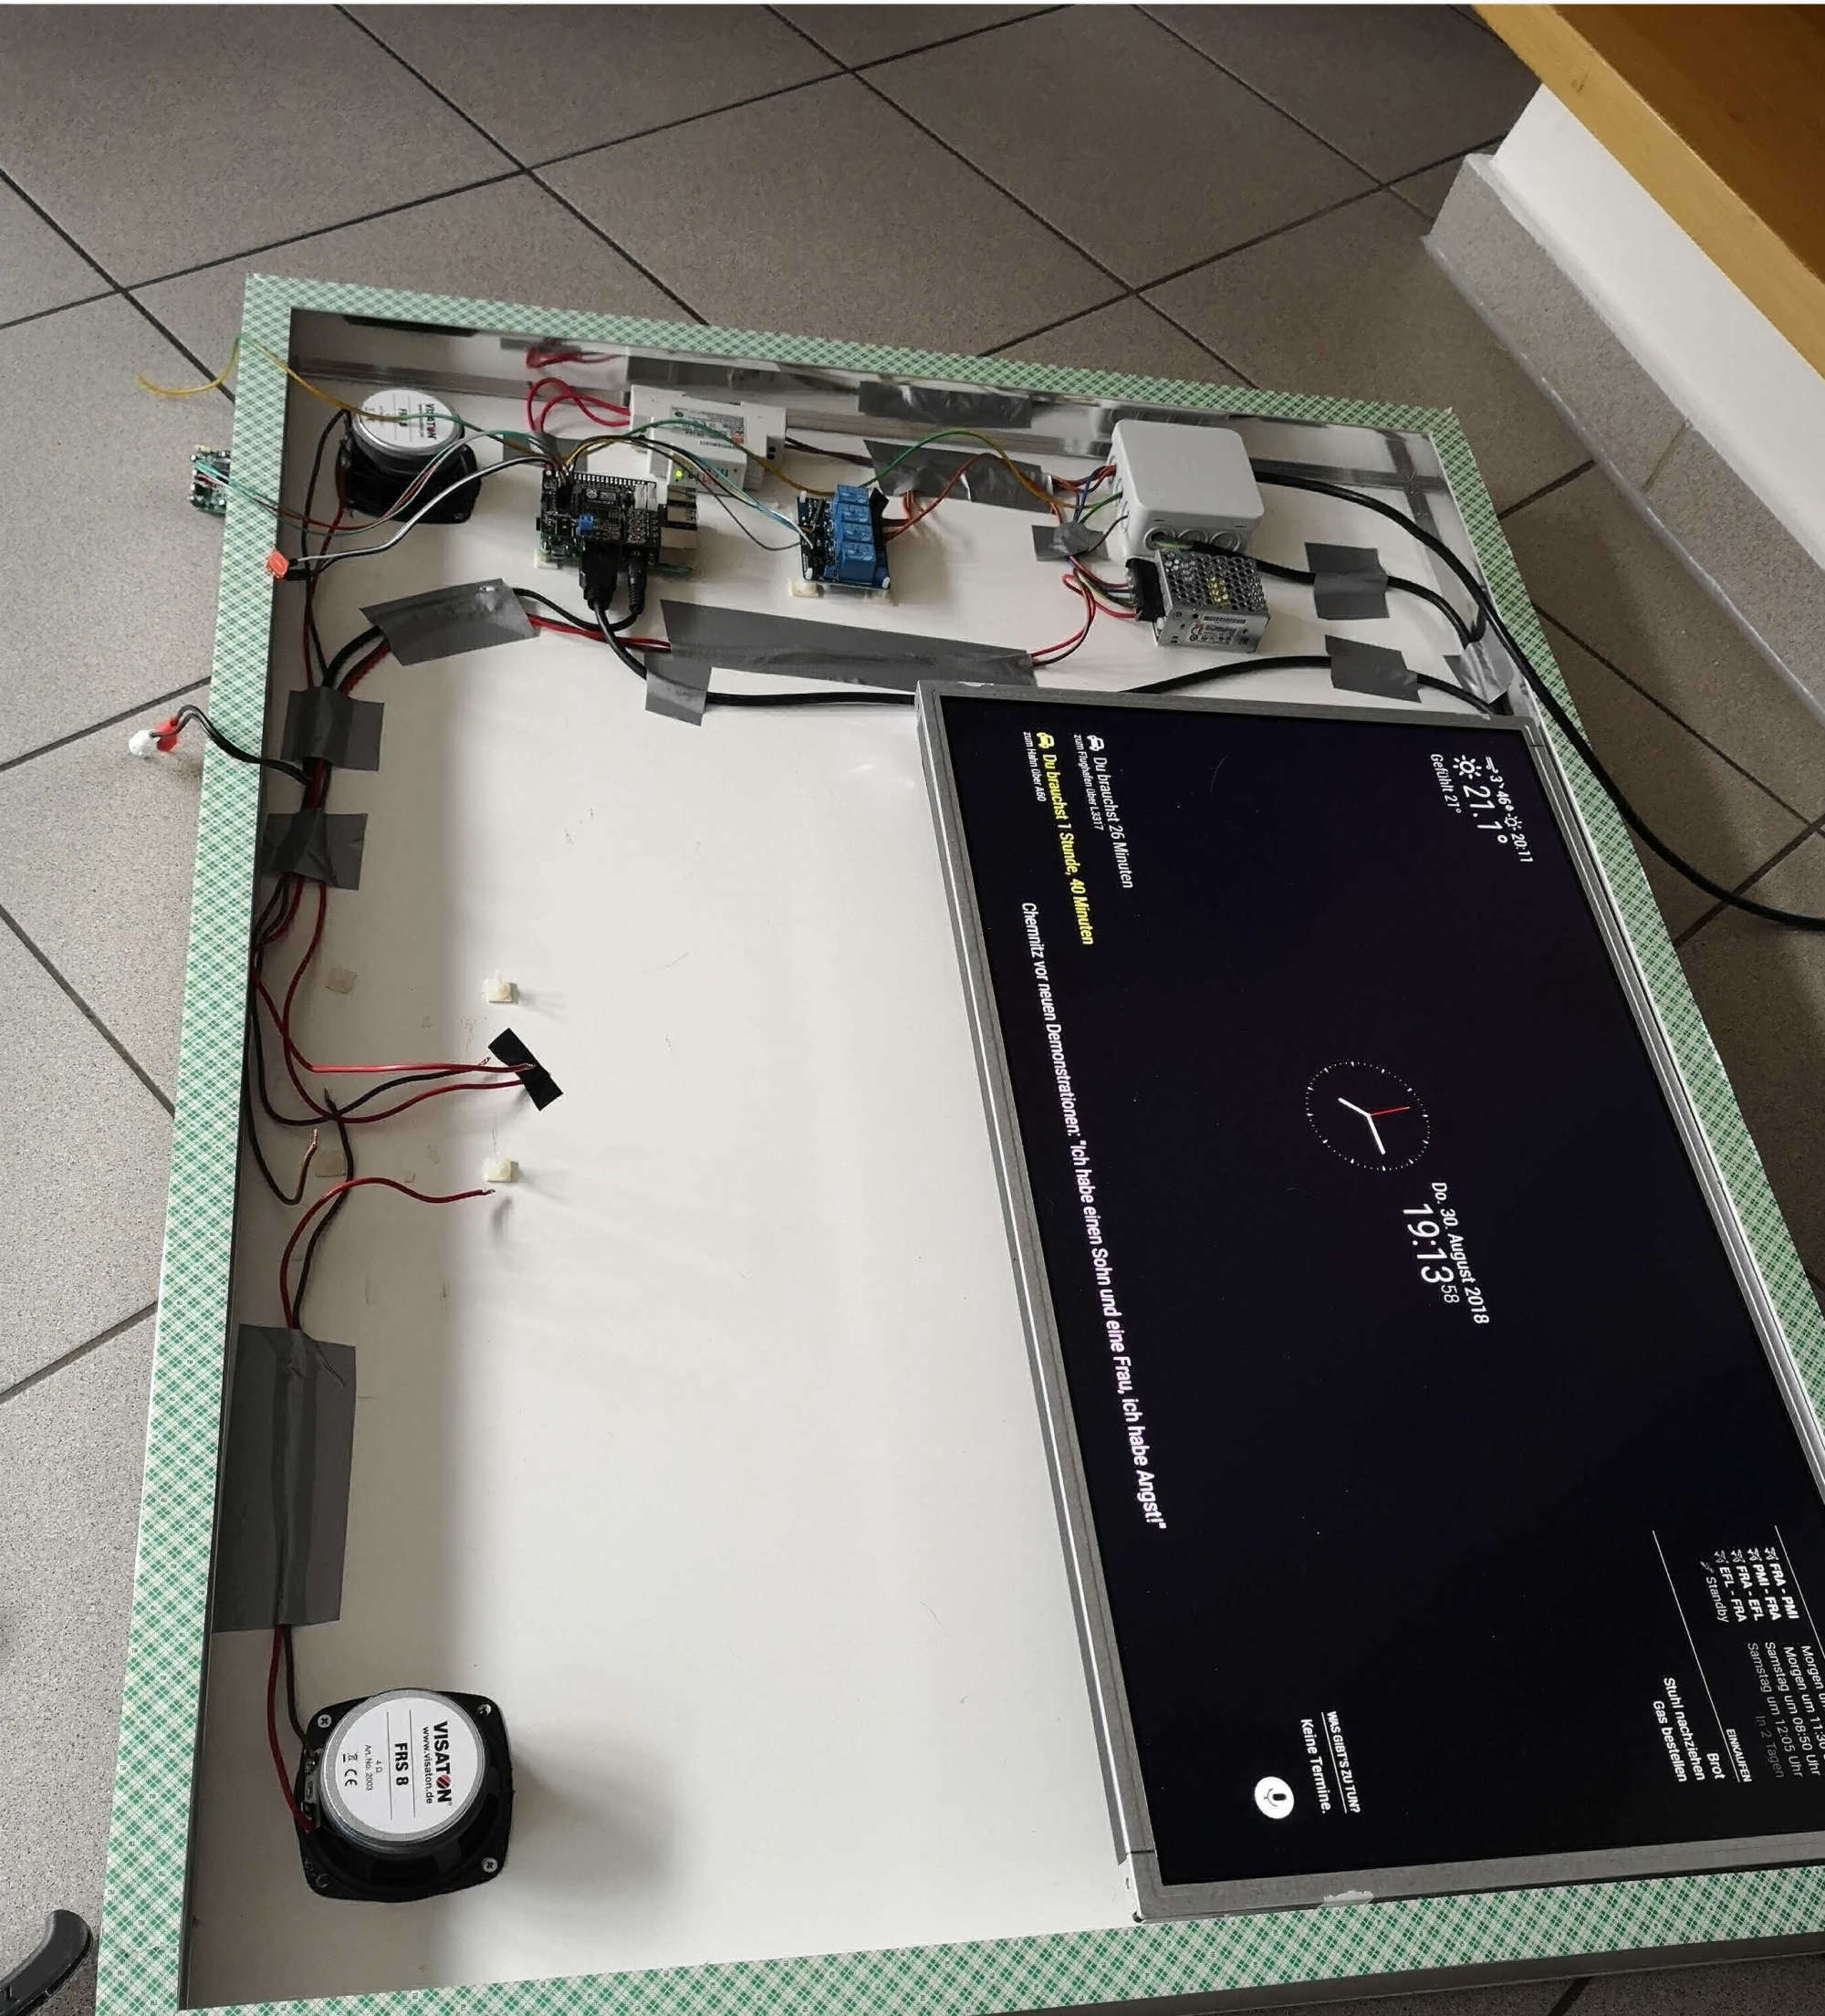
I initially fixed the monitor with duct tape to see if I was happy with the position, you can nicely see the 50mm painted edges:
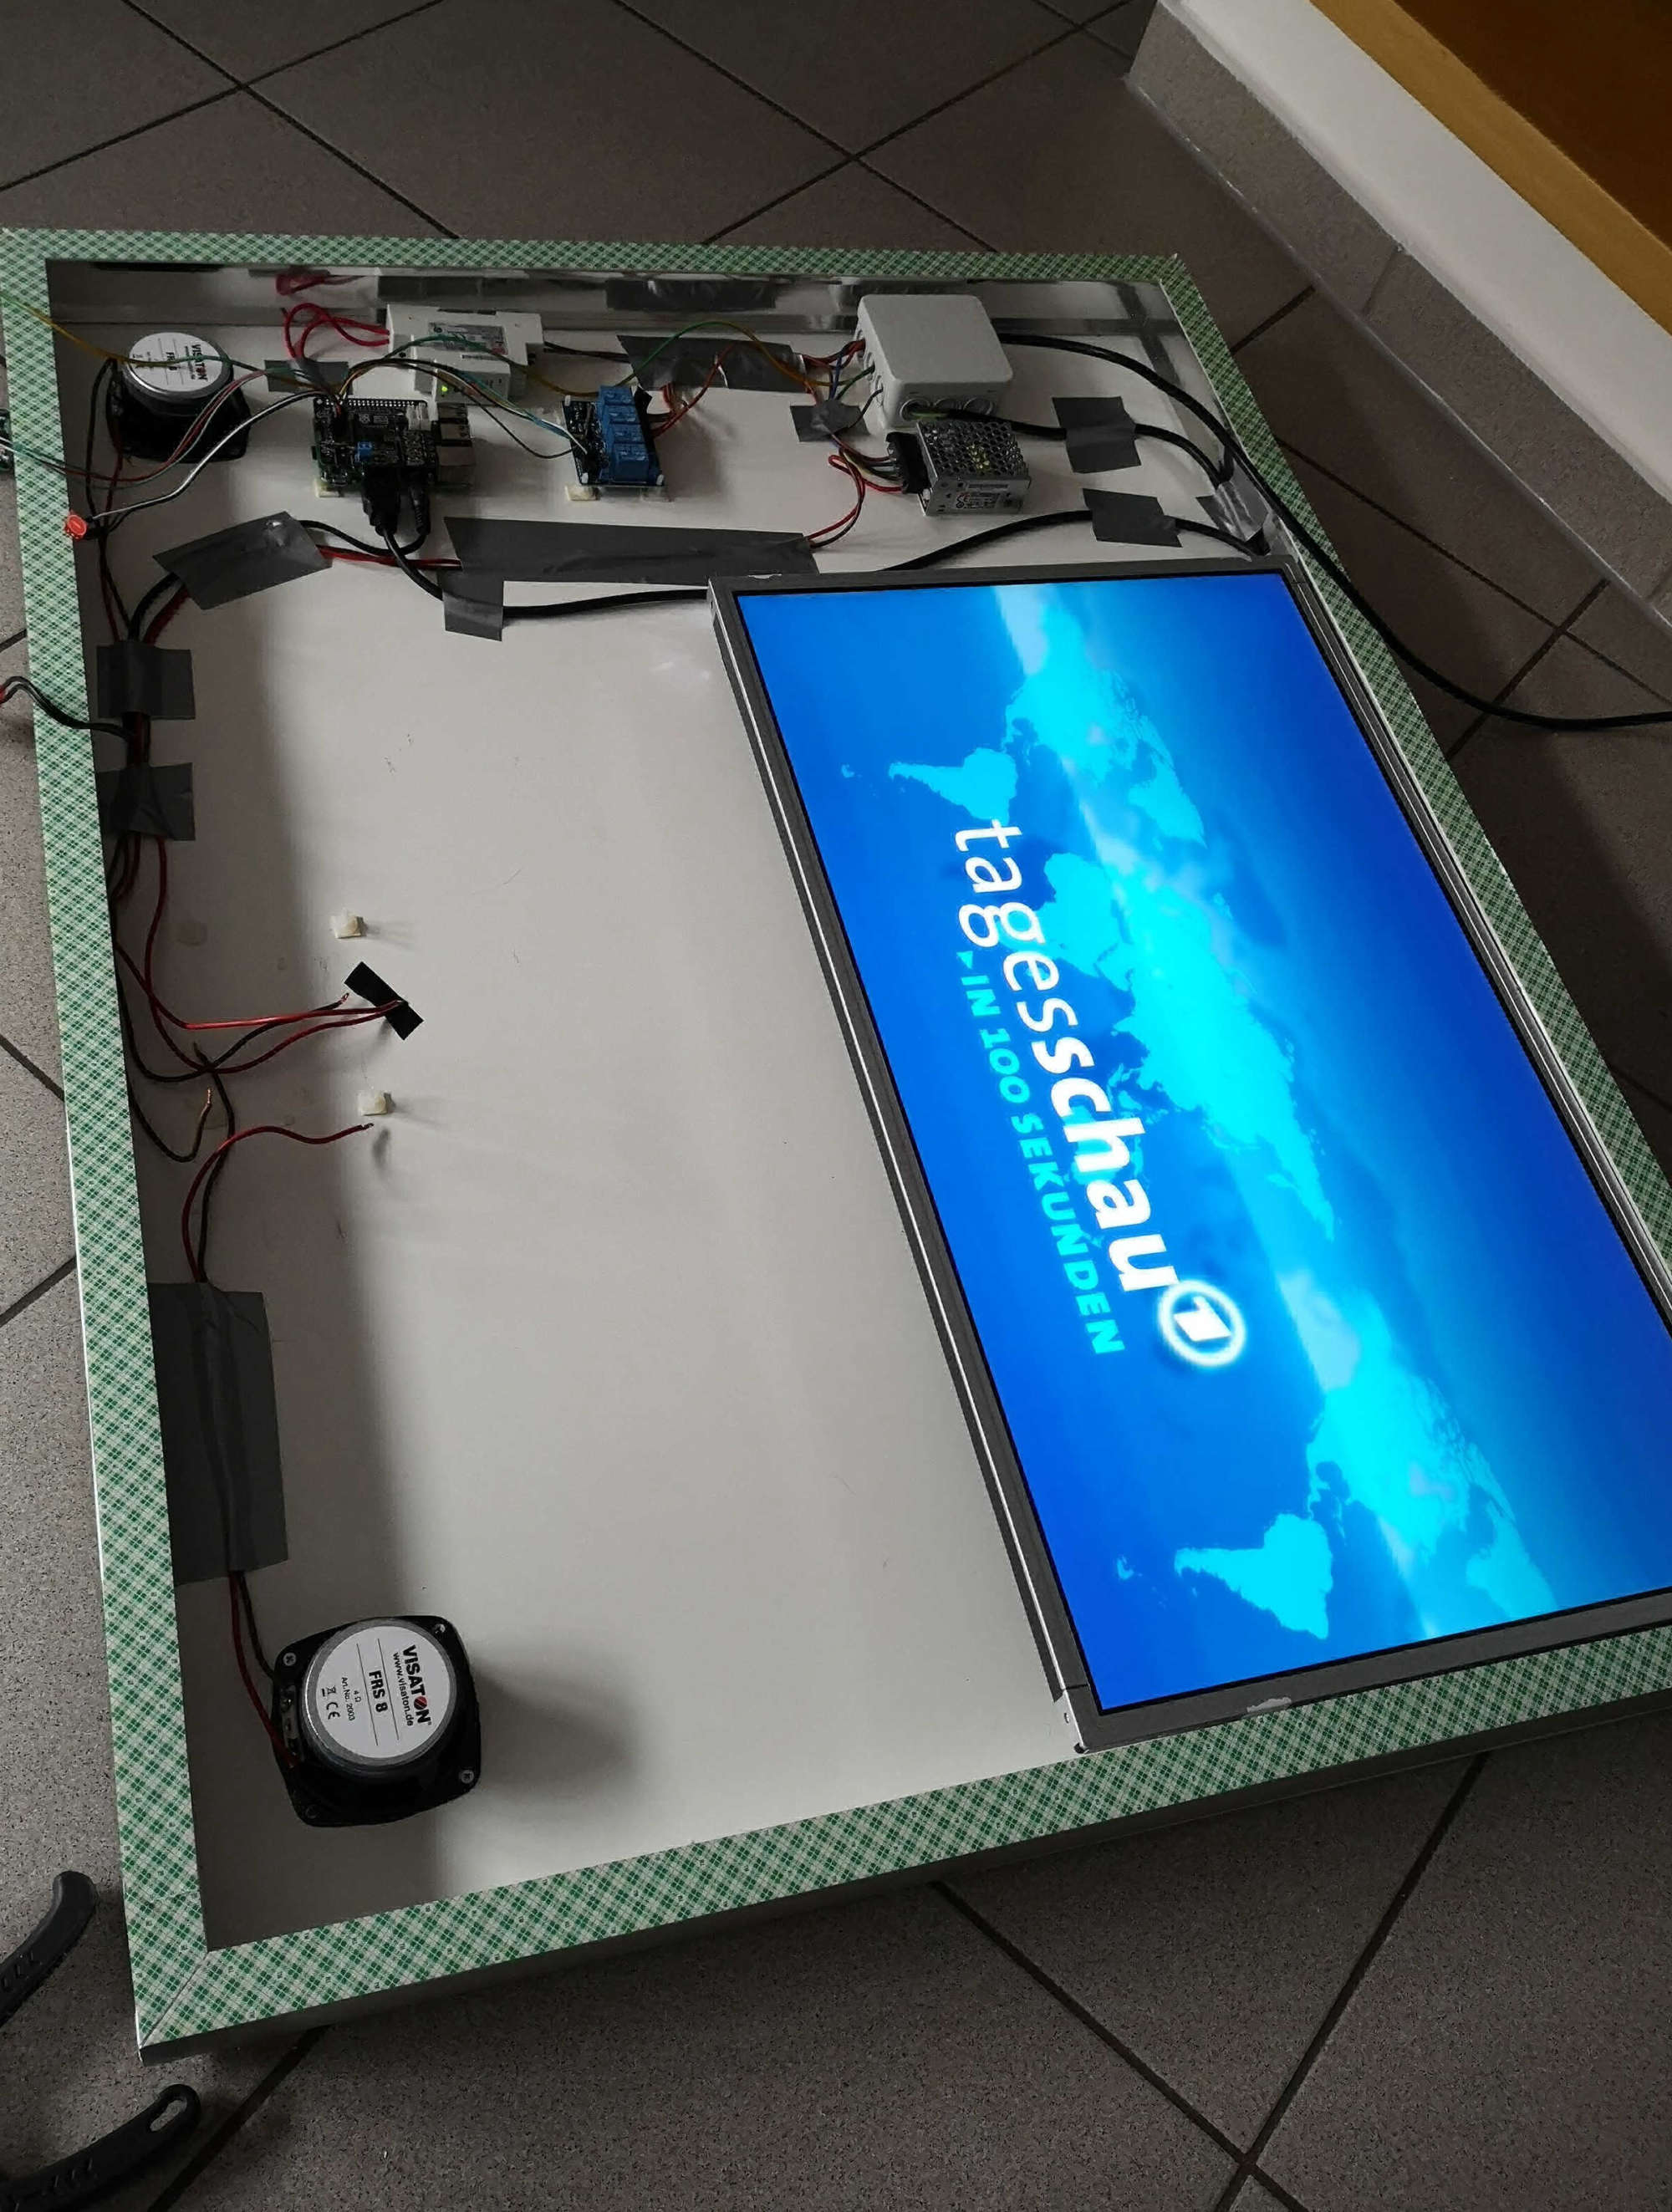
First test:
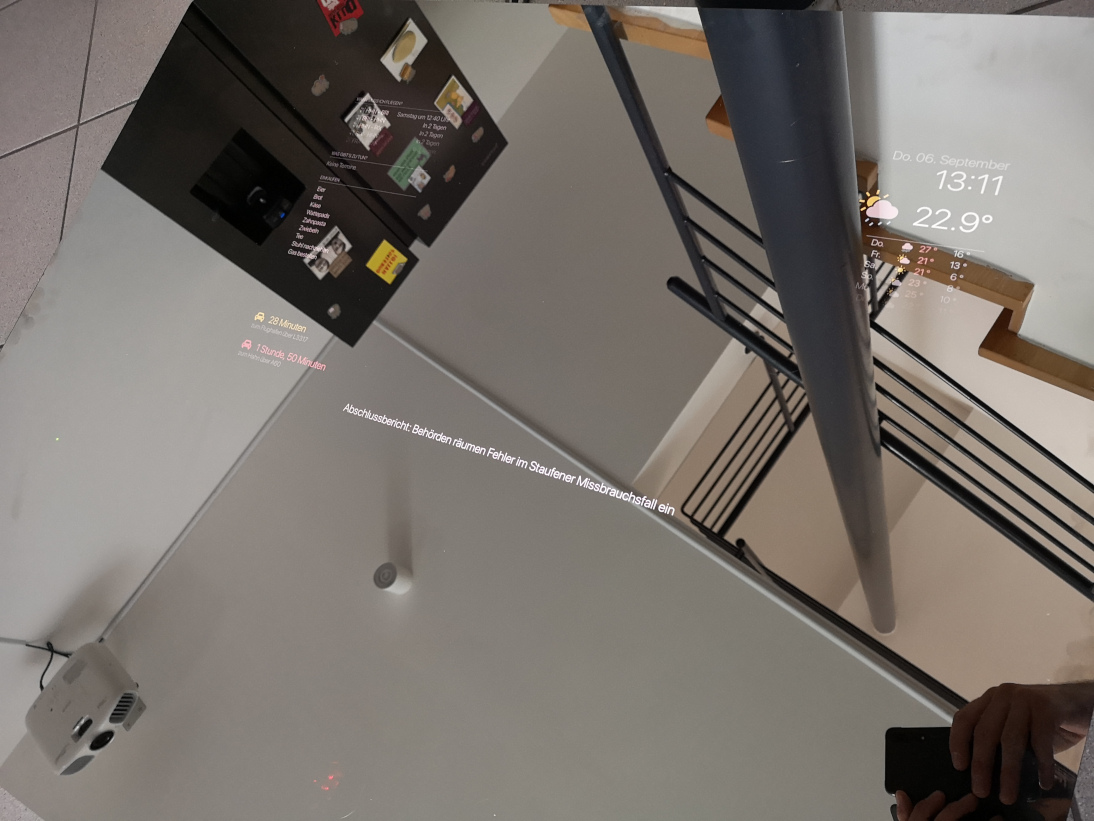
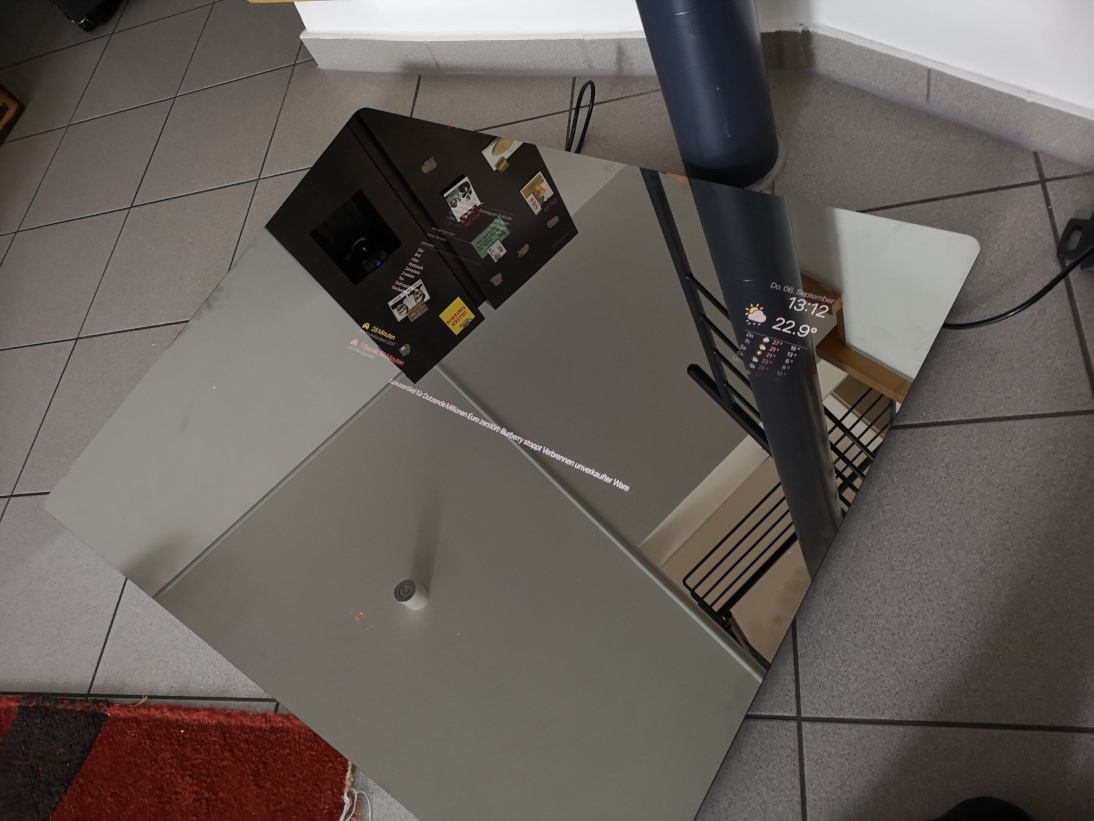
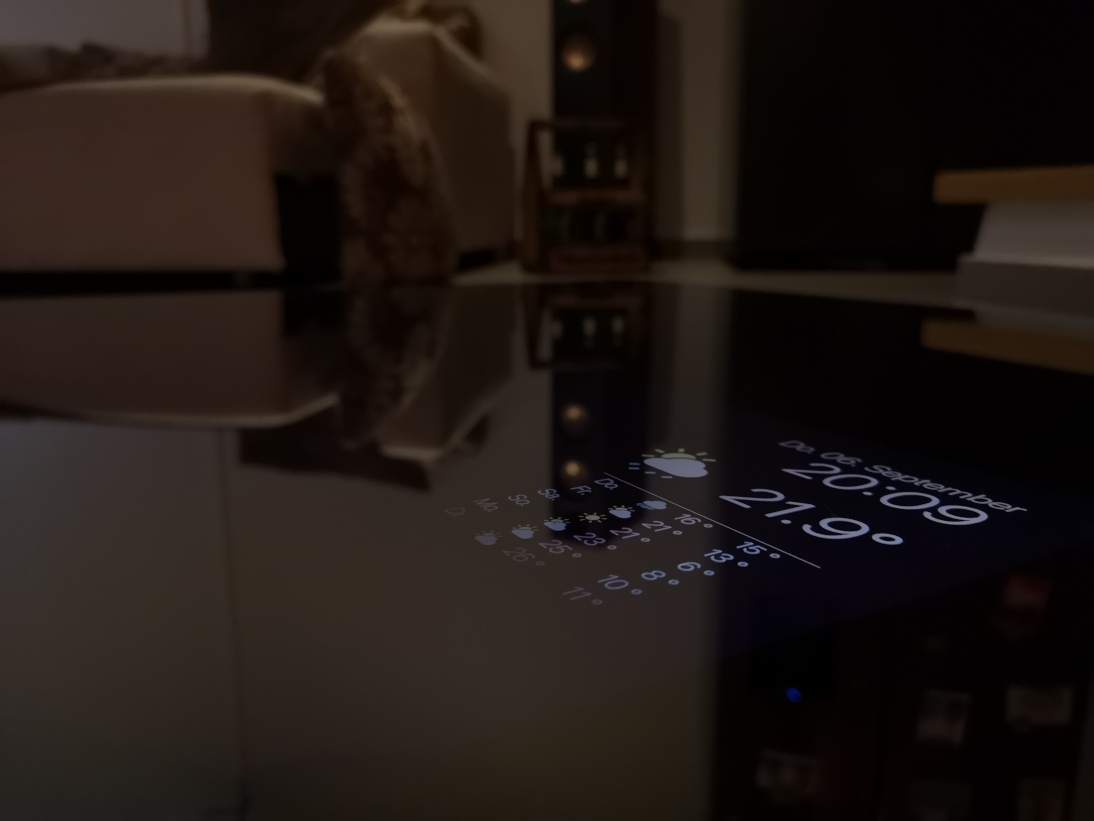
I think the quality of the monitor at night is amazing:
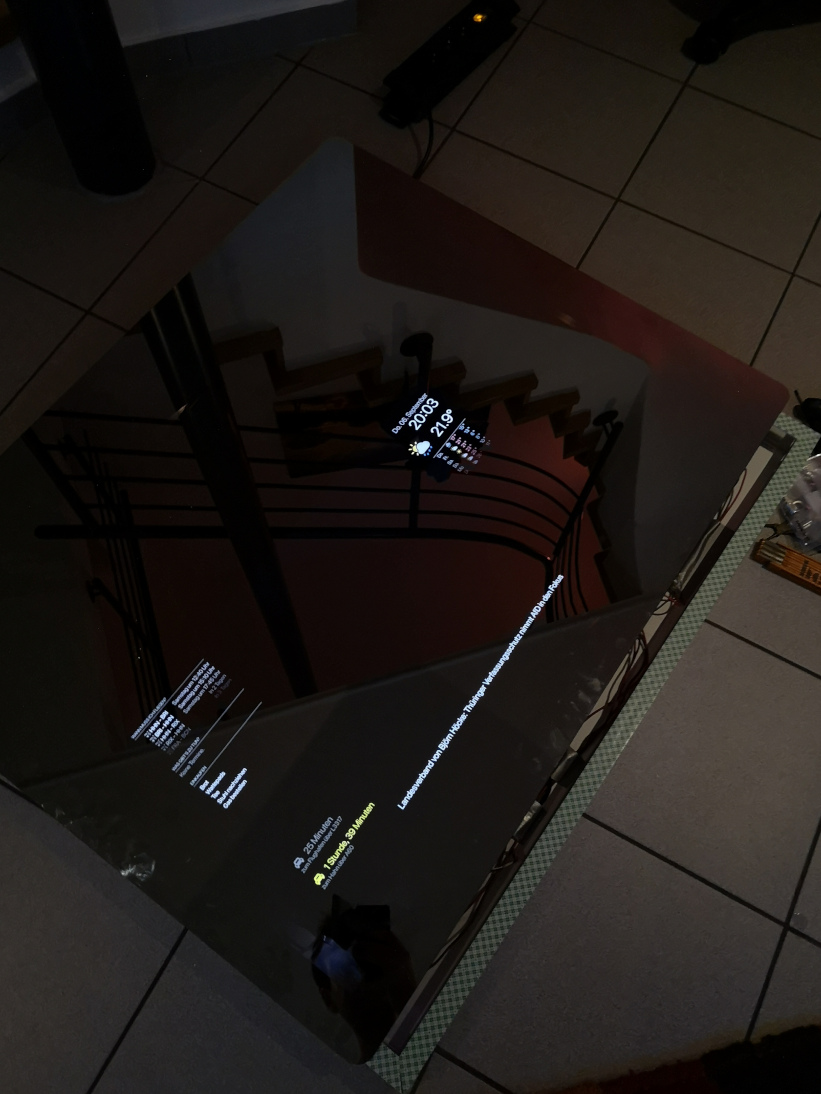
Even from a steeper angle the backlight is barely visible:
-
Are you sure the touch sensor works behind the mirror? It’s pretty expensive and it would be a pity if it doesn’t. Touch-anything generally doesn’t work behind the mirror because of the metallic coating.
What mirror are you using and where did you get it from? I am still looking for a better alternative for mine. Not very happy with the transmission of only 8%.
-
@madscientist that is what I am afraid of as well, the metal coating sure does not help… but worst case I will put them on the aluminum frame below from the outside and a nice cover on top
I got the mirror from here: Glas-star.de
-
@madscientist you were right, it does not work well behind the mirror. I will keep the sensor anyway as the way it is designed it is easier to affix to my aluminum frame. I am now thinking of getting small black plexiglas casing to attach to the bottom part to control the mirror and make it look nice… let’s see.
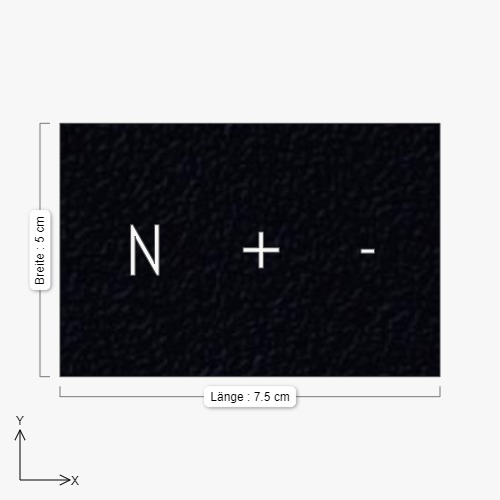
So this could be the plan:
-
Plexiglas with Cutout letters
-
behind that translucent plexiglas
-
glue together
-
LED Strip on top of translucent glas to illuminate the cutout letters
-
enjoy?
-
-
I am just going to follow up on that, I found a different solution. I am using a HUE Dimmer Switch that is controlled via FHEM and it controls a python script running on MagicMirror to play my podcast and change the volume:
(I found that script somewhere on github and modified it a bit)
#!/usr/bin/python3 -u host_name = '10.0.1.49' host_port = 8000 import RPi.GPIO as GPIO import os import subprocess import signal from subprocess import call from time import sleep from http.server import BaseHTTPRequestHandler, HTTPServer class MyServer(BaseHTTPRequestHandler): def do_HEAD(self): self.send_response(200) self.send_header('Content-type', 'text/html') self.end_headers() def do_GET(self): global proc html = ''' <html> <body style="width:960px; margin: 20px auto;"> <h1>Magic Mirror Control</h1> <p>Current GPU temperature is {}</p> <p>Podcast: <a href="/play">Play</a> <a href="/stop">Stop</a></p> <p>Volume: <a href="/down">down</a> <a href="/up">up</a></p> <p>System: <a href="/shutdown">Shutdown</a> <a href="/restart">Restart</a></p> <div id="podcast-status"></div> <script> document.getElementById("podcast-status").innerHTML="{}"; </script> </body> </html> ''' temp = os.popen("/opt/vc/bin/vcgencmd measure_temp").read() self.do_HEAD() status = '' if self.path=='/': status='nothing' elif self.path=='/play': proc = subprocess.Popen(["omxplayer", "-o", "alsa:hw:ALSA", "--no-osd", "/tmp/video.mp4"], preexec_fn=os.setsid) status='Playing Podcast' elif self.path=='/stop': status='Stopping Podcast' os.killpg(os.getpgid(proc.pid), signal.SIGTERM) elif self.path=='/shutdown': status='Shutdown' subprocess.Popen(["sudo", "shutdown", "-h", "now"], preexec_fn=os.setsid) elif self.path=='/restart': status='Restart' subprocess.Popen(["sudo", "reboot"], preexec_fn=os.setsid) elif self.path=='/down': status='Volume down' subprocess.Popen(["amixer", "set", "Master", "12%-"], preexec_fn=os.setsid) elif self.path=='/up': status='Volume up' subprocess.Popen(["amixer", "set", "Master", "12%+"], preexec_fn=os.setsid) self.wfile.write(html.format(temp[5:], status).encode("utf-8")) if __name__ == '__main__': http_server = HTTPServer((host_name, host_port), MyServer) print("Server Starts - %s:%s" % (host_name, host_port)) try: http_server.serve_forever() except KeyboardInterrupt: http_server.server_close() -
Hello,
Would it be possible to use a relay to power/unpower the screen ? On the sheet you show pin 3/4 power the backlight correct?
Thanks
Hello! It looks like you're interested in this conversation, but you don't have an account yet.
Getting fed up of having to scroll through the same posts each visit? When you register for an account, you'll always come back to exactly where you were before, and choose to be notified of new replies (either via email, or push notification). You'll also be able to save bookmarks and upvote posts to show your appreciation to other community members.
With your input, this post could be even better 💗
Register Login