Read the statement by Michael Teeuw here.
Magic Mirror build with Pi Zero/Red Bear IoT pHAT
-
Hey guys!
This thread is basically a way for me to log my process for making a Magic Mirror, and update it with new findings, or input from the MM community!
-
I’m sure some of you are wondering why I went through the hassle of doing all of this vs. just buying a Canakit that includes all of this stuff etc.
Well, in short, I bought the OG RP years ago, with plans to make an MM, but never got around to it. My dad recently mentioned that he saw an MM somewhere on the internet, and breathed new life into my project, so here we are.
First things first, I had to get Raspian onto a Micro SD Card, get a female USB adapter, and a keyboard/mouse setup for the commands etc, and power to the RP (Standard micro-usb charger, everyone has roughly 8,000 of these laying around their house).
I used a Sandisk 32GB, and followed the guide right on RP’s website.
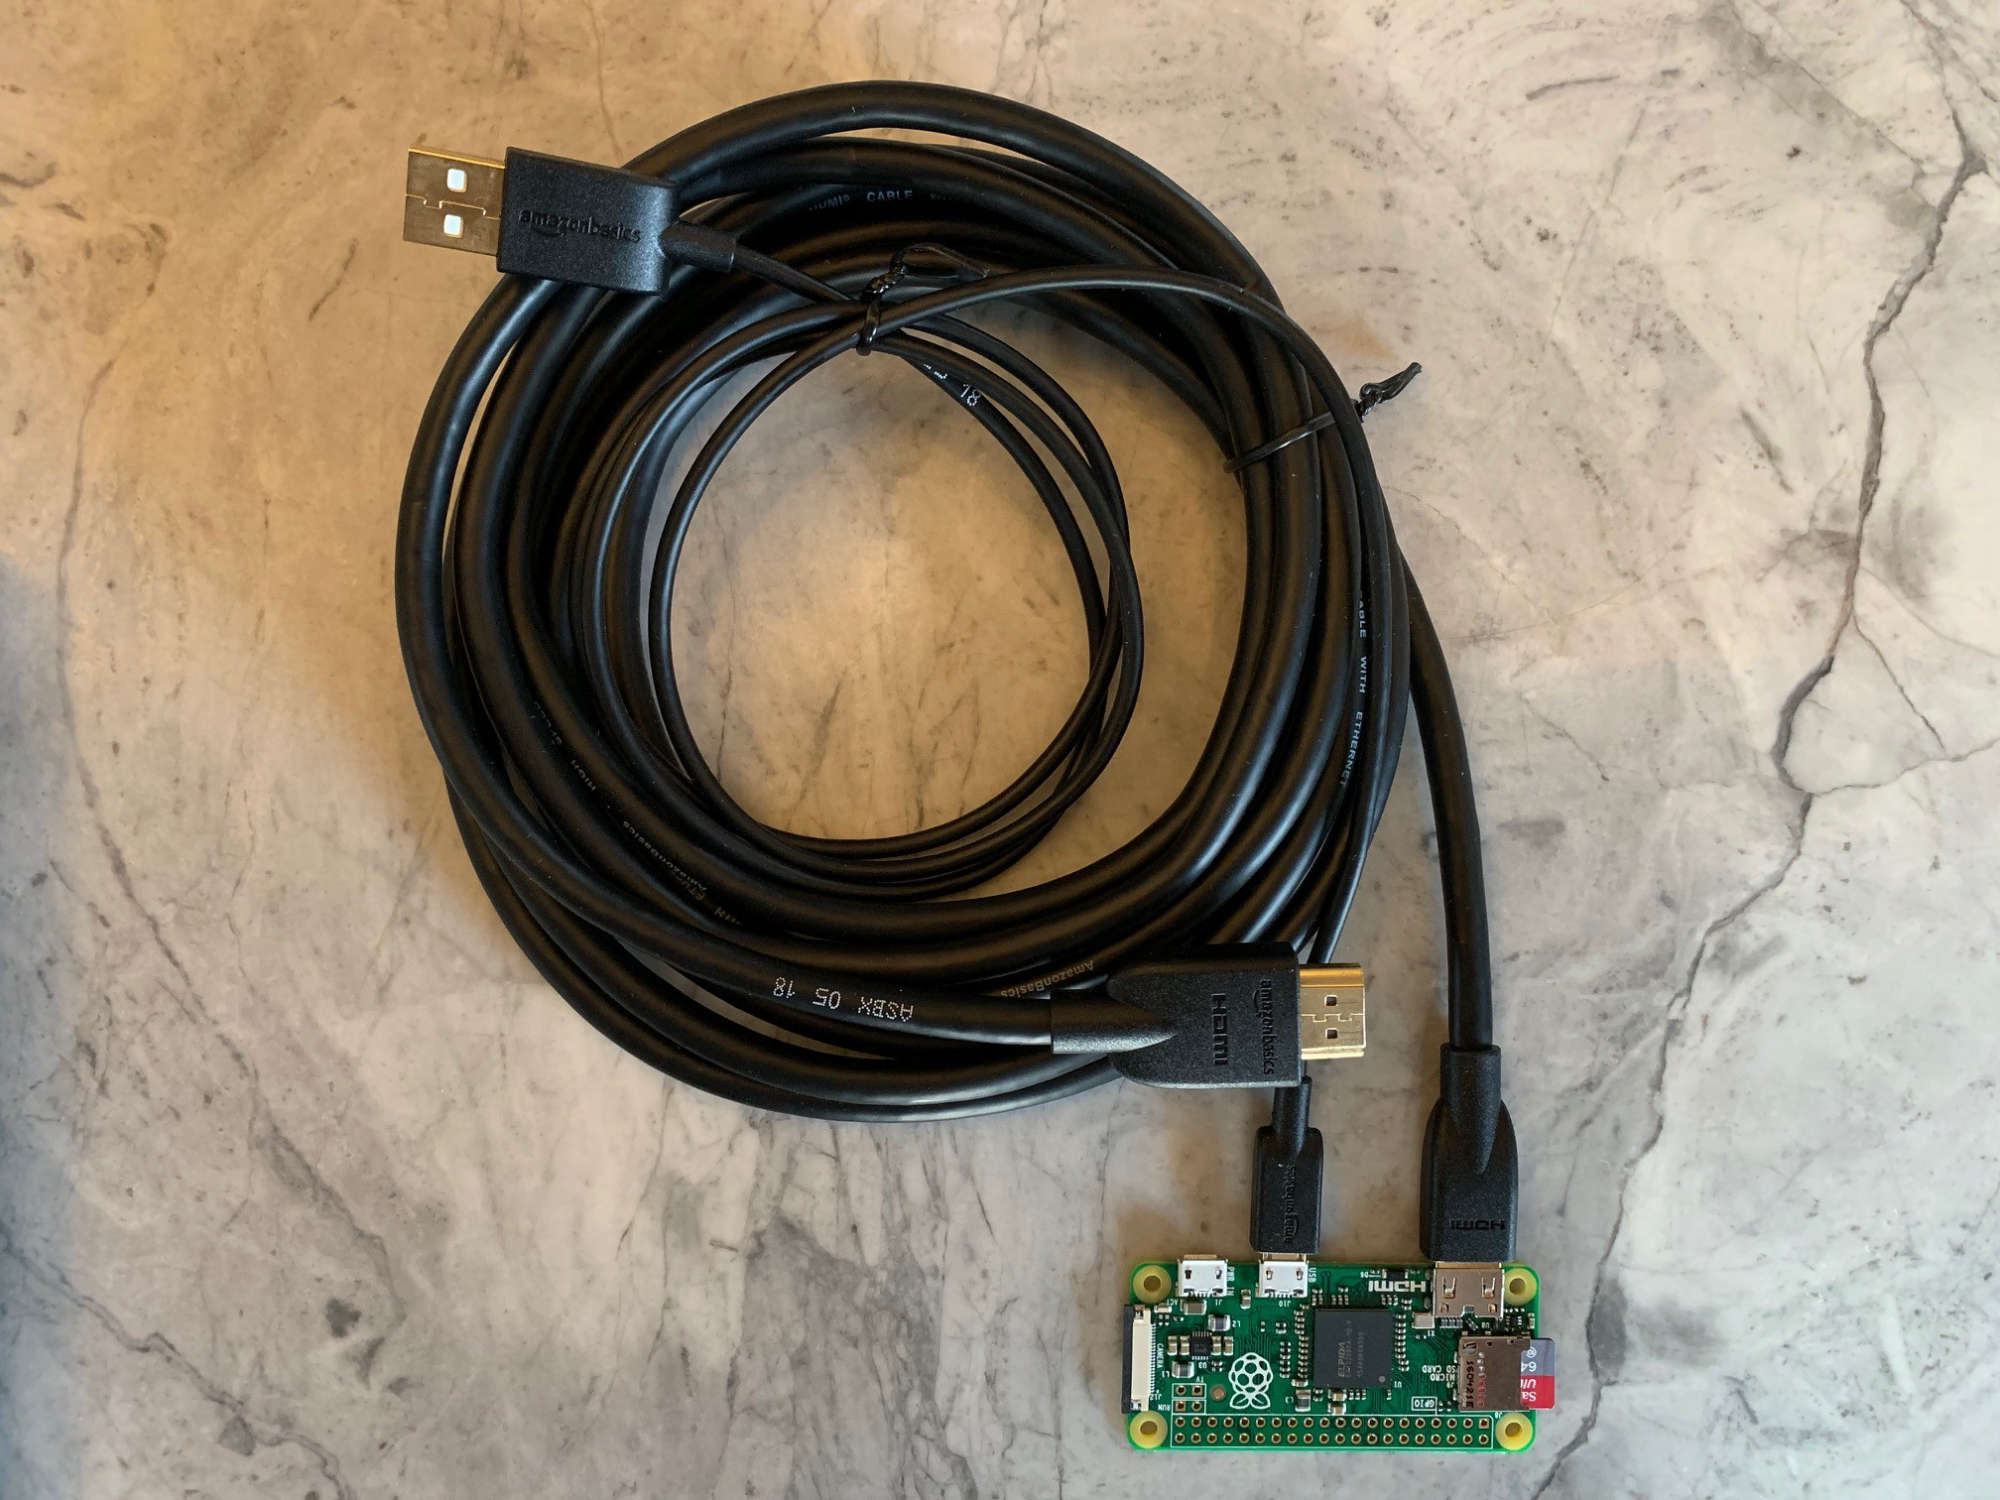
Not realizing this has a mini-HDMI, had to get a conversion cable.
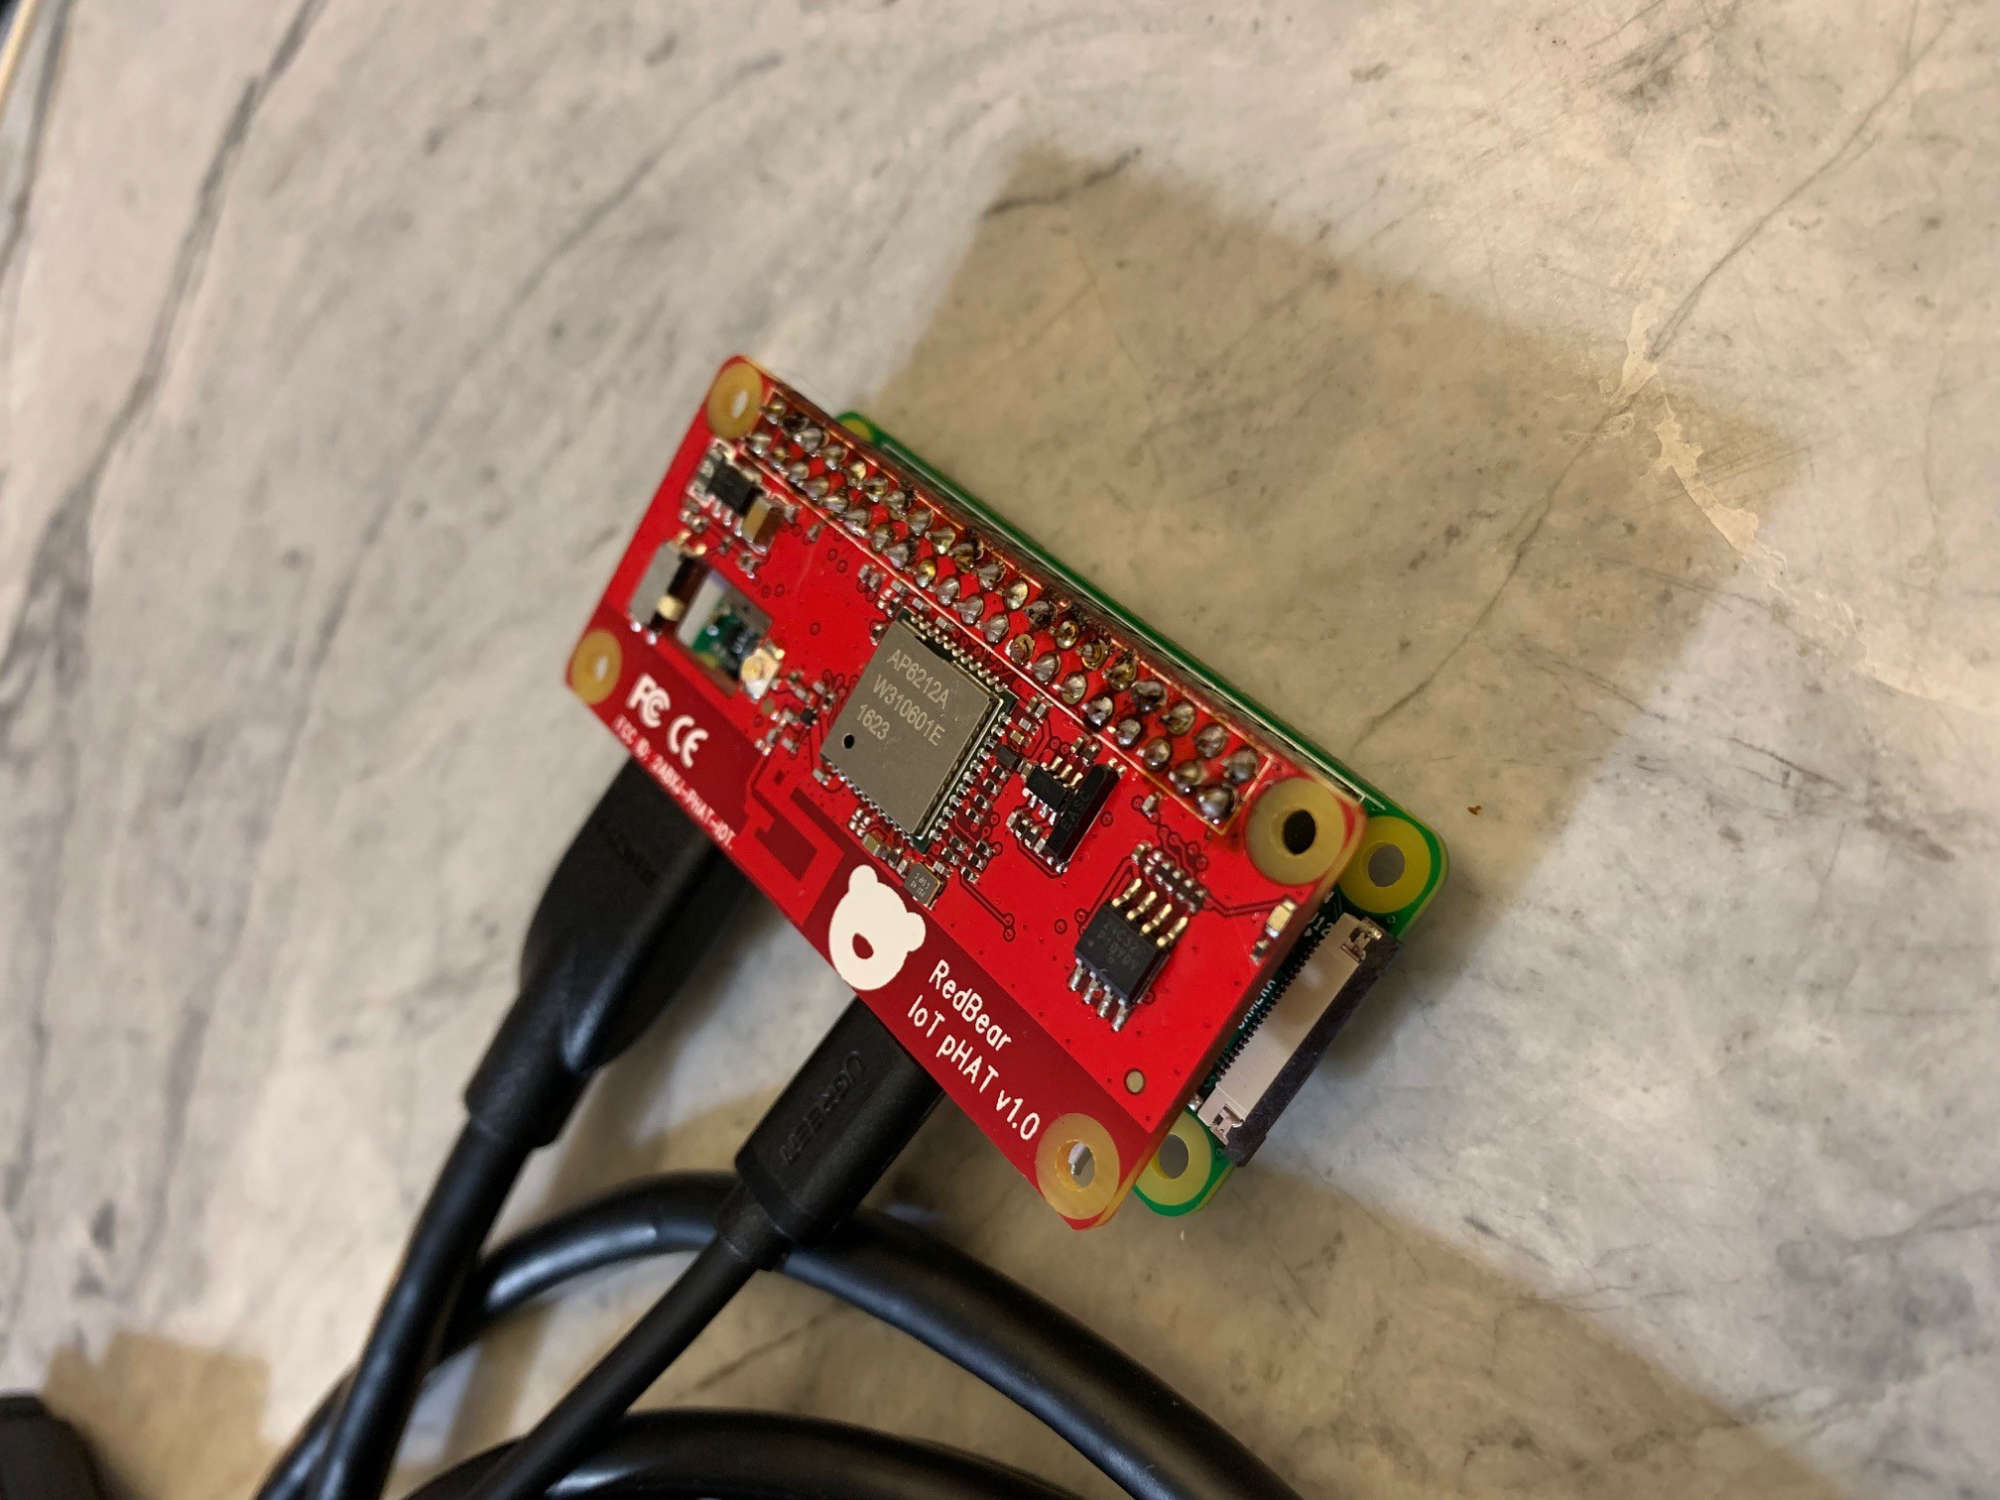
Red Bear IoT pHAT (Header NOT soldered, because why would I want anything to be simple?).
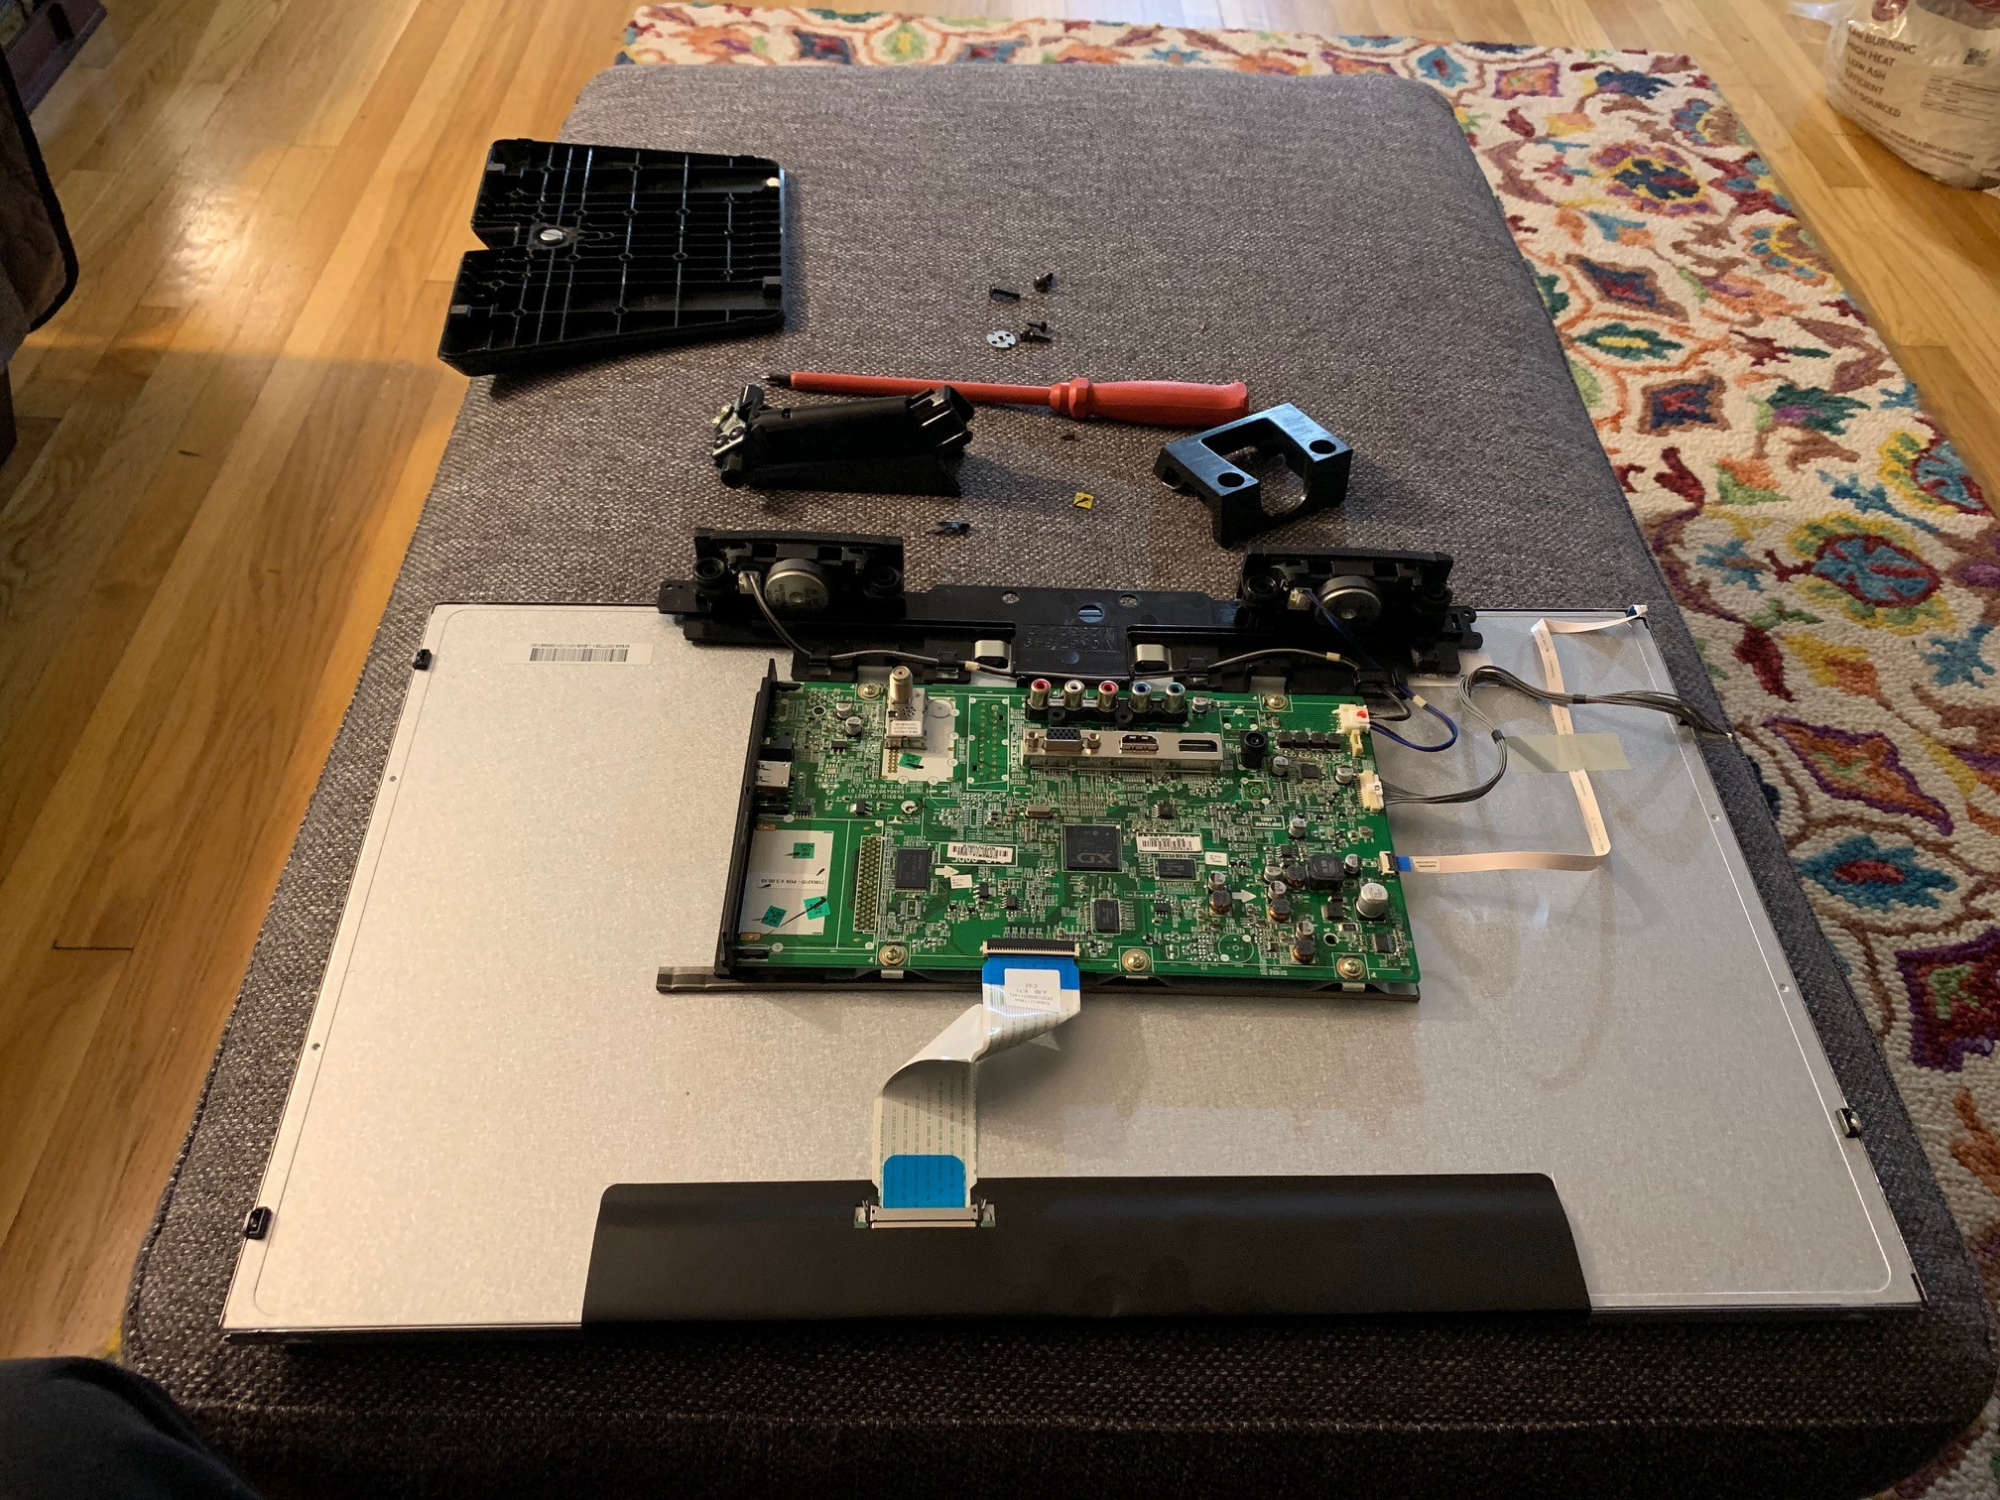
The last bit of hardware I needed was a display. Did some searching on the Facebook Marketplace. Found a 24" LG 1080P listed for $80, got it for half…and then stripped it all apart.
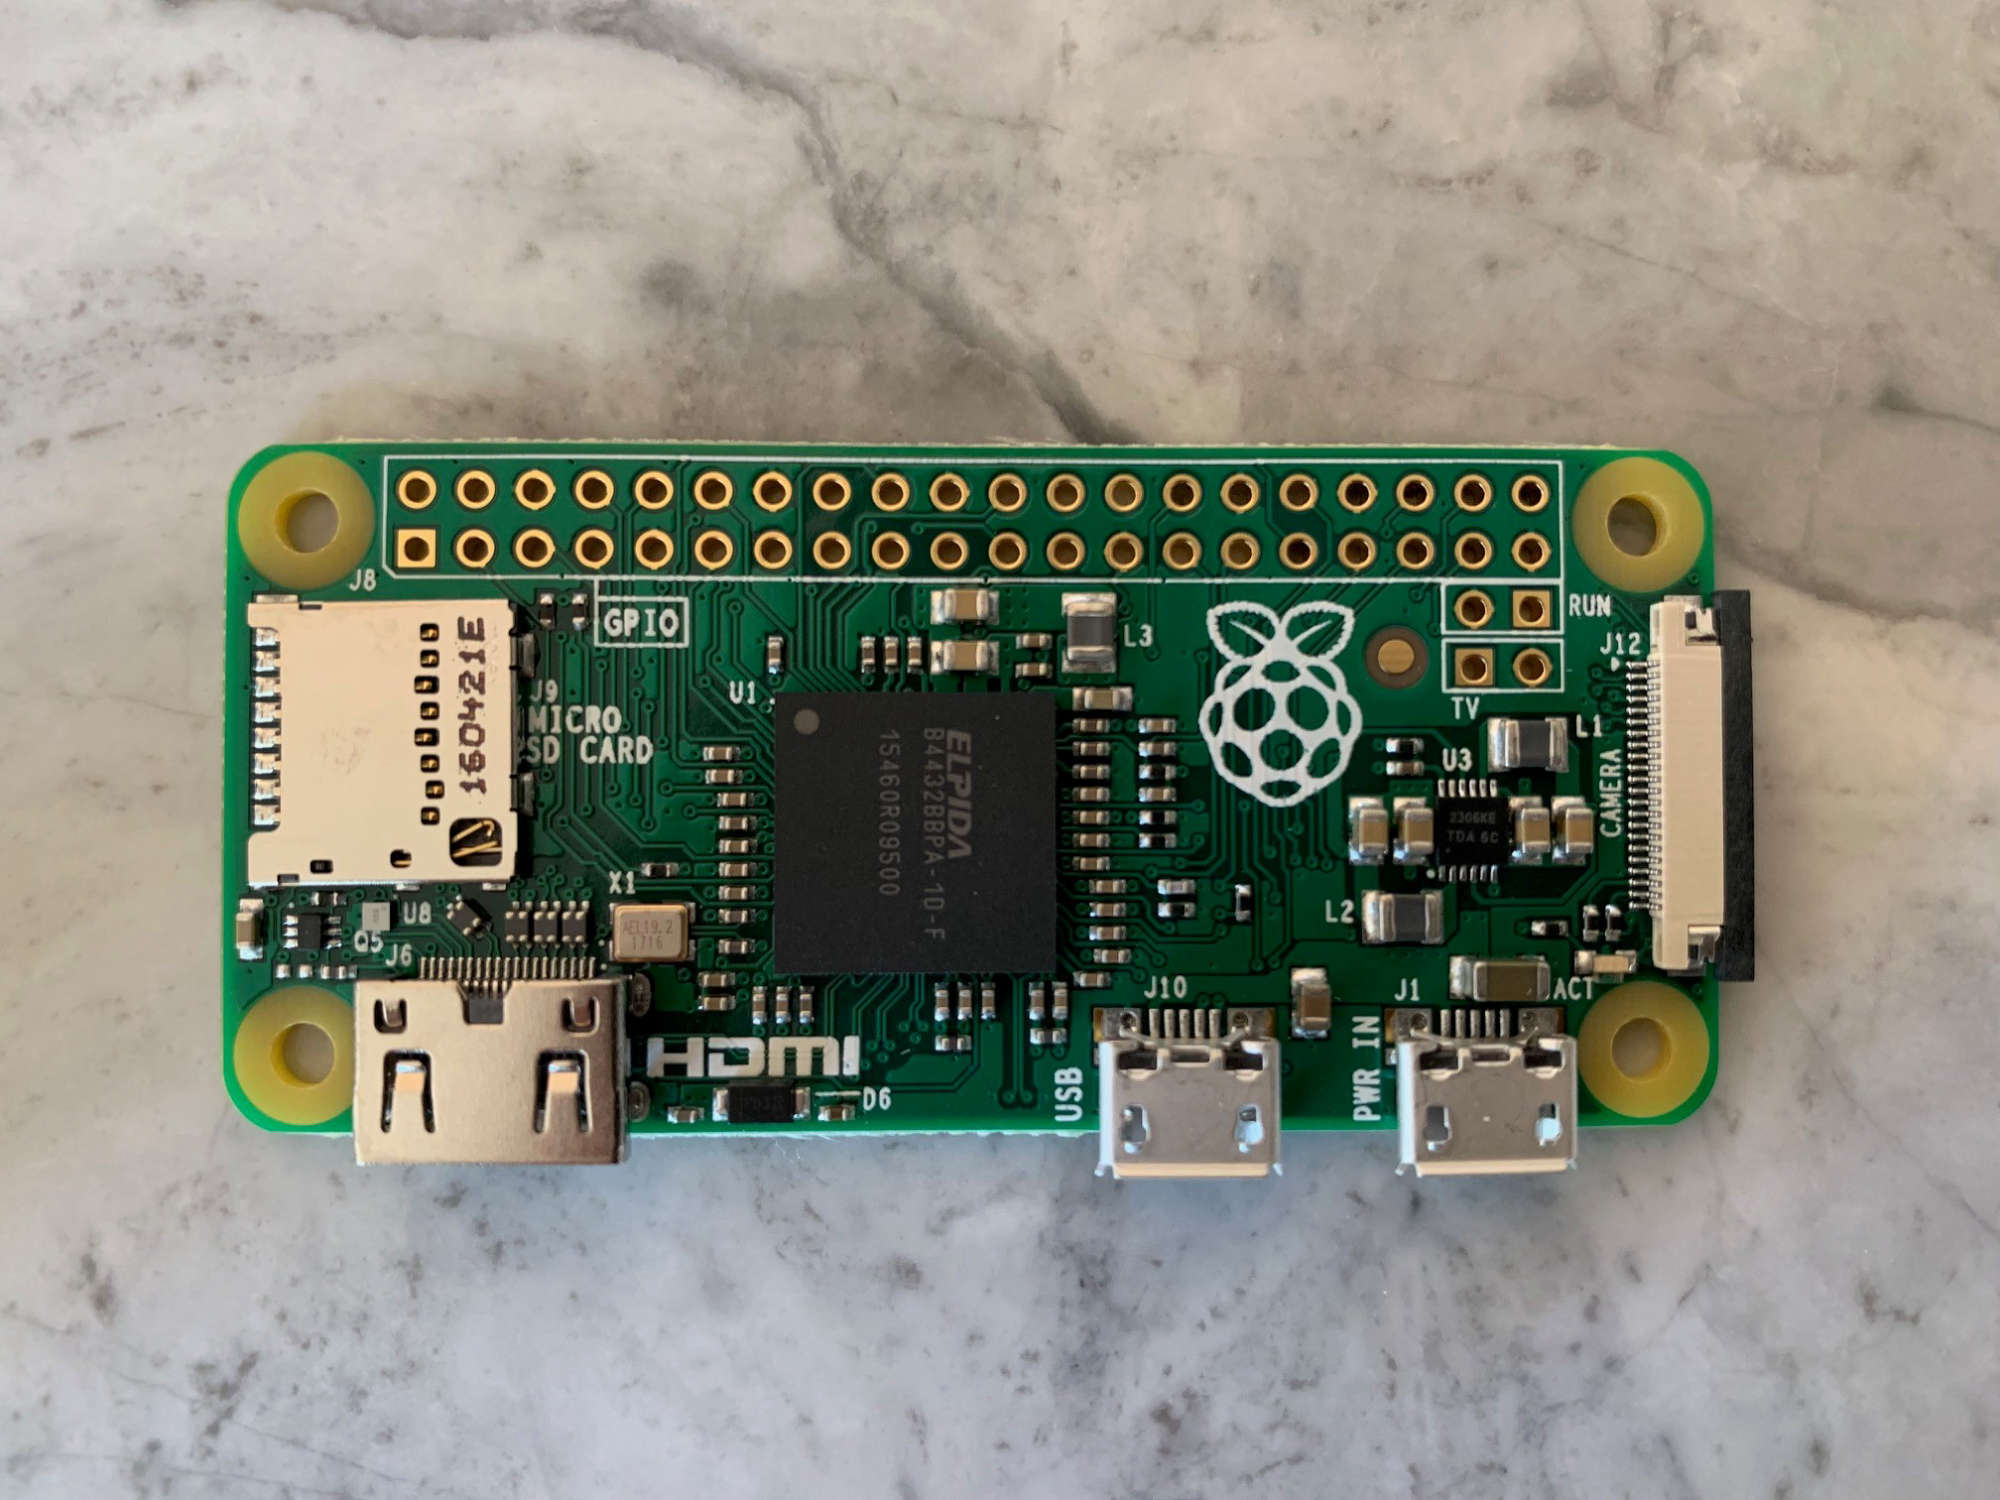
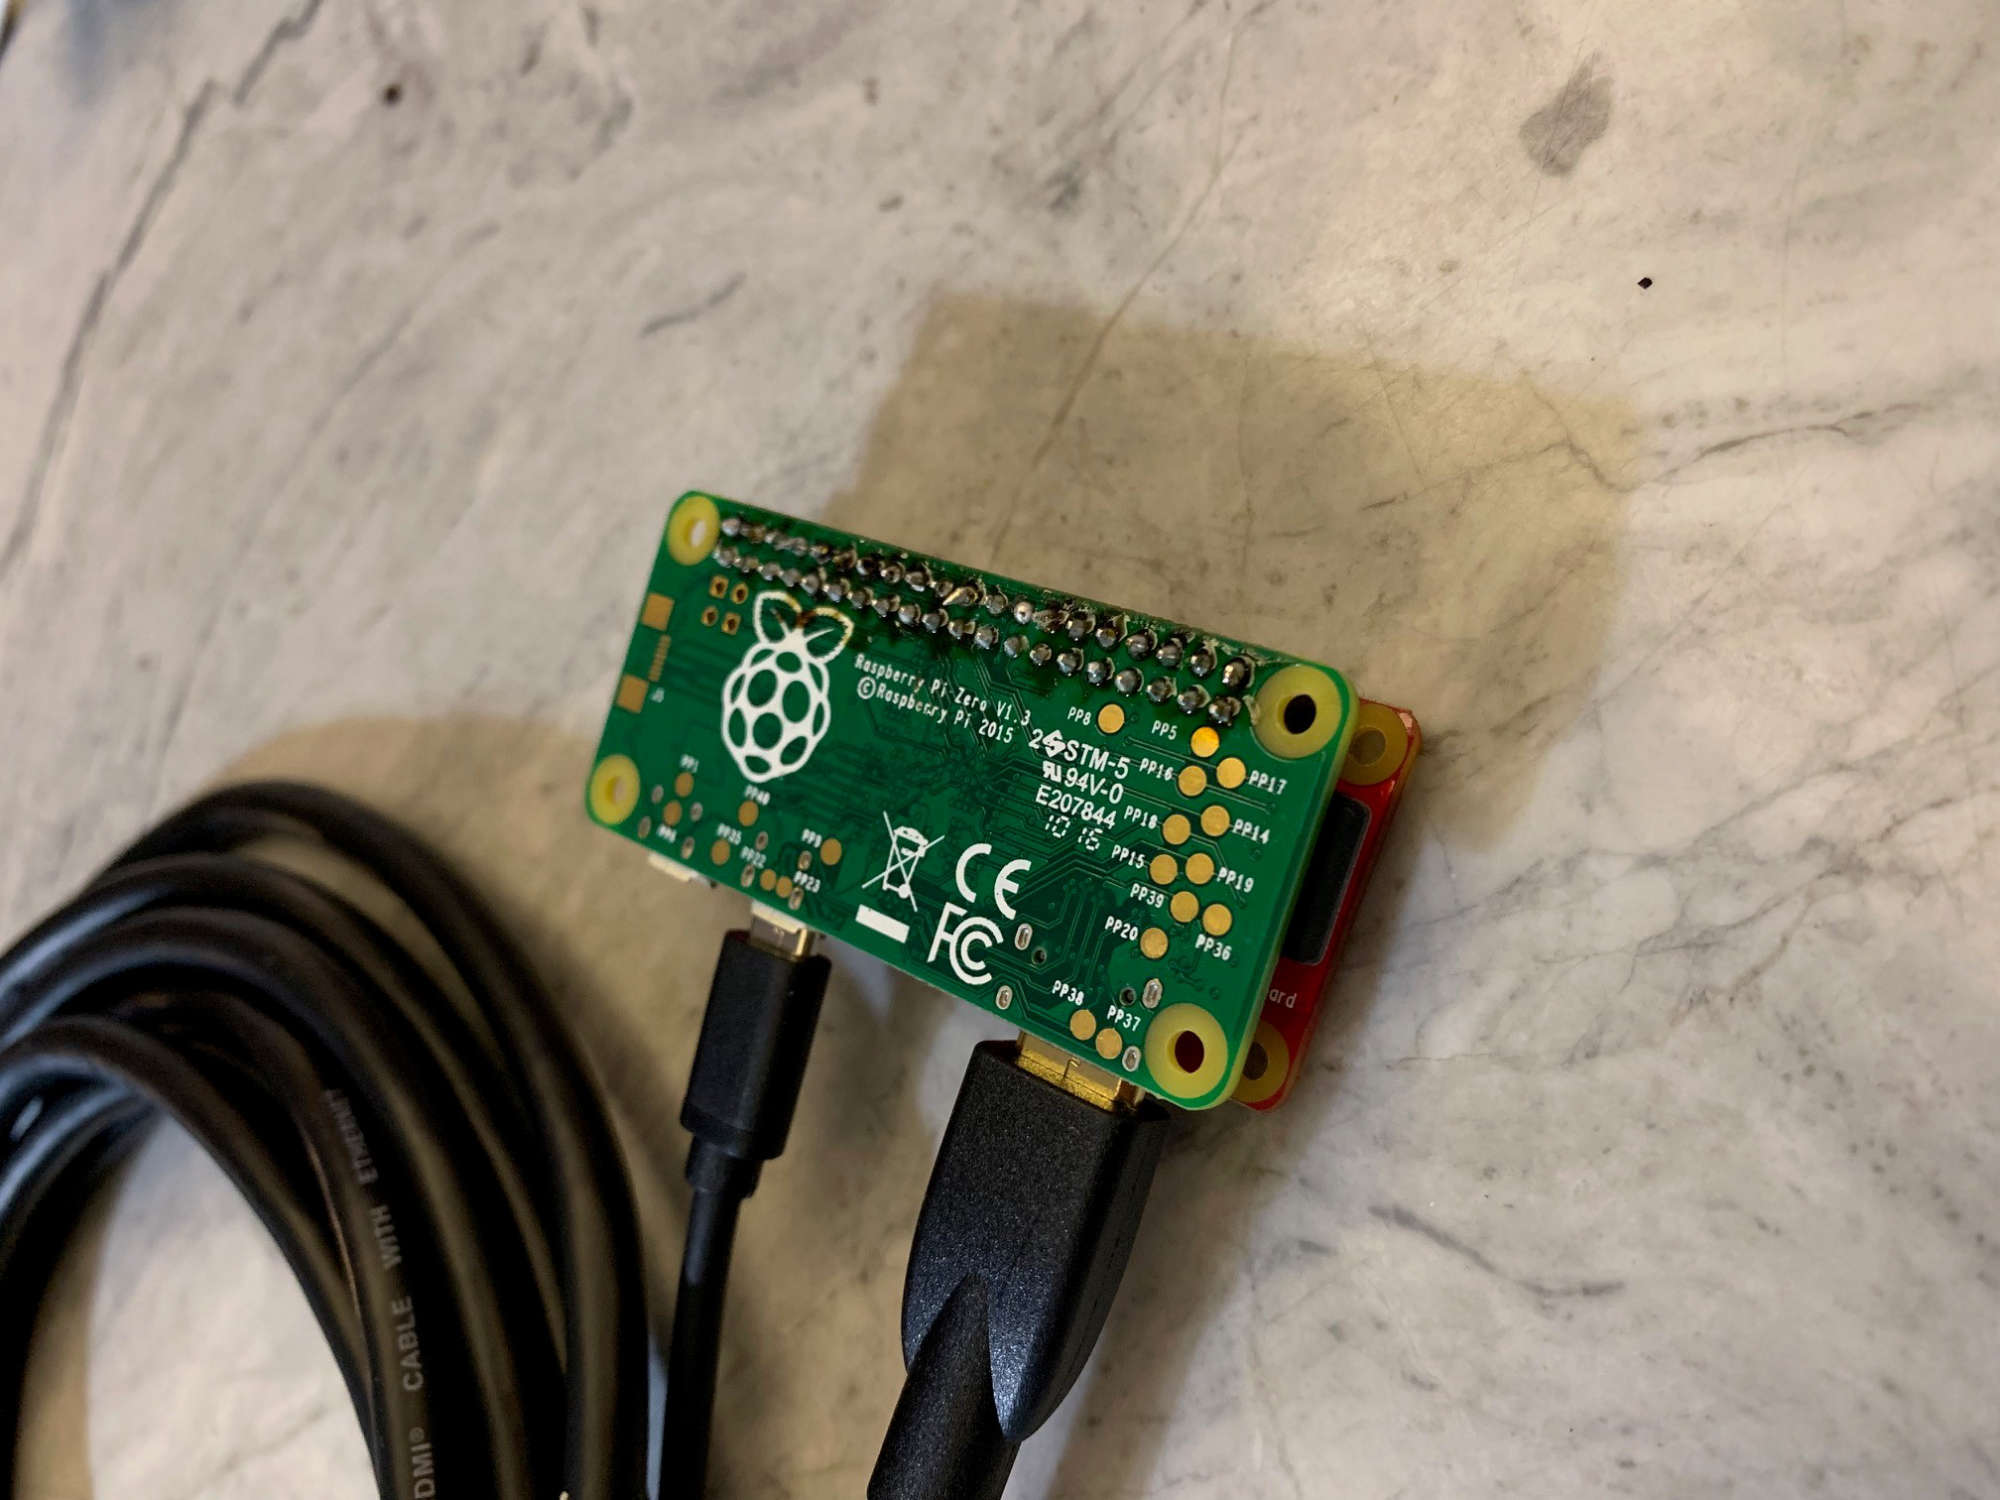
Base Pi Zero, no WiFi/Bluetooth capabilities:
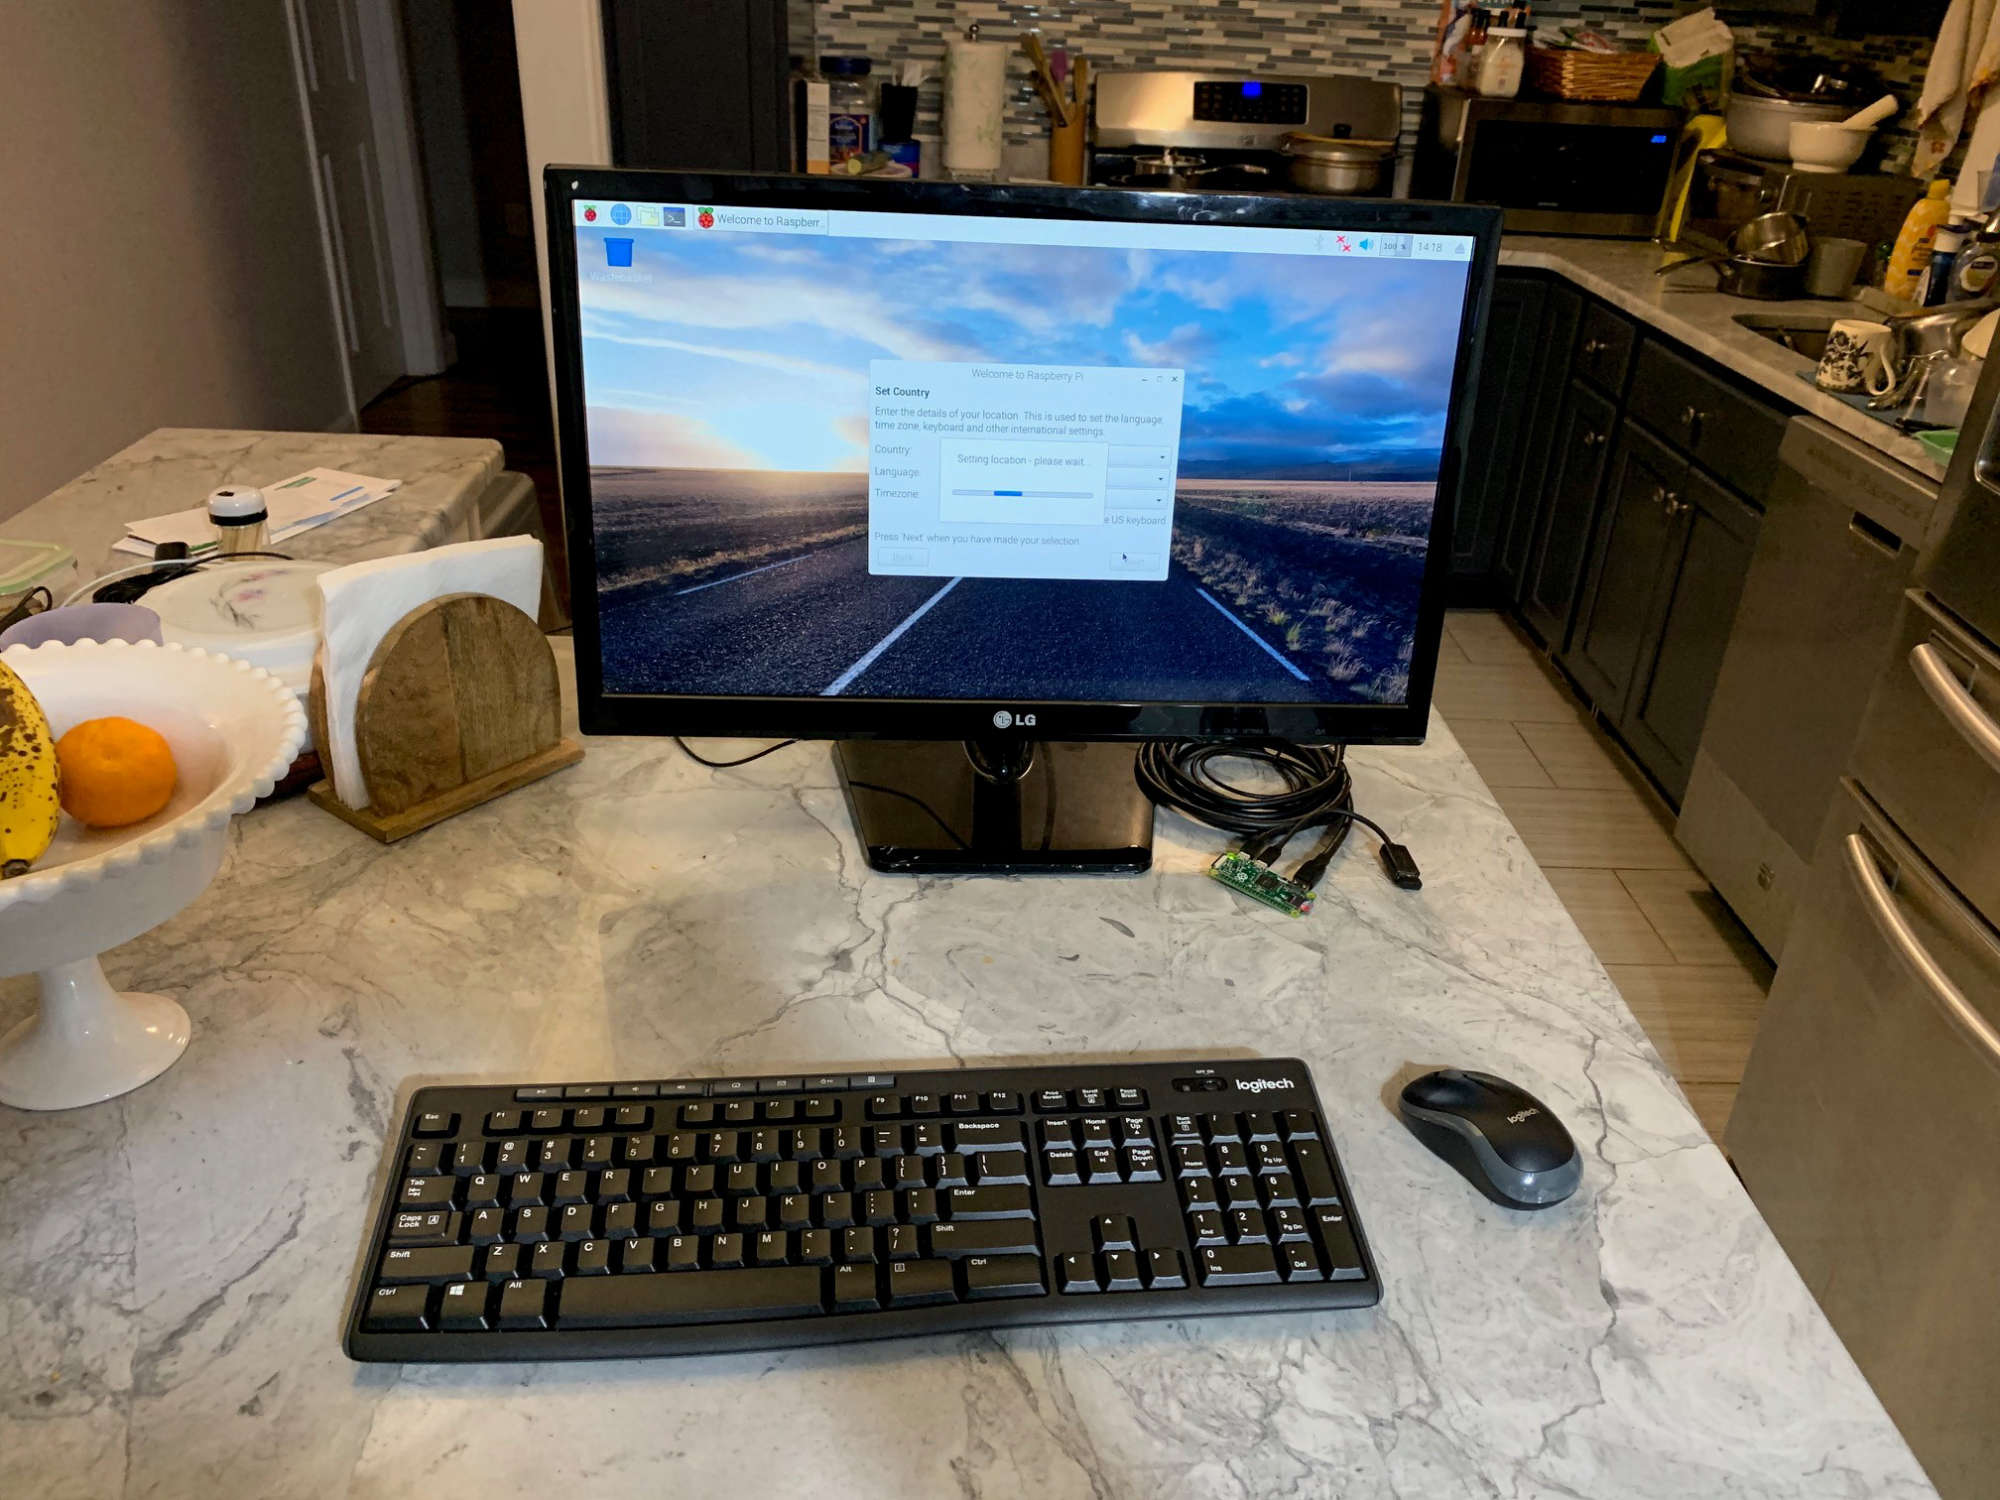
Keyboard, mouse, monitor, and power working well:
Destroying a perfectly fine monitor:
Next up: getting WiFi onto the RP.
The headers that come with the basic pHAT are a male/female 20 pin. Luckily my dad had some 10 pin male/male headers laying around, as well as self taught skill with the soldering iron, so he meticulously soldered those to the RP/pHAT for me:
The other option for WiFi was stripping/soldering a USB dongle to the RP board itself:
I bought a few dongles from eBay, (pronounced “China”), but then my dad mentioned the Red Bear pHAT, so I went with that instead. I think it looks a lot better too!
-
@wordonroad said in Magic Mirror build with Pi Zero/Red Bear IoT pHAT:
I’m sure some of you are wondering why I went through the hassle of doing all of this
No, not really. We’ve all decided to try something unknown and create a nifty toy. We understand the urge to go our own way.
That said, you look like you’re off to a great start. Keep us informed!
-
@bhepler said in Magic Mirror build with Pi Zero/Red Bear IoT pHAT:
@wordonroad said in Magic Mirror build with Pi Zero/Red Bear IoT pHAT:
I’m sure some of you are wondering why I went through the hassle of doing all of this
No, not really. We’ve all decided to try something unknown and create a nifty toy. We understand the urge to go our own way.
That said, you look like you’re off to a great start. Keep us informed!
I appreciate the feedback and support! Thank you!
-
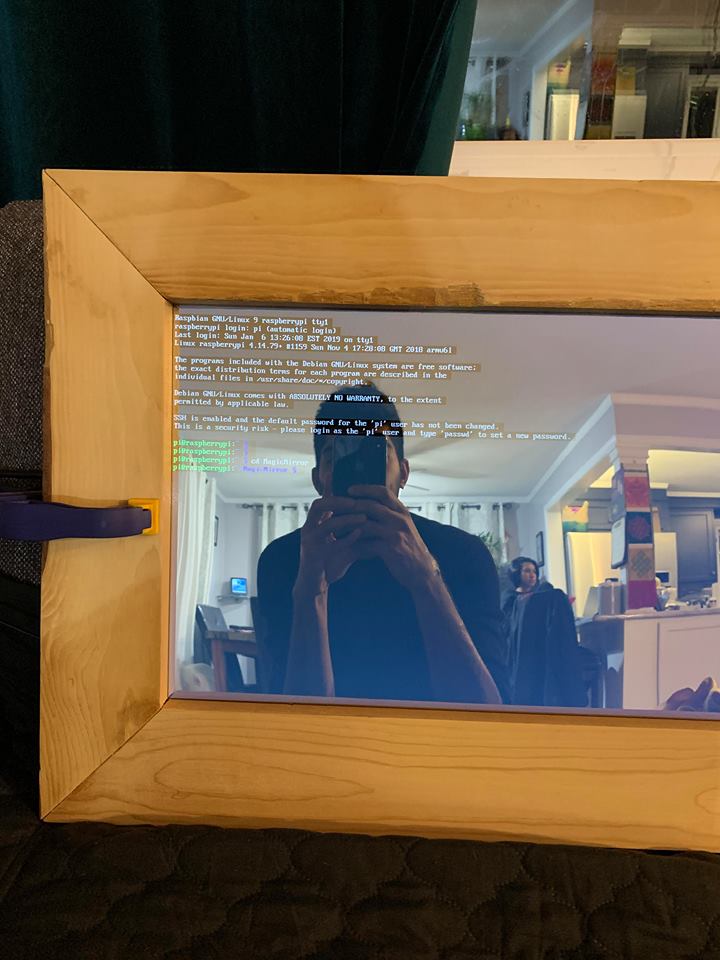
Now that I had the RP working, connected to WiFi, and a working display set up, it was time to get the MM installed. No need to download a browser either, as the Raspbian version I installed has Chromium on it.
I tried a bunch of different install methods and DIYs, but I kept getting stuck with Node and NPM. Whatever the hell those are…
Eventually I got fed up with all the errors I was getting (beer didn’t help here), and took to YouTube to figure out this Node/NPM nonsense.
Welp, video after video, I was still clueless. I just needed to get it installed.
Finally stumbled across this. God bless.
- Got Node/NPM installed without error.
Sidenote: I did a lot of this through my MacBook/SSH to my RP.
Now to install the extras (Node/NPM should be installed at this point), and MM:
-
Install git: sudo apt install git
-
Install Unclutter (hide cursor): sudo apt install unclutter
-
Use the command “git clone https://github.com/MichMich/MagicMirror” to get the MM installed. This shouldn’t take too long.
-
Enter the MM using the command “cd MagicMirror” - Case does matter!
-
Install and run using “npm install && node serveronly”
Once this is done, you’ll get directed back to “cd MagicMirror”.
Now finally launch the MM using “node serveronly”.
The terminal will tell you to point your browser to a certain site. Copy and paste that URL into your search bar. Sit back, open your presumably 60th beer, and admire your hard work!
Now, as I gawked at this beautiful display, it disappeared after 15 minutes, so…
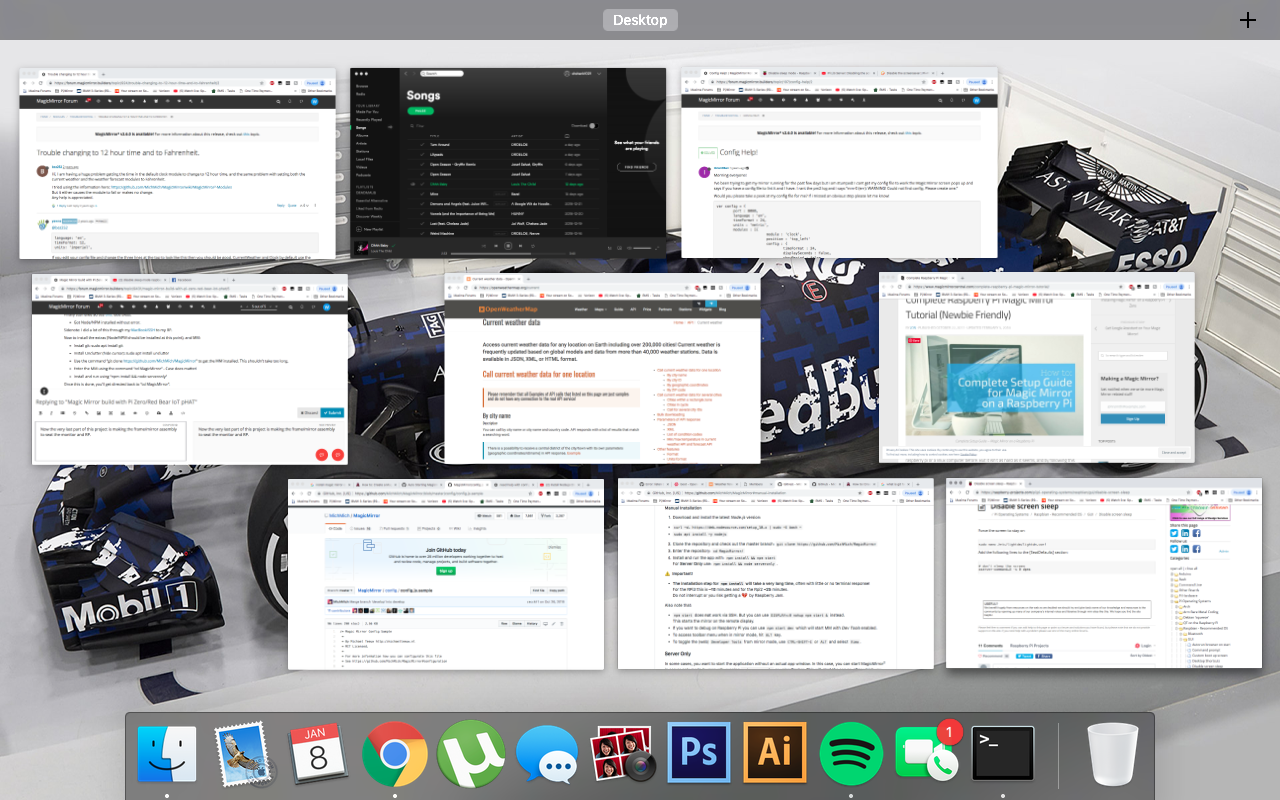
Also; a quick look at how many different sources I was referencing while doing this portion.
-
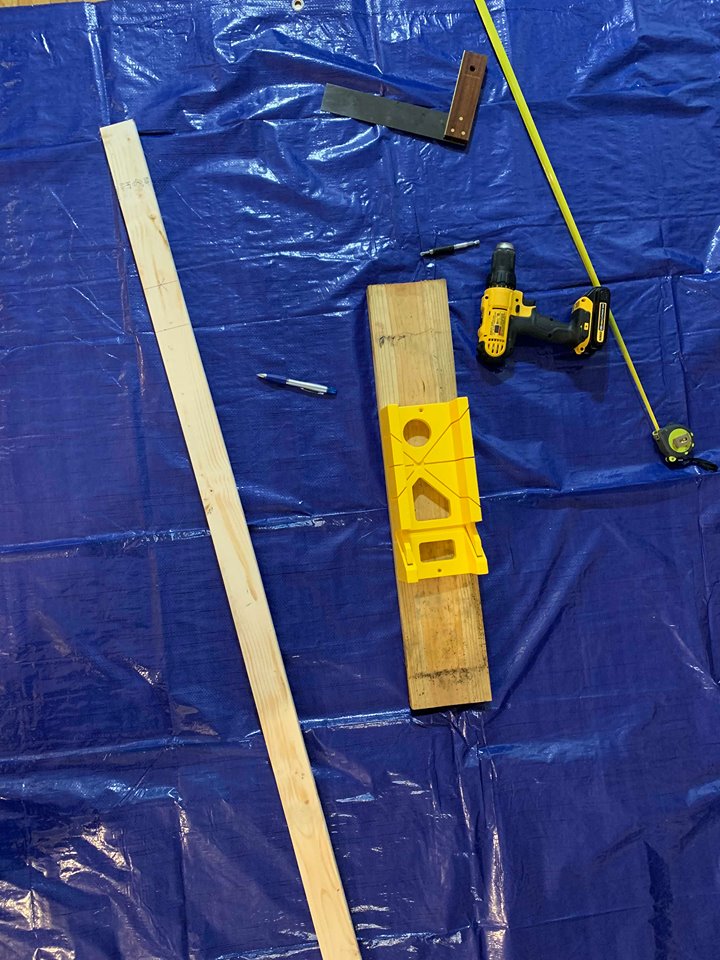
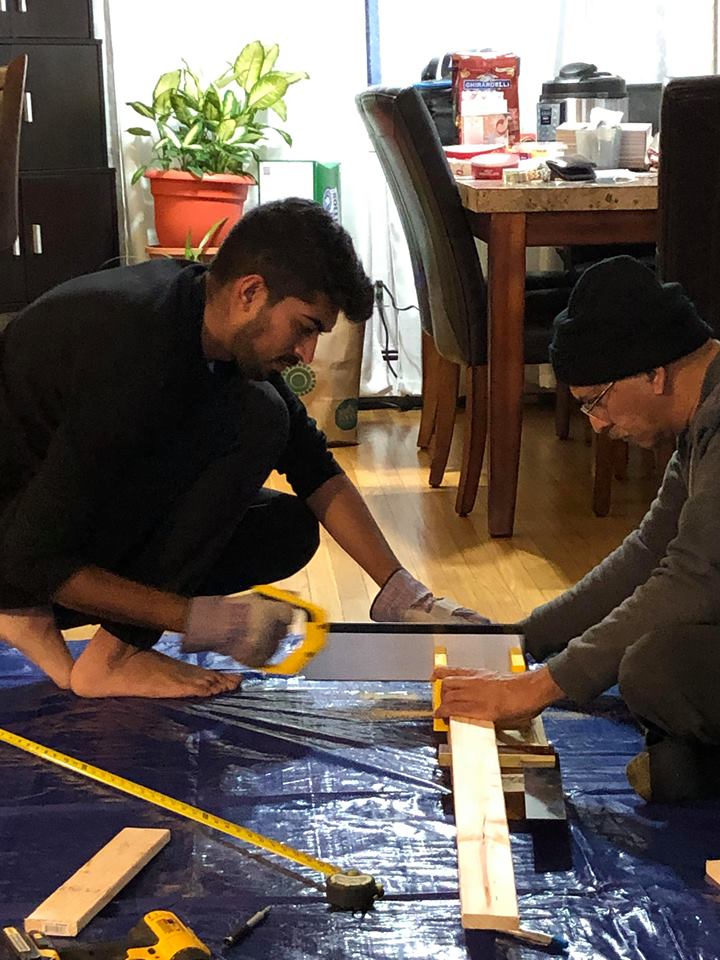
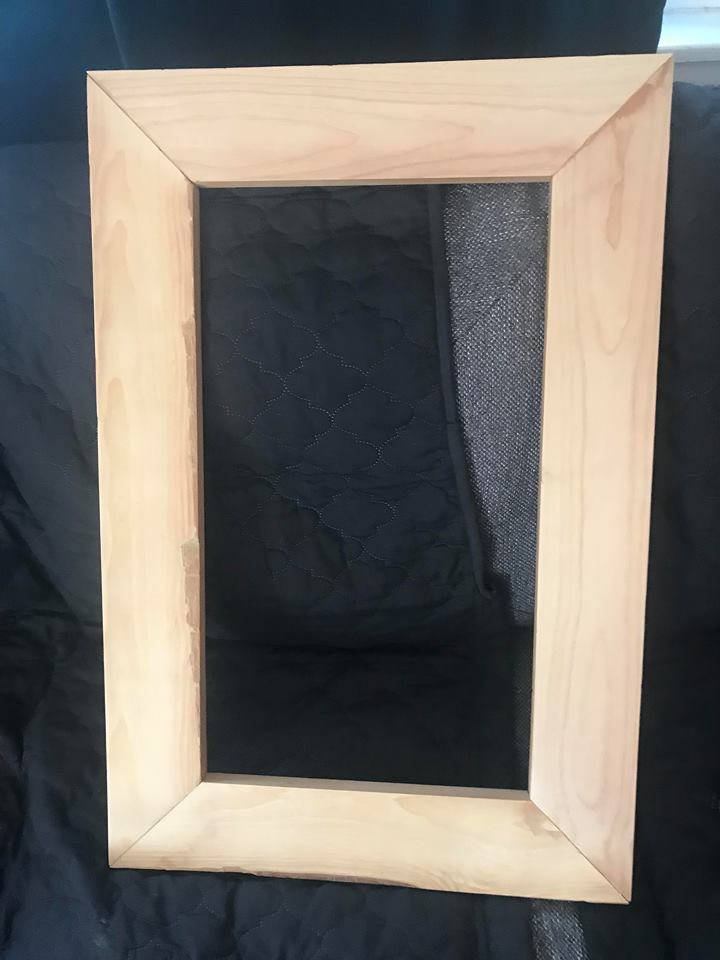
Now the very last part of this project is making the frame/mirror assembly to seat the monitor and RP.
Went to Home Depot, got some wood. Went to Harbor Freight, got a free gift (5’X7’ tarp) . Oh, and a miter box.
Did a simple frame design with 45 degree angle cuts, and a small framed box behind that.
The only material(s) I can recommend for this part of the project is the two-way acrylic sheet.
Everything else will obviously vary based on the frame you want to build.
Setup (Note free tarp!):
Progress:
Incorrectly measuring/cutting wood.
Assembling/securing frame.
This was irritating, as the cuts weren’t perfect, resulting in less than ideal alignment of the pieces. Oh well! We slapped some Gorilla Wood Glue on the edges, then sent some staples (yikes) into the corners to keep it all together. This oddly worked perfectly.
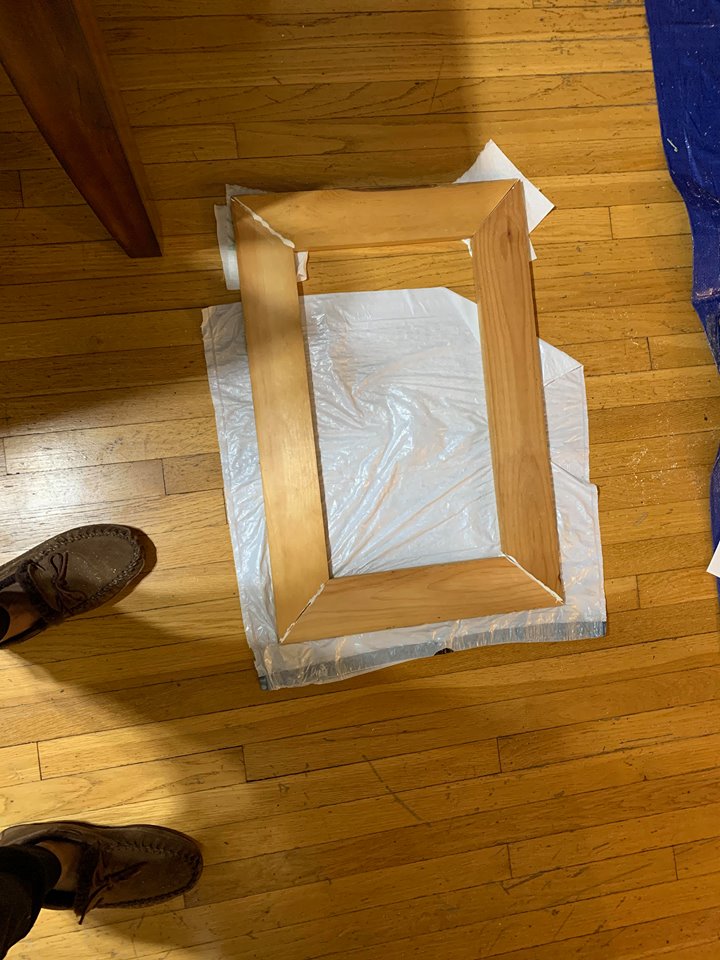

Once the glue dried, we hammered the staples all the way in, flipped it over, and were again, pleasantly surprised to see that it looked excellent. My dad sanded down the now front of the frame.
Huzzah!
Now that that was done, I had to make a box to hold the brains:
I (poorly) cut some wood, and just screwed it to the back of frame to accommodate the OUTER edges of the monitor.
Just pretend I didn’t split that one piece of wood.
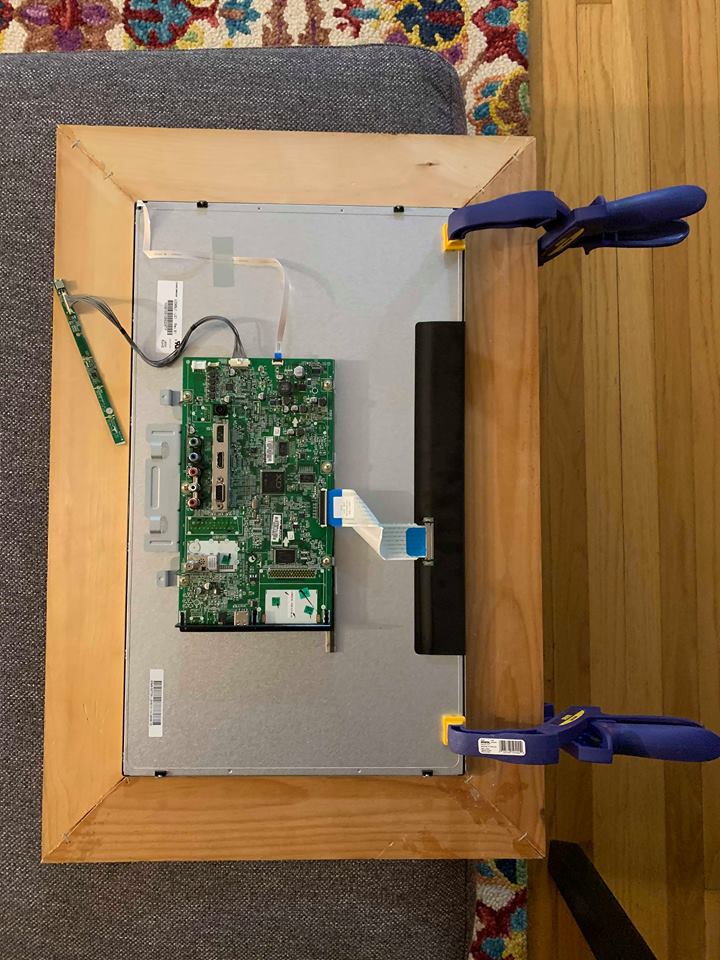
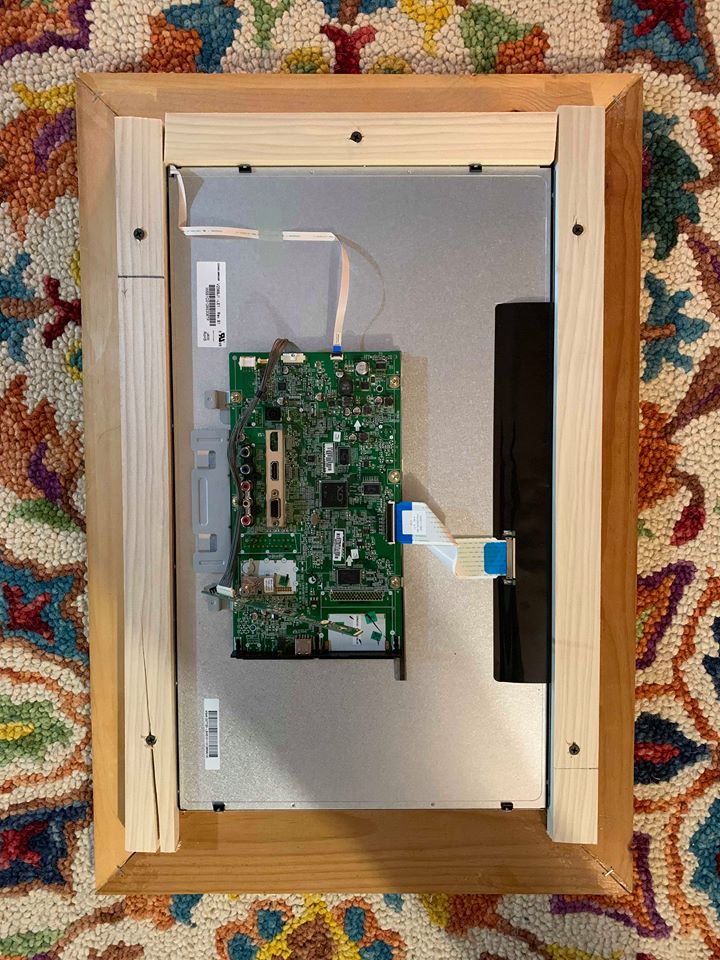
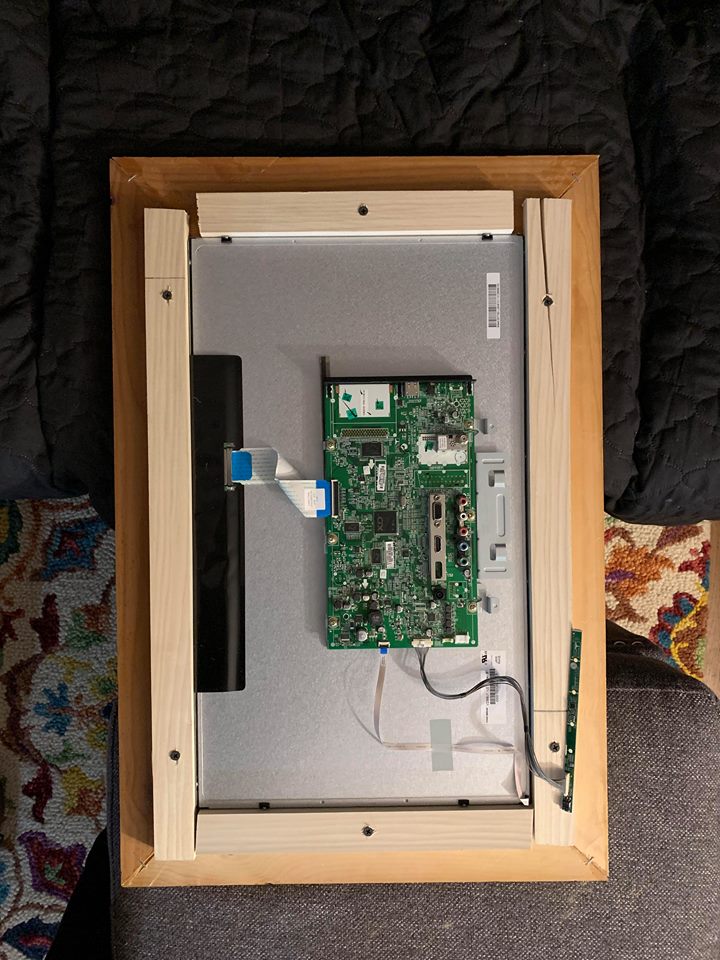
All I have to say about the box is “Good not great”.
99.5% finished product:
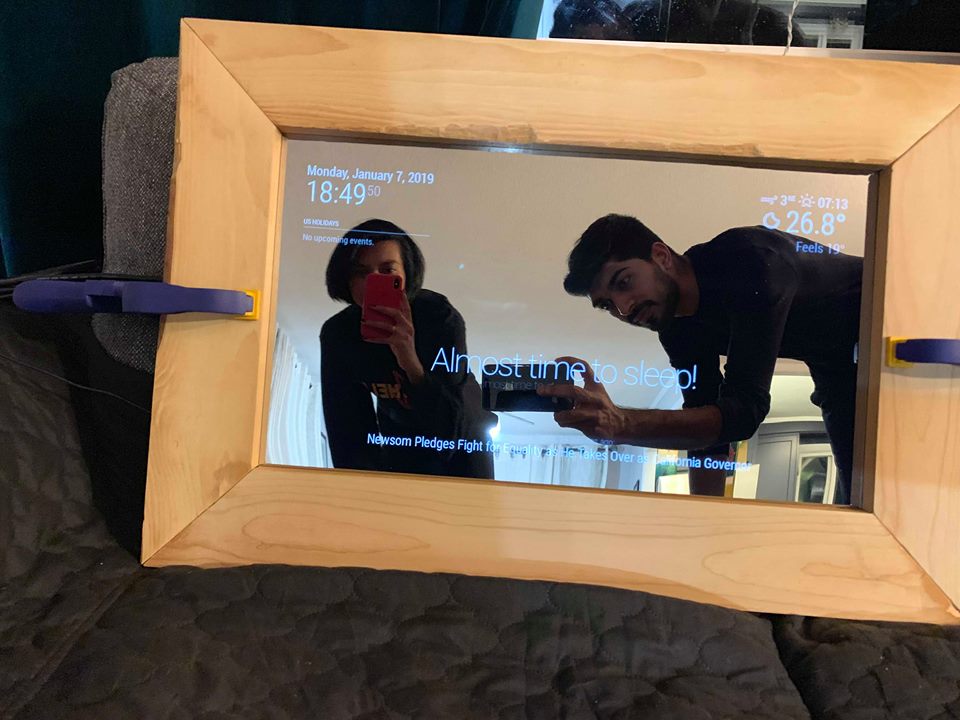
I didn’t say 100% finished because if you look, you’ll see the blue clamps on the either side holding the monitor into the box. I haven’t quite figured out how to secure the monitor into the box yet. So any ideas/tips/tricks are welcome!
Hello! It looks like you're interested in this conversation, but you don't have an account yet.
Getting fed up of having to scroll through the same posts each visit? When you register for an account, you'll always come back to exactly where you were before, and choose to be notified of new replies (either via email, or push notification). You'll also be able to save bookmarks and upvote posts to show your appreciation to other community members.
With your input, this post could be even better 💗
Register Login