Read the statement by Michael Teeuw here.
The latest Install Guide (MM w/ Google Assistant)
-
This guide is about how to install google assistant and magic mirror on latest raspbian.
I had some errors, so I made a video to share it, https://youtu.be/UBgH5hejYtMAnd Here is github for this, https://github.com/makepluscode/rpi-tutorial-advanced/blob/master/006-raspbian-magicmirror-google-assistant-latest/
Dependency Versions
- OS : 2018-11-13-raspbian-stretch-full.img
- MagicMirror2 : 2.5.0
- MMM-Hotword : 1.1.0
- MMM-AssistantMk2 : 2.1.2
Install
STEP1. Rasbian installation
- Download the latest image from the RazBian website. (2018-11-13-raspbian)
- Download Rufus to write images to SD card.
- Run Rufus and select the downloaded image to burn the SD card.
STEP2. Insert SD card + LCD + Power connection
- Insert SD card and keyboardㆍmouse dongle into raspberry pi.
- Connect LCD to raspberry pi on HDMI.
STEP3. First Boot
- Connect the USB power cable to the raspberry pi
- After boot is done, connect to the Internet with WIFI
- Update packages
sudo apt-get updateSTEP4. Installing a Magic Mirror
- Install the Magic Mirror using a script on the Internet
sudo apt-get install npm
sudo npm install -g npm@latest
bash -c "$(curl -sL https://raw.githubusercontent.com/MichMich/MagicMirror/master/installers/raspberry.sh)"
STEP5. Installing Magic Mirror Modules
- Go to modules directory and install the MMM-Hotword
cd ~/MagicMirror/modules/ sudo apt-get install libmagic-dev libatlas-base-dev sox libsox-fmt-all git clone https://github.com/eouia/MMM-Hotword.git cd MMM-Hotword npm install cd ~/MagicMirror/modules/MMM-Hotword/node_modules/snowboy npm install --save-dev electron-rebuild npm install nan ./node_modules/.bin/electron-rebuild- Install MMM-AssistantMk2
cd ~/MagicMirror/modules/
sudo apt-get install mpg321 libasound2-dev
git clone https://github.com/eouia/MMM-AssistantMk2
cd MMM-AssistantMk2
npm install
cd scripts
chmod +x *.sh
cd ~/MagicMirror/modules/MMM-AssistantMk2
npm install --save-dev electron-rebuild
./node_modules/.bin/electron-rebuild
STEP6. Configure Google Assistant Module
- Open the Google Action Console and create a new project
https://console.actions.google.com- Open the Google Cloud Platform Console and select the generated project
https://console.cloud.google.com- Search for the Google Assistant API and click Enable.
- Click CONFIGURE … of Credentials and put the name and e-mail.
- Generate Other credentials with the OAuth Client ID in Create Credentials
- Download generated OAuth client ID in json format
- Move the downloaded OAuth client ID to modules/MMM-AssistantMk2/credentials.json
mv ~/Download/cre.... credentials.json- Run auth_and_test.js to verify the generated client ID
node auth_and_test.js- Accept the client verification process and copy and enter your Google account key
- Move the generated token.json
mv token.json ./profiles/default.jsonSTEP7. Edit Google assistant module config
- Open the Magic Mirror configuration file with TextEditor and modify it with the contents of github
Install USB Mic. and Speaker
https://github.com/makepluscode/rpi-tips/tree/master/001-bringup-audio-and-mic
vi ~/.asoundrcpcm.!default{ type asym playback.pcm{ type hw card 0 } capture.pcm{ type plug slave.pcm "hw:1, 0" } } ctl.!default{ type hw card 0 }And, change audio output from hdmi to analog.
Test
Go to the location where the Magic Mirror is and start the application
cd ~/MagicMirror
npm start
Video Tutorial
-
Wow this is a great tutorial, and video. I am going to add this to my mirror. Can I ask where you got your USB mic and speaker combo from?
I especially liked how you showed the troubleshooting, and corrections in your video. So many people edit out the hurdles. Kudos to you my friend! A++
-
Thank you for the elaborate instructions, everything for me went well until I’ve noticed that the default modules (calendar, complements, news feed) seem to disappear after some time. Did you run into similar issues?
-
@leej00 hello mate
how did you configure the last part i.e.
STEP7. EDIT GOOGLE ASSISTANT MODULE CONFIG
Open the Magic Mirror configuration file with TextEditor and modify it with the contents of github
there is soo much information on github that needs to be added on to the config.js, which part of it did you add to your config.js? can you please share it?
I get the google icon on my mm but when I say “Ok Google” nothing happens"
Thanks.
-
A few things you can do:
Add your location inside the config.js under the module call. You can find this info inside the CONFIGURATION.md
i.e.
// — ESSENTIALS / modifying for your environment might be needed.Use: https://www.mapdevelopers.com/geocode_tool.php
deviceLocation: {
  coordinates: { // set the latitude and longitude of the device to get localized information like weather or time. (ref. mygeoposition.com)
    latitude: 00.0, // -90.0 - +90.0
    longitude: -00.00, // -180.0 - +180.0
  },
},
With MMM-Hotword, using USB mic (plughw:1) you need to use the following:
//Hotword Module
{
    module: "MMM-Hotword",
    config: {
      record: {
        recordProgram : "arecord",
        device        : "plughw:1",
      },
      autostart:true,
      onDetected: {
        notification: function (payload) {
          return "ASSISTANT_ACTIVATE"
        },
        payload: function (payload){
          return {
            profile: payload.hotword
          }
        }
      },
    },
  },
{
		module: "MMM-AssistantMk2",
		position: "bottom_bar",
		config: {
		record: {
        recordProgram : "arecord",
        device        : "plughw:1",
      },

      notifications: {
        ASSISTANT_ACTIVATED: "HOTWORD_PAUSE",
        ASSISTANT_DEACTIVATED: "HOTWORD_RESUME",
      },
deviceLocation: {
      coordinates: { // set the latitude and longitude of the device to get localized information like weather or time. (ref. mygeoposition.com)
        latitude: 00.00, // -90.0 - +90.0
        longitude: -00.00, // -180.0 - +180.0
      },
    },

}
},
It works. Thank You! I am using the PS Eye as suggested in other forms. My audio out is still set to HDMI because im staging on my TV.
LPT: Add the following to the MK2 module config so the screens dont toggle so fast:
screenDuration: 5000, //this is milliseconds -
@leej00
Testing this now to see if I get the same results.@makepluscode
Can confirm all modules disappear besides the default weather module.I have a YouTube playlist playing, and I can still hear the module playing through the speakers, but visually it is no longer there.
If I give it a keyword voice command it is listening for it will draw the modules again.
Another observation is every time I give it a voice command it starts my playlist from the top.
-
@bachoo786 say “smart mirror” or “snowboy”
You can also read more on the .umdl and how to obtain a custom .umdl here:
snowboy.kitt.aiMore particularly:
http://docs.kitt.ai/snowboy/#api-v1-train -
This post is deleted! -
@makepluscode
Hello first of all thanks for the great tutorial!
Unfortunately I’m stuck with the last step (installation of the microphone)
When I enter the command “vi ~/.asoundrc” I get the following message:
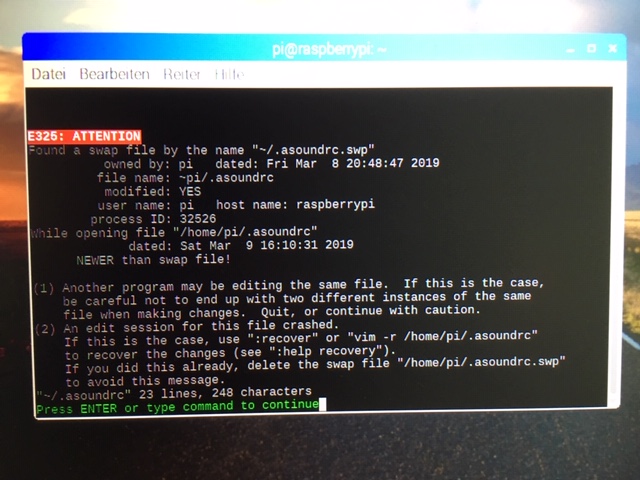
I ask for help
Greeting Fabian -
@Fabian
Type sudo nano. asoundrc in command prompt
Then paste your code there.
To save that code press ctrl+X, then Y and then enter.
You are good to go -
So In Your Opinion is MMM Hotword and MMM-assistankmk2 the best combo for google assistant?
I see a few other modules like MMM-GoogleAssistant out there too
-
pcm.!default {
type asym
capture.pcm “mic”
playback.pcm “speaker”
}
pcm.mic {
type plug
slave {
pcm “hw:1,0”
}
}
pcm.speaker {
type plug
slave {
pcm “hw:0,1”
}
}This is my asoundrc conf but i want to change conf like this
defaults.pcm.!card
defaults.ctl.!cardscreencast and google assistant both want diffrent asoundrc so any suggetions ??
Thank you.
i am noob at this so sorry in advance for dumb question…
Thank you for your reply 🙂
-
This post is deleted! -
@makepluscode
https://pastebin.com/cBFMG7aki got this… what sholde i do?
-
An amazing guide! Thanks a lot. Got the mirror and the google assistant module up an running well, with a few issues that I will address here.
So, overall, everything is VERRY LAGGY- from audio, video, animation and update rate. I was told to downgrade MM from 2.9.0 down to 2.1.0, but have no idea how. Any help please. And the google assistant, when asked about some specific things like direction or information on the web, it just shows the URL for like a split second, then stop. Anyway I can display this on my phone, like idk connect the module to my phone in any way?
Please help. I’ve been struggling with this for 4 weeks already and it’s starting to br a major annoyance :( -
Excuse me but i have a problem in your tutoriel : step 5 point 1.
when you ask to go :cd ~/MagicMirror/modules/MMM-Hotword/node_modules/snowboy
I havent folder node module. When i “npm install” in MMM-hotword i have :
npm notice created a lockfile as package-lock.json. You should commit this file. npm WARN MMM-Hotword@2.0.1 No repository field. -
@Ayos53 said in The latest Install Guide (MM w/ Google Assistant):
I havent folder node module.
its node_modules (note the trailing s)…
it will be there if you ran npm install in the MMM-Hotword folder as required by the install instructions (the install.sh script does this)
-
Sorry it’s me again.
I have a problem when i launch magicmiror, he crashed.
The log file :0 info it worked if it ends with ok 1 warn npm npm does not support Node.js v10.15.2 2 warn npm You should probably upgrade to a newer version of node as we 3 warn npm can't make any promises that npm will work with this version. 4 warn npm Supported releases of Node.js are the latest release of 4, 6, 7, 8, 9. 5 warn npm You can find the latest version at https://nodejs.org/ 6 verbose cli [ '/usr/bin/node', '/usr/bin/npm', 'start' ] 7 info using npm@5.8.0 8 info using node@v10.15.2 9 verbose run-script [ 'prestart', 'start', 'poststart' ] 10 info lifecycle magicmirror@2.9.0~prestart: magicmirror@2.9.0 11 info lifecycle magicmirror@2.9.0~start: magicmirror@2.9.0 12 verbose lifecycle magicmirror@2.9.0~start: unsafe-perm in lifecycle true 13 verbose lifecycle magicmirror@2.9.0~start: PATH: /usr/share/npm/node_modules/npm-lifecycle/node-gyp-bin:/home/pi/MagicMirror/node_modules/.bin:/usr/local/sbin:/usr/local/bin:/usr/sbin:/usr/bin:/sbin:/bin:/usr/local/games:/usr/games 14 verbose lifecycle magicmirror@2.9.0~start: CWD: /home/pi/MagicMirror 15 silly lifecycle magicmirror@2.9.0~start: Args: [ '-c', 'sh run-start.sh' ] 16 info lifecycle magicmirror@2.9.0~start: Failed to exec start script 17 verbose stack Error: magicmirror@2.9.0 start: `sh run-start.sh` 17 verbose stack spawn ENOENT 17 verbose stack at ChildProcess.<anonymous> (/usr/share/npm/node_modules/npm-lifecycle/lib/spawn.js:48:18) 17 verbose stack at ChildProcess.emit (events.js:189:13) 17 verbose stack at maybeClose (internal/child_process.js:970:16) 17 verbose stack at Process.ChildProcess._handle.onexit (internal/child_process.js:259:5) 18 verbose pkgid magicmirror@2.9.0 19 verbose cwd /home/pi/MagicMirror 20 verbose Linux 4.19.75-v7l+ 21 verbose argv "/usr/bin/node" "/usr/bin/npm" "start" 22 verbose node v10.15.2 23 verbose npm v5.8.0 24 error file sh 25 error code ELIFECYCLE 26 error errno ENOENT 27 error syscall spawn 28 error magicmirror@2.9.0 start: `sh run-start.sh` 28 error spawn ENOENT 29 error Failed at the magicmirror@2.9.0 start script. 29 error This is probably not a problem with npm. There is likely additional logging output above. 30 verbose exit [ 1, true ]If someone have an idea ?
-
@Ayos53 said in The latest Install Guide (MM w/ Google Assistant):
/home/pi/MagicMirror
seems a file is missing, please do
ls /home/pi/MagicMirror/run-start.shyou should see this result
pi@raspberrypi:~ $ ls /home/pi/MagicMirror/run-start.sh
/home/pi/MagicMirror/run-start.sh
it is part of the git clone distribution and never changed
-
@sdetweil
i dols /home/pi/MagicMirror/run-start.shand yes i have this result
pi@raspberrypi:~ $ ls /home/pi/MagicMirror/run-start.sh
/home/pi/MagicMirror/run-start.sh
but always crash after 1 seconde
i see this :
> magicmirror@2.9.0 start /home/pi/MagicMirror
> sh run-start.sh

Starting MagicMirror: v2.9.0
Loading config ...
Loading module helpers ...
No helper found for module: alert.
Initializing new module helper ...
Module helper loaded: updatenotification
No helper found for module: clock.
No helper found for module: currentweather.
No helper found for module: weatherforecast.
Initializing new module helper ...
Module helper loaded: newsfeed
Initializing new module helper ...
Module helper loaded: MMM-NetworkConnection
Initializing new module helper ...
Module helper loaded: MMM-Hotword
Initializing new module helper ...
Module helper loaded: MMM-AssistantMk2
All module helpers loaded.
Starting server on port 8080 ...
Server started ...
Connecting socket for: updatenotification
Connecting socket for: newsfeed
Starting module: newsfeed
Connecting socket for: MMM-NetworkConnection
MMM-NetworkConnection helper started ...
Connecting socket for: MMM-Hotword
[HOTWORD] MMM-Hotword starts
Connecting socket for: MMM-AssistantMk2
Sockets connected & modules started ...
Launching application.
Create new news fetcher for url: https://www.francetvinfo.fr/titres.rss - Interval: 300000
[AMK2] Recipe is loaded: hide_and_show_all_modules.js
[AMK2] Recipe is loaded: reboot.js
[AMK2] Recipe is loaded: screen_onoff.js
[AMK2] Recipe is loaded: shutdown.js
[HOTWORD] No model to load
[AMK2] Temporal storage directory is clearing.
[AMK2] assistant ready
/home/pi/MagicMirror/node_modules/electron/dist/electron js/electron.js: symbol lookup error: /home/pi/MagicMirror/modules/MMM-AssistantMk2/node_modules/grpc/src/node/extension_binary/electron-v3.0-linux-arm-glibc/grpc_node.node: undefined symbol: __atomic_store_8
npm ERR! file sh
npm ERR! code ELIFECYCLE
npm ERR! errno ENOENT
npm ERR! syscall spawn
npm ERR! magicmirror@2.9.0 start: `sh run-start.sh`
npm ERR! spawn ENOENT
npm ERR!
npm ERR! Failed at the magicmirror@2.9.0 start script.
npm ERR! This is probably not a problem with npm. There is likely additional logging output above.

npm ERR! A complete log of this run can be found in:
npm ERR!     /home/pi/.npm/_logs/2019-12-04T14_51_36_364Z-debug.log
Hello! It looks like you're interested in this conversation, but you don't have an account yet.
Getting fed up of having to scroll through the same posts each visit? When you register for an account, you'll always come back to exactly where you were before, and choose to be notified of new replies (either via email, or push notification). You'll also be able to save bookmarks and upvote posts to show your appreciation to other community members.
With your input, this post could be even better 💗
Register Login