MagicMirror Forum
    • Recent
    • Tags
    • Unsolved
    • Solved
    • MagicMirror² Repository
    • Documentation
    • 3rd-Party-Modules
    • Donate
    • Discord
    • Register
    • Login
    1. Home
    2. svenpisa
    3. Posts
    A New Chapter for MagicMirror: The Community Takes the Lead
    Read the statement by Michael Teeuw here.
    S
    Offline
    • Profile
    • Following 5
    • Followers 0
    • Topics 13
    • Posts 51
    • Groups 0

    Posts

    Recent Best Controversial
    • RE: MMM-Pir or MMM-PIR-Sensor

      @sdetweil

      62e173cd-c4e4-4b8a-81ca-b777a8b9d593-image.png

      I don’t understand that. I have done it exactly according to the tutorial and via

      sudo python motion_sensor.py
      

      to test the Pir. I could not recognize a new line immediately after a movement, but a line is generated every 5 seconds.
      Since the tutorial says that the sensor waits 5 seconds until it queries again, I would have thought that it would work since the 1 is specified.

      But now an entry is created directly every 5 seconds

      I am open to all modules and settings to get the PIR up and running. If only I knew how to do it…

      posted in Troubleshooting
      S
      svenpisa
    • RE: Default Weather Module Icon Position

      Thank you very much for your help.
      I first had to read through your messages at my leisure and at the same time I tried to understand the messages parallel to the developer tool.

      And lo and behold, it worked.

      0e90df8a-da41-4c3f-b2b7-c4d7e5436f24-image.png

      I have now split the weather module into two classes.

      		{
      			module: "weather",
      			classes: "forecast",
      			position: "top_right",
      			header: "Wettervorschau",
      			config: {
      				weatherProvider: "openweathermap",
      				type: "forecast",
      				location: "Hamburg",
      				locationID: "2911xxx", //ID from http://bulk.openweathermap.org/sample/city.list.json.gz; unzip the gz file and find your city
      				apiKey: "c64bb3321848fe4e76163xxxxxxxxxc"
      			}
      		},
      		{
      			module: "weather",
      			classes: "wetter",
      			position: "top_center",
      			config: {
      				weatherProvider: "openweathermap",
      				type: "current",
      				location: "Hamburg",
      				locationID: "2911xxx", //ID from http://bulk.openweathermap.org/sample/city.list.json.gz; unzip the gz file and find your city
      				apiKey: "c64bb3321848fe4e76163xxxxxxxxx"
      			}
      		},
      

      You could then play around really well with each class in the developer tool and then find the right position.

      For those who are interested. I have now made the following entries in the Custom.css so that it looks like this:

      .forecast .weathericon {
      position:absolute;	// absolute
      z-index: 0;
      height: 200px;
      right: 120px;
      margin-top: -65px; 
      padding-left: 60px;
      padding-top: 50px;
      height: 35px;
      }
      
      .forecast .wi-day-sunny {
      content: url("/css/icons/day.svg");
      }
      
      .forecast .wi-day-cloudy {
      content: url("/css/icons/cloudy-day-1.svg");
      }
      
      .forecast .wi-rain {
      content: url("/css/icons/rainy-6.svg");
      }
      
      forecast .wi-night-clear {
      content: url("/css/icons/night.svg");
      }
      
      .forecast .wi-night-cloudy {
      content: url("/css/icons/cloudy-night-2.svg");
      padding-right: 15px;
      padding-top: 10px;
      }
      
      .forecast .wi-cloudy {
      content: url("/css/icons/cloudy.svg");
      }
      
      .forecast .wi-showers {
      content: url("/css/icons/rainy-7.svg");
      }
      
      .forecast .wi-thunderstorm {
      content: url("/css/icons/thunder.svg");
      }
      
      .forecast .wi-snow {
      content: url("/css/icons/snowy-6.svg");
      }
      
      .forecast .wi-cloudy-windy {
      content: url("/css/icons/cloudy-day-3.svg");
      }
      
      .forescast.wi-night-rain {
      content: url("/css/icons/rainy-6.svg");
      }
      
      .forecast .wi-night-snow {
      content: url("/css/icons/snowy-6.svg");
      }
      
      .forecast .wi-night-thunderstorm {
      content: url("/css/icons/thunder.svg");
      }
      
      .forecast .wi-night-showers {
      content: url("/css/icons/rainy-7.svg");
      }
      
      .forecast .wi-fog {
      content: url("/css/icons/cloudy.svg");
      }
      
      .forecast .wi-night-alt-cloudy-windy {
      content: url("/css/icons/cloudy-night-1.svg");
      }
      
      /* Aenderungen Wettervorhersage */
      .wetter .weathericon {
      position: absolute;
      z-index: 1;
      margin-top: -33px;
      padding-top: 20px;
      left: 60px;	
      }
      	
      .wetter .wi-day-sunny {
      content: url("/css/icons/day.svg");
      padding-left: 6px;
      padding-top: 5px;
      height: 50px;
      }
      
      .wetter .wi-day-cloudy {
      content: url("/css/icons/cloudy-day-1.svg");
      }
      
      .wetter .wi-rain {
      content: url("/css/icons/rainy-6.svg");
      padding-left: 8px;
      padding-top: 5px;
      height: 45px;
      }
      
      .wetter .wi-night-clear {
      content: url("/css/icons/night.svg");
      }
      
      .wetter .wi-night-cloudy {
      content: url("/css/icons/cloudy-night-2.svg");
      height: 50px;
      padding-left: 5px;
      padding-top: 7px;
      }
      
      .wetter .wi-cloudy {
      content: url("/css/icons/cloudy.svg");
      }
      
      .wetter .wi-showers {
      content: url("/css/icons/rainy-7.svg");
      }
      
      .wetter .wi-thunderstorm {
      content: url("/css/icons/thunder.svg");
      }
      
      .wetter .wi-snow {
      content: url("/css/icons/snowy-6.svg");
      }
      
      .wetter .wi-cloudy-windy {
      content: url("/css/icons/cloudy-day-3.svg");
      height: 45px;
      padding-left: 8px;
      padding-top: 7px;
      }
      
      .wetter .wi-night-rain {
      content: url("/css/icons/rainy-6.svg");
      padding-left: 8px;
      padding-top: 5px;
      height: 45px;
      }
      
      .wetter .wi-night-snow {
      content: url("/css/icons/snowy-6.svg");
      }
      
      .wetter .wi-night-thunderstorm {
      content: url("/css/icons/thunder.svg");
      }
      
      .wetter .wi-night-showers {
      content: url("/css/icons/rainy-7.svg");
      }
      
      .wetter .wi-fog {
      content: url("/css/icons/cloudy.svg");
      }
      
      .wetter .wi-night-alt-cloudy-windy {
      content: url("/css/icons/cloudy-night-1.svg");
      height: 50px;
      padding-left: 5px;
      padding-top: 7px;
      }
      

      We can therefore close the entry here

      Thanks all again

      posted in Troubleshooting
      S
      svenpisa
    • RE: MMM-GoogleKeep config.js

      @KristjanESPERANTO ah ok, then I took it the wrong way. Sorry and thanks

      posted in Troubleshooting
      S
      svenpisa
    • RE: MMM-Pir or MMM-PIR-Sensor

      Hi Sam, I have now taken the instructions from you
      https://pimylifeup.com/raspberry-pi-motion-sensor/ and have gone through them step by step.

      I am using pin 15 (Gripo22)

      I then edited the motion_sensor.py and entered pir_sensor = 15.
      I simply ignored the piezo =7 entry as I only want to connect the PIR. So I really only entered pir_sensor = 15.

      I have now entered the following in Config.js

      		{
      			module: 'MMM-Pir',
      			position: 'top_left',
      			config: {
      				debug: false,
      				delay: 1 * 60 * 1000,
      				turnOffDisplay: true,
      				mode: 1,
      				ecoMode: true,
      				displayCounter: true,
      				displayBar: true,
      				displayStyle: "SemiCircle",
      				displayLastPresence: true,
      				lastPresenceTimeFormat: "LL H:mm",
      				mode6_gpio: 22,
      				mode6_clearGpioValue: true,
      				pir_gpio: 22,
      				pir_reverseValue: false,
      				xrandrForceRotation: "normal",
      				wrandrForceRotation: "normal"
      			}
      		},
      

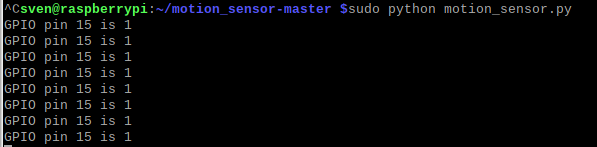
      But I don’t have the feeling that the PIR is really reacting to my movements. I can stand in front of it or tap it with my finger, but the screen doesn’t wake up.
      But strangely enough, the screen does wake up from time to time, which I don’t think is due to the PIR.

      where is my mistake or am I using the following entry incorrectly? What is the purpose of the two entries?

      				mode6_gpio: 22,
      				mode6_clearGpioValue: true,
      				pir_gpio: 22,
      				pir_reverseValue: false,
      

      ab099d81-9a1b-4071-a274-25f977e44361-image.png

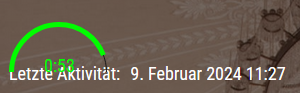
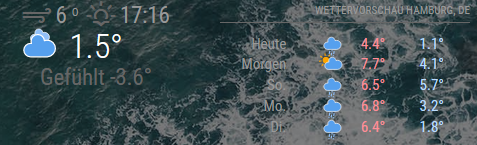
      As you can see the countdown runs down and goes back to full time but I have no idea why. I don’t think it’s because of the PIR… I can fiddle with it as much as I like… The time doesn’t change

      posted in Troubleshooting
      S
      svenpisa
    • RE: Default Weather Module Icon Position

      @sdetweil said in Default Weather Module Icon Position:

      html {
      cursor: default;
      }

      9e5c80d4-5f63-48e4-a5b4-1149ff8a8384-image.png

      Is the screenshot better?

      posted in Troubleshooting
      S
      svenpisa
    • RE: MMM-Pir or MMM-PIR-Sensor

      @sdetweil
      HELP!!!
      and how do I do that?
      I just googled and came across the following page:
      https://tutorials-raspberrypi.de/raspberry-pi-bewegungsmelder-sensor-pir/?utm_content=cmp-true

      do I just need to create the file and refer to the correct pin?

      Or what exactly do I need to install?

      posted in Troubleshooting
      S
      svenpisa
    • RE: Default Weather Module Icon Position

      @sdetweil I had taken the section to see the Custom.css and weather.css on the right side. Shouldn’t the wallpaper actually be displayed?

      posted in Troubleshooting
      S
      svenpisa
    • MMM-Pir or MMM-PIR-Sensor

      Next Problems on my side…

      First of all, the assignment I used:
      PIR sensor that I have connected: HC-SR505
      Pins : 2(5V) 9(Ground) 15(GPIO22)
      Raspberry Pi 3b

      The first thing I tried was https://github.com/MarcLandis/MMM-PIR-Sensor?tab=readme-ov-file on my MM.

      Installation so far ok. But when I wanted to install wiring-pi I got stuck at the following step:
      eba43324-edfc-4de3-8f76-b0930f646dd4-image.png

      What exactly do I have to enter under ‘wiring-pi’? This is where I fail.

      Then I thought I’d give it a try with
      https://github.com/bugsounet/MMM-Pir .
      The timer also counts down nicely and switches the monitor off after 2 minutes, but the PIR doesn’t react.

      {
        module: 'MMM-Pir',
        position: 'top_left',
        config: {
          debug: false,
          delay: 2 * 60 * 1000,
          turnOffDisplay: true,
          mode: 1,
          ecoMode: true,
          displayCounter: true,
          displayBar: true,
          displayStyle: "Text",
          displayLastPresence: true,
          lastPresenceTimeFormat: "LL H:mm",
          mode6_gpio: 20,
          mode6_clearGpioValue: true,
          pir_gpio: 21,
          pir_reverseValue: false,
          xrandrForceRotation: "normal",
          wrandrForceRotation: "normal"
        }
      },
      

      I would have to
      mode6_gpio: 20, and / or pir_gpio: 21, to 15? But the PIR doesn’t react there either.
      I read somewhere that you have to “unlock” the pins first?
      Can you tell me how I can use one of the two modules?

      posted in Troubleshooting
      S
      svenpisa
    • RE: MMM-GoogleKeep config.js

      Hi @KristjanESPERANTO I have seen that something has happened in the issue. But I didn’t understand what was changed and what was adjusted. May I come back to your help? If you have time, could you take a look at the issue on GitHub?
      Thank you very much and best regards

      posted in Troubleshooting
      S
      svenpisa
    • RE: Default Weather Module Icon Position

      Thank you guys for your tips and help. Now I only have one issue left.

      How do I get the icons in the right place?
      9fd7ed16-6ef7-47a5-84d6-29b73b951ab6-image.png

      posted in Troubleshooting
      S
      svenpisa
    • RE: Default Weather Module Icon Position

      @sdetweil i installed Bitvise now. The first view looks good… i will try it the next days!

      posted in Troubleshooting
      S
      svenpisa
    • RE: Default Weather Module Icon Position

      Thanks @sdetweil
      It works… Was my mistake… i took a / instead of : between ip and port…
      Looks great now.
      Last question for that… Have you got a link for a tutorial how to use the developer mode?

      posted in Troubleshooting
      S
      svenpisa
    • RE: Default Weather Module Icon Position

      I have reset the weather.css again. Fits so far.
      I think I have also understood the module and classes.
      So if I have the following

      			module: "weather",
      			classes: "forecast",
      

      then I would have to enter it in the custom.css as follows?

      .weather .forecast

      Unfortunately, I have not yet understood how to access it via browser.
      Exactly! The MM should hang on the wall, but if I want to make changes, I want to access the Raspi / MM via WLAN and make the changes via my laptop and since I am not a programmer and like to have everything visually, I would like to mirror the MM or the OS on my laptop screen and preferably make the changes via the “Geany” tool.
      How exactly should I enter it in the browser?
      I have tried it with IP and port, but only get an error message. I have also tried with the WLAN IP and port, but also without success.

      	address: "0.0.0.0",
      	port: 8080,
      

      Thanks in advance

      posted in Troubleshooting
      S
      svenpisa
    • Default Weather Module Icon Position

      Hey guys, me again. I’m currently trying to soak up everything in the forum but can’t quite get any further.
      I’ve already worked through the forum entry https://forum.magicmirror.builders/topic/7227/changing-icons-of-the-modules-current-weather-and-weather-forecast/24?page=3 but I’m making a mistake somewhere.
      An entry in Config.js looks like this:

      		{
      			module: "weather",
      			//  classes: "forecast",
      			position: "top_right",
      			header: "Wettervorschau",
      			config: {
      				weatherProvider: "openweathermap",
      				type: "forecast",
      				location: "Hamburg",
      				locationID: "29112xx", //ID from http://bulk.openweathermap.org/sample/city.list.json.gz; unzip the gz file and find your city
      				apiKey: "c64bb3321848fe4e7616335xxxxxxx"
      			}
      		},
      		{
      			module: "weather",
      			//  classes: "wetter",
      			position: "top_center",
      			config: {
      				weatherProvider: "openweathermap",
      				type: "current",
      				location: "Hamburg",
      				locationID: "29112xx", //ID from http://bulk.openweathermap.org/sample/city.list.json.gz; unzip the gz file and find your city
      				apiKey: "c64bb3321848fe4e7616335xxxxxxx"
      			}
      		},
      

      Additionally my entries in the Custom.css

      .weather .weathericon {
      position: absolute;	// absolute
      z-index: 0;
      height: 200px;
      right: 180px;
      margin-top: -65px; 
      padding-left: 60px;
      padding-top: 30px;
      height: 50px;
      }
      
      .weather .wi-day-sunny {
      content: url("/css/icons/day.svg");
      }
      
      .weather .wi-day-cloudy {
      content: url("/css/icons/cloudy-day-1.svg");
      }
      
      .weather .wi-rain {
      content: url("/css/icons/rainy-6.svg");
      }
      
      .weather .wi-night-clear {
      content: url("/css/icons/night.svg");
      }
      
      .weather .wi-night-cloudy {
      content: url("/css/icons/cloudy-night-2.svg");
      padding-right: 15px;
      padding-top: 10px;
      }
      
      .weather .wi-cloudy {
      content: url("/css/icons/cloudy.svg");
      }
      
      .weather .wi-showers {
      content: url("/css/icons/rainy-7.svg");
      }
      
      .weather .wi-thunderstorm {
      content: url("/css/icons/thunder.svg");
      }
      
      .weather .wi-snow {
      content: url("/css/icons/snowy-6.svg");
      }
      
      .weather .wi-cloudy-windy {
      content: url("/css/icons/cloudy-day-3.svg");
      }
      
      .weather .wi-night-rain {
      content: url("/css/icons/rainy-6.svg");
      }
      
      .weather .wi-night-snow {
      content: url("/css/icons/snowy-6.svg");
      }
      
      .weather .wi-night-thunderstorm {
      content: url("/css/icons/thunder.svg");
      }
      
      .weather .wi-night-showers {
      content: url("/css/icons/rainy-7.svg");
      }
      
      .weather .wi-fog {
      content: url("/css/icons/cloudy.svg");
      }
      
      .weather .wi-night-alt-cloudy-windy {
      content: url("/css/icons/cloudy-night-1.svg");
      }
      
      /* Aenderungen Wettervorhersage */
      
      .weather .weathericon {
      position: absolute;	/absolute
      left: 35px;
      z-index: 1;
      margin-top: -30px;	
      }
      	
      .weather .wi-day-sunny {
      content: url("/css/icons/day.svg");
      padding-left: 6px;
      padding-top: 5px;
      height: 50px;
      }
      
      .weather .wi-day-cloudy {
      content: url("/css/icons/cloudy-day-1.svg");
      }
      
      .weather .wi-rain {
      content: url("/css/icons/rainy-6.svg");
      padding-left: 8px;
      padding-top: 5px;
      height: 45px;
      }
      
      .weather .wi-night-clear {
      content: url("/css/icons/night.svg");
      }
      
      .weather .wi-night-cloudy {
      content: url("/css/icons/cloudy-night-2.svg");
      height: 50px;
      padding-left: 5px;
      padding-top: 7px;
      }
      
      .weather .wi-cloudy {
      content: url("/css/icons/cloudy.svg");
      }
      
      .weather .wi-showers {
      content: url("/css/icons/rainy-7.svg");
      }
      
      .weather .wi-thunderstorm {
      content: url("/css/icons/thunder.svg");
      }
      
      .weather .wi-snow {
      content: url("/css/icons/snowy-6.svg");
      }
      
      .weather .wi-cloudy-windy {
      content: url("/css/icons/cloudy-day-3.svg");
      height: 45px;
      padding-left: 8px;
      padding-top: 7px;
      }
      
      .weather .wi-night-rain {
      content: url("/css/icons/rainy-6.svg");
      padding-left: 8px;
      padding-top: 5px;
      height: 45px;
      }
      
      .weather .wi-night-snow {
      content: url("/css/icons/snowy-6.svg");
      }
      
      .weather .wi-night-thunderstorm {
      content: url("/css/icons/thunder.svg");
      }
      
      .weather .wi-night-showers {
      content: url("/css/icons/rainy-7.svg");
      }
      
      .weather .wi-fog {
      content: url("/css/icons/cloudy.svg");
      }
      
      .weather .wi-night-alt-cloudy-windy {
      content: url("/css/icons/cloudy-night-1.svg");
      height: 50px;
      padding-left: 5px;
      padding-top: 7px;
      }
      

      d06de720-b1df-4a8c-bef1-d6181d6637bf-image.png

      I mean that I customized the icons in wether.css (I don’t think you’re supposed to do that, are you?)

      1. what do I have to change so that the icons are nicely arranged in the right row and exactly in the middle between the days and the temperature? (and for “Current” nice beside temperature)
        1. how can I separate the Forecast and Current icons? So what should the entry in Custom.css look like?
      2. I would have guessed the following
      .weather .current .weathericon 
      

      (is not currently entered in the css)

      1. and I would also like the icon size of “Current” to be larger than that of “forecast”
        I would be happy if you could take me by the hand and help me here

      And last question: I started the developer mode as described in the documentation https://forum.magicmirror.builders/topic/6808/css-101-getting-started-with-css-and-understanding-how-css-works
      How can I close this developer mode again so that the MM is displayed on my external monitor?
      For information: I have the MM with a Raspi on an external monitor and access it via remote desktop. If I start the developer mode and then just close it I have the MM on my laptop monitor. But I would like to have it on my external monitor again…

      Phew… so many questions…

      posted in Troubleshooting
      S
      svenpisa
    • RE: MMM-AccuWeatherForecastDeluxe Fahrenheit instead of Celsius

      Hi @sdetweil

      Here is the modul config

      		{
      			module: "MMM-AccuWeatherForecastDeluxe",
      			header: "Wettervorhersage",
      			position: "top_center",
      			classes: "default everyone",
      			disabled: false,
      			config: {
      				apikey: "H5ShqAVZaIGdQDoSrG4uwS31xxxxx",
      				locationKey: "1685xx",
      				relativeColors: true,
      				showCurrentConditions: false,
      				showExtraCurrentConditions: false,
      				showSummary: false,
      				showForecastTableColumnHeaderIcons: false,
      				showHourlyForecast: false,
      				dailyForecastLayout: 'bars',
      				maxDailiesToShow: 8,
      				showPrecipitationProbability: false,
      				showPrecipitationSeparator: false,
      				showPrecipitationAmount: false,
      				showWindSpeed: false,
      				showWindDirection: false,
      				showWindGust: false,
      				iconset: "4c",
      				useAnimatedIcons: false,
      				label_ordinals: ['↓', '↙', '←', '↖', '↑', '↗', '→', '↘'],
      				label_high: "",
      				label_low: "",
      			}
      		},
      

      I tried it with locationkey and also with latitude and longitude. Nothing works. But i think that is not the problem.

      However… I have distanced myself from this module for the time being and am currently trying to change the icons in the standard weather module based on your instructions and forum entry. That seems to make more sense to me at the moment.
      If you find a solution for this Accu module, it might be interesting for other users. I myself will not use it for the time being or test it on https://github.com/luxiouronimo/MMM-OpenWeatherForecastDeluxe. :-)

      posted in Troubleshooting
      S
      svenpisa
    • RE: MMM-GoogleKeep config.js

      @KristjanESPERANTO Thank you very much. Do I understand correctly that I may only have to wait until the module works or do I have to make additional settings? Can I see the status somewhere when it should work again?

      posted in Troubleshooting
      S
      svenpisa
    • RE: MMM-GoogleKeep config.js

      @sdetweil What? I thought you were the God Father of Magic Mirror Modules!!! ;-)

      No problem, maybe there is someone who has used this module before and it works for him to tell me what to do… I would be very happy anyway!!!

      posted in Troubleshooting
      S
      svenpisa
    • RE: MMM-GoogleKeep config.js

      @sdetweil You’re great… Thank you very much
      Partly good news.
      It could now be installed and entered in config.js. MM also starts cleanly and is also displayed cleanly, but the KEEP module is unfortunately not displayed on the MM.
      Now I need to get the list displayed somehow.
      I have tried it with the APP password 16 digits as well as 4x4 digits and also with the Google password but unfortunately it is not displayed.
      Any more ideas?

      posted in Troubleshooting
      S
      svenpisa
    • RE: MMM-GoogleKeep config.js

      @sdetweil i did it…
      I went directly to ~/MagicMirror/modules/MMM-GoogleKeep $ and started npm install but then only got error messages

      npm ERR! code ERESOLVE
      npm ERR! ERESOLVE could not resolve
      npm ERR!
      npm ERR! While resolving: MMM-GoogleKeep@1.0.0
      npm ERR! Found: stylelint@15.11.0
      npm ERR! node_modules/stylelint
      npm ERR! peer stylelint@“15.x” from grunt-stylelint@0.19.0
      npm ERR! node_modules/grunt-stylelint
      npm ERR! dev grunt-stylelint@“latest” from the root project
      npm ERR!
      npm ERR! Could not resolve dependency:
      npm ERR! dev stylelint-config-standard@“latest” from the root project
      npm ERR!
      npm ERR! Conflicting peer dependency: stylelint@16.2.0
      npm ERR! node_modules/stylelint
      npm ERR! peer stylelint@“^16.1.0” from stylelint-config-standard@36.0.0
      npm ERR! node_modules/stylelint-config-standard
      npm ERR! dev stylelint-config-standard@“latest” from the root project
      npm ERR!
      npm ERR! Fix the upstream dependency conflict, or retry
      npm ERR! this command with --force or --legacy-peer-deps
      npm ERR! to accept an incorrect (and potentially broken) dependency resolution.
      npm ERR!
      npm ERR!
      npm ERR! For a full report see:
      npm ERR! /home/sven/.npm/_logs/2024-01-25T19_14_43_524Z-eresolve-report.txt

      npm ERR! A complete log of this run can be found in: /home/sven/.npm/_logs/2024-01-25T19_14_43_524Z-debug-0.log

      posted in Troubleshooting
      S
      svenpisa
    • MMM-AccuWeatherForecastDeluxe Fahrenheit instead of Celsius

      And because it’s so nice, here’s the next request.

      I downloaded the https://github.com/maxbethge/MMM-AccuWeatherForecastDeluxe module to my MM because I really like the design.

      There are only two things I can’t change and I’m wondering where I’m making a mistake.

      Display of the days: I have set the line maxDailiesToShow: 8 from 5 to 8 in Config.js. Nevertheless, I still get 5 days displayed and not 8 days as desired. Also in the module js file 8 are entered. Why are only the 5 days displayed anyway?

      Display Fahrenheit instead of Celsius: All modules on my MM run on Celsius and “metric” is also entered in the units in Config.js

      	language: "de",
      	locale: "de-DE",
      	logLevel: ["INFO", "LOG", "WARN", "ERROR"], 
      	timeFormat: 24,
      	units: "metric",
      

      Here is also the excerpt from the MMM-AccuWeatherForecastDeluxe

            units: config.units,
              language: "de-DE", 
      

      How can I also set Celsius in this module? What do I have to enter in my Custom.css? or am I missing something?

      Sorry for all my questions and thanks for help

      posted in Troubleshooting
      S
      svenpisa
    • 1 / 1