Read the statement by Michael Teeuw here.
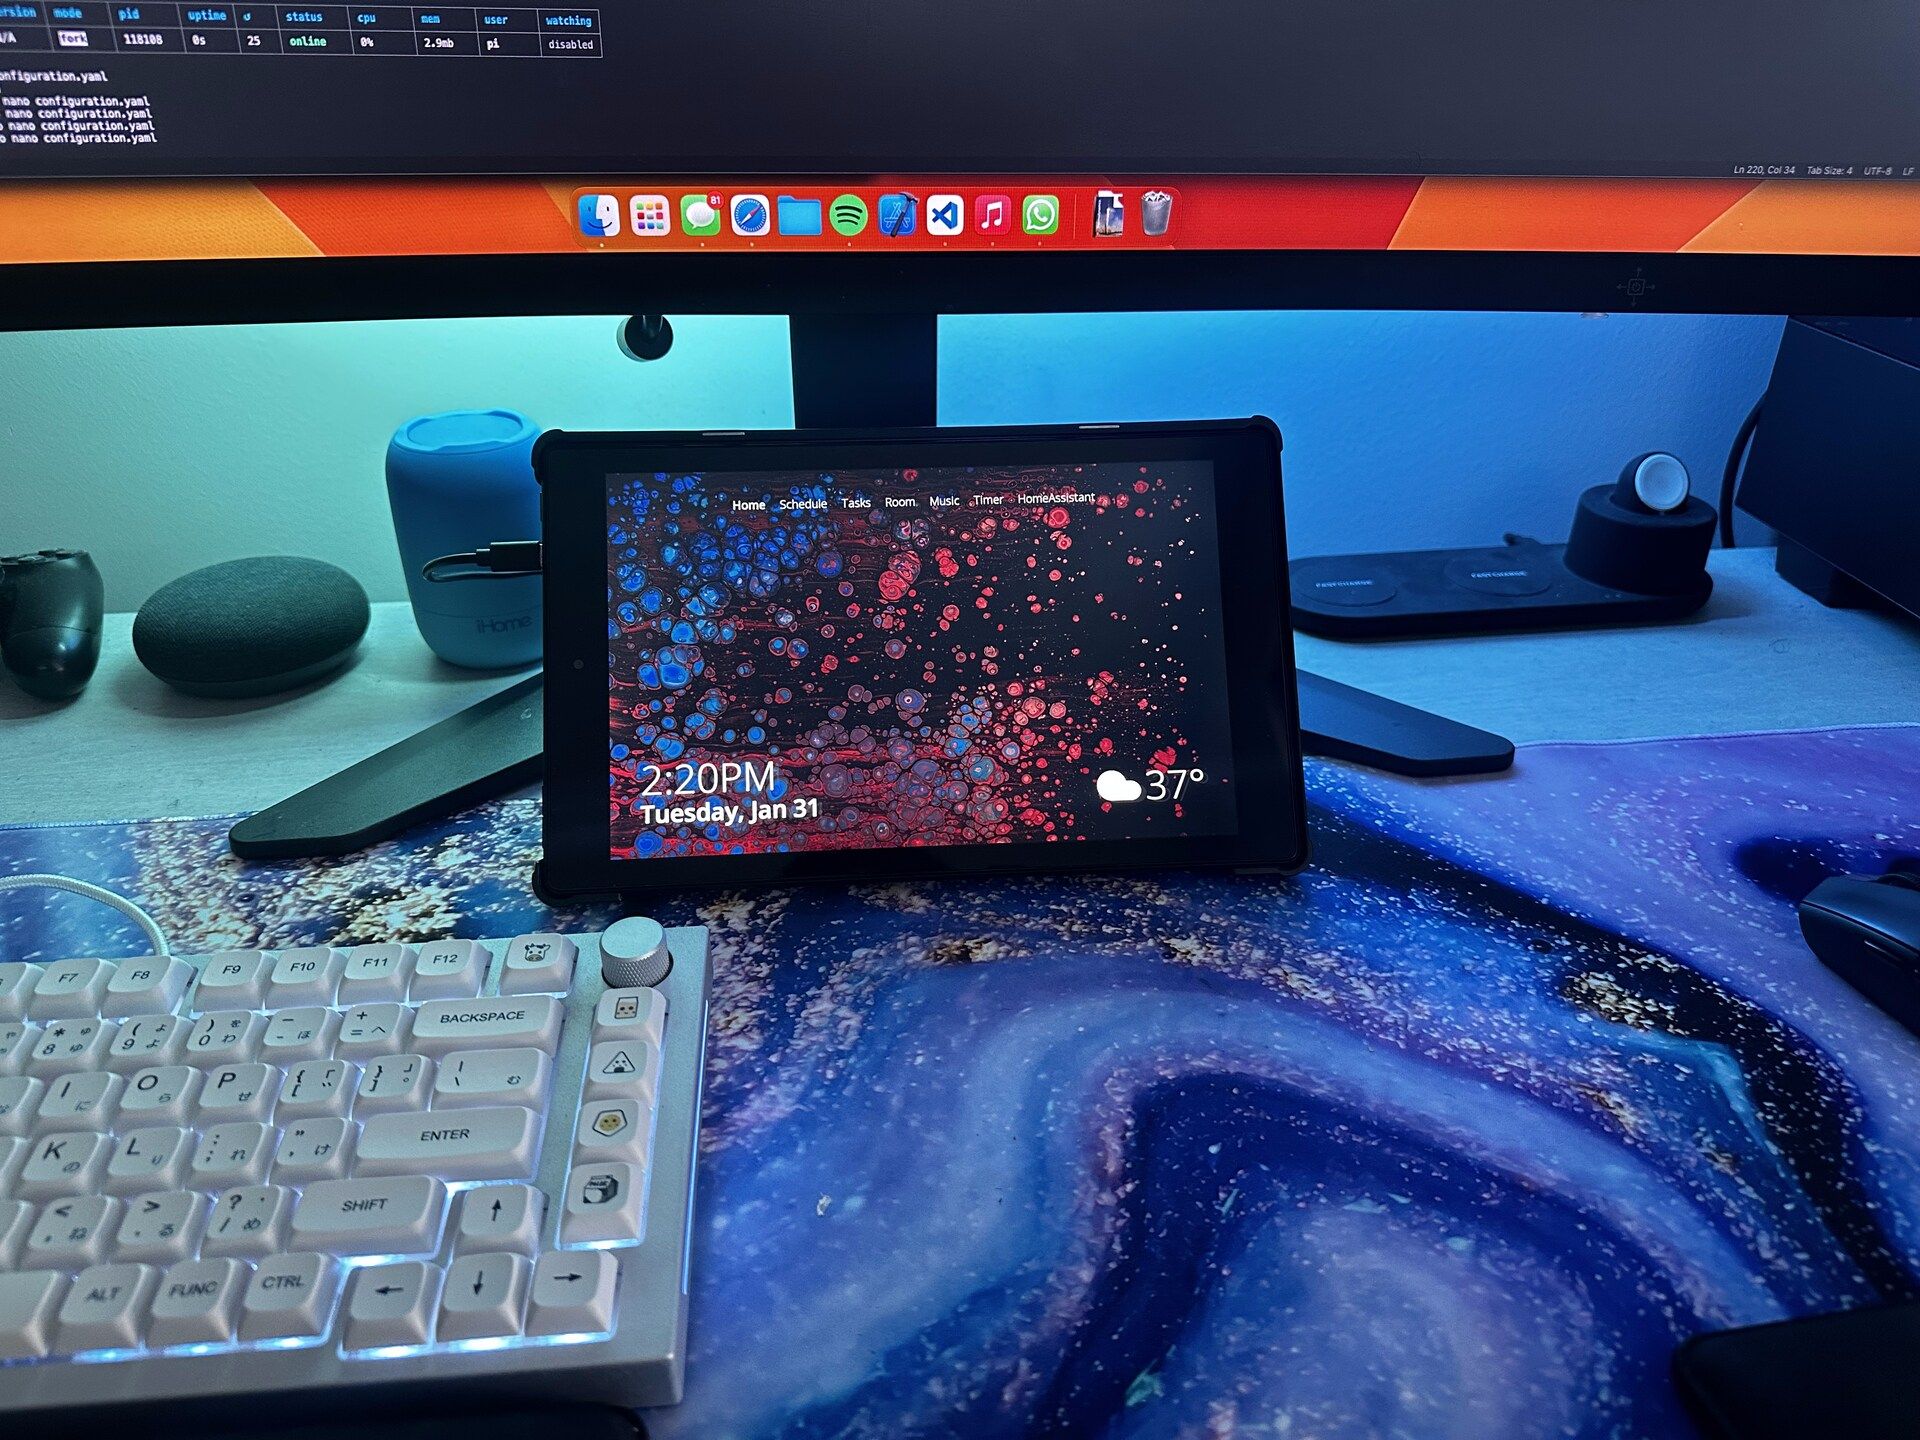
Magicmirror touchscreen tablet dashboard
-
Hello everyone! As an absent-minded university student, I’ve always liked the idea of having a touchscreen dashboard that I could use to keep track of my schedule, to-do list, homework, etc.
I have finished just that and I’d figure I’d share it with the forum.
Here’s a link to the album of screenshots for each page since the image files were too big for the forum: https://imgur.com/a/LjmpA16
This magicmirror has been achieved by using a number of 3rd party modules, custom CSS, and a custom music widget which connects to HomeAssistant and MMM-FF-Genius-Lyrics.
Feel free to ask any questions or share any suggestions.
-
@CobraRL_ how did you implement that? which software is running?
-
@KamiSchami I’m using a Raspberry Pi 4 running Home Assistant and MagicMirror on server mode, then opening MagicMirror from my tablet.
I can go into detail how I tweaked and used every module if needed but for now I’ll provide a bit of the overview.
In order of pages:
- MMM-Pages
- for separating all modules into individual pages (as shown on the top of the screen)
- MMM-Page-Indicator
- Usually the page indicators use dots, but I decided to use CSS to replace the dots with actual titles for each page.
- MMM-Unsplash
- Provides wallpaper
Page 1 (Home)
- Default Clock
- I can talk about how I edited this, because usually the date is at the top not the bottom. I used CSS to reorient the module’s HTML elements
- Default Weather with custom weather icons
Page 2 (Schedule)
- MMM-CalendarExt3
- provides the weekly calendar. This has been heavily tweaked with CSS.
- MMM-CalendarExt3Timeline
- This provides the timetable on top of the calendar. It has also been heavily tweaked with CSS.
Page 3 (Tasks)
- MMM-CalendarExt3Agenda
- I use my canvas calendar to provide me with all the assignments that are due. This modules on the bottom_right
- MMM-ToDoist
- I have the ToDoist app to help me keep up with the things I need to do. this module is on bottom_left.
Page 4 (Room)
- MMM-HomeAssistant-Touch
- Also heavily tweaked with CSS, but allows me to control my homeassistant entities from the dashboard for ease-of-access
Page 5 (Music)
- MMM-HA-MediaPlayer
- Originally this was MMM-HomeAssistant but I changed around the JS, Node helper, and CSS to make it a suitable music module that can also work with MMM-FF-Genius-Lyrics.
- MMM-FF-Genius-Lyrics
- Connects to the Genius API to get the lyrics of songs you’re listening to
Page 6 (Timer)
- Heavily tweaked MMM-KitchenTimer
Page 7 (HomeAssistant)
- iFrame
- I use an iframe to show my HomeAssistant home page just in case I want to change the colors of my lights.
Let me know if you want to know about any specific modules and how I tweaked them!
- MMM-Pages
-
@CobraRL_ Nice work! I really like your work with the page indicator. Can you provide an example how you changed the CSS of it? Would like to try it by myself.
-
@CobraRL_ hi, i love your timer. Can you show/send me what you’ve changed on the MMM-KitchenTimer module?
tx -
@easily It was kind of simple. I hid the page indicator’s “::before” and created an “::after” with the content of the page title. Here’s all the code I used for the page indicator:
.MMM-page-indicator div div { display: flex; margin: 0px var(--header-horizontal-margin); justify-content: space-between; } .MMM-page-indicator div i::before { display: none; } .MMM-page-indicator .fa-circle::after { font-weight: 400 !important; } .MMM-page-indicator div i::after { font-family: var(--font-primary); font-size: var(--header-font-size); font-weight: 300; } .MMM-page-indicator div i:nth-child(1)::after { content: "Home"; } .MMM-page-indicator div i:nth-child(2)::after { content: "Schedule"; } .MMM-page-indicator div i:nth-child(3)::after { content: "Tasks"; } .MMM-page-indicator div i:nth-child(4)::after { content: "Room"; } .MMM-page-indicator div i:nth-child(5)::after { content: "Music"; } .MMM-page-indicator div i:nth-child(6)::after { content: "Timer"; } .MMM-page-indicator div i:nth-child(7)::after { content: "HomeAssistant"; } -
@Axel51 I did a bunch of small changes to the JS like adding extra class names, adding extra wrappers, and removing the sounds because I found them annoying. The extra class names and wrappers helped me with the css. Hopefully the css variables are self-explanatory that it still makes sense.
Let me know if you need me to clarify anything!
Here’s the .css code
.MMM-KitchenTimer div {
  display: grid;
}

.MMM-KitchenTimer .text {
  font-family: var(--font-primary);
  font-weight: 300;
  font-size: 12rem;
  color: var(--secondary-background-color);
  text-align: center;
  line-height: 1;
}

.MMM-KitchenTimer .paused {
  color: rgba(255, 255, 255, 0.6);
}

.MMM-KitchenTimer .button {
  font-size: 20px;
  font-weight: 300;

  display: flex;
  align-items: center;
  justify-content: center;
  min-width: 6rem;
  aspect-ratio: 1;
  border-radius: 100px;

  background-color: var(--primary-background-color);
  color: var(--primary-foreground-color);
  backdrop-filter: blur(var(--blur));
  -webkit-backdrop-filter: blur(var(--blur));
}

.MMM-KitchenTimer .list-container {
  display: flex !important;
  justify-content: center;
  gap: 1rem;
}
Here’s the .js code
/* global Log, Module, moment, config */ /* Magic Mirror * Module: Kitchen timers * * By Tom Short * MIT Licensed. */ Module.register("MMM-KitchenTimer",{ // Module config defaults. defaults: { timertext: ["1m", "5m", "20m"], timersecs: [60, 300, 1200], }, // Define required scripts. getScripts: function() { return []; }, // Define styles. getStyles: function() { return ["MMM-KitchenTimer.css"]; }, // Define start sequence. start: function() { Log.info("Starting module: " + this.name); // Schedule update. setTimeout(function() { self.getDom(); }, 1000); }, // Override dom generator. getDom: function() { var time = 0, startTime, interval, alarm; function start() { if (!interval) { startTime = Date.now(); interval = setInterval(update, 1000); } display(); } function pause() { if (interval) { timerText.className = "text paused"; sound.pause(); clearInterval(interval); interval = null; } } function update() { time -= delta(); display(); } function addSeconds(value) { time += value; } function delta() { var now = Date.now(), d = now - startTime; startTime = now; return d / 1000; } function stop() { pause(); time = 0; display(); } function pad(val) { var str = "00"; return str.substring(0, str.length - String(val).length) + val; } function display() { var secs = Math.round(Math.abs(time % 60)); var mins = Math.abs(Math.trunc(time / 60) % 60); var hours = Math.abs(Math.trunc(time / 3600)); var sign = Math.sign(time); if (time > 0) { timerText.className = "text positive"; } else if (time < 0) { timerText.className = "text negative"; } else { timerText.className = "text"; } timerText.innerHTML = (time < 0 ? "-" : "") + (hours > 0 ? hours+":" : "") + pad(mins,2) + ":" + pad(secs,2); } var timerText = document.createElement("span"); var wrapper = document.createElement("div"); wrapper.appendChild(timerText); var wrapper2 = document.createElement("section"); wrapper2.className = "list-container"; // Create buttons for (var i=0; i<this.config.timertext.length; i++) { var el = document.createElement("div"); el.className = "button"; el.innerHTML = this.config.timertext[i]; el.counter = i; var self = this; el.addEventListener("click", function(event) { addSeconds(self.config.timersecs[this.counter]); start(); }); wrapper2.appendChild(el); }; const sound = document.createElement('audio'); sound.src = this.file("alarm.wav"); sound.setAttribute('autoplay', true); sound.setAttribute('loop', true); sound.pause(); const beep = document.createElement('audio'); beep.src = this.file("beep.wav"); beep.volume = 0.2; beep.pause(); display(); timerText.addEventListener("click", function(event) { if (interval) { pause(); } else if (time != 0) { start(); } }); var stopButton = document.createElement("div"); stopButton.className = "button stop"; stopButton.innerHTML = "X"; stopButton.addEventListener("click", stop); wrapper2.appendChild(stopButton); wrapper.appendChild(wrapper2); return wrapper; } }); -
Nice job on this. I was also thinking of going the tablet route with MM. I never thought of the server approach, which seems to make it a lot easier. Although I’m guessing streaming video wouldn’t work out so well (if I wanted to implement that).
Question: How did you set up the client on the tablet? Is it just a full-screen web browser?
-
@wfsaxton Yeah its just a fullscreen browser. I’ve tried doing google cast and a smart assistant on it but neither of them worked for me.
-
Your project is quite interesting.
I also have a pizero running MM on server mode and a tablet as a dashboard.I would like to know how you manage to move between the different screens as it is a fullscreen browser.
Thanks in advance
-
@frentemorao he uses the MMM-Pages module which creates logical pages by showing and hiding modules in groups.
-
@sdetweil thanks for the explanation but I am afraid it’s not the answer I was waiting for…
I understood he touches the screen to move between pages. Am I right?
-
@frentemorao I doubt it, pages will cycle thru, mmm-carousel can too.
I haven’t seen a module that does touch screen swipe. I have seen swipe with additional sensorshere’s a talk about mouse gestures in browsers
https://gizmodo.com/how-to-use-mouse-gestures-in-chrome-edge-safari-opera-f-1848790869 -
Hi,
you can use MMM-Touch to react to swipes. I am not sure if it works with pages but it does with the MMM-ProfileControl. -
@wishmaster270 very cool…
-
@wishmaster270 do you think this solution will work in a tablet considering the server is in an external rpi?
-
@frentemorao Did not test that. I have it running on the same Pi in my case. But as MMM-Touch only sends notifications to other modules I do not see a reason why it shouldn’t.
-
@wishmaster270 I can confirm you that it does work in an Android tablet !!!
Now I have to figure out how it interacts with Pages (and MMM-Remote-Control)
Hello! It looks like you're interested in this conversation, but you don't have an account yet.
Getting fed up of having to scroll through the same posts each visit? When you register for an account, you'll always come back to exactly where you were before, and choose to be notified of new replies (either via email, or push notification). You'll also be able to save bookmarks and upvote posts to show your appreciation to other community members.
With your input, this post could be even better 💗
Register Login