Read the statement by Michael Teeuw here.
Head first developing MM module for extreme beginners
-
Head first developing MM module for extreme beginners
Today morning, I’ve got two messages from two members of this forum at the same time. Both of two asked me the same thing - “How can I show my contents on MM with my module?”
So, here is a simple guide for developing MM module. This is not a royal road or perfect answer, but I hope this could be a helpThis article is not about using
gitor any other deeper knowledge. I assume you are familiar with javascript(nodeJS) at least.Make a workspace
cd ~/MagicMirror/modules mkdir MMM-Test cd MMM-Test touch MMM-Test.jsMMM-Test.jsis your main module script. It will be called by MM core at running.Let’s make something.
configuration
First, add your module into MM framework. open
~/MagicMirror/config/config.jsand add your module.modules: [ { module: "MMM-Test", position: "top_left", config: {} }, ]For simple things, remove all other modules except your
MMM-Test.MMM-Test.js
open
MMM-Test.jsand edit.nano MMM-Test.jsIn that, copy this and paste into
MMM-Test.js.Module.register("MMM-Timetable", { defaults: {}, start: function () {}, getDom: function() {}, notificationReceived: function() {}, socketNotificationReceived: function() {}, })There are many other things to study but currently, we will focus on these 5 things.
getDom()
This function will render your content on MM screen.
Let’s do something.getDom: function() { var element = document.createElement("div") element.className = "myContent" element.innerHTML = "Hello, World!" return element },<div>element is created and returned to MM for rendering.
When MM needs your module’s output being refreshed, this function will be called by MM core.
See how it works.cd ~/MagicMirror npm start dev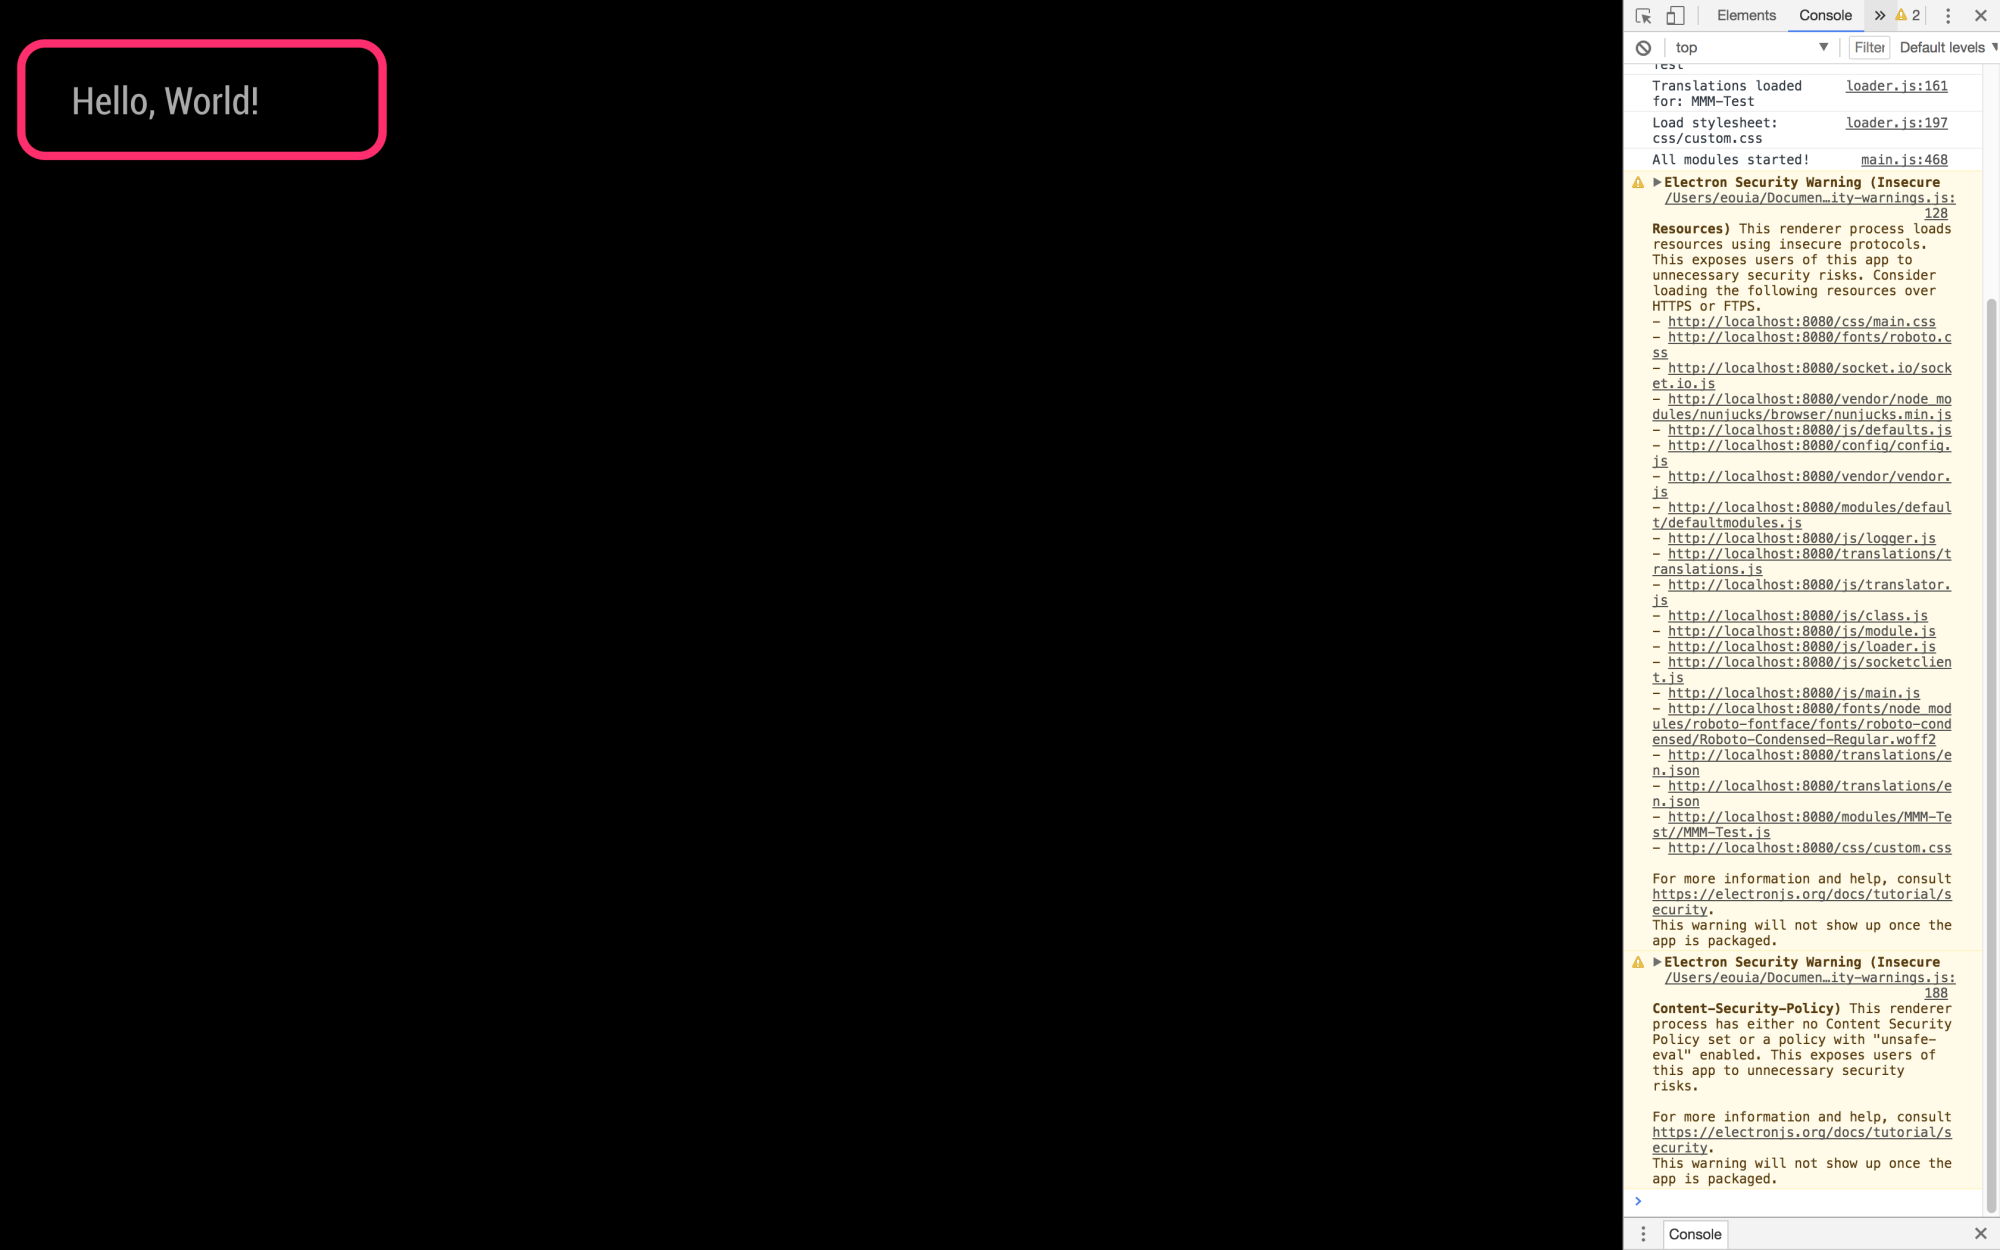
defaults:{}
You can use default configuration values. Let’s do it
defaults: {
  foo: "I'm alive!"
},
getDom: function() {
  var element = document.createElement("div")
  element.className = "myContent"
  element.innerHTML = "Hello, World! " + this.config.foo
  return element
},
your configuration value
foocould be used likethis.config.foo.
thisin this module, it directs module itself. you can access various module values with it.
See how it works.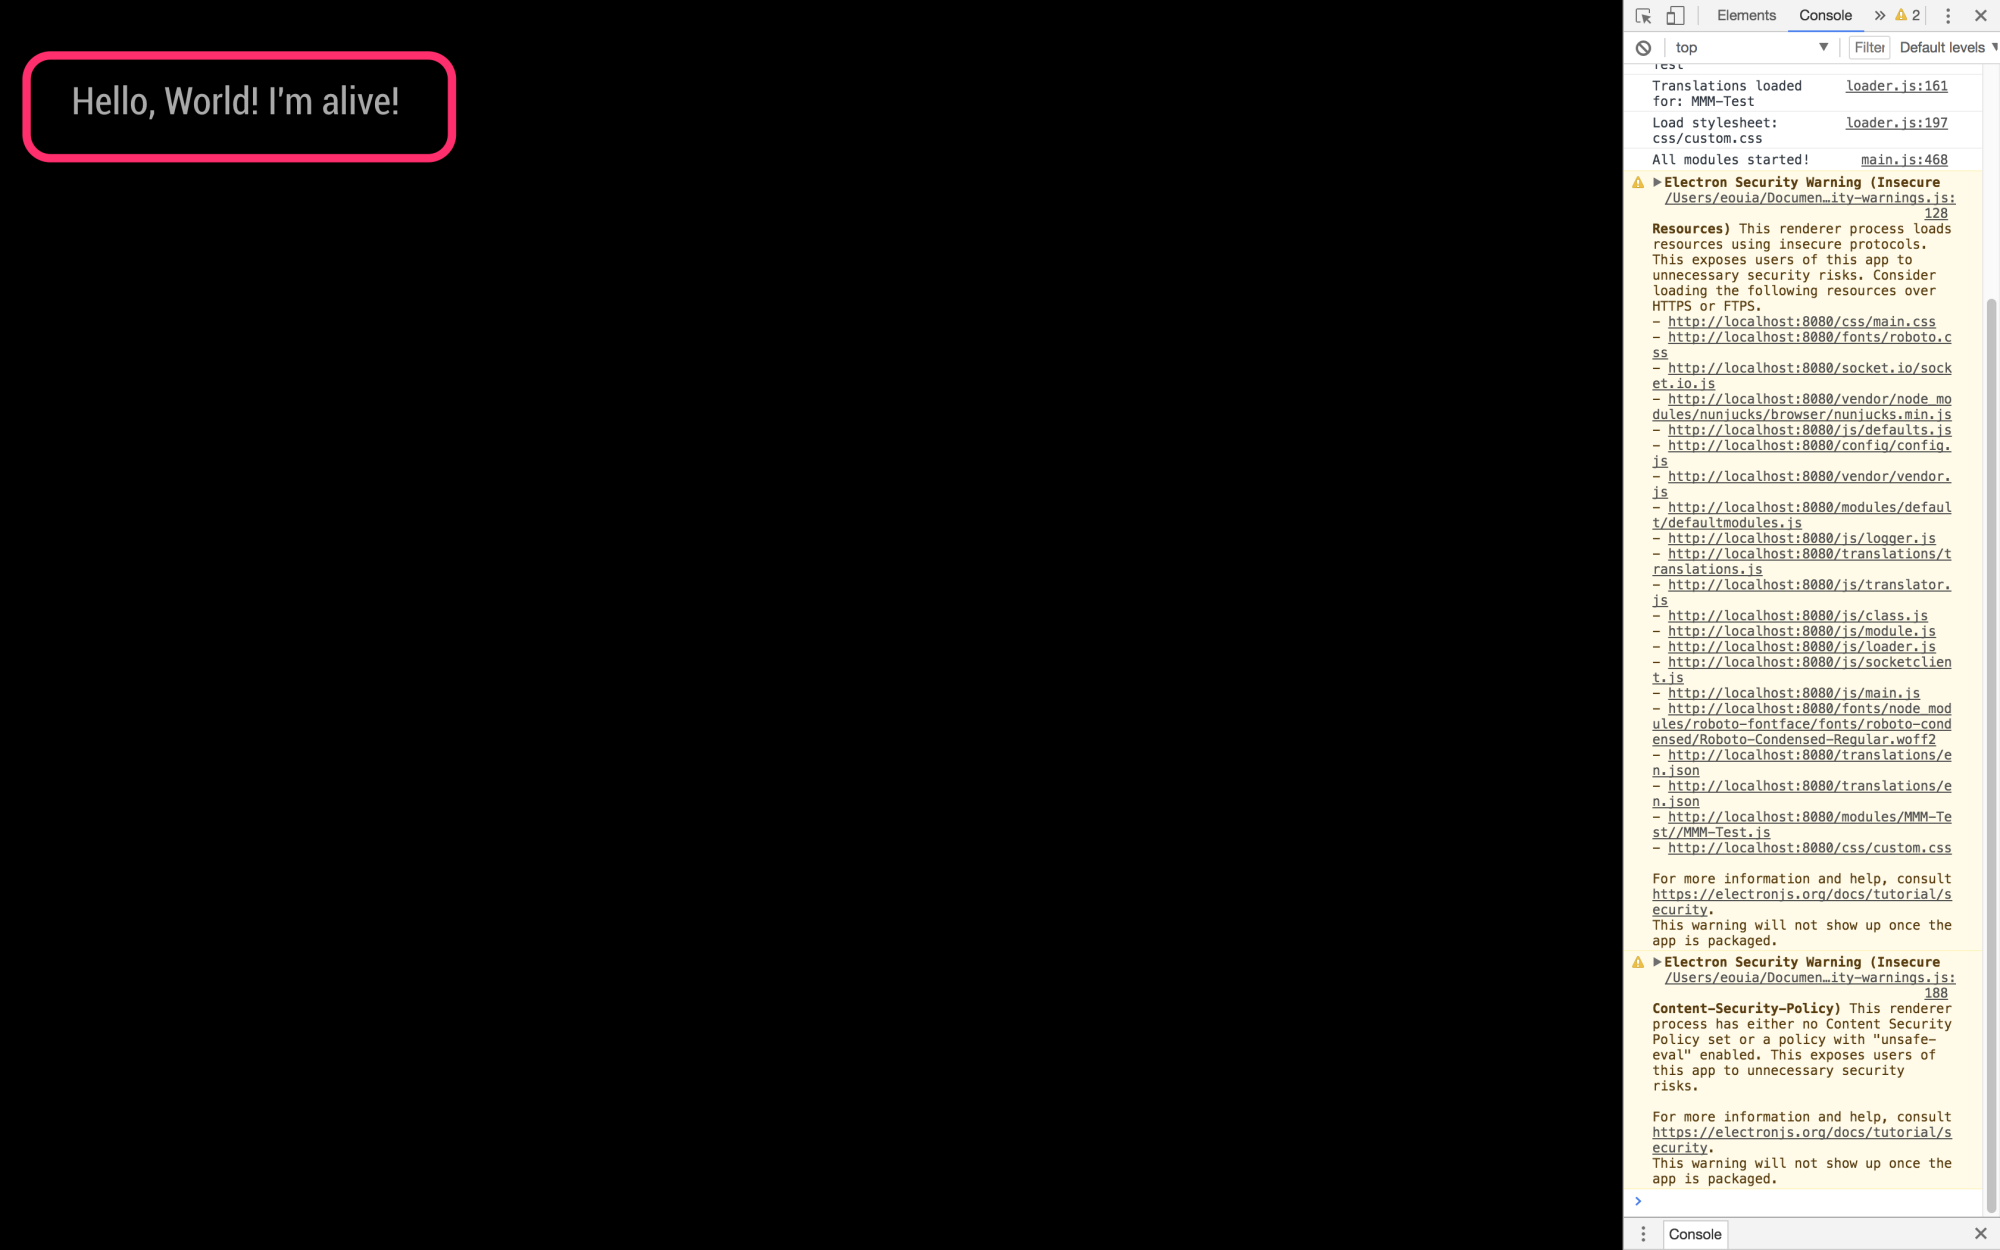
And you can customize configuration values with
config.js
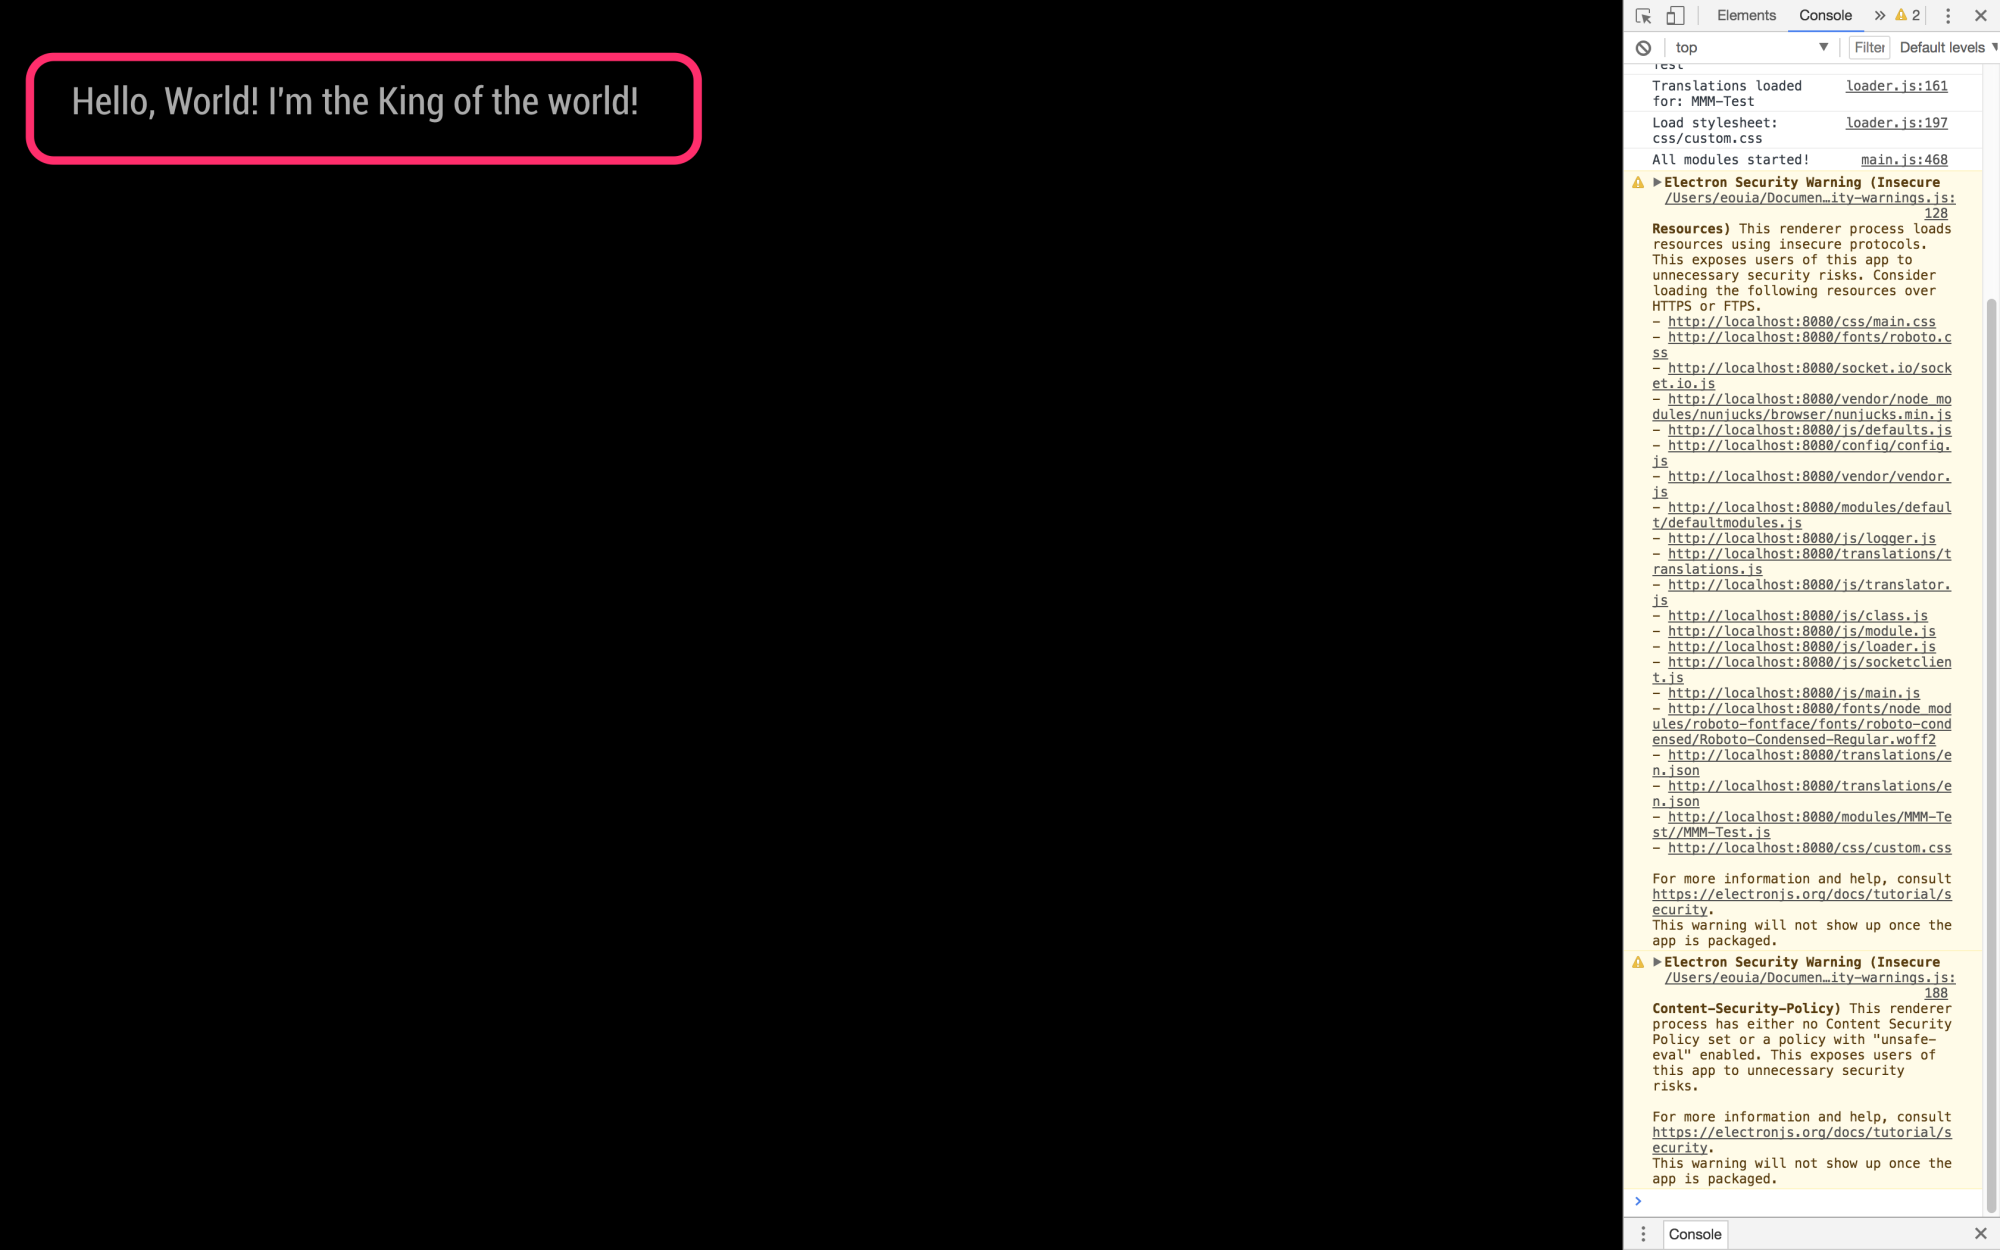
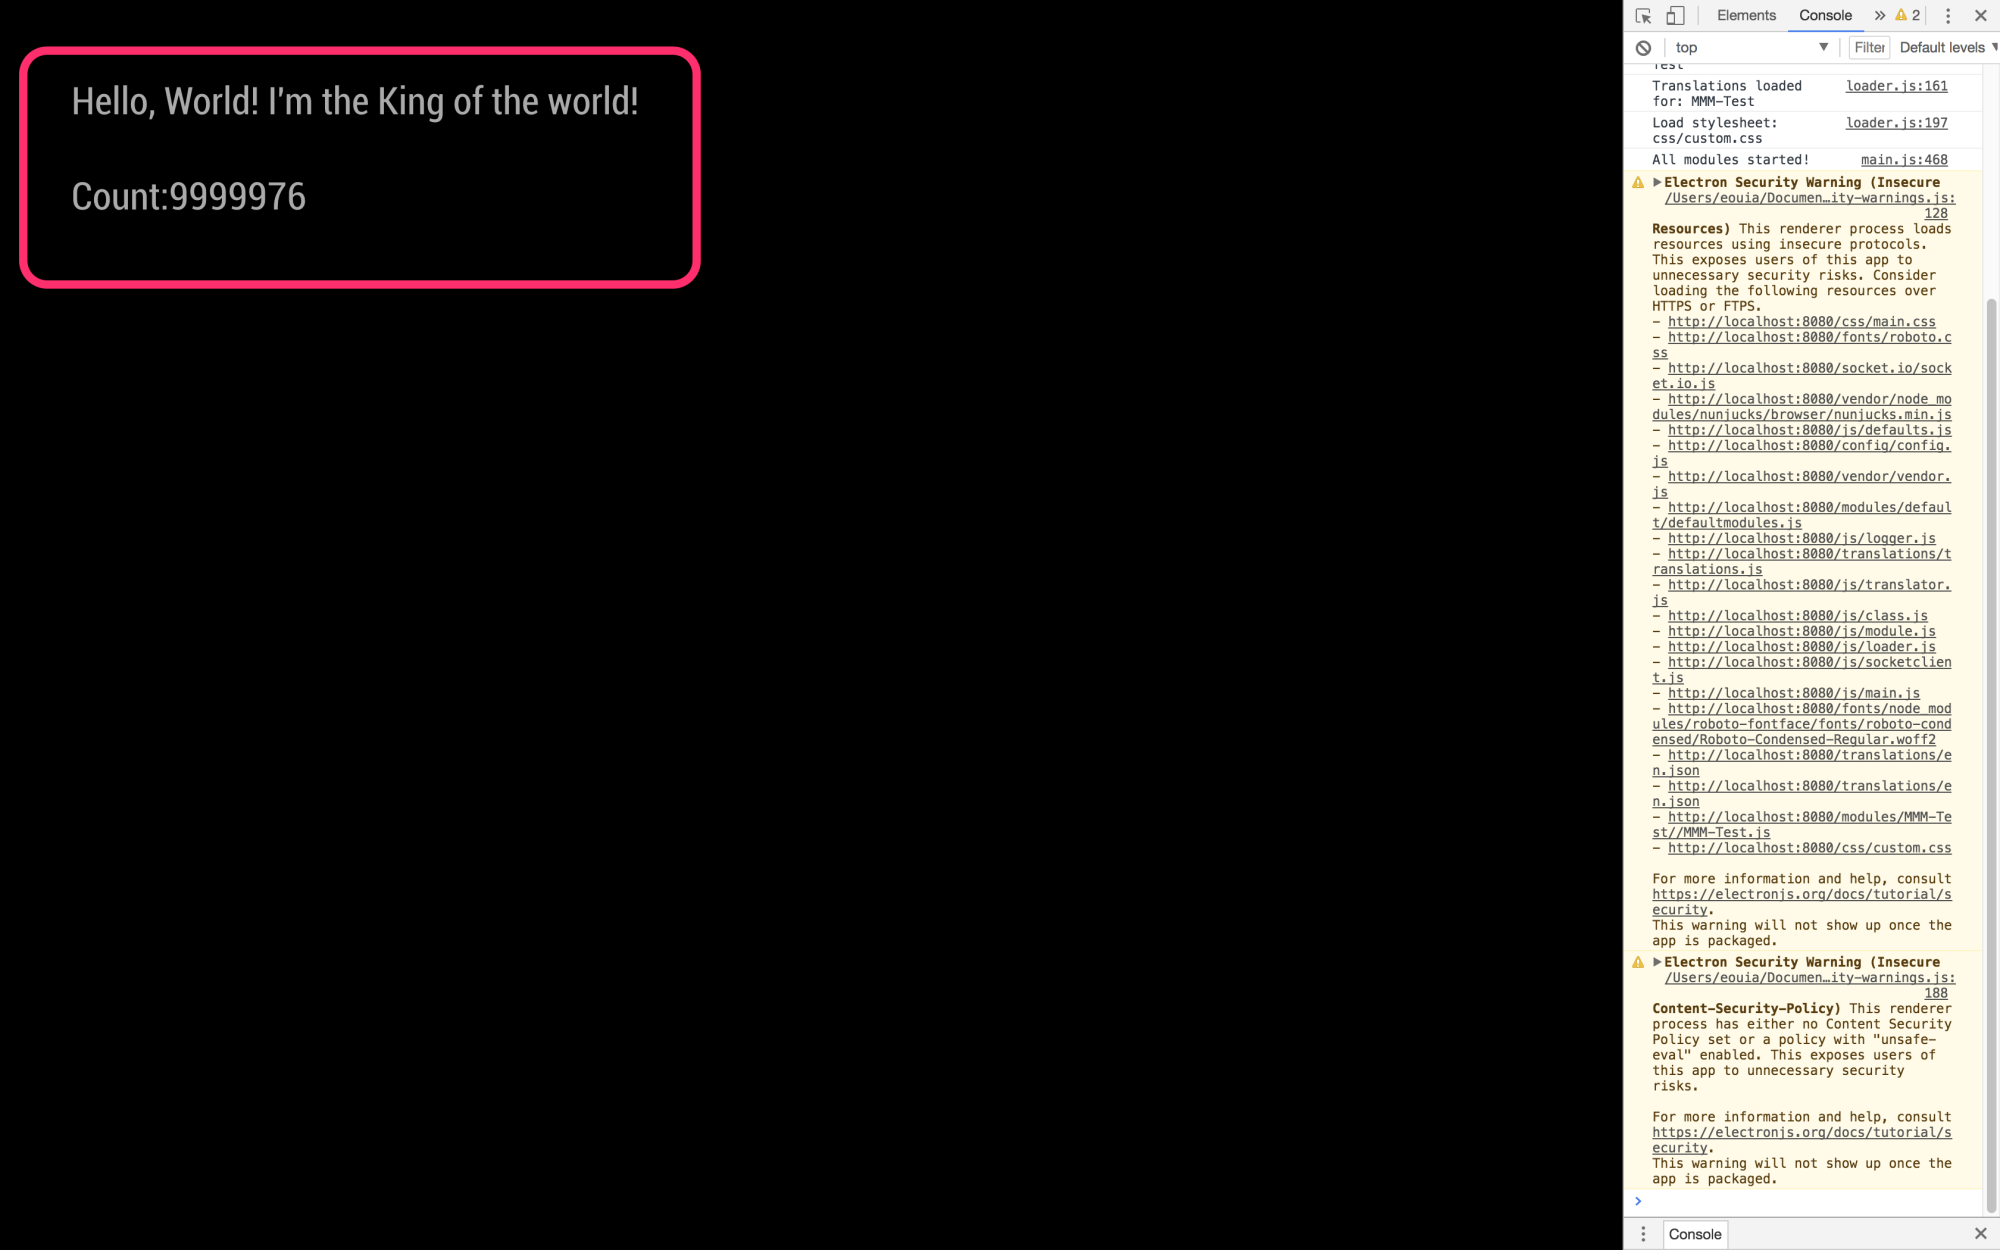
set yourconfig.jslike this;{ module: "MMM-Test", position: "top_left", config: { foo: "I'm the King of the world!" } },The result will be like this;
start() & updateDom()
This function will be executed when your module is loaded successfully.
Let’s change something.start: function (){ this.count = 0 var timer = setInterval(()=>{ this.updateDom() this.count++ }, 1000) }, getDom: function() { var element = document.createElement("div") element.className = "myContent" element.innerHTML = "Hello, World! " + this.config.foo var subElement = document.createElement("p") subElement.innerHTML = "Count:" + this.count subElement.id = "COUNT" element.appendChild(subElement) return element },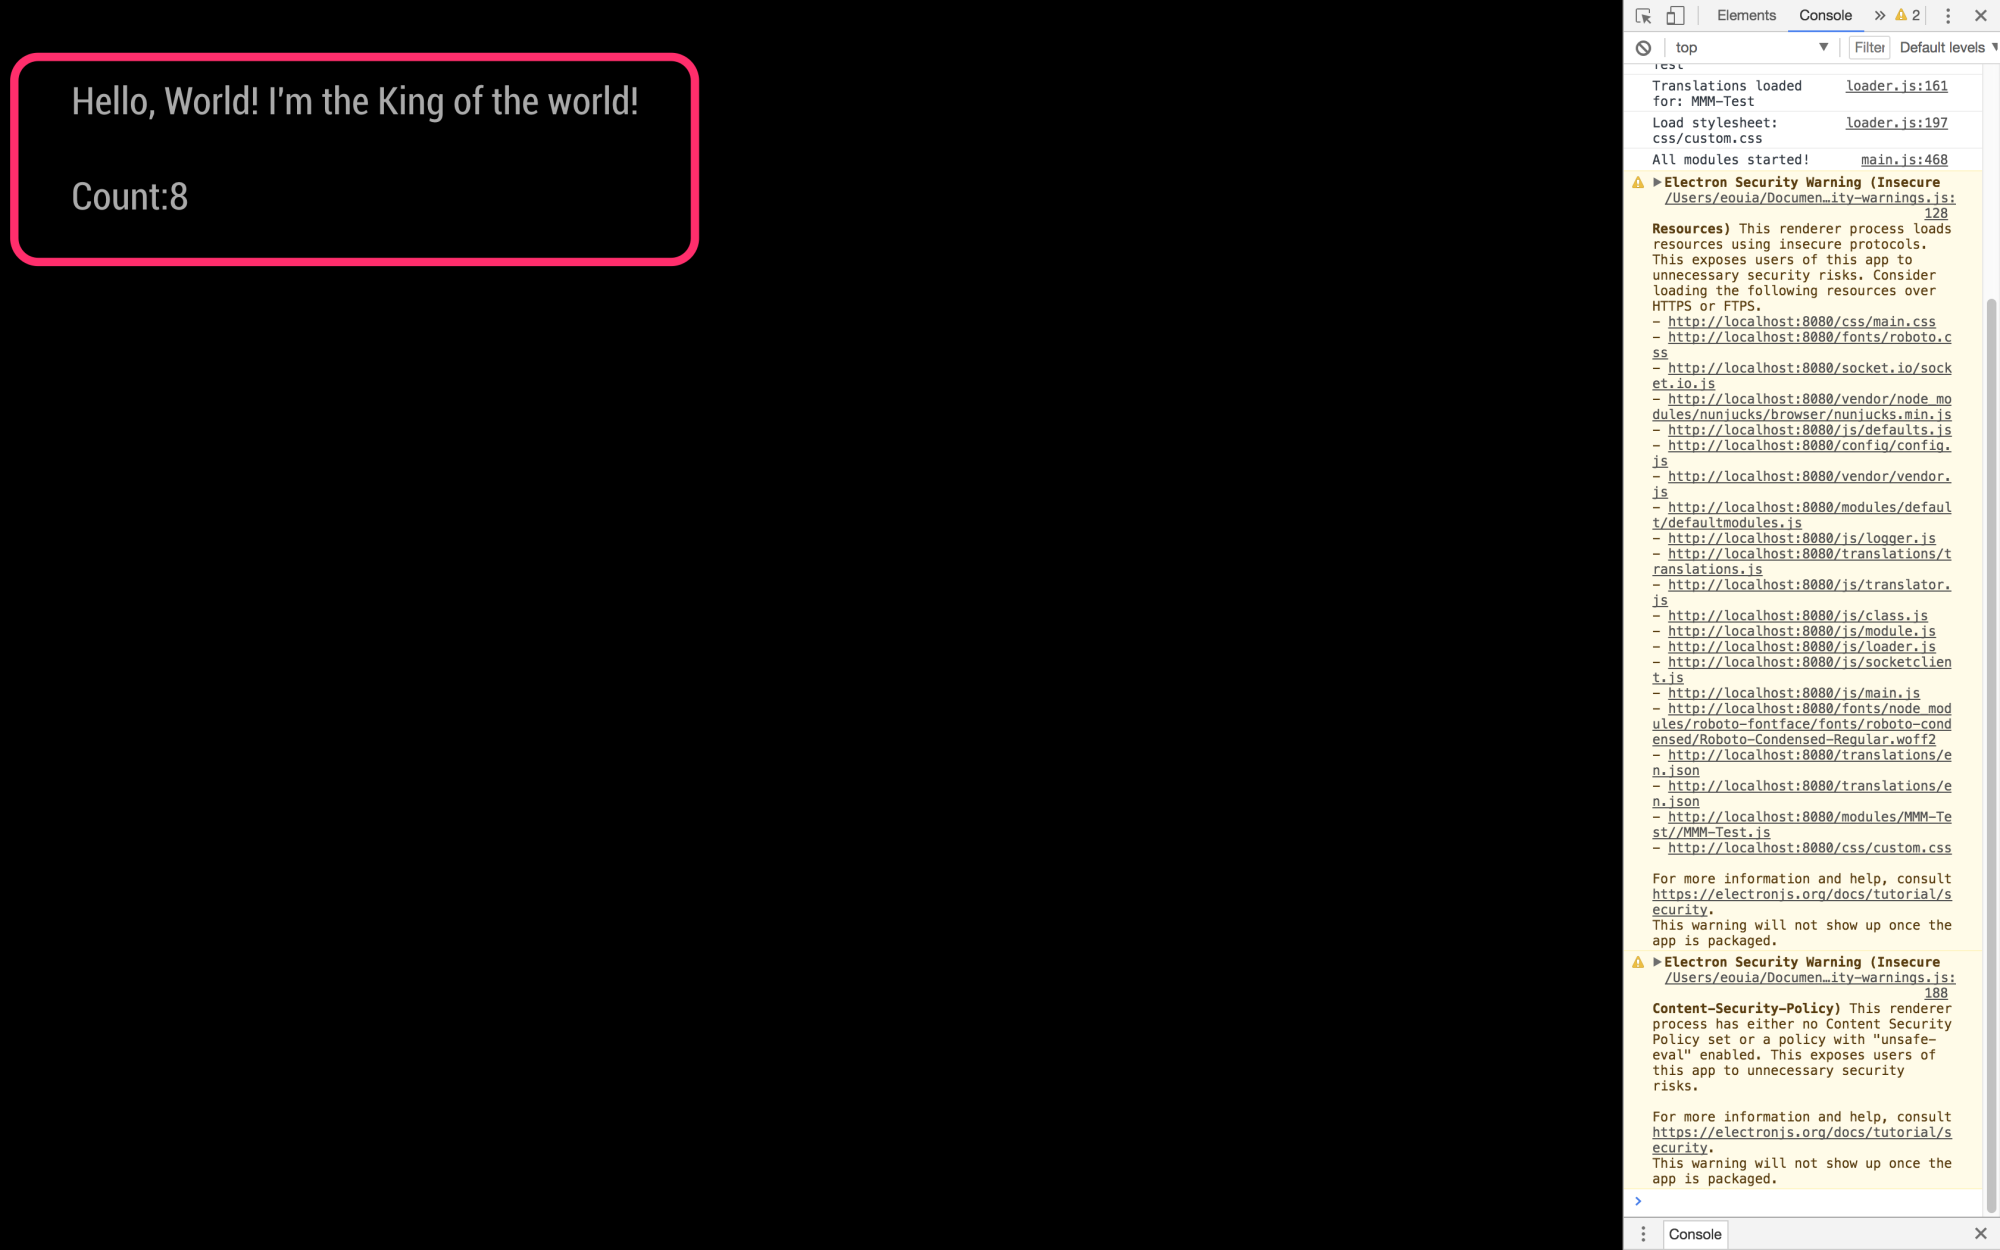
After your module is loaded, your module’s output will be updated per every 1 second.
Whenever you want to update your output, you can call.updateDom()to let MM also call your.getDom()to redraw the output. (Don’t try to callgetDom()directly by yourself. It will not work as your expectation. Rendering is delegated to the MM core.)By the way,
start()is not a good place to control drawing, becausestart()is called before your DOM objects are first rendered. Above code is somewhat bad behavior.notificationReceived()
MM and modules are communicating each other with
notification. Your module can receivenotificationand send it also.start: function (){ this.count = 0 }, getDom: function() { var element = document.createElement("div") element.className = "myContent" element.innerHTML = "Hello, World! " + this.config.foo var subElement = document.createElement("p") subElement.innerHTML = "Count:" + this.count subElement.id = "COUNT" element.appendChild(subElement) return element }, notificationReceived: function(notification, payload, sender) { switch(notification) { case "DOM_OBJECTS_CREATED": var timer = setInterval(()=>{ this.updateDom() this.count++ }, 1000) break } },The result looks so same with previous codes. But your timer will be started after when “DOM_OBJECTS_CREATED” notification is received but not when the module is loaded.
DOM_OBJECTS_CREATEDnotification is emitted when all of modules are loaded and rendered(withgetDom()) first time. At the moment, you can manipulate your output in your module.Another way to control output
Once your DOM is ready(after first calling
getDom()andDOM_OBJECTS_CREATEDnotification is emitted), you can access your DOM with script.notificationReceived: function(notification, payload, sender) { switch(notification) { case "DOM_OBJECTS_CREATED": var timer = setInterval(()=>{ //this.updateDom() var countElm = document.getElementById("COUNT") countElm.innerHTML = "Count:" + this.count this.count++ }, 1000) break } },Instead
updateDom(), direct access to DOM is used.node_helper.js
But your
MMM-Test.jshas some limitation. Because it is run on MM framework and Browser(Electron/Chromium or Midori)
When you need more than what browser can provide, you should usenode_helper.js
By example, yourMMM-Test.jscannot read or write local files by usual way (Of course, there is a hack, but that is not the point at this moment.).
But yournode_helper.jscan. Or when you need to use other variousnode modules,node_helper.jsexists for that purpose.Let’s make
node_helper.jsnano node_helper.jsCopy this code and paste.
var NodeHelper = require("node_helper")

module.exports = NodeHelper.create({
  start: function() {},
  socketNotificationReceived: function() {},
})
This is a default template of
node_helper.js. Now add some codes.var NodeHelper = require("node_helper") module.exports = NodeHelper.create({ start: function() { this.countDown = 10000000 }, socketNotificationReceived: function(notification, payload) { switch(notification) { case "DO_YOUR_JOB": this.sendSocketNotification("I_DID", (this.countDown - payload)) break } }, })Like
MMM-Test.js,start()will be executed whennode_helper.jsis loaded and connected to your module.
BetweenMMM-Test.jsandnode_helper.js,socketNotificationis used for communication. (similar withnotification)
You can getsocketNotificationwithsocketNotificationReceived()and can send it bysendSocketNotification().Then, you should modify
MMM-Test.jsgetDom: function() { var element = document.createElement("div") element.className = "myContent" element.innerHTML = "Hello, World! " + this.config.foo var subElement = document.createElement("p") subElement.id = "COUNT" element.appendChild(subElement) return element }, notificationReceived: function(notification, payload, sender) { switch(notification) { case "DOM_OBJECTS_CREATED": var timer = setInterval(()=>{ this.sendSocketNotification("DO_YOUR_JOB", this.count) this.count++ }, 1000) break } }, socketNotificationReceived: function(notification, payload) { switch(notification) { case "I_DID": var elem = document.getElementById("COUNT") elem.innerHTML = "Count:" + payload break } },Result will be like this;
Now you made your
MMM-Test.jsto work withnode_helper.js
Of course, this is not so good example to show whatnode_helper.jscan do.
But I believe you can understand hownode_helper.jsandMMM-Test.jswork with each other.Well. You’ve learned 90% of how to develop MM module. the remains are described in https://github.com/MichMich/MagicMirror/blob/master/modules/README.md
Good luck to you. -
I cant get the text to appear when I run it, I made the Test.js file in the MagicMirror modules folder and copied in what was posted and put the config in the config.js file but when I run it the screens all black, here’s what happens when I try to run it
pi@raspberrypi:~/MagicMirror/modules $ cd ~/MagicMirror
pi@raspberrypi:~/MagicMirror $ npm start devmagicmirror@2.8.0 start /home/pi/MagicMirror
sh run-start.sh “dev”Starting MagicMirror: v2.8.0
Loading config …
Loading module helpers …
No helper found for module: MMM-Test.
All module helpers loaded.
Starting server on port 8080 …
Server started …
Sockets connected & modules started …
Launching application.
Shutting down server…
pi@raspberrypi:~/MagicMirror $any help would be greatly appreciated I dont see what I’m missing
-
It is because there is an error (at least I think so - I am new too) and no instructions on where to put the function.
-
change the Module.register(“MMM-Timetable”) to Module.register(“MMM-Test”)
-
The article does not tell you where to put the getDom function when it is first introduced. Replace the getDom: function() {}. with the code shown. In other words, don’t just add it to the file. This article would have benefited from a final section that gave the entire code.
I think the original author at least expected us to be very familiar with Node.js (fair enough), but alas, I am not so it took a bit of work to figure it out. :-)
Here it is, for the first part:
Module.register(“MMM-Test”, {
defaults: {},
start: function () {},getDom: function() {
var element = document.createElement(“div”)
element.className = “myContent”
element.innerHTML = “Hello, World!”
return element
},
notificationReceived: function() {},
socketNotificationReceived: function() {},
})
_ -
-
Shame, code is really messed up. Not helpful to use it as a guide to start developing modules.
-
@nrayever see my sample module,
https://github.com/sdetweil/SampleModuleand follow the module developers doc
-
@sdetweil will try it. I don’t have JS experience that is why I have found it difficult to start.
-
@nrayever sorry cant help develop module if u dont know programming and dont want to learn
-
@StuGrunt said in Head first developing MM module for extreme beginners:
It is because there is an error (at least I think so - I am new too) and no instructions on where to put the function.
-
change the Module.register(“MMM-Timetable”) to Module.register(“MMM-Test”)
-
The article does not tell you where to put the getDom function when it is first introduced. Replace the getDom: function() {}. with the code shown. In other words, don’t just add it to the file. This article would have benefited from a final section that gave the entire code.
I think the original author at least expected us to be very familiar with Node.js (fair enough), but alas, I am not so it took a bit of work to figure it out. :-)
Here it is, for the first part:
Module.register(“MMM-Test”, {
defaults: {},
start: function () {},getDom: function() {
var element = document.createElement(“div”)
element.className = “myContent”
element.innerHTML = “Hello, World!”
return element
},
notificationReceived: function() {},
socketNotificationReceived: function() {},
})
_Both of those functions go outside the getDom function pretty much anywhere you want to put them.
The socketNotificationReceived function [example below, can be used in either node_helper OR your main.js file. The example below is in my node_helper] :
socketNotificationReceived: function(notification, payload) {
		if (notification === 'CONFIG') {
            this.config = payload;
        }
        if (notification === 'GET_CURRENT') {
            this.getCurrent(payload);
        }
        if (notification === 'GET_FORECAST') {
            if (this.forecast.timestamp === this.getDate() && this.forecast.data !== null) {
                this.sendSocketNotification('FORECAST_RESULT', this.forecast.data);
                console.log("Using data we already have");
            } else {
                this.getForecast();
				console.log("Getting new data");
            }
        }

    }
Here is the corresponding one in the main.js
socketNotificationReceived: function(notification, payload) {
        if (notification === "CURRENT_RESULT") {
            this.processCurrent(payload);
        }
        if (notification === "FORECAST_RESULT") {
            this.processForecasts(payload);
        }
		this.updateDom(this.config.initialLoadDelay);
    },
You can use notificationReceived to receive info from other modules like this:
Here are examples of that:
notificationReceived: function (notification, payload){
        if (notification === 'CURRENT_RESULT') {
			this.processCurrent(payload);
        }
	},
this.sendNotification('CURRENT_RESULT', payload);This is how I send and receive my ‘payload’ from one module to another.
The first example is getting my ‘CURRENT_RESULT’ [getting info for a Forecast module from the Current weather module] from the bottom example that is
sending out ‘CURRENT_RESULT’…The bottom example will ‘broadcast’ and in reality ANY module can get the data it’s sending out.
Hope this helps. It’s a really simple process.
-
-
How can I test the getDom() html output?
I don’t want to restart MM every time when I change something just to look if it worked. -
@Schmaniel ctrl-r to reload the screen
-
@sdetweil … ok.
-
Hey guys,
I’m quite new in developing an own module. I was able to change exiting modules on my magic mirror but now I wanted to create my own module, but I’m not able to get socket communication between my “main” module an the “helper-function”
I uploaded my module here:
https://github.com/Dobherrmann/MMM_Testmodul.git
my Module looks like this on my magic mirror:

maybe someone can find my mistake(s).BR
-
@dobi two things
when the DomObject Created method is called, its POSSIBLE that the elements are not yet accessible… so your code fails as the document.getElementbyID returns null…
second, do you have a position: set in the module def in config.js?
third and MOST important
the module NAME must match the folder name AND the filename and the register in the file…
so, the filename is MMM-cookbook.js
therefore ALL the things must be called MMM-cookbookgit clone will name the folder the name of the github repo
(unless u add an extra part to git clone repo_url output_folder_name)I fixed all those and the module displays the countdown/up each second
-
@sdetweil ahh thank you for these information I will give it a try.
-
@sdetweil I gave it a try but without differences :(
I made a new git repo : https://github.com/Dobherrmann/MMM-cookbook.git
Now there I should have the same name in the repo like my module.my config. js looks like this (I gave it a position):
 {
      module: "MMM-cookbook",
      position: "middle_center",
      config: {
        header: "My Cookbook",
        foo: "I'm the King of the world!"
      }
    },
I started to debug “my code” a little bit and I found this when I want to send a socket notification:
self.sendSocketNotification("DO_YOUR_JOB", this.count);
					console.log("Notfication", this.sendSocketNotification("DO_YOUR_JOB", this.count))
					this.sendSocketNotification("DO_YOUR_JOB", this.count)
					this.subElementUp.innerHTML = "Count UP:" + this.count
On my console i get the feedback that “this.sendSocketNotification(“DO_YOUR_JOB”, this.count” is undefined. It looks like that this function is unkown.
-
@dobi u are inside a callback. change the ‘this’ to ‘self’ like the self.sendSocketNotification
‘this’ is always tricky. depends on the context, and some of the programming idioms used
that’s why we typically see
var self = this;
at the beginning of functions that have callbacks or .then() used inside -
@sdetweil ok, but it dosen’t change something.
notificationReceived: function (notification, payload, sender) {
		self = this;
		switch (notification) {
			case "DOM_OBJECTS_CREATED":
				var timer = setInterval(() => {
					//this.updateDom()
					self.sendSocketNotification("DO_YOUR_JOB", this.count);
					console.log(`self.sendSocketNotification("DO_YOUR_JOB", this.count)`, self.sendSocketNotification("DO_YOUR_JOB", this.count))
					self.sendSocketNotification("DO_YOUR_JOB", this.count)
					this.subElementUp.innerHTML = "Count UP:" + this.count
					this.count++
				}, 1000)
				break
		}
	},
Now i could post a picture of my console

-
@dobi show the source code page. u had to fix both counters
sources tab, modules, mmm-cookbook, mmm-cookbook.js
-
self.sendSocketNotification("DO_YOUR_JOB", this.count)but u didn’t change this.count to self.count
in all the places -
@sdetweil I replaced all this. … calls to self. … but I don’t get a change. Is there a way that I can check to check that I can check that the function is loaded correctly from the kernal?
Hello! It looks like you're interested in this conversation, but you don't have an account yet.
Getting fed up of having to scroll through the same posts each visit? When you register for an account, you'll always come back to exactly where you were before, and choose to be notified of new replies (either via email, or push notification). You'll also be able to save bookmarks and upvote posts to show your appreciation to other community members.
With your input, this post could be even better 💗
Register Login