Read the statement by Michael Teeuw here.
Magic Mirror @ Munich
-
Basically I rebuilt our Magic Mirror monitor in a very similar way like @MichMich. I did order the same 24" monitor at Amazon (thanks to @MichMich for the great instruction). The installation of the software on the raspi3 was really simple and showed great results on a test monitor.
What I could not imagine that it was nearly a nightmare to get a spy glass at a local glacier in Munich, however after many mails and phone calls, I was able to find a local glacier. (More details on this part of the story here.
As promised in this separate thread here are some pictures of my MagicMirror.
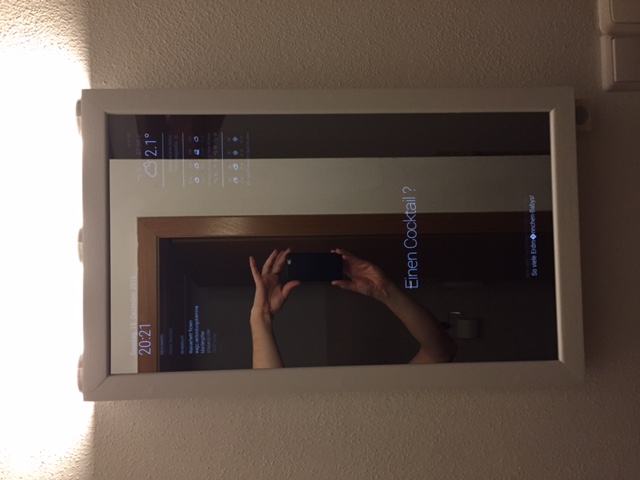
Let us start with the final result, and I am more than happy with it, the wife acceptance factor is great as well and especially my nine year old boy loves it, since he helped to do a lot of the assembly stuff together with me :).

You can see at the right bottom a small IR sensor, since I do not have a 3D printer, I have sawn the casing yesterday manually, it still needs to be painted, currently I am testing it and trying to get the module running.
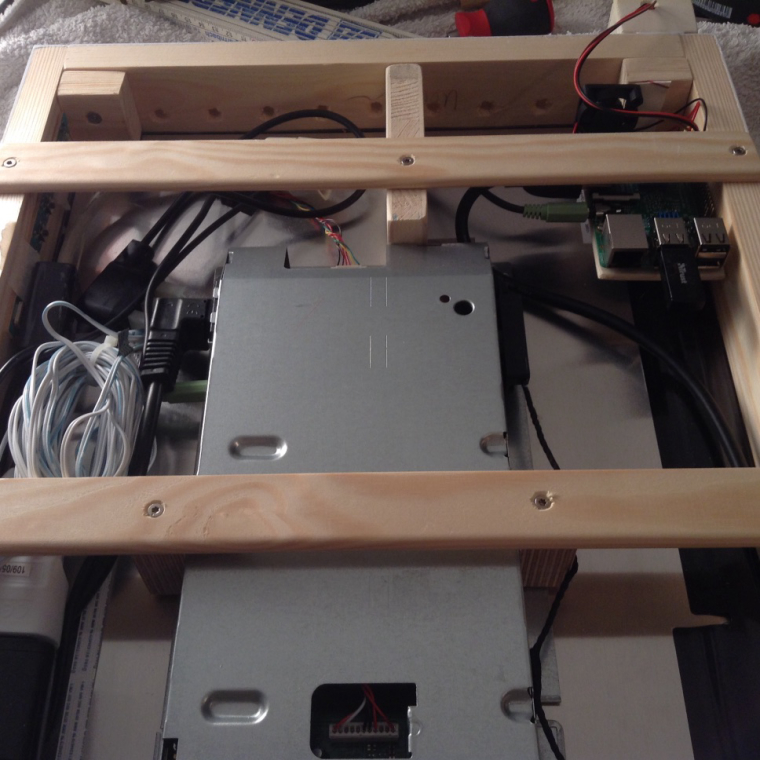
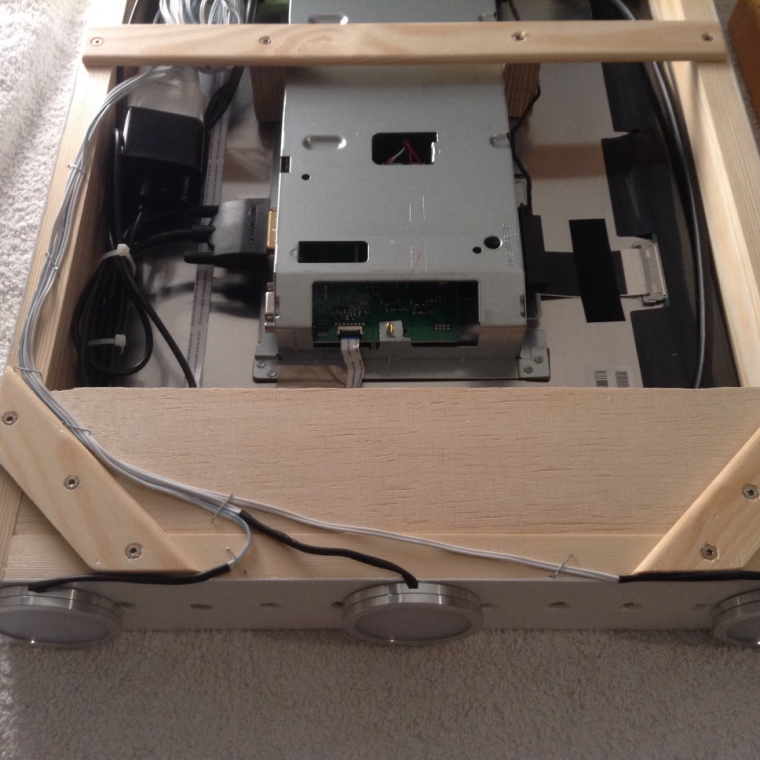
What I did differently is the way to mount the mirror. I am using two pieces of wood cut in 45° angle enforcing a direct fit and very reliable and stable mounting position of the MagicMirror. Details you can see in the following pictures. Note: If you are wondering about the power supply, I simply drilled a hole through the wall, since a power plug was much nearer that at the mounting position.


The interior looks like this:

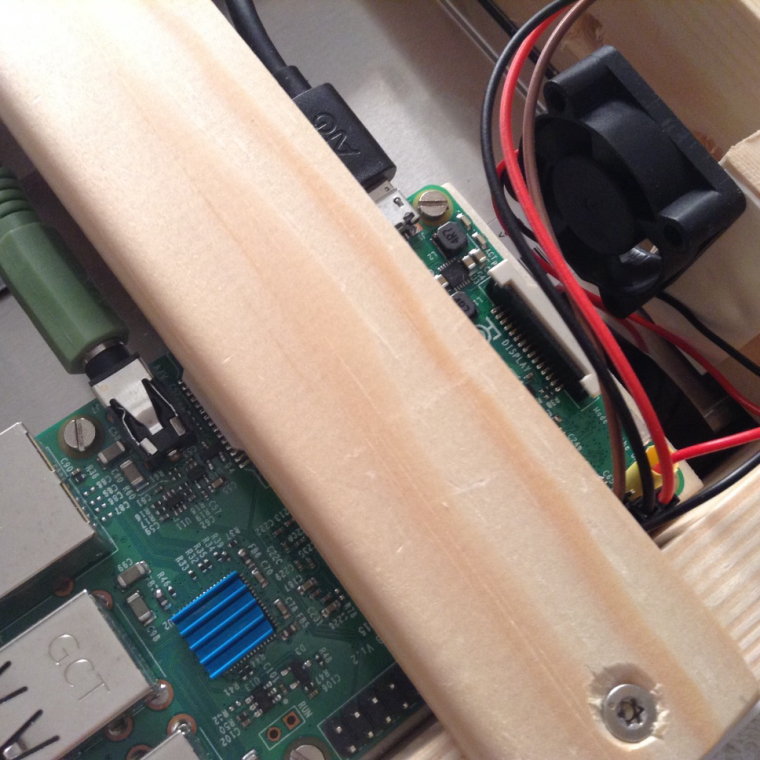
There is one thing I am unsure about. I have noticed that the controller unit (inverter/ controller) of the monitor has slightly shifted. Maybe I “pressed” the HDMI cable too much and therefore it got dislocated. You can see this in the last picture.
Did anyone of you observe this as well ? I am considering to stabilize it again mechanically by construction something in wood.In case you have questions do not hesitate :).
Regards
Stefan -
Looks great, good job Stefan.
-
Great job!
Can you tell me which modules you are using? e.g. which weather modul and so on… :)
Thanks -
Following modules are currently used:
MMM-PIR-Sensor
MMM-Wunderlist
MMM-WunderGround
clock
calendar referring to my personal google calendar
compliments
newsfeed referring to the rss of Sueddeutsche ZeitungThat´s it.
I am thinking of implementing additionally some picture slide show for my kids, however firstly I have to get the PIR running, currently the PIR is correctly detecting, however not yet switching off my hdmi, that is something I have to work on… -
Some enhancements done in the meanwhile:
a) The CPU temperature was always above 60°C so I added two heatsinks and one small ventilator. Since then my CPU temperature is always below 50°C (mostly around 40-44 °C).
b) I did ask in my first post whether someone had the problem that the inverter of the monitor did move. Well, in my case I did have this problem, so added some wooden holders to ensure that the inverter stays at the place intended to be.
c) In the area where I mounted the mirror on the wall it is even during daylight quite dark. So the mirror did not really show its intended mirror effect. In order to get more light directly in the area of the mirror I mounted 3 LED spots on top of the mirror. Now I do have extremely good conditions. :)
View of the 3 LED spots:
View with the LED spots in operation:
-
How did you guys manage to change the greeting? That has been giving me trouble lately.
-
-
Nice work done. Your idea with the LEDs is pretty cool.
-
@Steff said in Magic Mirror @ Munich:
There is one thing I am unsure about. I have noticed that the controller unit (inverter/ controller) of the monitor has slightly shifted. Maybe I “pressed” the HDMI cable too much and therefore it got dislocated. You can see this in the last picture.
Hi all,
I encountered the same thing with my Viewsonic. It appears, the Controller units arent’t riveted or bolted (or even glued) to the backpanel. They are just taped together with a silverisch tape. My Monitor has a VESA-Mount at the back, so I thought of bolting the wonitor to the wall with a slim VESA-Mount - which worked for 12hours, then the panel fell off - fortunatetly everything is still working.
So I’m thinking - either you have to tape it more thoroughly or use a two-component metal glue for a stable compound.In my case, I’m making a provisionary case with wood also, which holds the Monitor - and I’m not using the VESA-Mount anymore.
Hello! It looks like you're interested in this conversation, but you don't have an account yet.
Getting fed up of having to scroll through the same posts each visit? When you register for an account, you'll always come back to exactly where you were before, and choose to be notified of new replies (either via email, or push notification). You'll also be able to save bookmarks and upvote posts to show your appreciation to other community members.
With your input, this post could be even better 💗
Register Login