Read the statement by Michael Teeuw here.
MagicMirror 150x70x2.5 Slim
-
Hi,
after quite some time of work and brainstorming my MagicMirror is finished now:
I have installed the following parts:
Benq GL2450 - 24 Inch Monitor
Raspberry 2
microwave sensor rcwl-0516Comments:
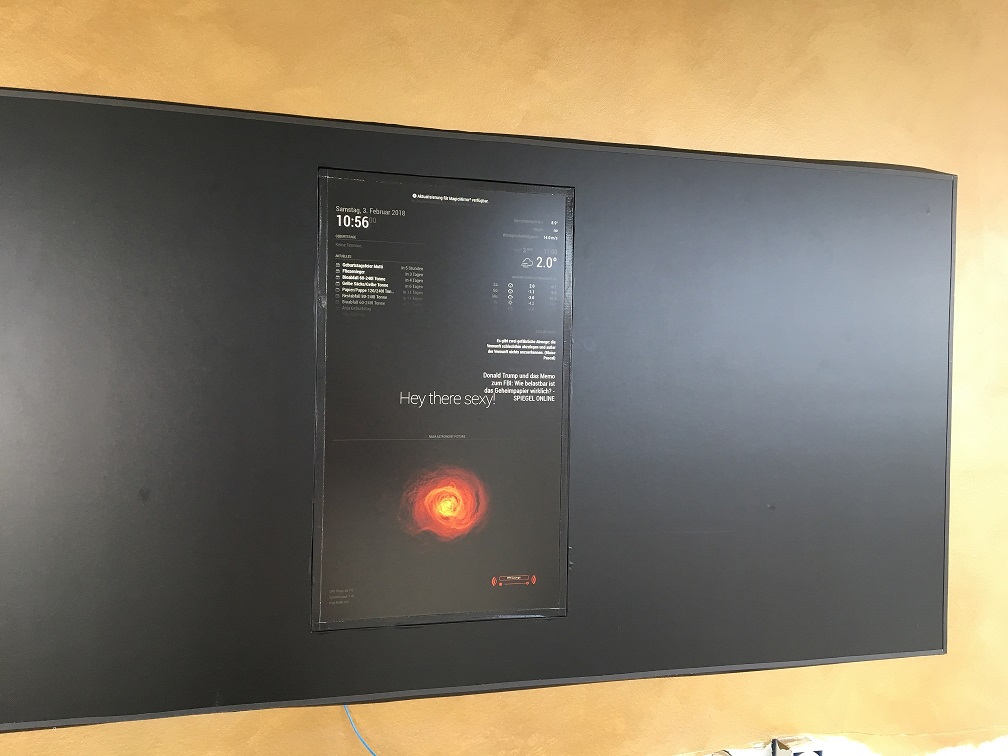
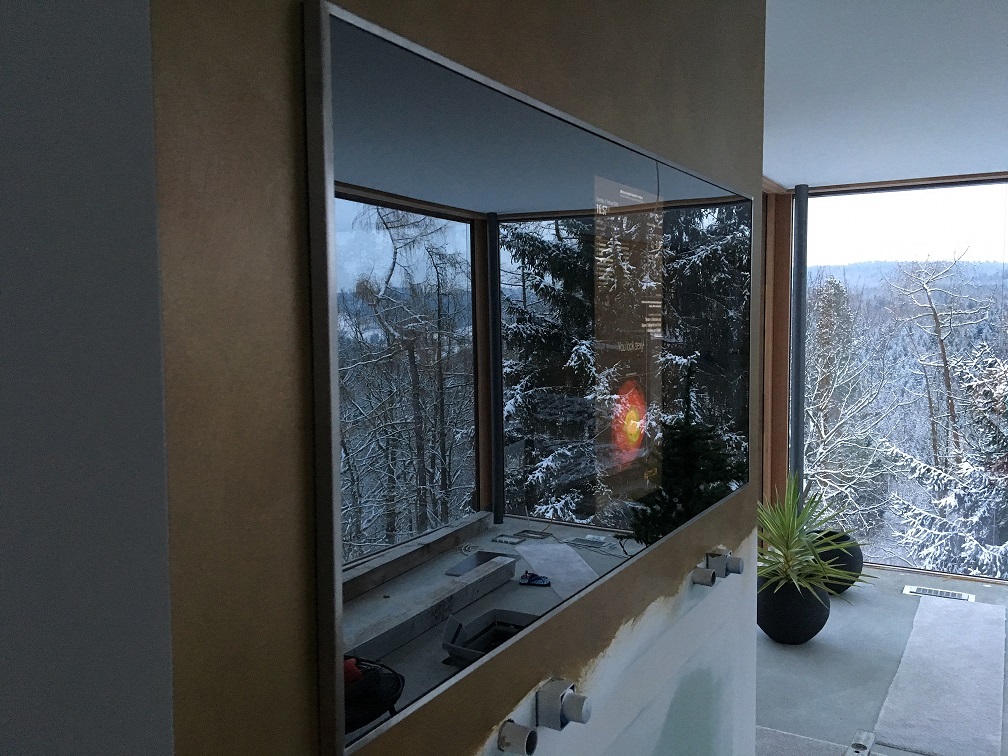
- The mirror switches on/off using the MMM-PIR-Sensor module, as the microwave sensor is very sensitive I still need to add some absorbing material to reduce 360 degree detection to maybe 180 degree.
- as the monitor is mounted vertically the view angle in that direction is wide enough, it is ok for the Benq but could be better
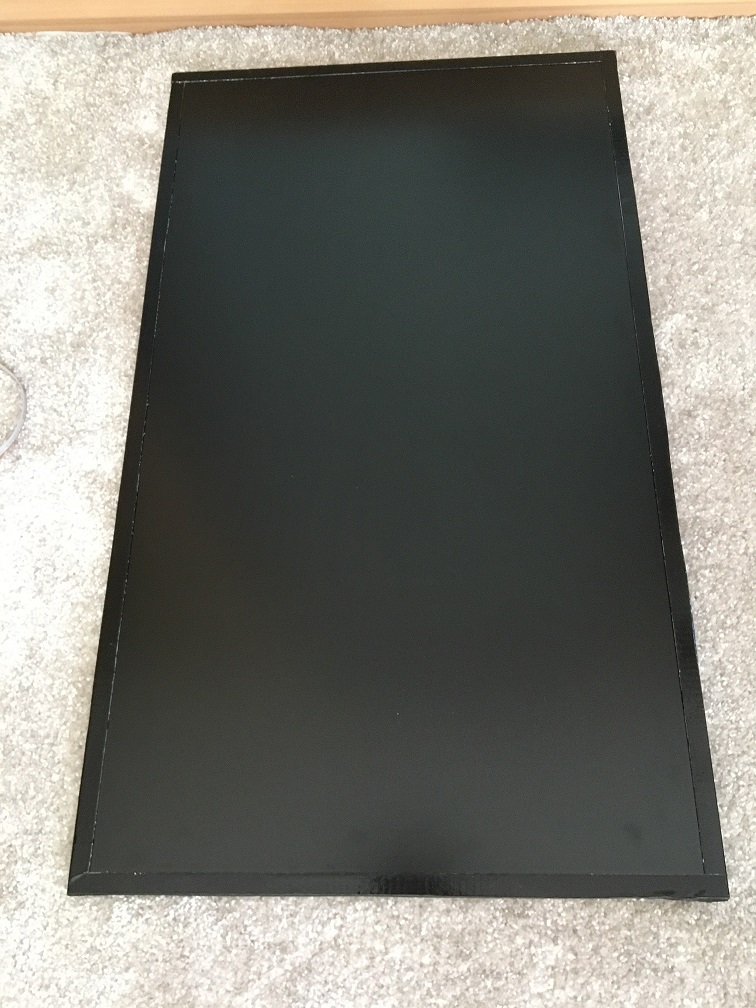
- for the backside of the mirror I used Film Coated Plywood
- to have a perfect background I used black matted car wrap
- the metal edges of the monitor I covered with some standard wrap, during the first functional test I discovered that this wrap was shining through so I had to redo that using the matted car wrap as well
- furthermore it is absolutely essential that the backside of the mirror itself is 100% clean and free of streaks
- to attach the glas to the plywood I used 5mm double sided adhesive mirror tape - believe me that is strong enough, considering the point before I had detach the mirror once to clean it once again an getting it off and removing all the glue remains was painfull
- above the mirror i will install an lamp (150cm as well)
- the lamp will be switched on using a touch switch which is connected to the metal frame of the mirror
cost:
- mirror 400€
- metal frame 130€
- monitor 90€
- Film Coated Plywood 50€
- 5mm double sided adhesive mirror tape 10€
- car wrap 20€
- raspberry + material around 50€
Total: 750€
Any comments are very welcome :)
Regards, F.
-
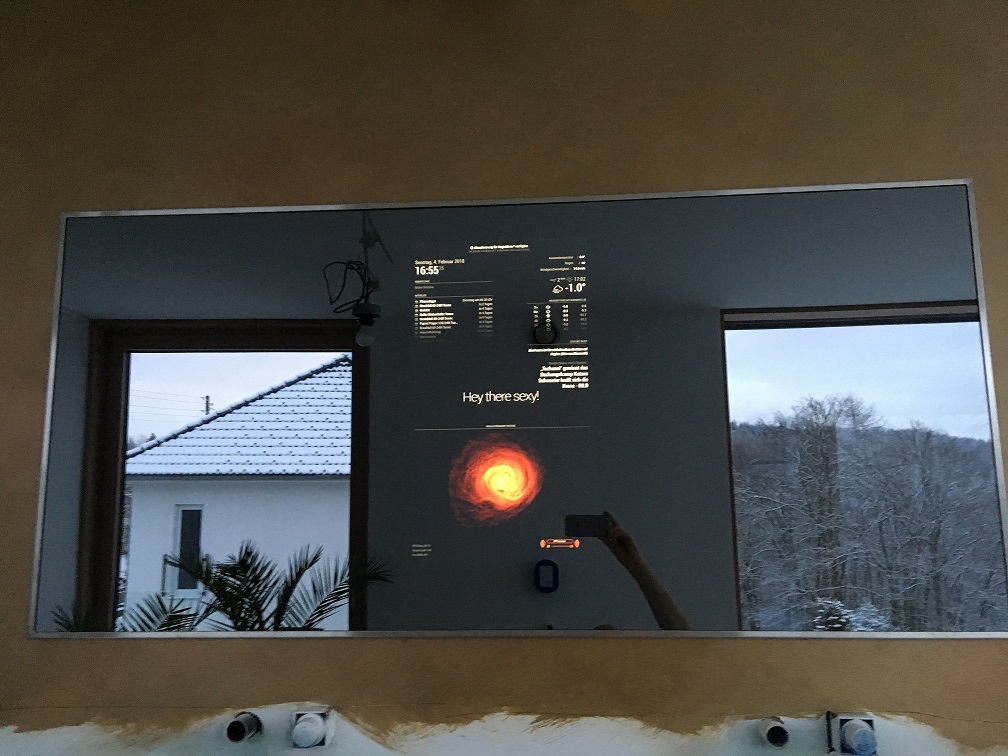
Interesting mirror concept. What are the outlets underneath the mirror used for? Is this a bathroom?
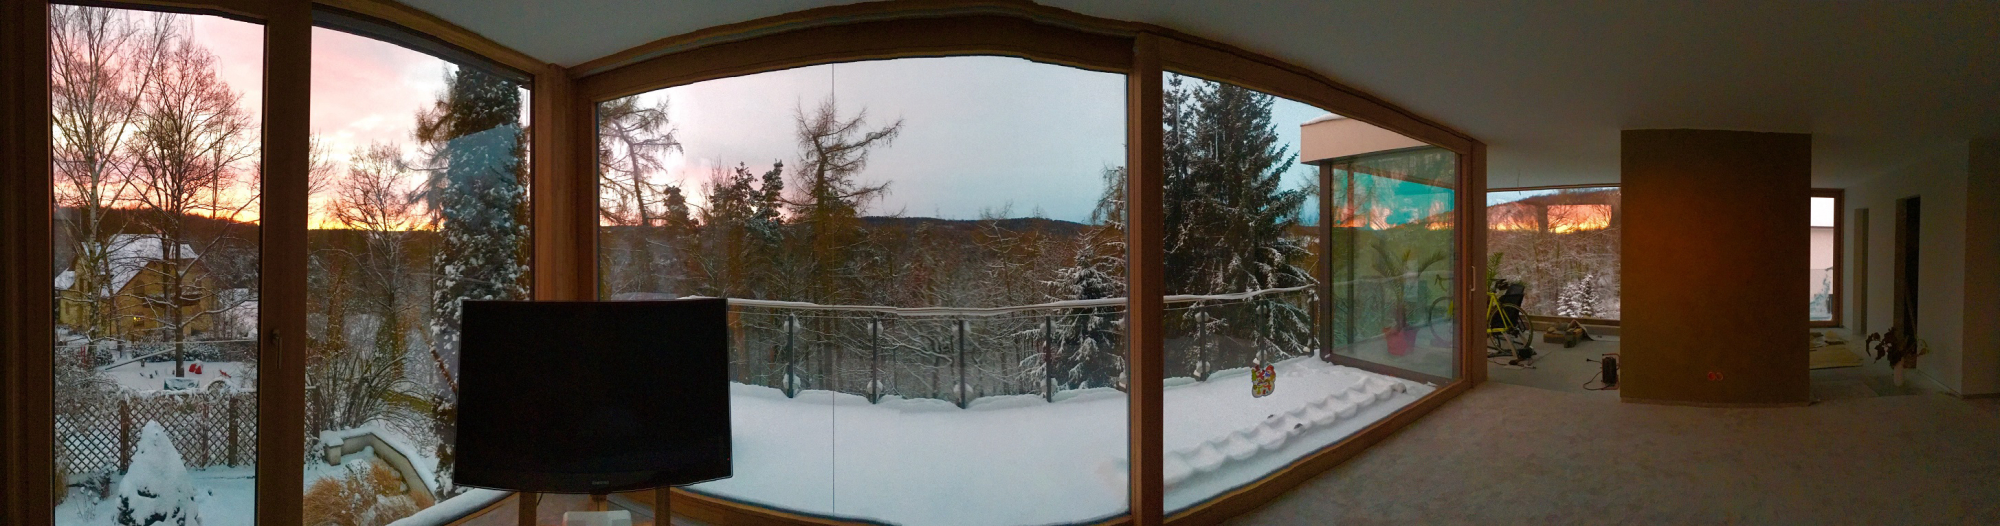
I have to admit the view out of these huge windows looks stunning :) -
looks awesome. is that the mirror I supplied? :)
-
@yawns: You are right it is the bathroom right to the master bedroom. The outlets are for the faucets :) The view is really great. Just for you another picture ;)
@Goldjunge_Chriz: Indeed it is the one you have delivered. Took a while to finish it. It was difficult to find someone who could build the frame because there are no L-profiles that did match my requirements.
-
Ok, now I am officially jealous. I can imagine it’s a dream just sitting there staring outside when the sun goes down. Or ride the bicycle on its stand.
Very nice!
-
That is beautiful. Well done.
-
How do you implement using a touch switch which is connected to the metal frame of the mirror? Any tips or instructions?
-
@goprojojo Hi, it is just a touch switch (search for it on Amazon). There is one wire that switches a relais once you touch it. You may know it from desk lamps. If you touch a metal part of the lamp you can switch it on or off.
-
Super build ecspecialy the thin metal bezel and the total thickness of 2.5cm
Could you post More building pictures and details. I’m looking for something to build like yours 😃 -
Hi MarkV,
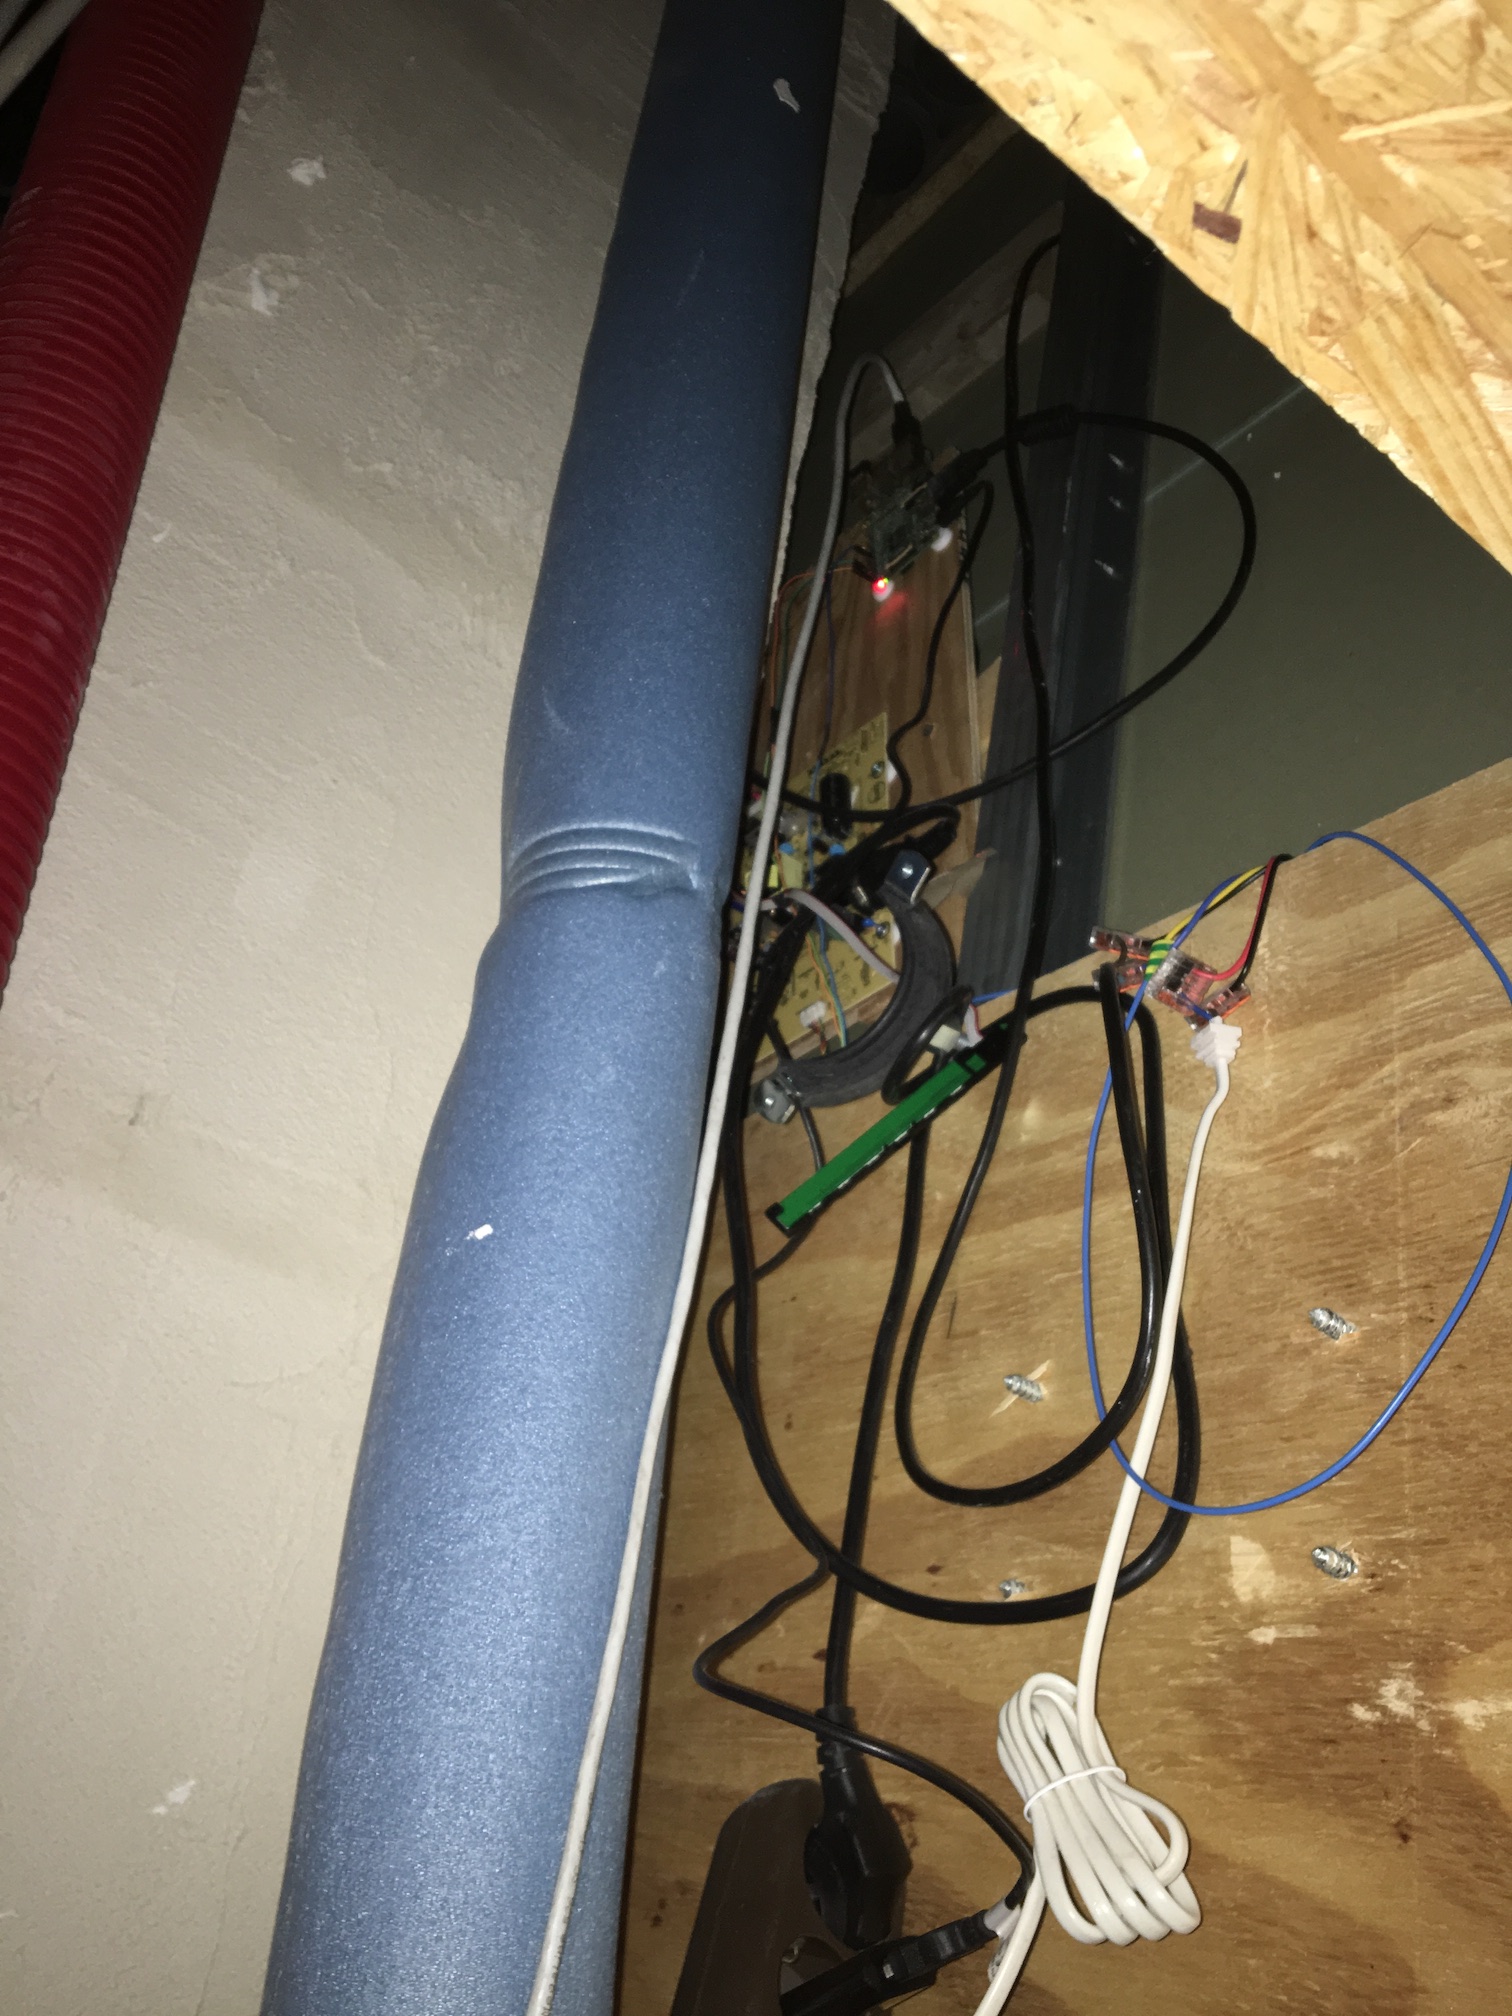
what exactly are you looking for? If you have questions about the project just let me know. The wall behind the mirror is a dry construction with space behind where I put all electronic parts (currently just quick and dirty :D ). The plywood is mounted just with screws and some small distance rings to the wall. That is as well an advantage as the mirror cannot fall down and stays small as well it is an disadvantage as it is not easy to demount it (for instance if the monitor has some defect).
The original plan was using some hangers to mount it. I skipped after ordering the frame because it would have been quite challenging to mount it. 5mm I had calculated for that. So behind the mirror I currently have 5mm space which might be good for ventilation.
If I would build a new one I probably would take such a hanger:
regards F.
-
This looks fantastic! Congratulations.
I’m thinking about making my own magic mirror too and I’ve found BENQ GL2450 monitor and relatively cheap price.However, I have a question that I hope you can give me a few pointers on. How did you manage to get the big backside of the mirror to be so slim? The monitor itself has a large panel in the back, how did you place the back panel boards to make it this slim?
Hope you can help me out by answering. A picture of the backside of the panel would be awesome, if you can take one.
-
Excellent work. I’m still nervous about the mirror tape adhesive, but to my knowledge nobody has had a problem with the frameless mirrors.
It looks great!
-
a quick question…if it’s used in the bathroom, does it need to be waterproofed? Wouldn’t the inside fog up if you’re taking a hot shower?
@bhepler if it’s not a big mirror, adhesive wouldn’t be a big problem unless you live in a place with lots of vibration going on. also it should always be supported at the bottom because just because the adhesive can withstand pulling force, it’s often the downward sliding force of gravity that makes it drop.
-
Hi all,
sorry for my late response. I was quite busy during the last weeks.
@Snowflake: You can completely disassamble the monitor. The connectors are long enough so that I could mount everything on the backside of the wall. It would also be possible to replace the cables and use longer ones I think. Attached a quick shot. Quick an dirty right now :D
@albertlwj: I don´t know the size of your bathroom. We do not have problems with fog maybe also due to our ventilation system. There is also not much space between wall and mirror so that it is very unlikely that water ever will be a problem.
@bhepler: The tape shouldn´t be a problem (see the comment section in my first post :) )
-
@albertlwj liquid nails… not only waterproof, but a great sealer and will hold just about anything if you let it cure long enough. I always double or triple what the directions say… ie: if says to allow to cure for 24 hours, I would most likely give it 72 hours. Also a good seal has no gaps in the glue strip. And most likely, the heat of the monitor will keep the mirror from fogging over.
Hello! It looks like you're interested in this conversation, but you don't have an account yet.
Getting fed up of having to scroll through the same posts each visit? When you register for an account, you'll always come back to exactly where you were before, and choose to be notified of new replies (either via email, or push notification). You'll also be able to save bookmarks and upvote posts to show your appreciation to other community members.
With your input, this post could be even better 💗
Register Login