Read the statement by Michael Teeuw here.
My living room magic mirror
-
Hello everyone! There’s some truly ingenious work presented here! I wish I’d taken a closer look at all your projects before embarking on mine, because there’s some very clever solutions to problems that I wish I’d seen earlier! Here’s my build write up. Hope it helps inspire other people to give it a try!
February 2017’s issue of The MagPi magazine (issue 54) caught my eye in a supermarket, because it featured a ‘magic mirror’ build project. I thought it was a great idea, and since I had a couple of Pis sitting around, and just had to build one!
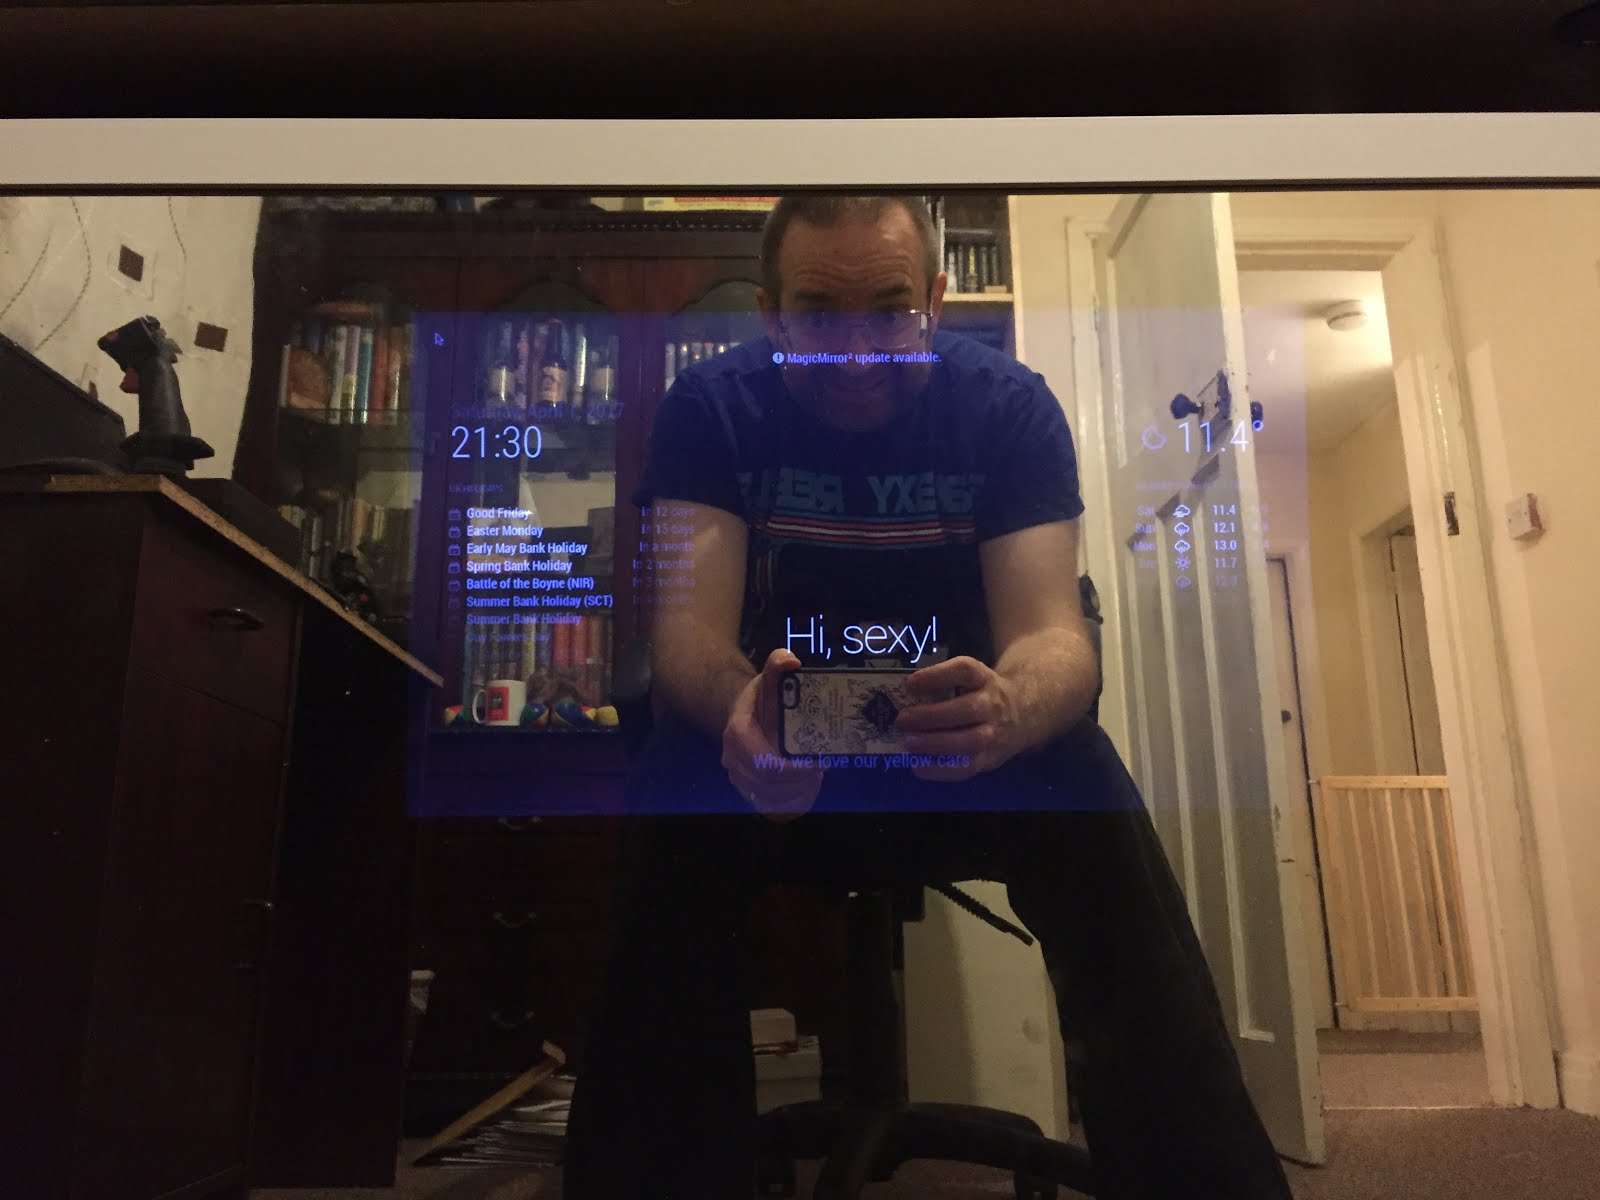
First, can I get it to work? I figured that I’d use the Pi Zero, because it’s a very small device, and would have the best chance of fitting it in a suitable picture frame. I managed to get an image running, but it did seem to be terribly slow, and I hoped to be able to run a few other services on it in the future, so I plumped for getting a version running on the larger and more powerful Pi3. Here is the image, with a few configured modules, running on my 23" main monitor…
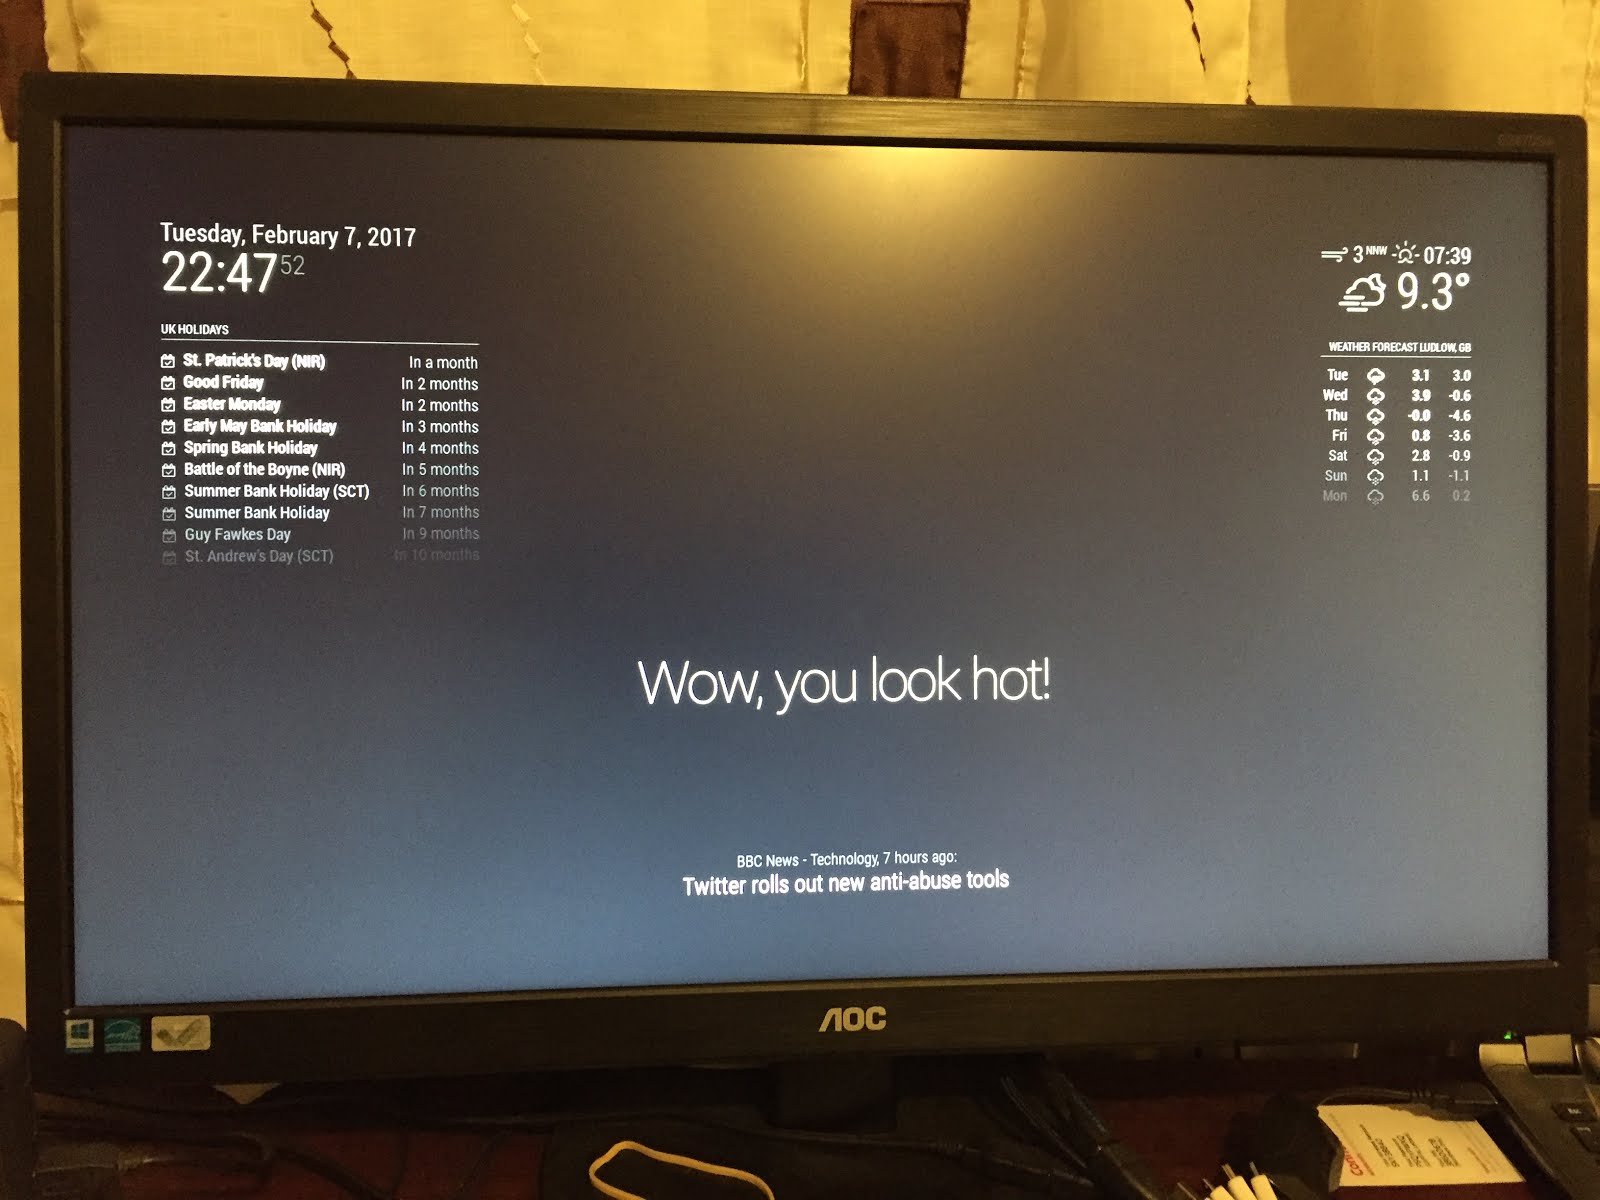
Configuring the modules was straigtforward enough, as long as you read their instructions.
So far so good, on to the difficult part of getting all the right bits.
I did all the standard things… find a cheap laptop screen on eBay, then Google the model number to find a compatible HDMI screen driver, and agonised over picking the correct power supply for it. I wanted to be a complete cheapskate in this build, and don’t want to blow anything up in the process. Double and triple checking was a necessity! A few hours later, the main electronic bits are ordered.
15.6" screen £25
HDMI Audio Controller Board Driver £13
Screen Power Supply £7
Short HDMI cable £3
Pi 5v 3A power supply £3
Once all the bits turned up, time to see if it all works…

…success!
Now, all this needs to be crammed into a picture frame. I needed one that would give me enough room to fit the ‘tallest’ component, which turns out to be the Pi itself, at just over 2cm, from the top of the USB ports to the bottom of the pins sticking out on the bottom. Plus this mirror was intended to replace the big mirror in our living room above the fireplace. I found just the right frame from B&Q for about £15. It’s the sort that you have to bend a bunch of little metal tabs down to keep the picture sandwiched between the backing board and the glass, but it was deep enough that it would just about fit the Pi inside the frame with the backing board remaining flush with the back of the frame. A pair of pliers was required to remove the metal tabs.
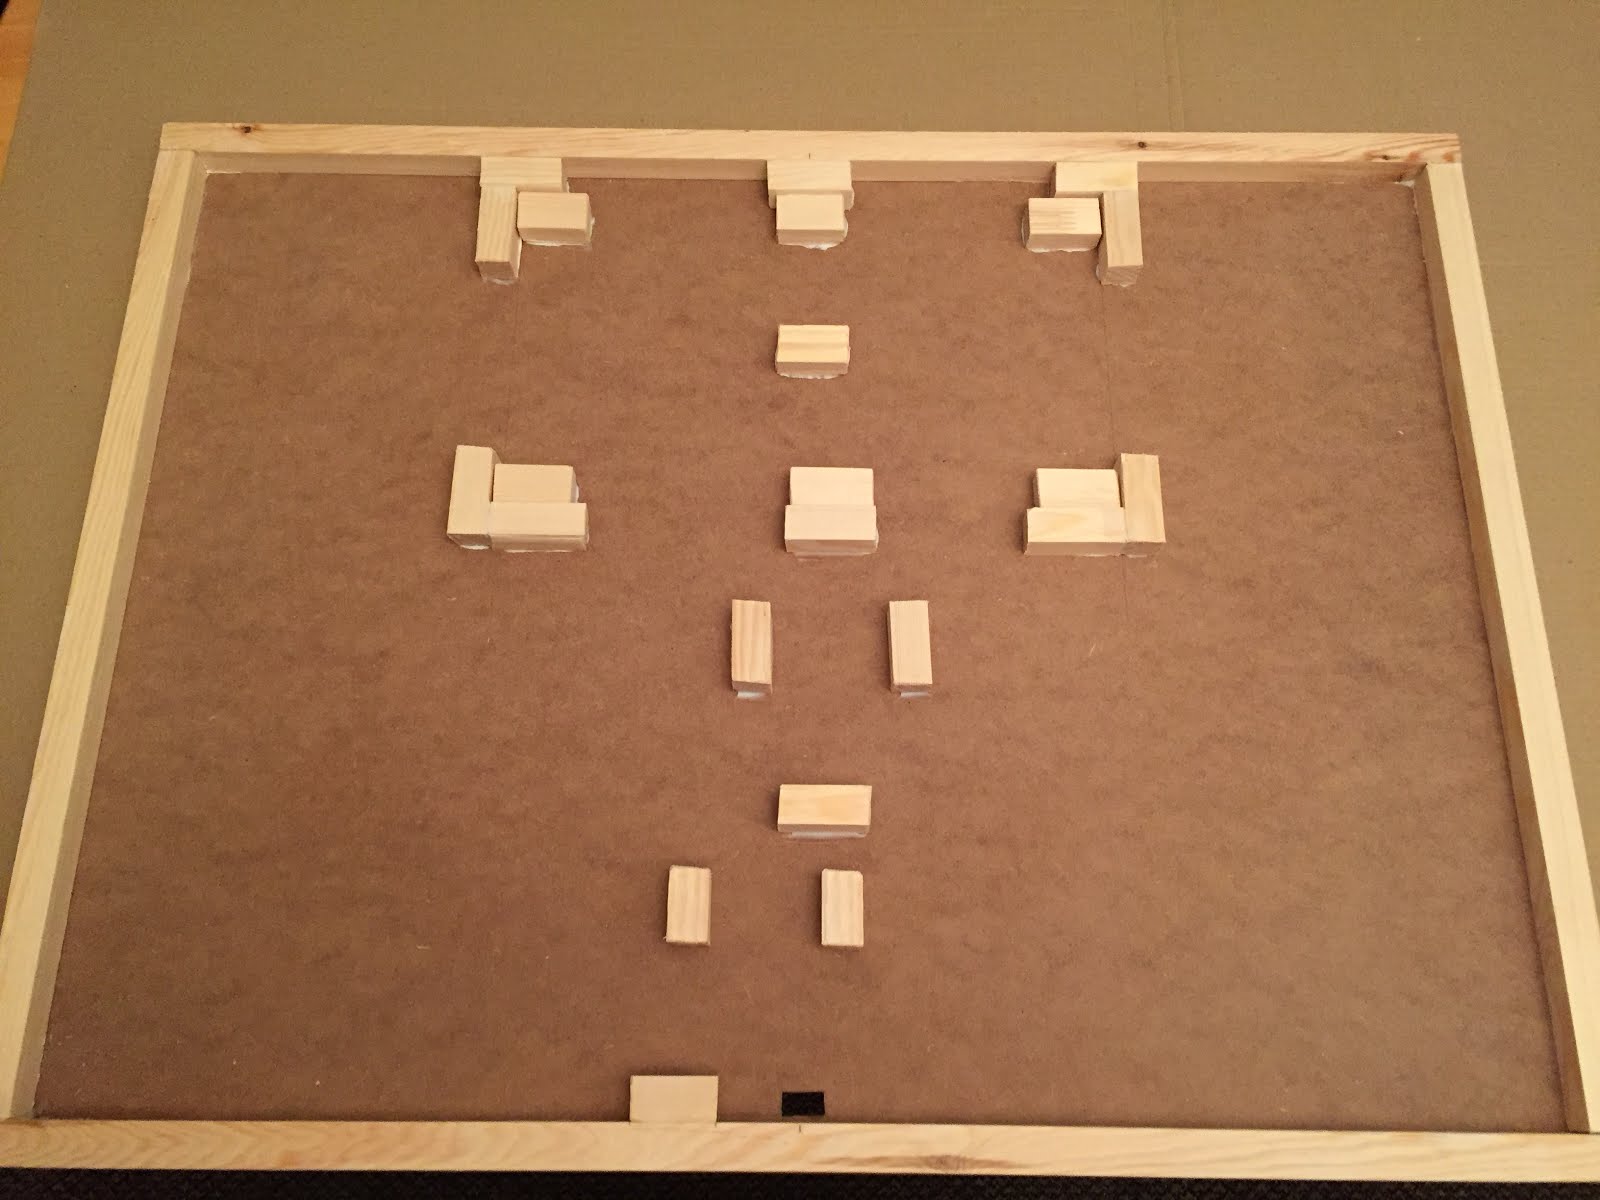
B&Q have had a lot of my money thanks to this project! Some 2cm wide strips of wood were purchased, and glued to the inside of the backing board to make an inner frame. Some smaller and shorter bits were used to hold the screen display in place…

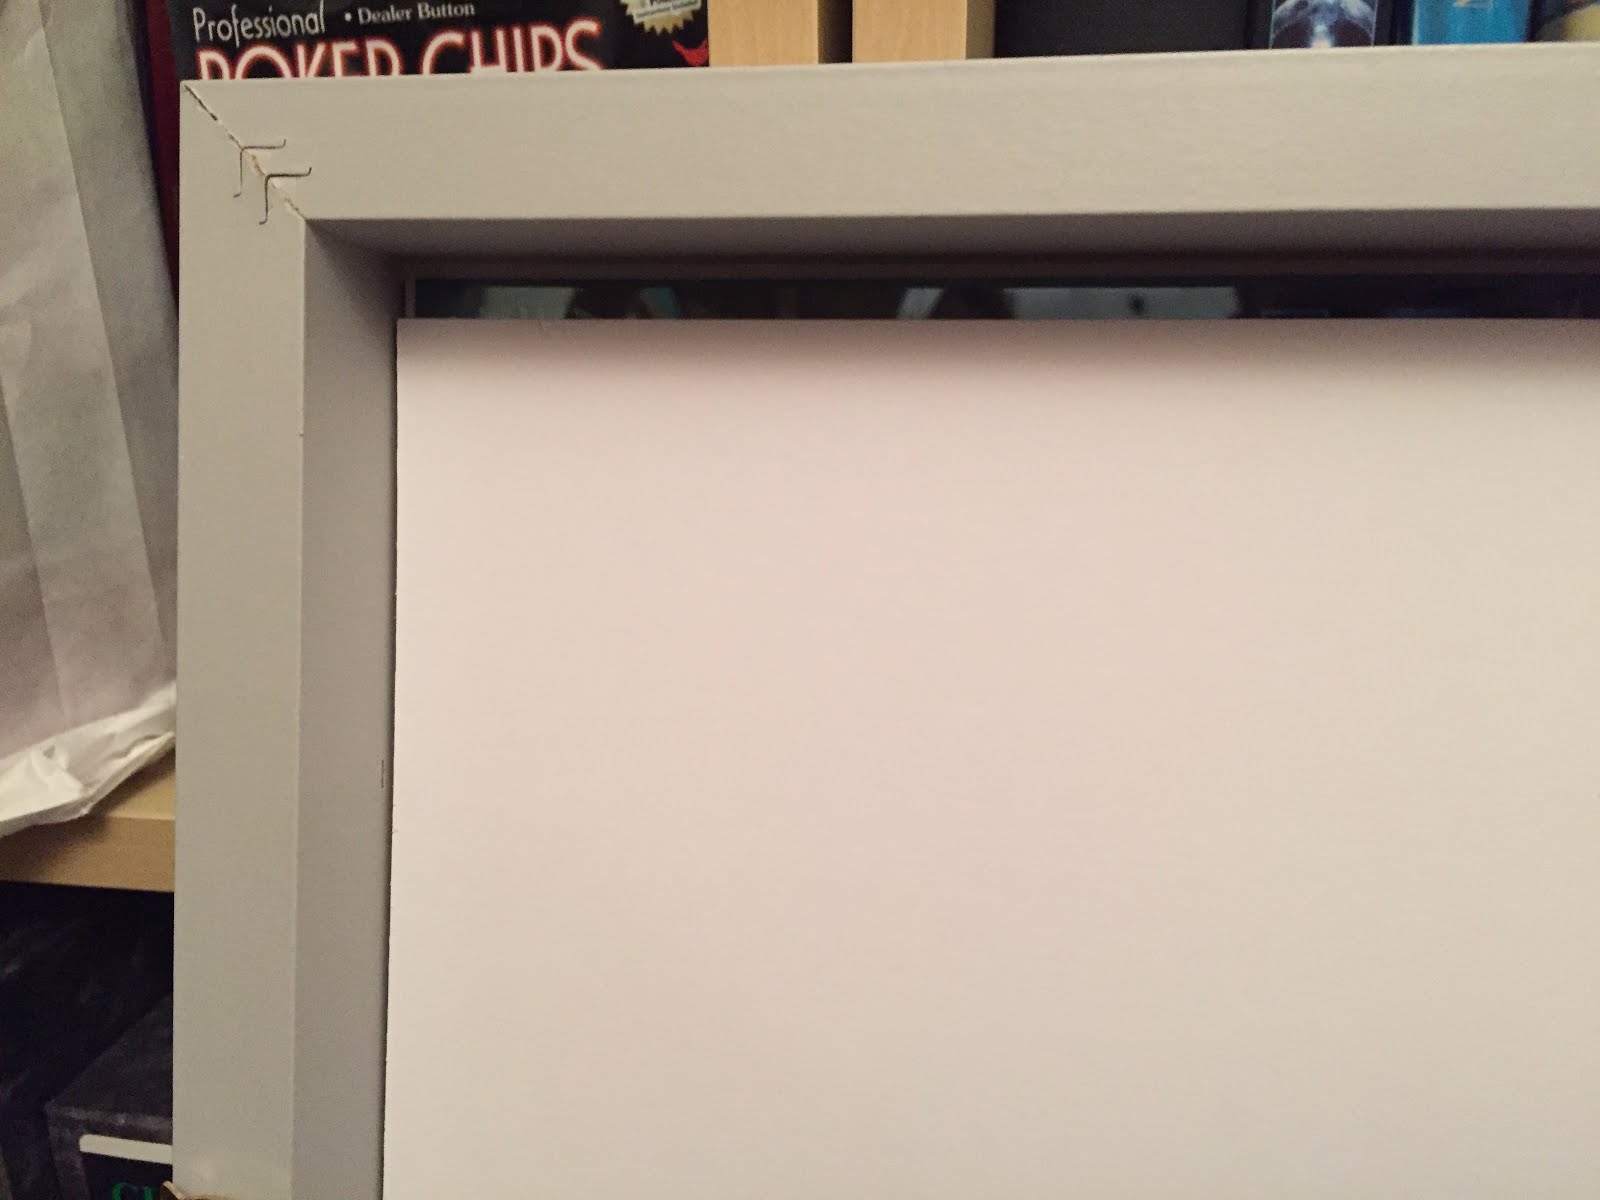
The screen is 4mm deep, so some other pieces that were 16mm high were used to prop the screen up from underneath, this allowed me to hold the screen right up against the glass to minimise internal reflections when finally complete. Clever, huh? ;)
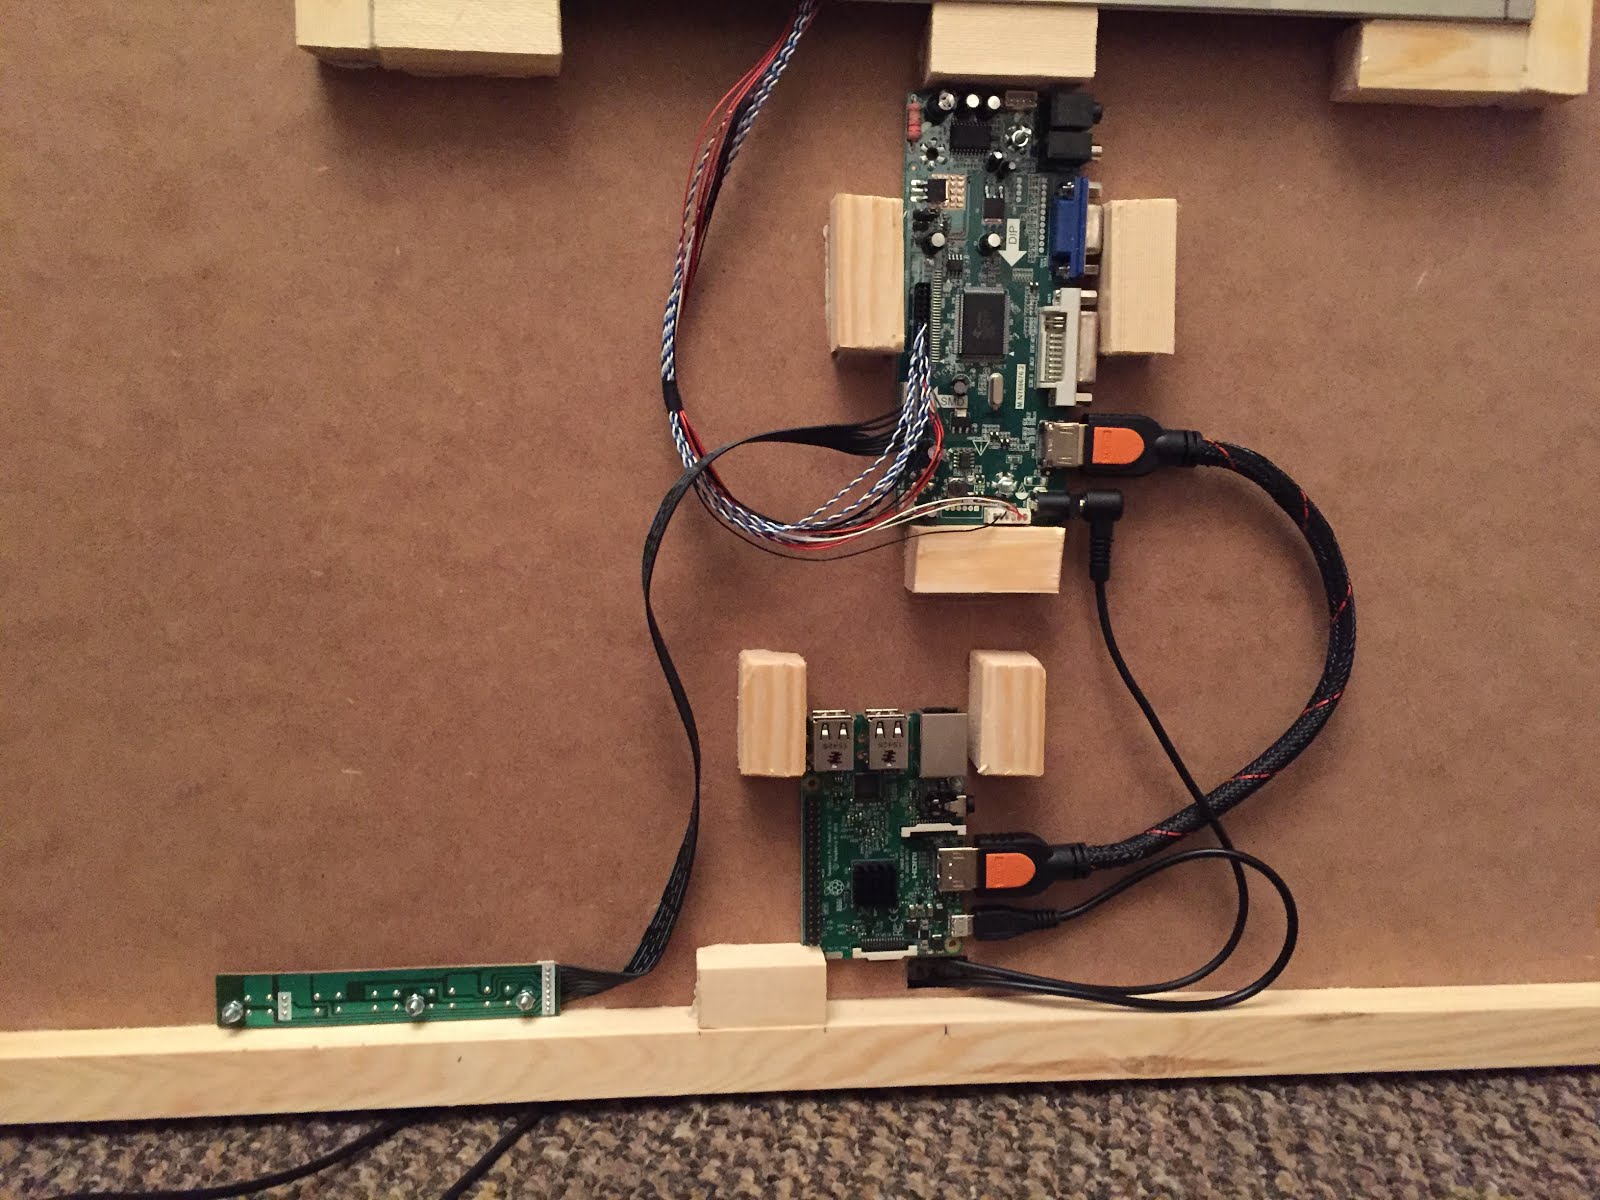
A few other scraps were used to help keep the driver board and Pi in position.
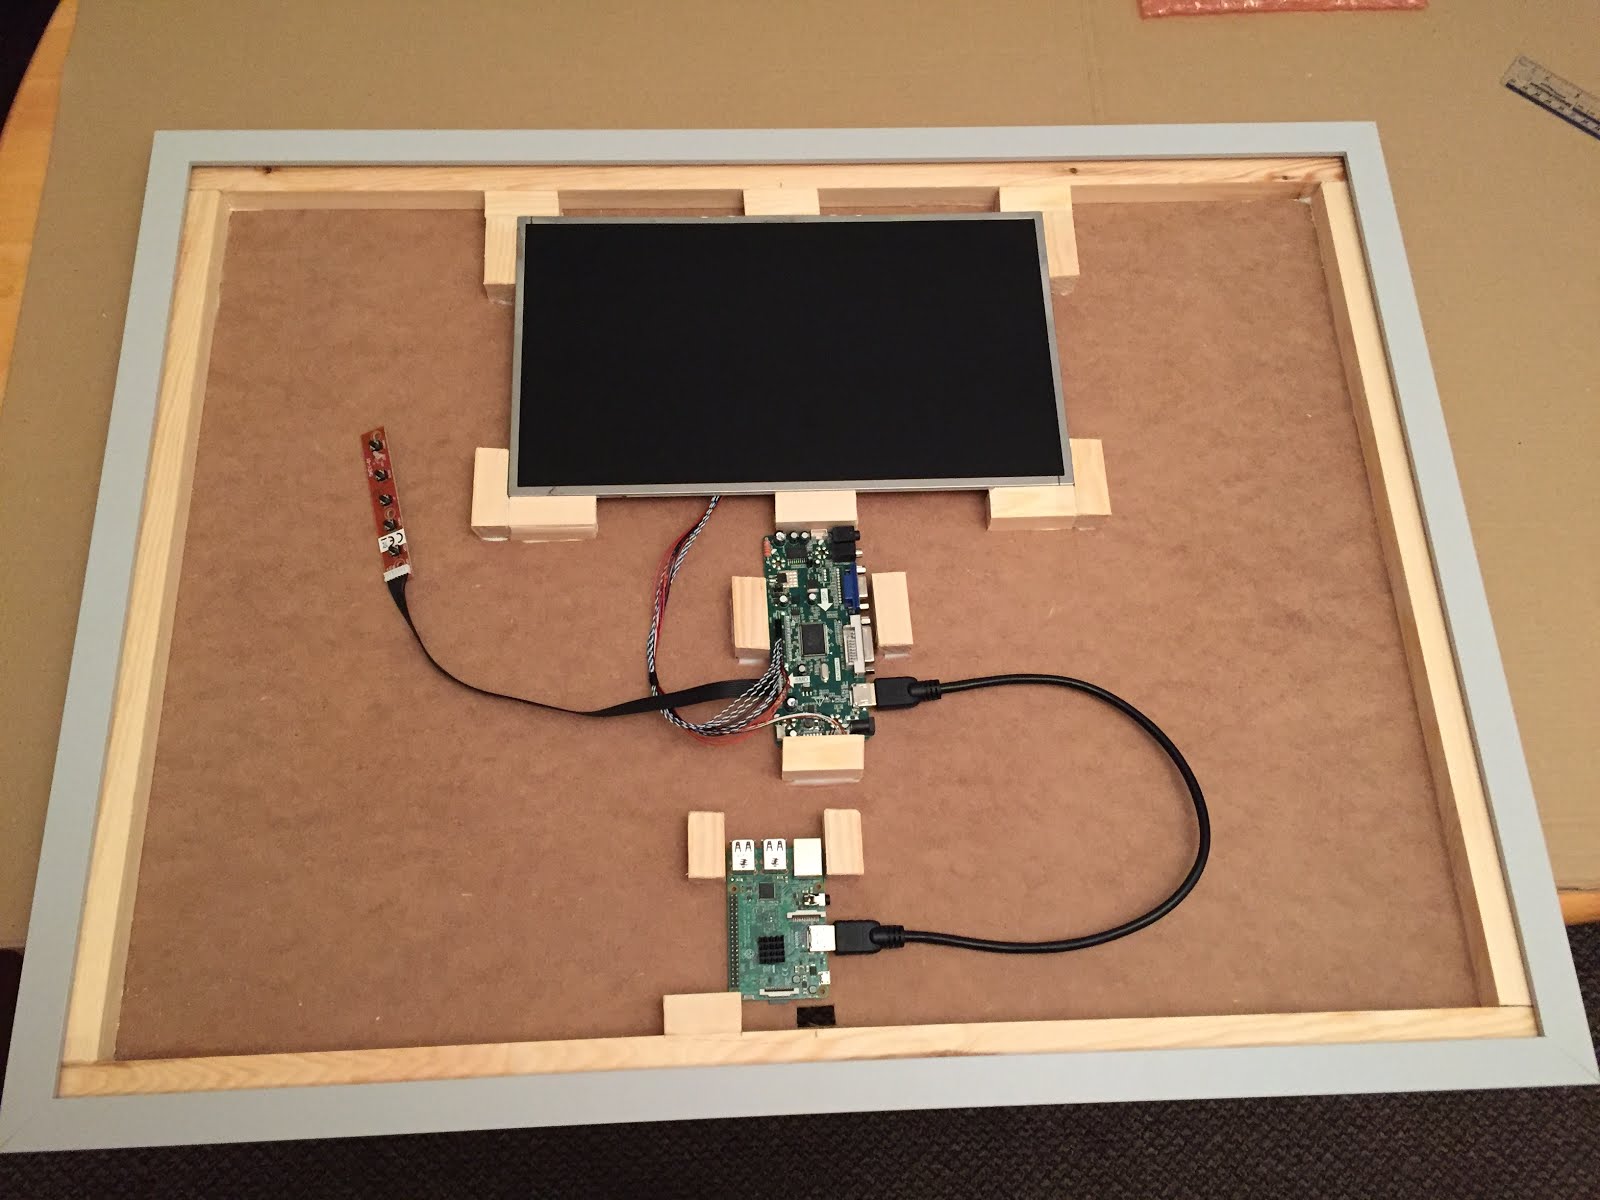
Here the backing board and inner frame is fitted inside the main frame ‘in reverse’ to show how much room is left for the glass. It all fits!
Next, more nerve wracking stuff… fixing the mirrored surface to the glass!
One Way Privacy Window Film £10
Brass plated side hooks £3
Heavy Duty Picture and Mirror Hanging Kit £4
M3 nuts and bolts £3.25
I had to re-read the instructions a number of times, to wrap my head around which sides of film and glass I was supposed to cover in ‘slip solution’ (soapy water) and to get the steps in the right order. I decided to trim the film before affixing to the glass, rather than afterwards as recommended, because I worried that I’d cause more damage to the reflective film by trimming it after sticking it than before.
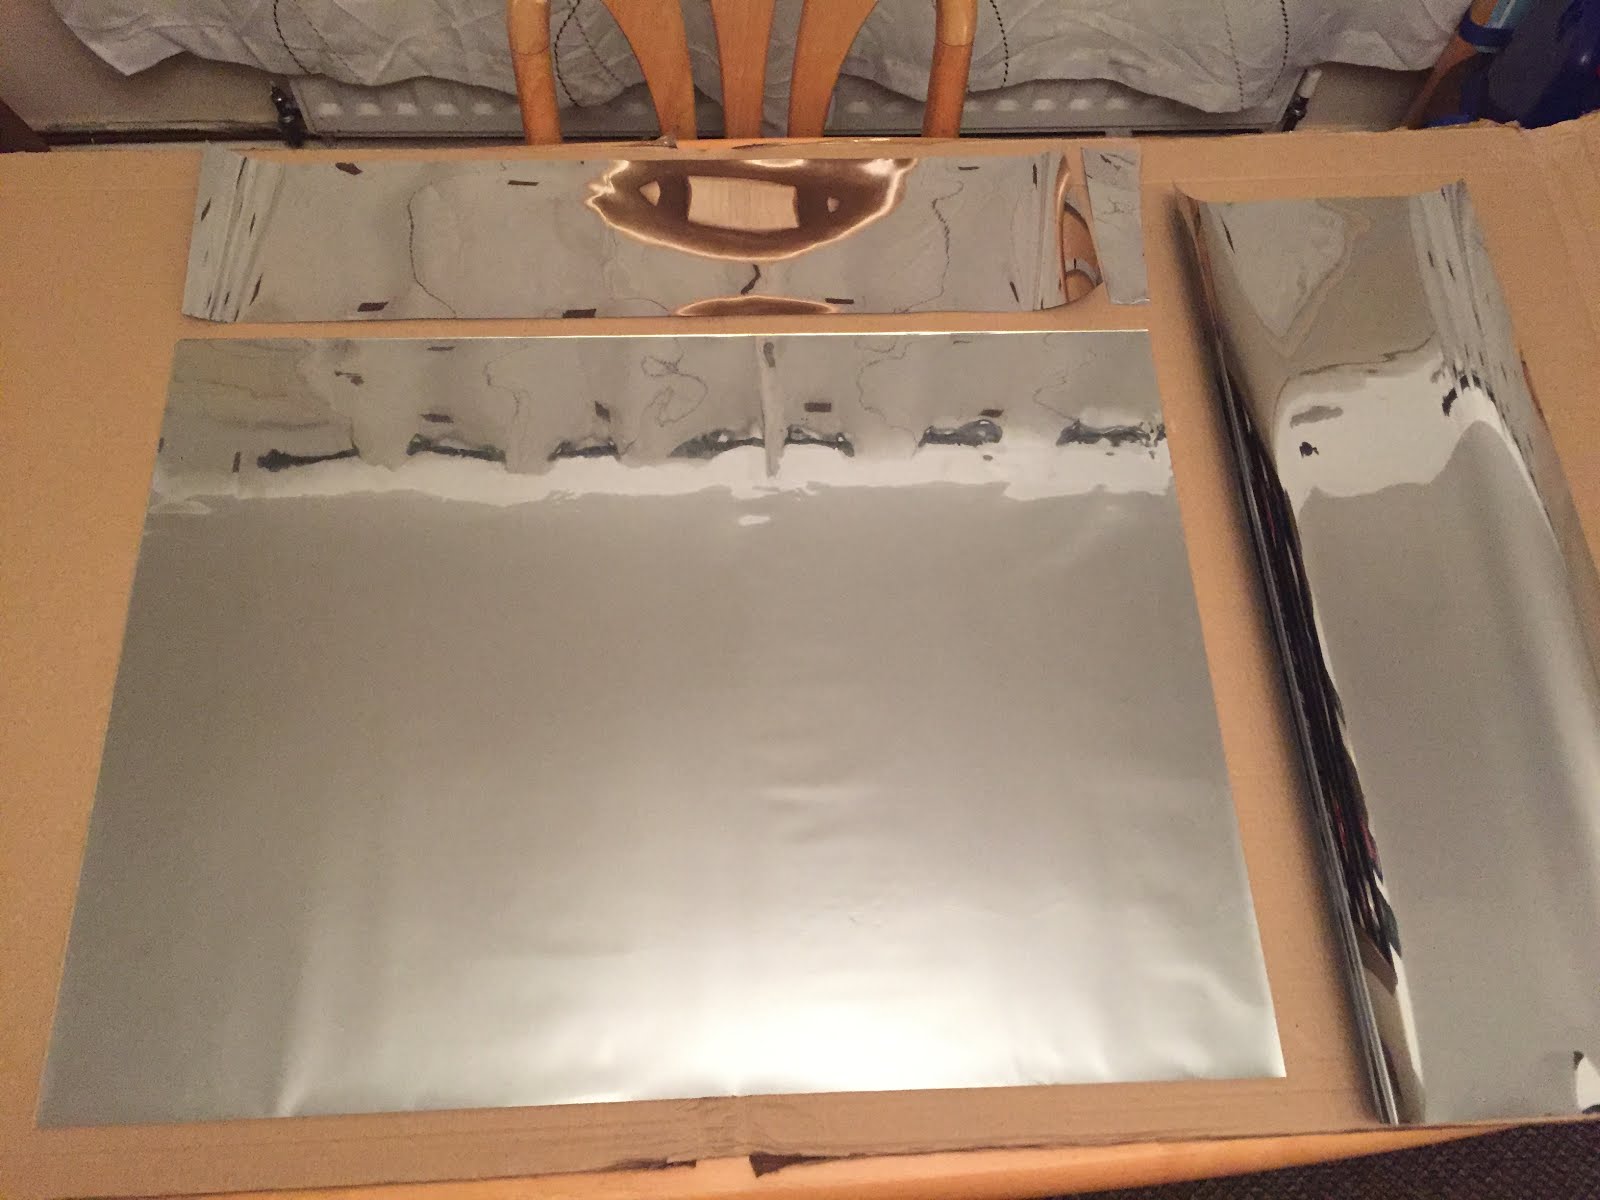
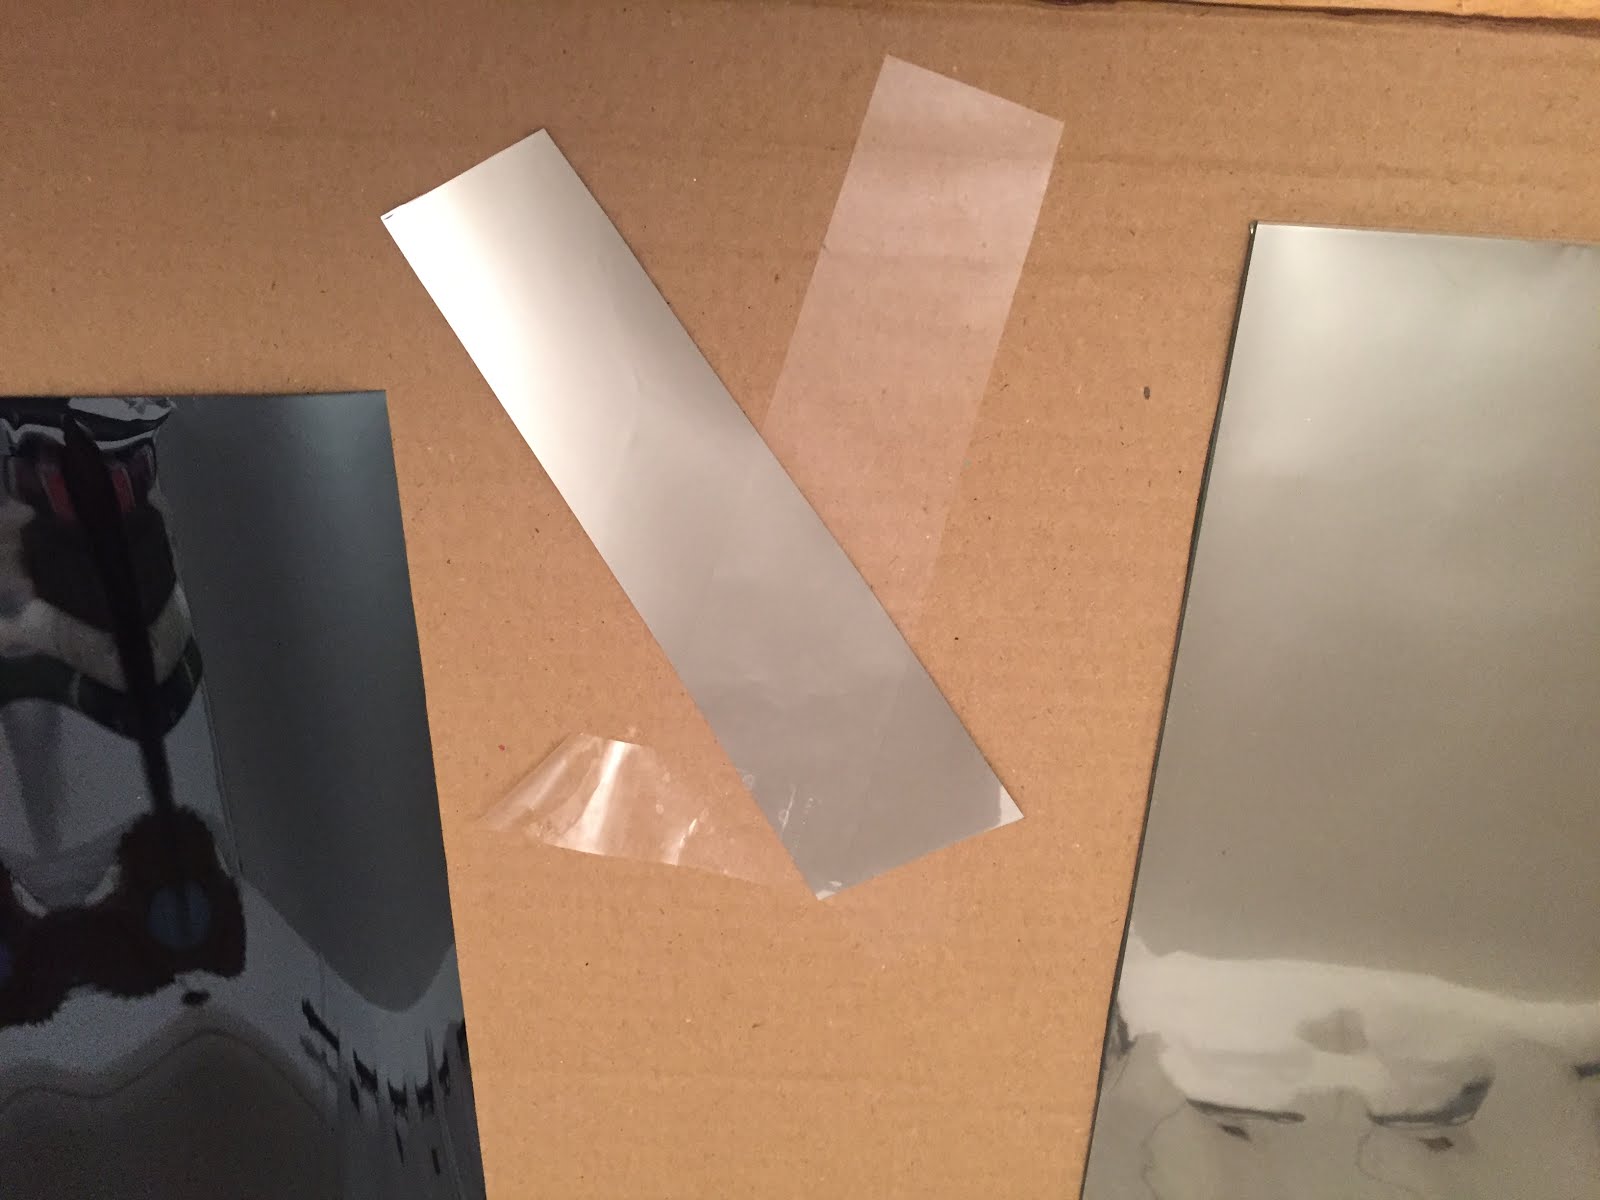
Handy hint: I used a small scrap of film to test how to separate the backing from the film with a bit of sellotape. Also, you can see the definite difference between silvery ‘front’ and see-through ‘back’ sides of the one way film…
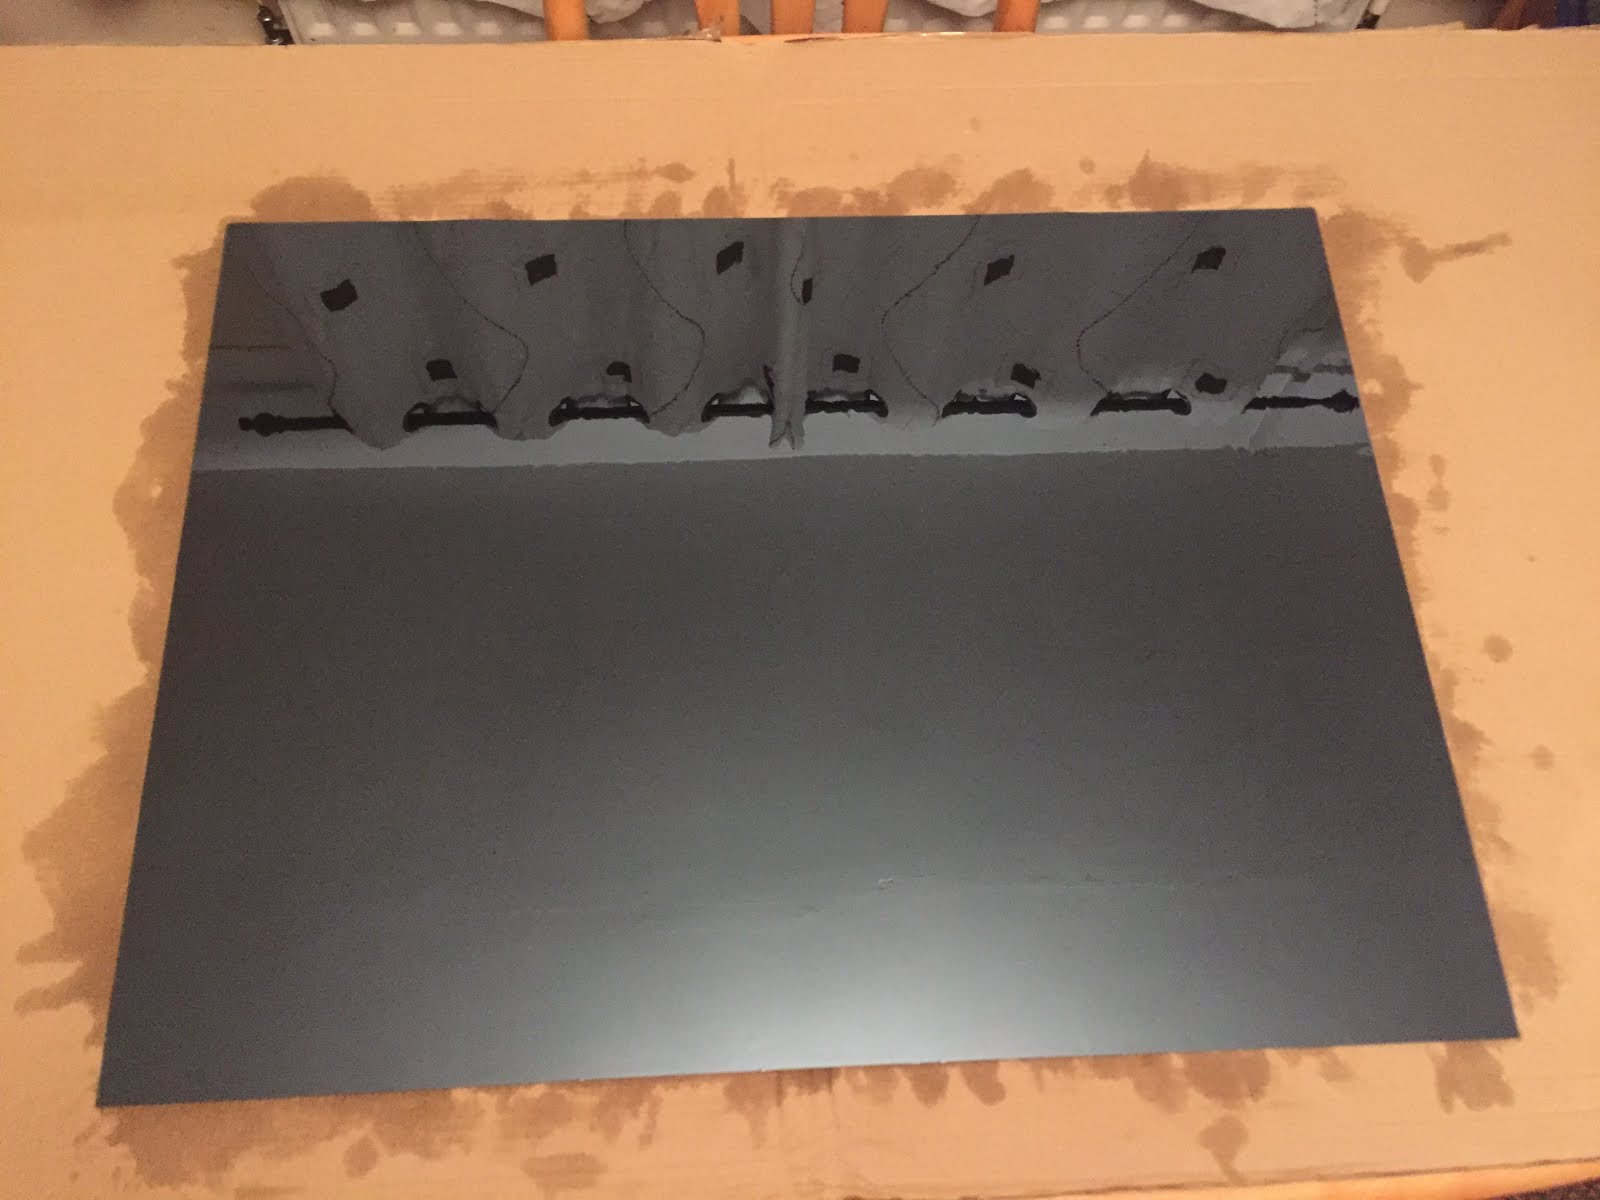
It was tricky to squeegie the trapped water out, and keep all the edges aligned. Here’s the final squeegied result…
I planned to use the original picture frame card to separate the inner wood frame from the one-way film, and trim out the bits where the screen is, however, after putting it all together, the white card was actually quite visible through the one way film. Not good enough! Here it can be seen, with some A4 white paper taped to it, that I used to mark out a template for the exact size and position of the screen hole…
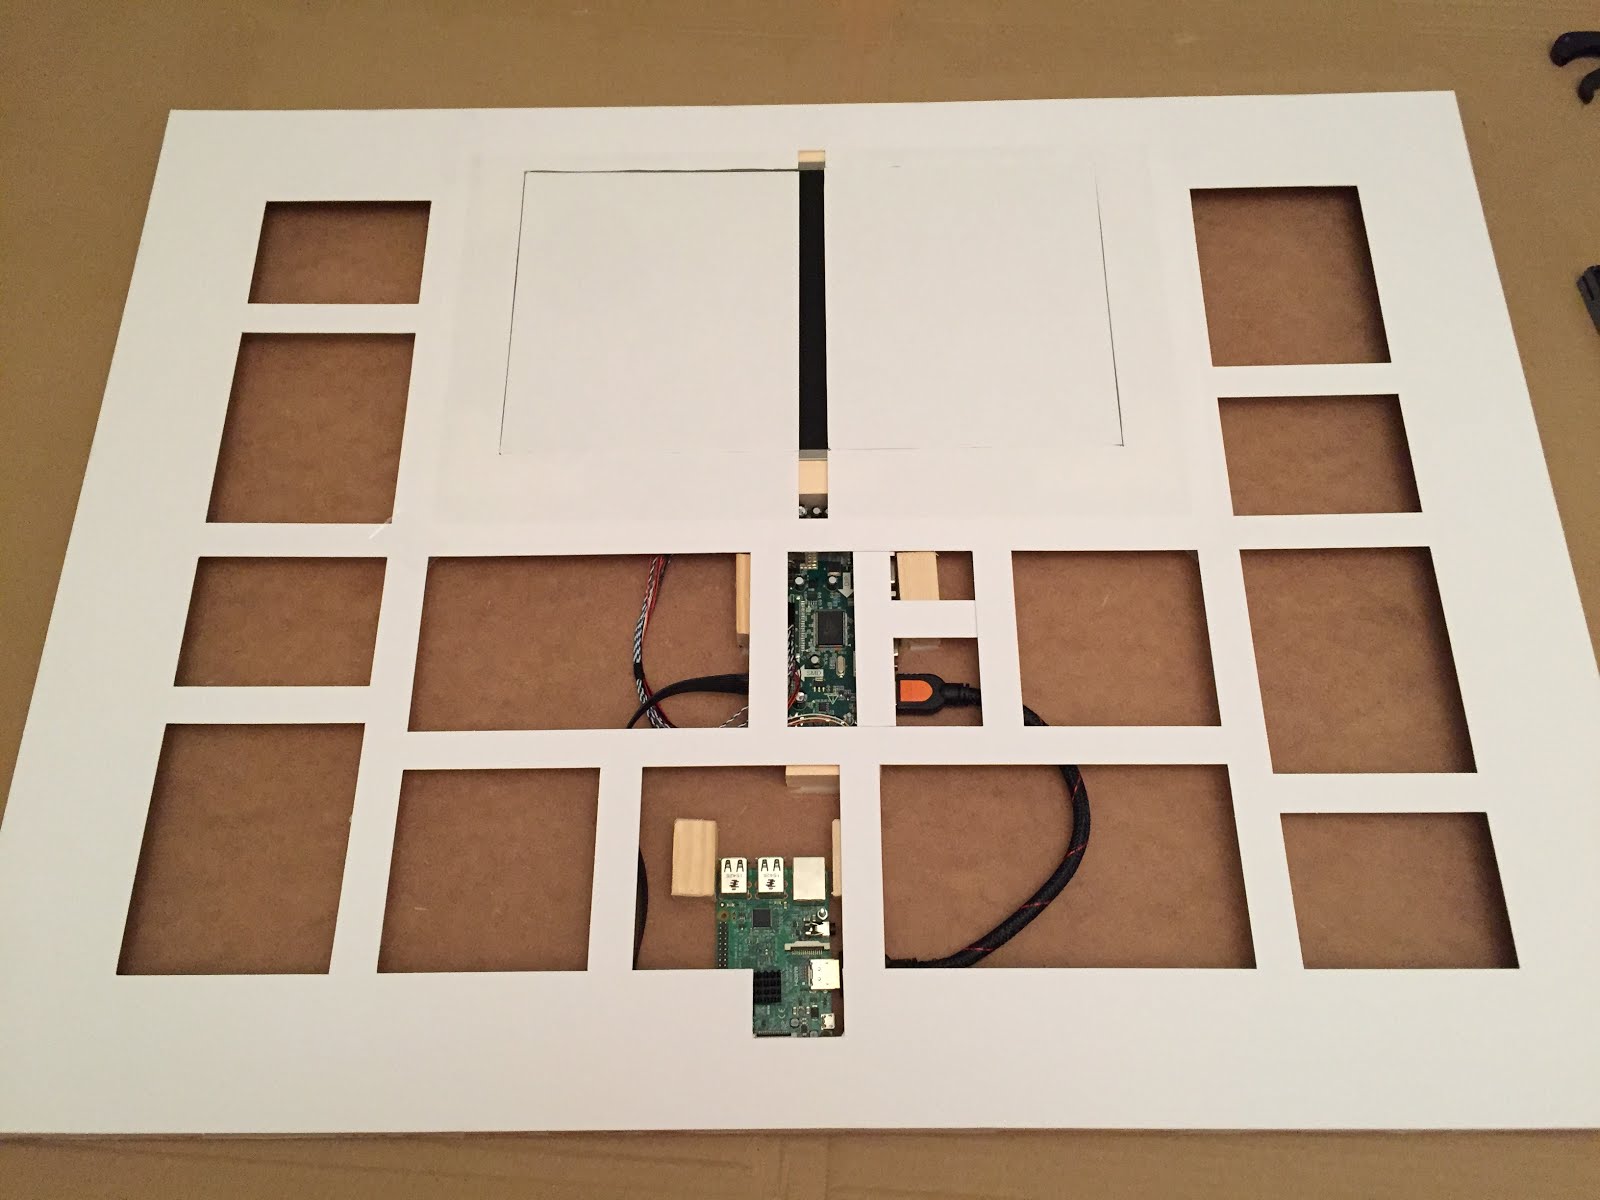
One trip to a local stationers later, I’ve obtained a large A2 piece of black card, easily trimmed to size using the backing board as a template. The paper template above worked perfectly to let me work out exactly where the hole for the screen display needed to be.
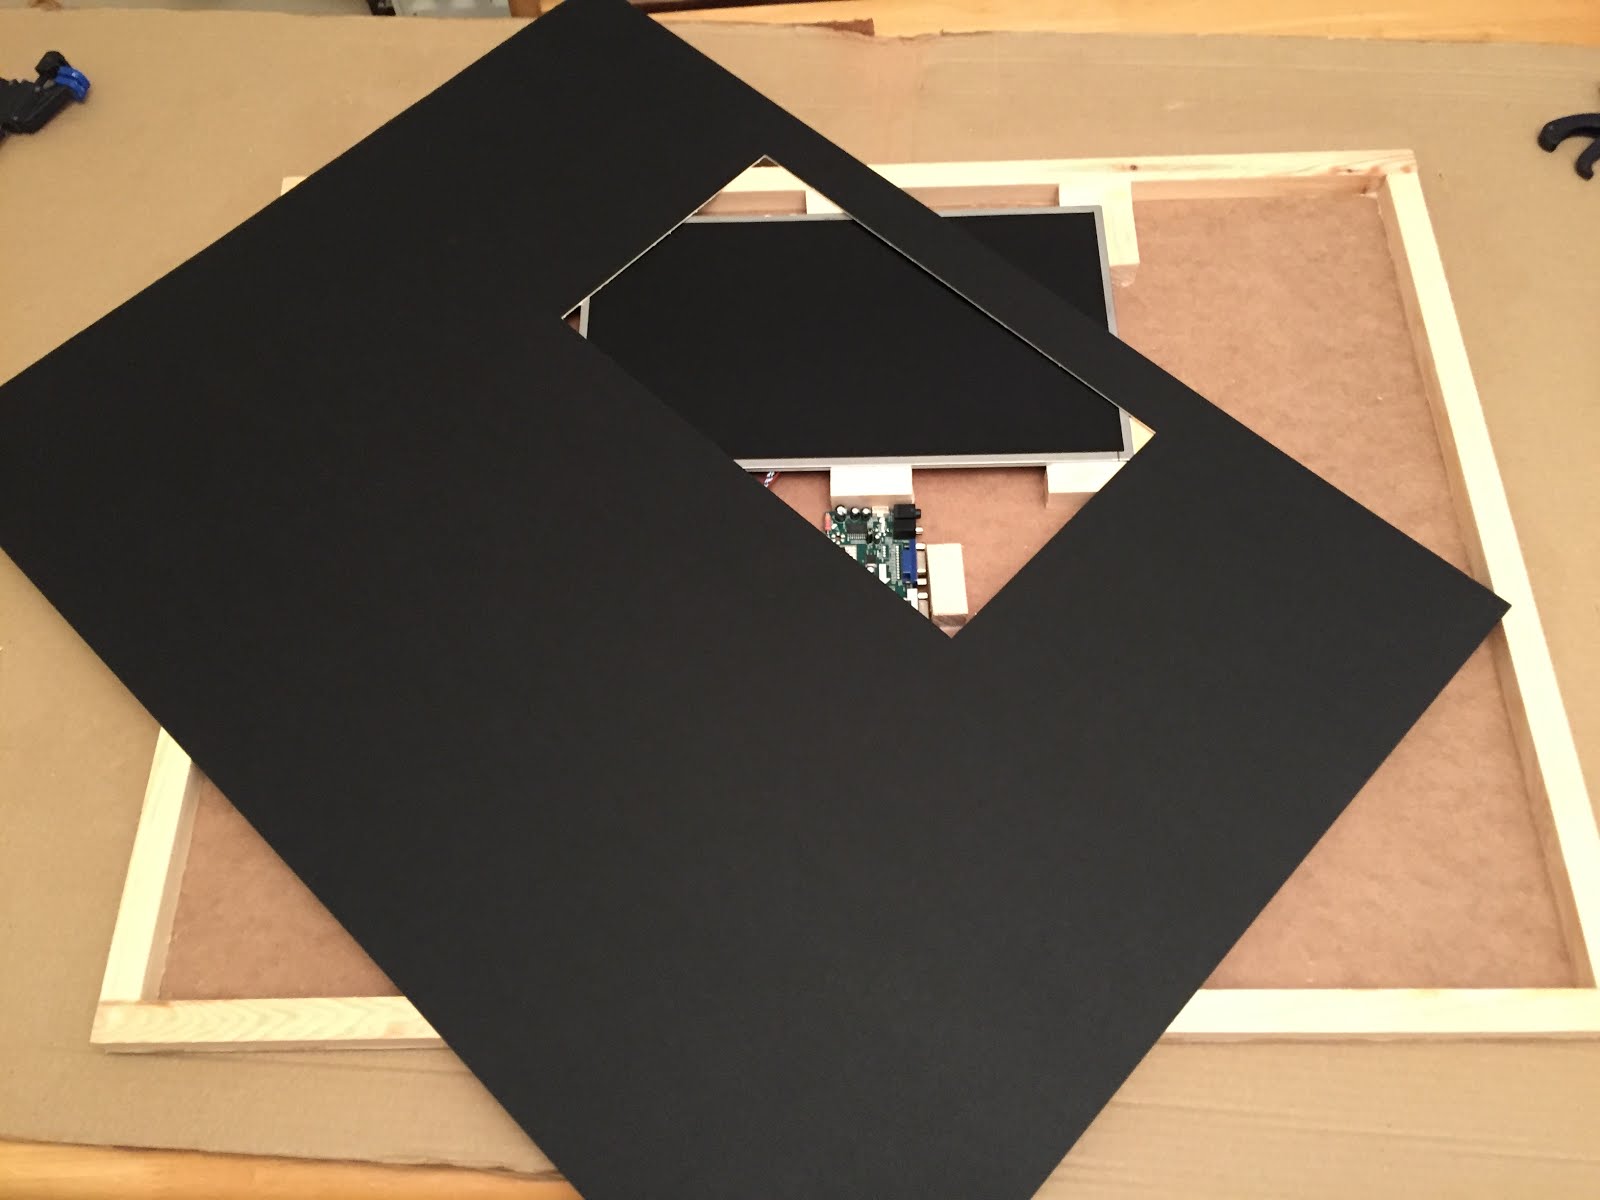
The only downside is that it was half a centimetre too short!
Again, some scraps of card were carefully trimmed to provide the last few millimetres and taped in place.

Even the cut inner edge of the black card reflected enough light back through the one way film to be visible, so a trusty Sharpie was employed to deal with the problem…

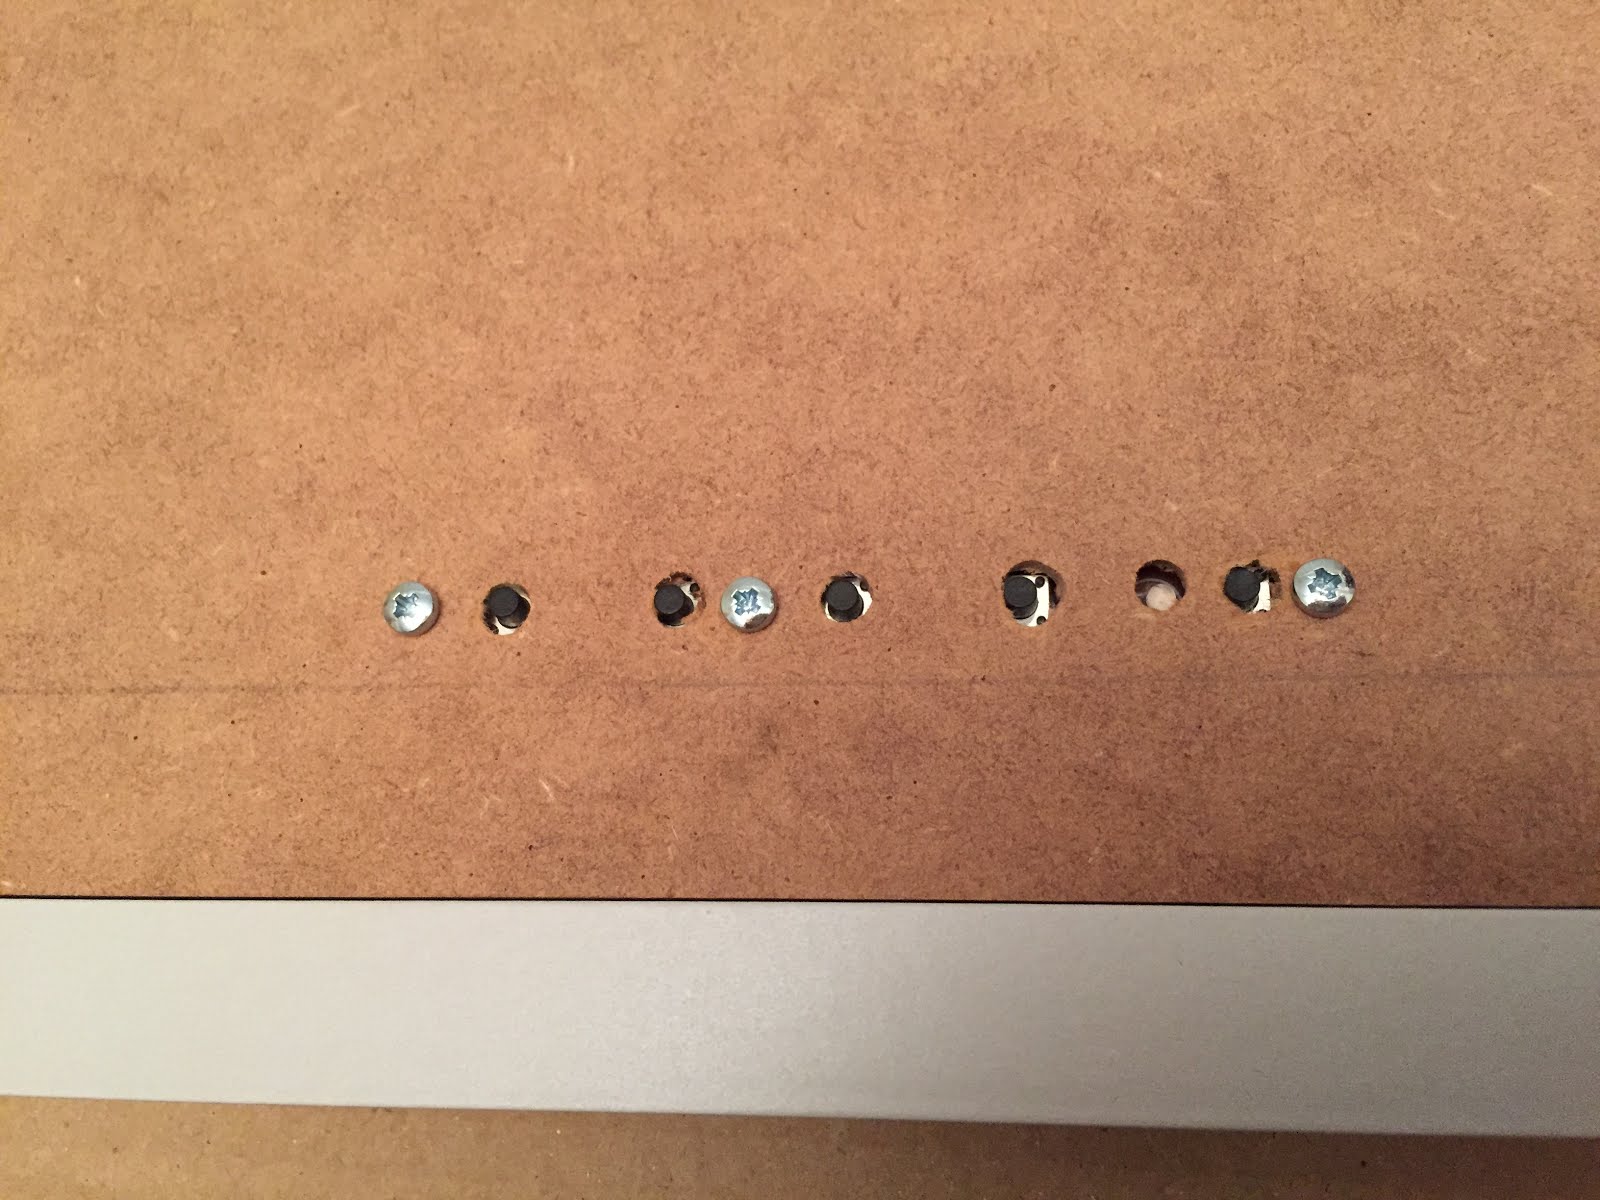
Some admittedly not-very-neatly placed holes were drilled to allow the screen control buttons to poke through the backing board…
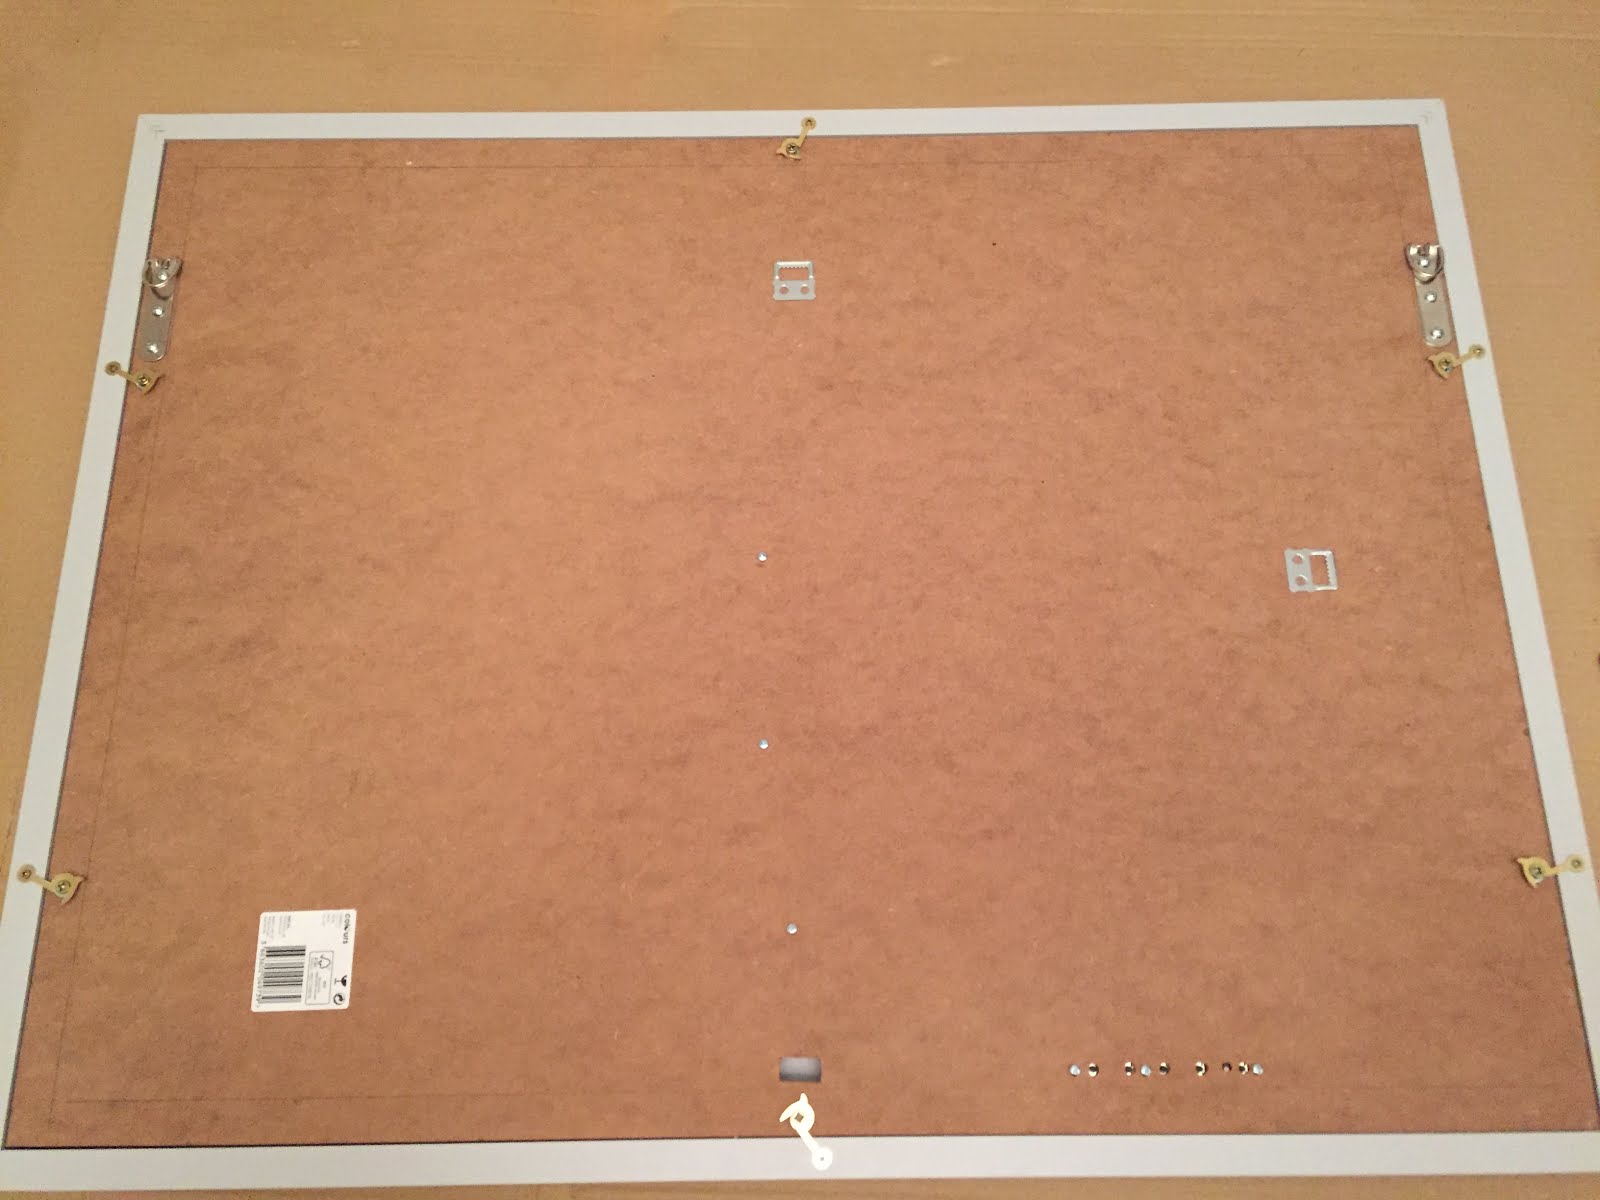
Lastly, the heavy duty picture hanging loops were affixed to the backing board (being drilled through to the inner wooden frame) and the brass hooks were added with some little self tapping wood screws to hold everything together. It also became a necessity to drill a couple of holes for some more M3 bolts to hold the Pi and driver board down, otherwise, they’d keep falling out when ever I tried to put the inner frame into the outer frame.
And with a super pleased and self satisfied grin, here it is on the floor, finally assembled and booted!
That was build Phase One. It sat on the floor in the office for a month before I found the time to move on to Phase Two…!
That’s the major build, but here’s my blog posts for the further parts:
Part 2 - Adding some audio for my ‘timebonger.py’ script
-
Nice description of your work. I will read part 2 to 4 tomorrow
-
nice mm thumbs up
-
VERY nice :)
-
I am trying to build a mirror which is way bigger than the monitor itself, but from your picture it seems the monitor easily recognisable from the front of the mirror.
Is it possible to make the monitor to blend with the mirror, possibly by by changing the monitor background color?
-
@mirror2onthewall I’m not sure about blend. The problem is more to do with the viewing angle of the LCD screen itself. With the old screen i’ve got, if you’re stood ‘above’ it or facing it the screen is very bright, and it’s dimentions are very obvious. However, due to how high it’s hanging on my wall, most people are actually looking ‘up’ at it, their eye level being below the centre, and it’s no where near as bad. I think also, the brightness of the screen could be adjusted downwards to make it less noticable, but then you’d have difficulty reading the text on bright days.
-
@christhomas Thanks for your reply. Didnt think of this minor issue when I first start designed it.
-
Amazing stuff @christhomas
How did you get the virtual projector effect in the last screenshot :-) Just awesome! :-)
Please could you post more photos of how does it look like hanging on the wall … -
@mirror2onthewall Nor did I! :) When you’ve got a laptop with a hinged screen, you don’t think twice about changing the viewing angle, but you don’t really get chance to adjust it when it’s fixed to the wall! I think I was lucky in that respect.
-
@saurabh76 Thanks! I’ll take a picture or two for you when I get home tonight.
-
Really nice !
-
This post is deleted! -
This post is deleted! -
This post is deleted! -
This post is deleted! -
This post is deleted! -
This post is deleted! -
This post is deleted! -
This post is deleted! -
It’s 1.1MB, about the same size as all the others I’ve posted. Here’s a 50% smaller version…
Ooh! That one worked! Ok… resize resize resize…
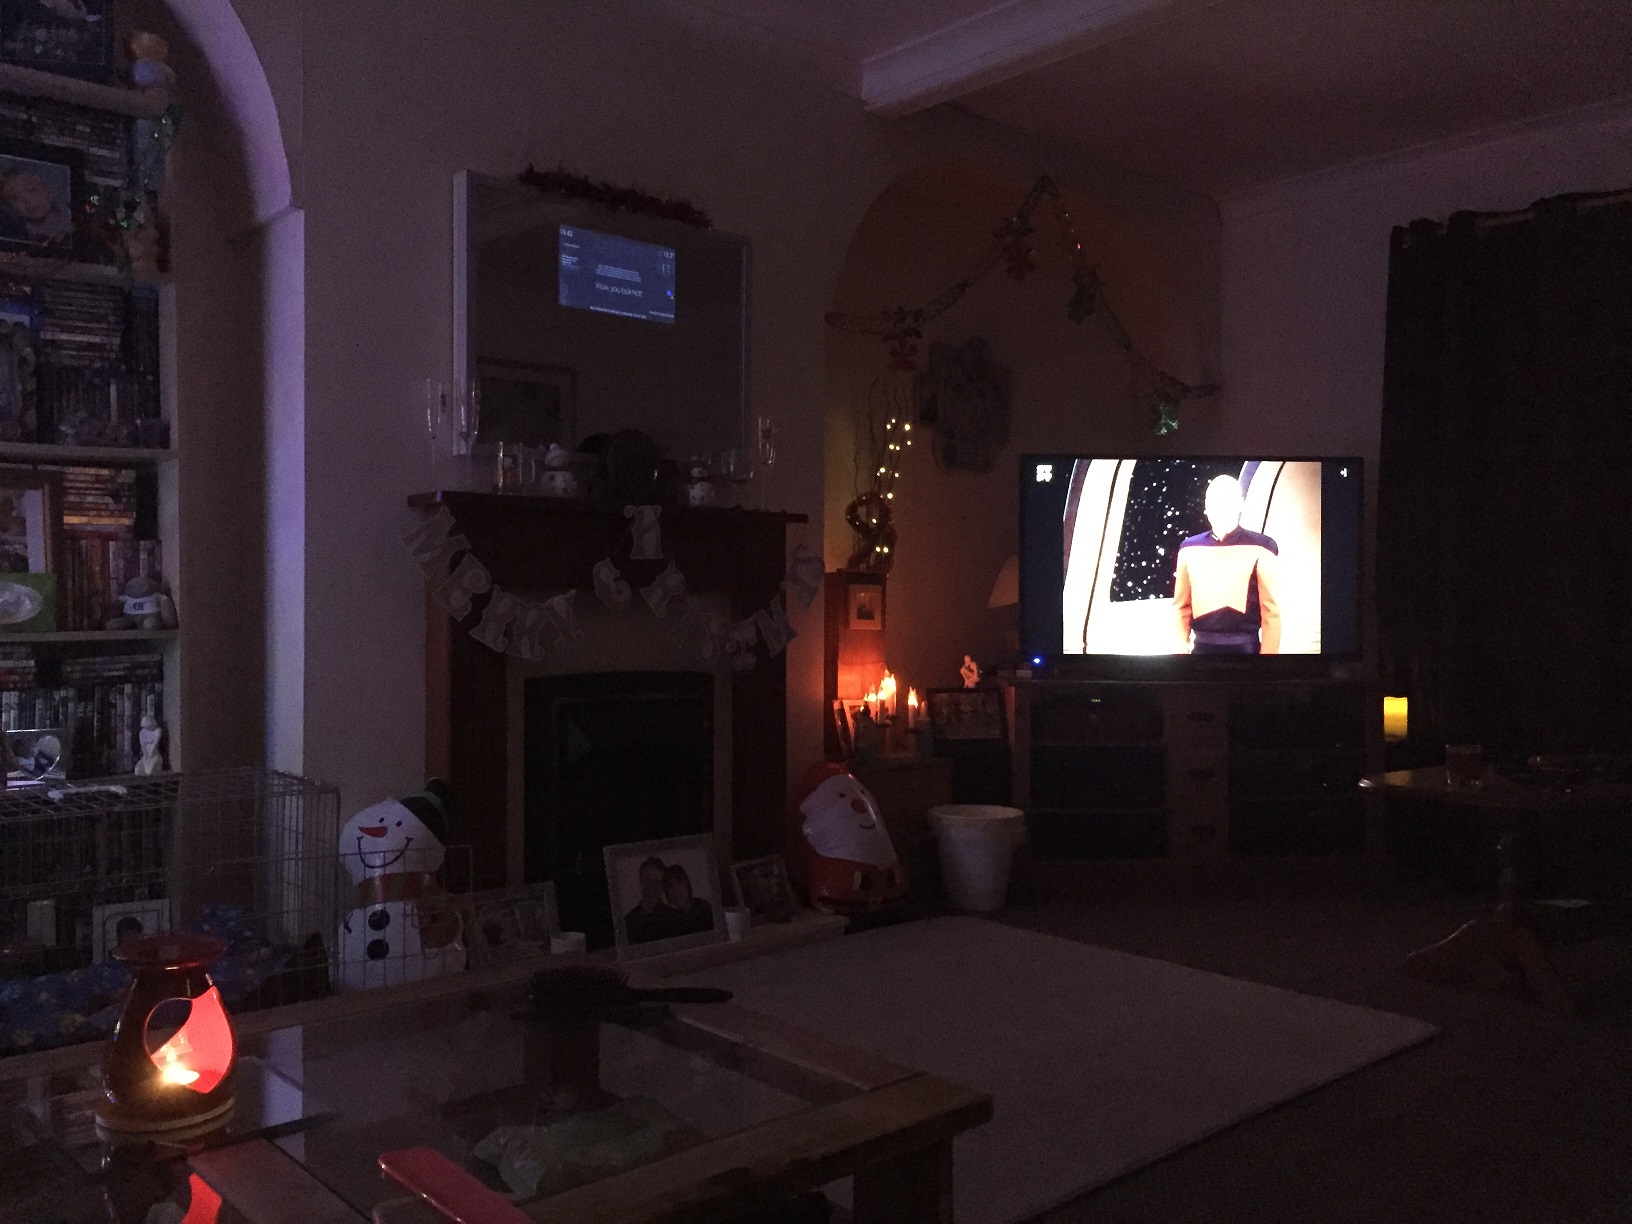
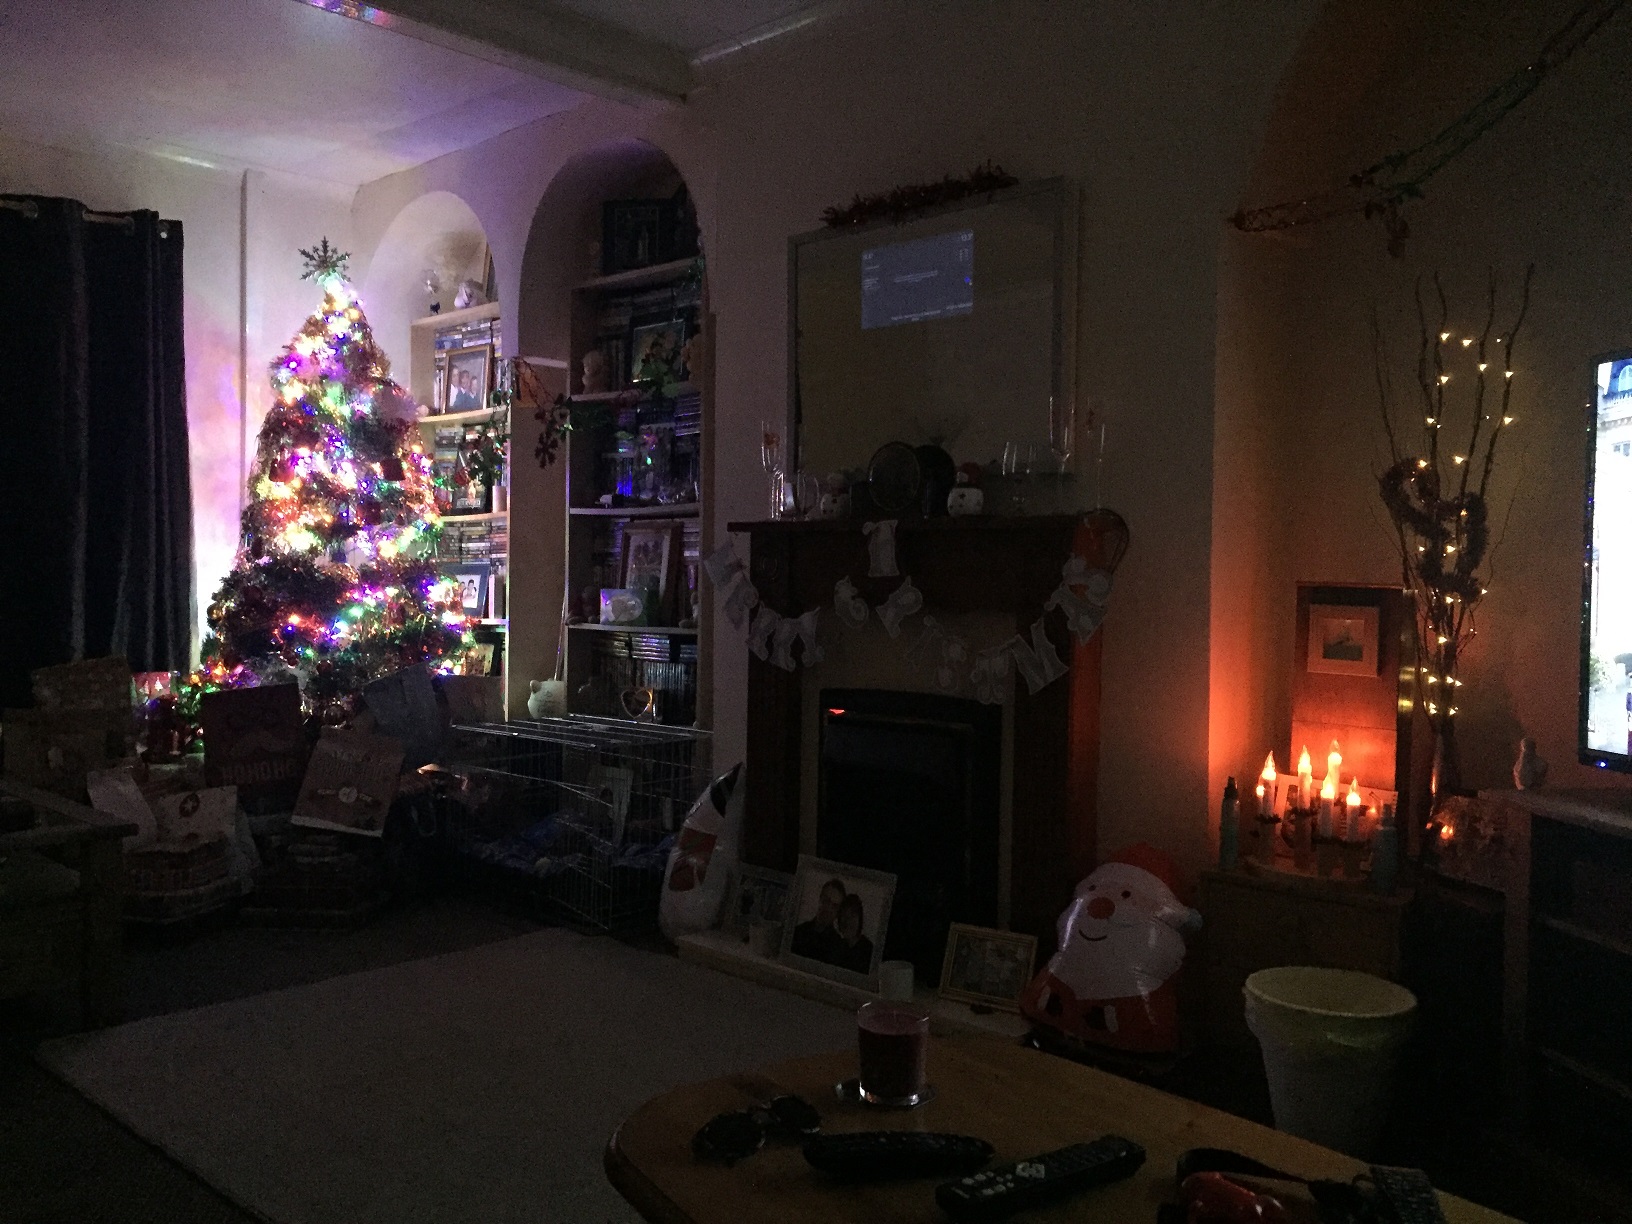
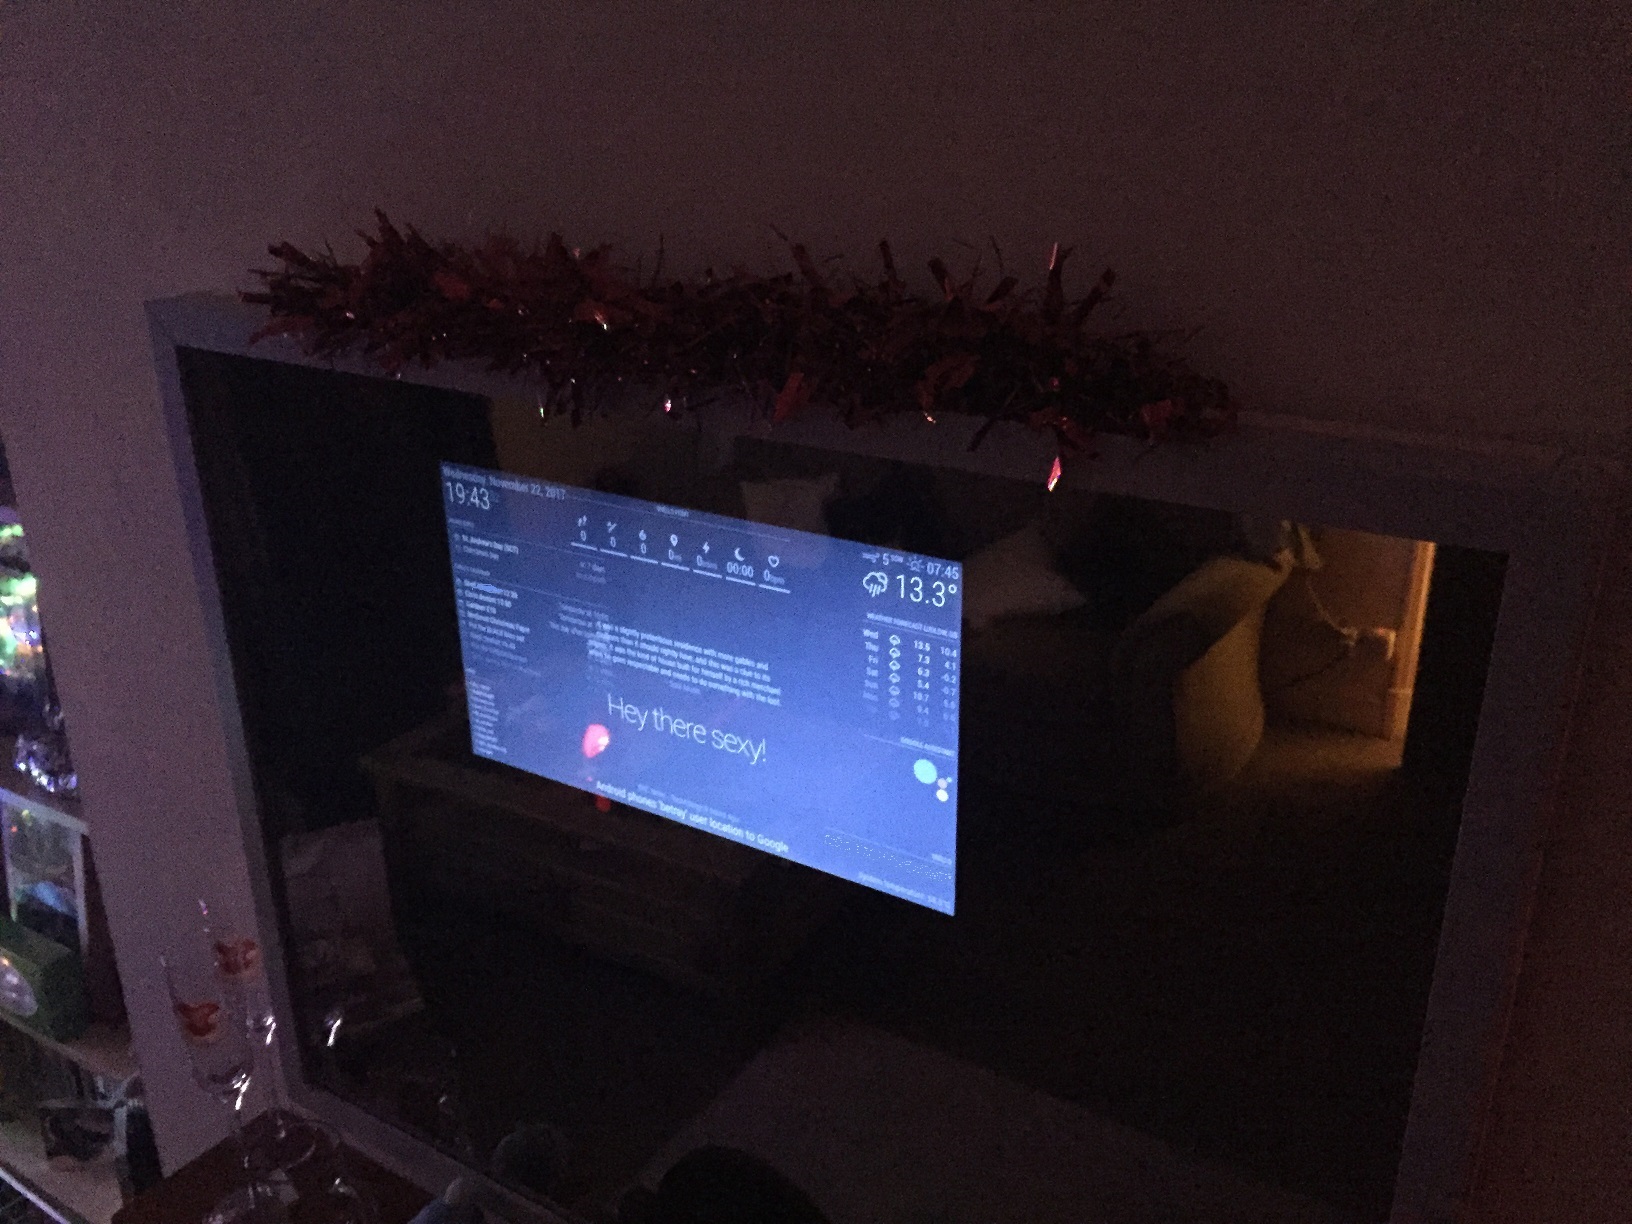
@saurabh76 Sorry for the delay… Above is how the mirror looks in the context of our living room, it’s a bit dark but it gives you a good impression of how unobtrusive the brightness of the screen is.
Compare with our bright Christmas tree!
Close up from below…
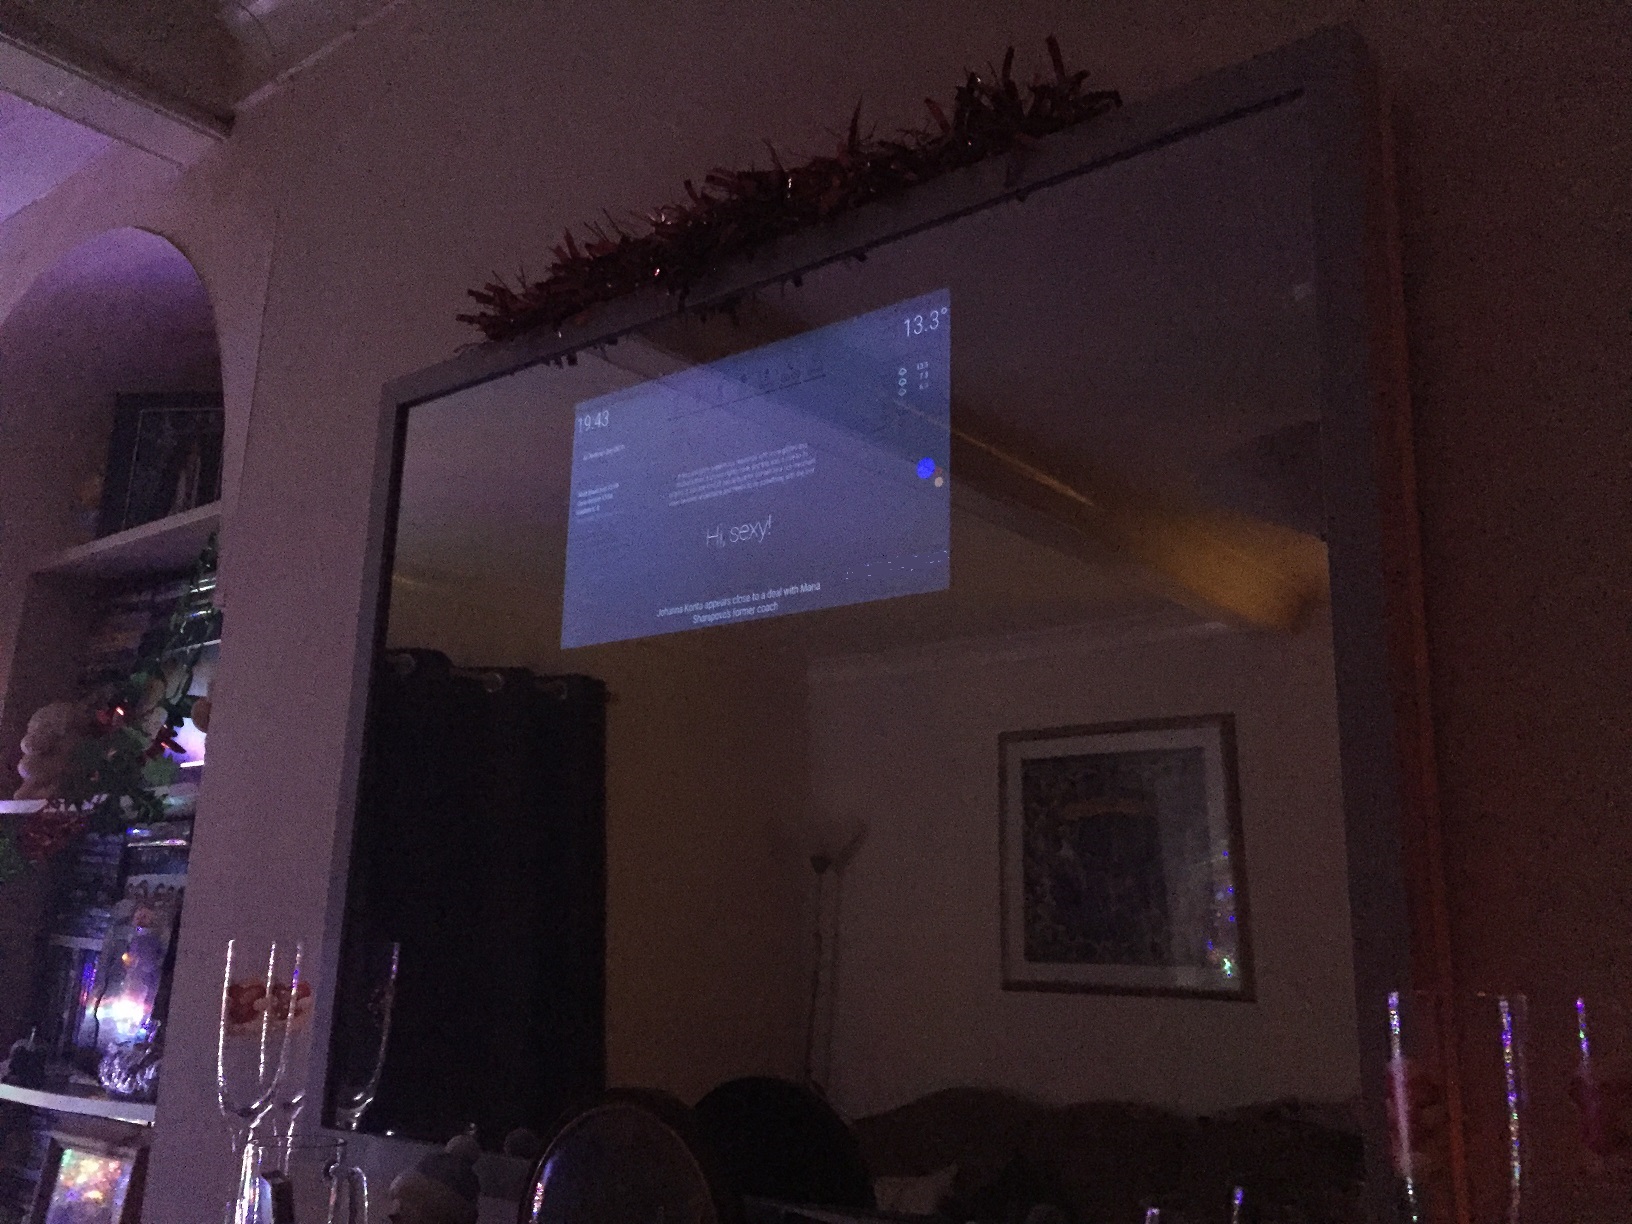
Close up from above. You should see what I mean about how bright the screen appears when you’re looking down at it…
Thanks @Mykle1 - I might have given up trying to upload pictures! Is dimension a factor in replies? The originals were 3264x2448.
Hello! It looks like you're interested in this conversation, but you don't have an account yet.
Getting fed up of having to scroll through the same posts each visit? When you register for an account, you'll always come back to exactly where you were before, and choose to be notified of new replies (either via email, or push notification). You'll also be able to save bookmarks and upvote posts to show your appreciation to other community members.
With your input, this post could be even better 💗
Register Login