for my friend Mr. Mykle i will answer in english :)
I use a common IP cam (always on) which points to the door and let the stream show on the mirror via the
MMM-RTSPStream module
Works awsome.
for my friend Mr. Mykle i will answer in english :)
I use a common IP cam (always on) which points to the door and let the stream show on the mirror via the
MMM-RTSPStream module
Works awsome.
yes its named “compliments”, already build in and shows for instance
“you look amazing!”
:)
please do not use this thread for a complete other module and problem
maybe this is what you are looking for?
https://forum.magicmirror.builders/topic/1467/mmm-plexnowplaying-display-current-song-played-by-plexmediaserver
?
Habe you compared the Laptops Power consumption with the raspberries? ;)
For sure it runs way better, but if you use just normal stuff, it is absolute not necessary imho.
Most of us use the mirror on the wall, without tons of cables (execpt Power) viewable. With a Laptop you have to be more tricky.
But nice to know that it runs easily With Ubuntu :D
I want to push this again, since i recognize there is a lot ongoing currently in the forums.
My updated list
What are your current top3 ?
Looks nice.
Playing some real classics :)
Still searching for a solution for a logitech Media Server. Hopefully your Code can point me to the right direction. Guess the api could be similar. Hopefully
oh i forgot something…
i also added this one at the pi server
In file /var/www/html/admin/scripts/pi-hole/php/auth.php add your host in the array of allow hosts:

$AUTHORIZED_HOSTNAMES = array( $ipv4, $ipv6, str_replace(array("[","]"), array("",""), $_SERVER["SERVER_NAME"]), "pi.hole", "localhost", "your.hostname.com" );
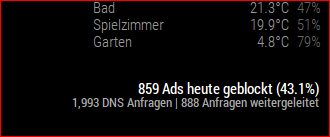
got it work.
Check if your clone from git is correct from up an lowercase…
for me it was cloned to
mmm-pihole-stats
instead of
MMM-pihole-stats
also check that in the config style.
it only showed something for me, after setting
showSources: false,
Maybe it helps someone
changed also some stats to see the more interesting stuff

19€ for the mirror?
That is really cheap
looks fine.