Are you on Pi 4 perhaps? I also got the same problem with the module mentioned above.
Then I switched to this one and it works https://github.com/bugsounet/MMM-NewPIR
A New Chapter for MagicMirror: The Community Takes the Lead
Read the statement by Michael Teeuw here.
Read the statement by Michael Teeuw here.
Posts
-
RE: "No Signal" message when PIR sensor is triggered
-
RE: My first, slim mirror at home
@djdocta I am using this one for spotify https://github.com/raywo/MMM-NowPlayingOnSpotify
-
RE: My first, slim mirror at home
@Philly yes I did solder on three needed wires. You can’t let them hang on sensor connection points, need to be soldered.
Try getting soldering gun from some friend. And skip buying cheap soldering device… -
RE: UPDATE: Replaced my PIR-Sensor with a Doppler Microwave Sensor.
@Philly I gave up on PIR as it was giving me too many false-positive reads no matter which type or brand I tried. Simply too unreliable for my taste. And you need to position it in front of mirror glass which doesn’t look good on my slim smart mirror design.
The microwave sensor mentioned in this thread works perfectly for my mirror so far. I had to set the trimmer value a bit higher (close to 180ohm) to get an ideal sensing range. But as you see on the link above, my design has a sensor behind glass. -
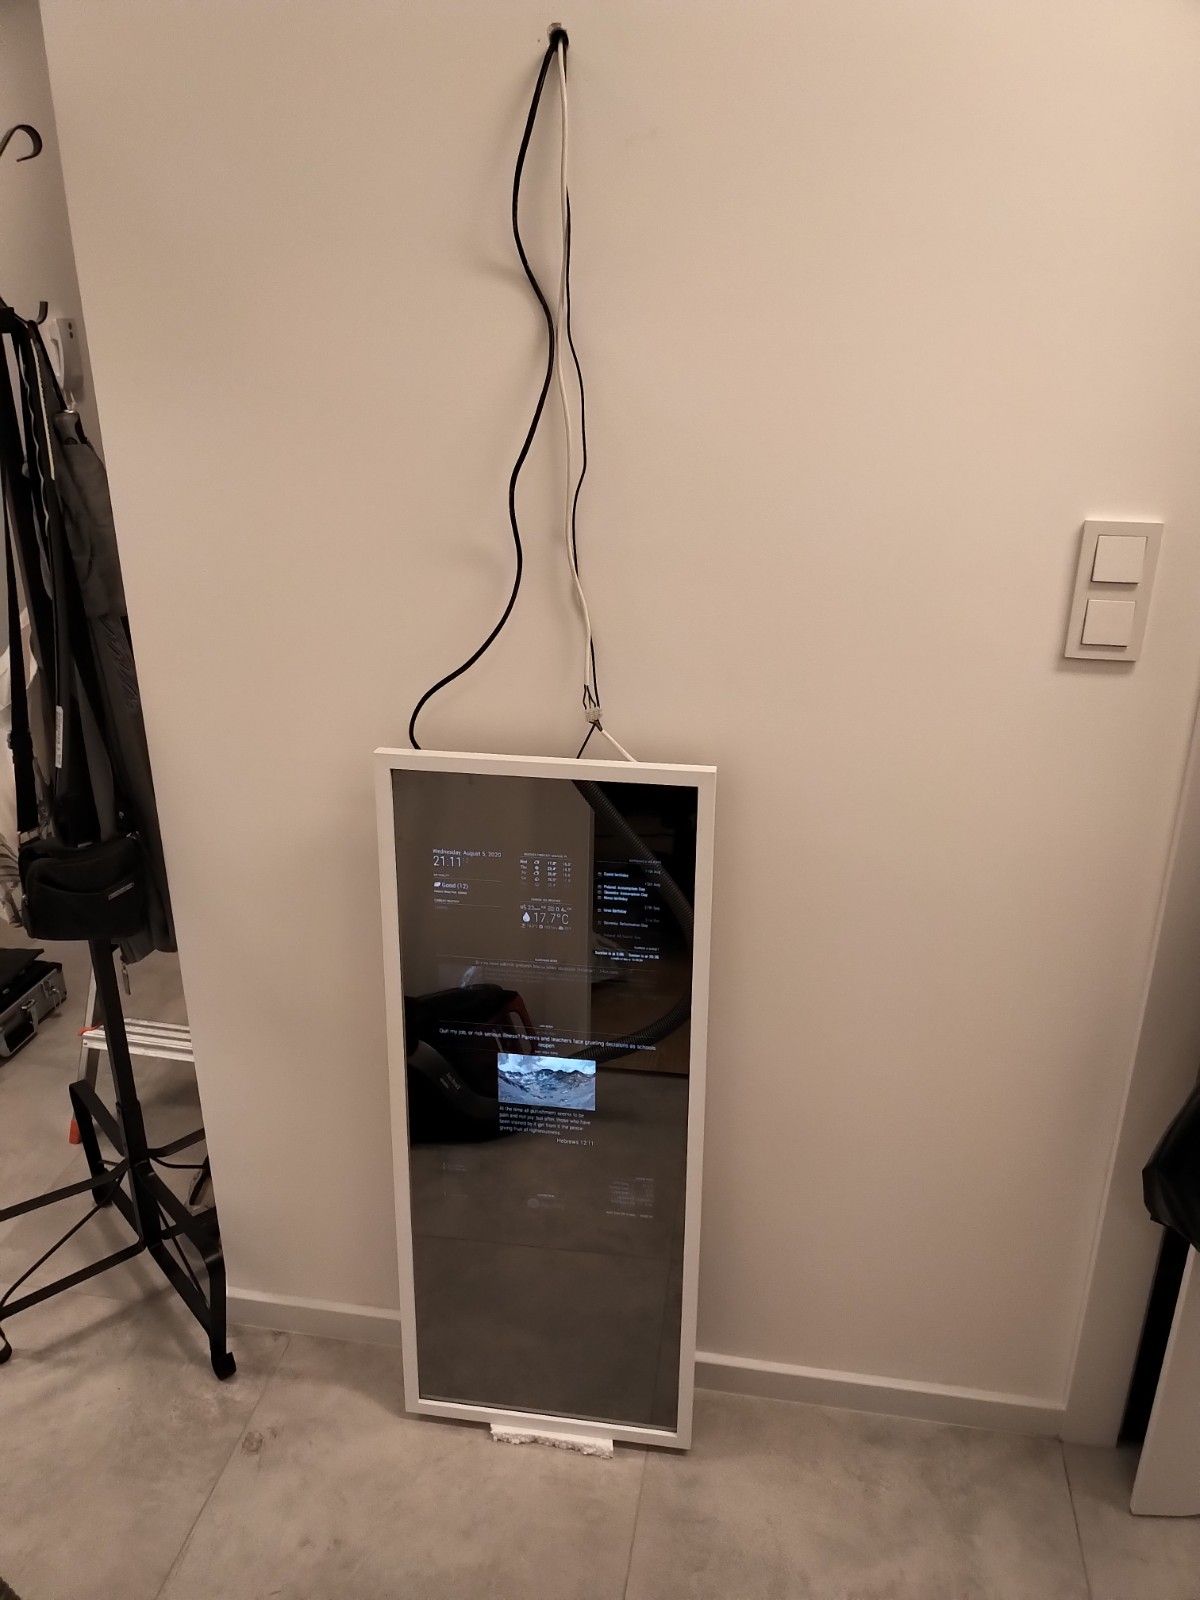
My first, slim mirror at home
Finally, I made it! My first magic mirror at home. I was planning and getting it all together for months.
Software and motion…
Initial MM install on Pi4 was not so hard, the only thing I struggled was putting the screen to sleep and waking it up with motion.
After trying several PIR sensors I always had false detections or poor detection. It would also look ugly on a clean minimal frame I wanted to install. I simply gave up on the PIR sensor and switched to RCWL-0516 sensor.
Here I need to thank @Fozi for his post on using a microwave sensor. Really good post with everything explained. When I tried a microwave sensor it just worked in the first try!
I am still fine tuning MM modules use and so far I have on: weather, air quality, spotify, philips hue, calendar, news, system stats, sunrise sunset, and motion detection and bible verse. All runs great on a 2GB Pi4 system.Screen…
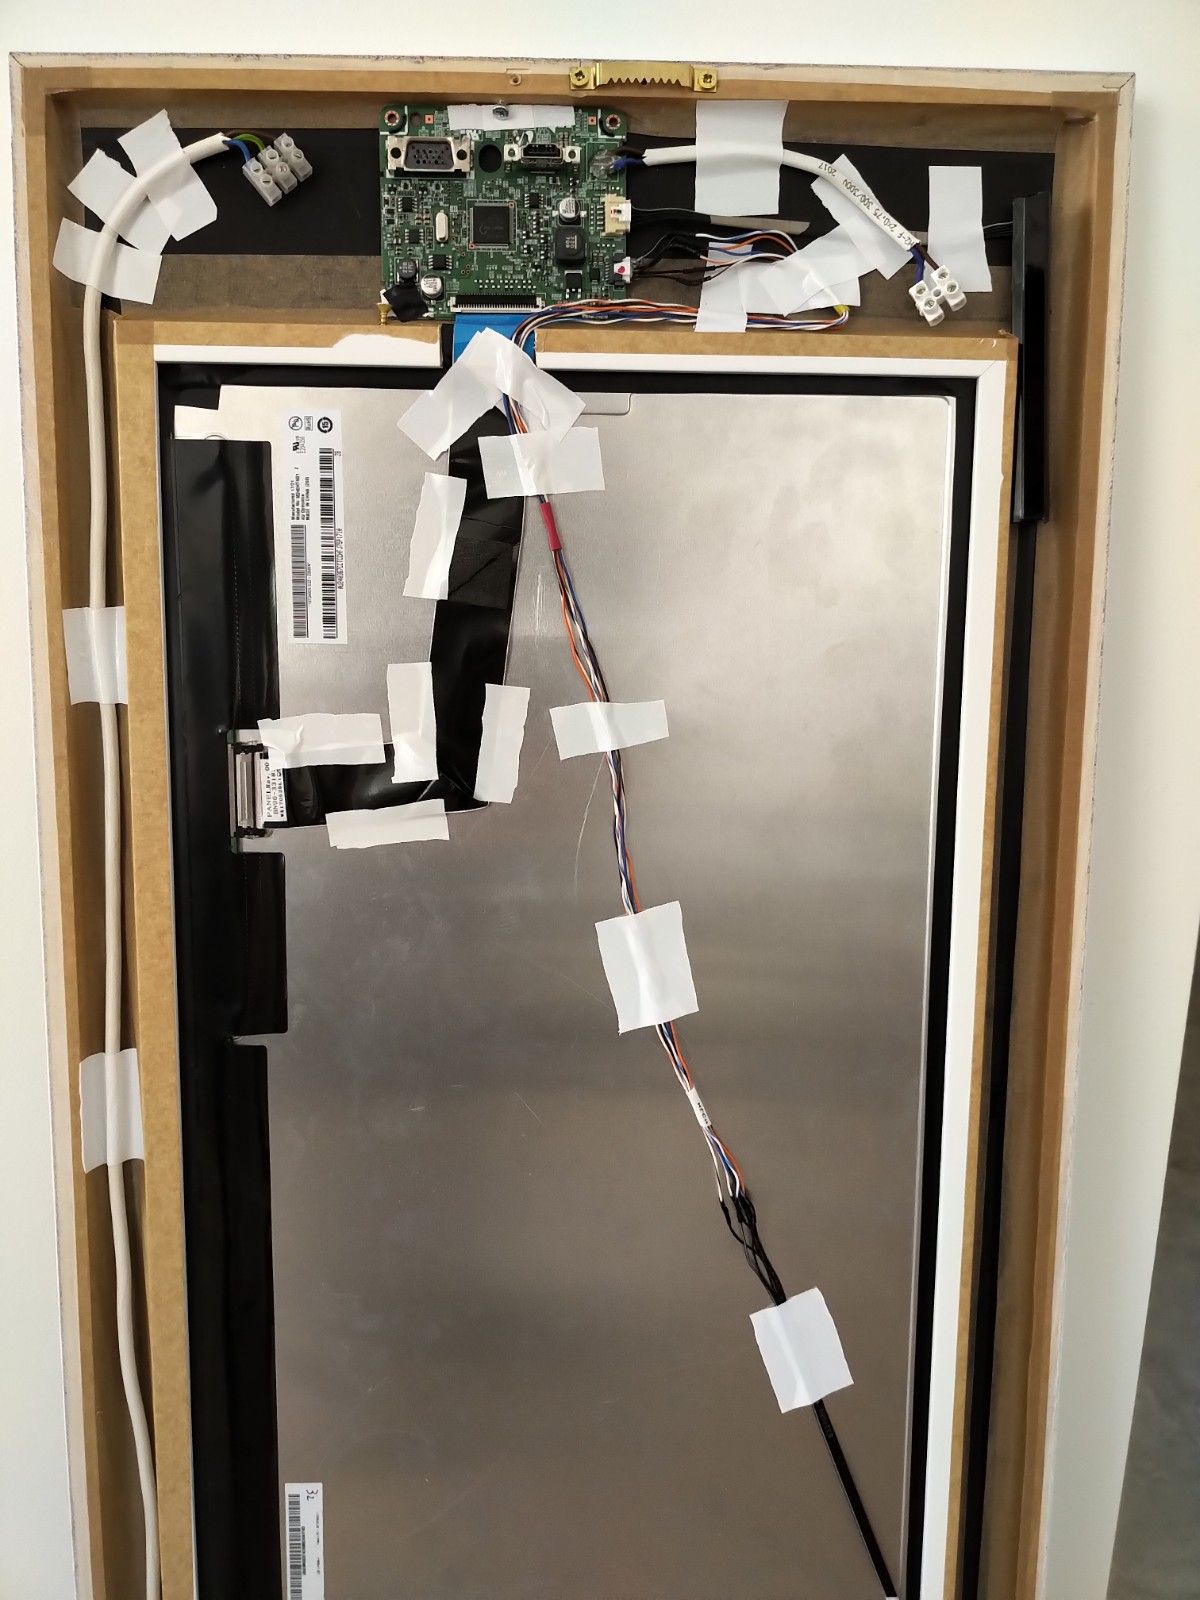
I was lucky to have a spare samsung 24" screen that was easy to disassemble. Total screen depth without its motherboard is only 20mm. That gave me the opportunity to use an ordinary wood frame and go as slim as possible.
I did need to move the screen mainboard to a different location which meant extending 6wire cable for the backlight. Another good thing with this monitor that it’s powered by external 14V brick. It means no mains AC power needed on mirror assembly.Mirror glass…
Big thanks to @Goldjunge_Chriz for organizing group buy of mirror glass. The glass itself looks great and it’s not too heavy. I was double lucky with my order, got it delivered in one piece and it had no protective film to indicate correct side :D
Advice for folks deciding on a future order of glass mirror, take it with polished edges. It makes your life easier when handling with a bigger piece of glass.Frame and mounting…
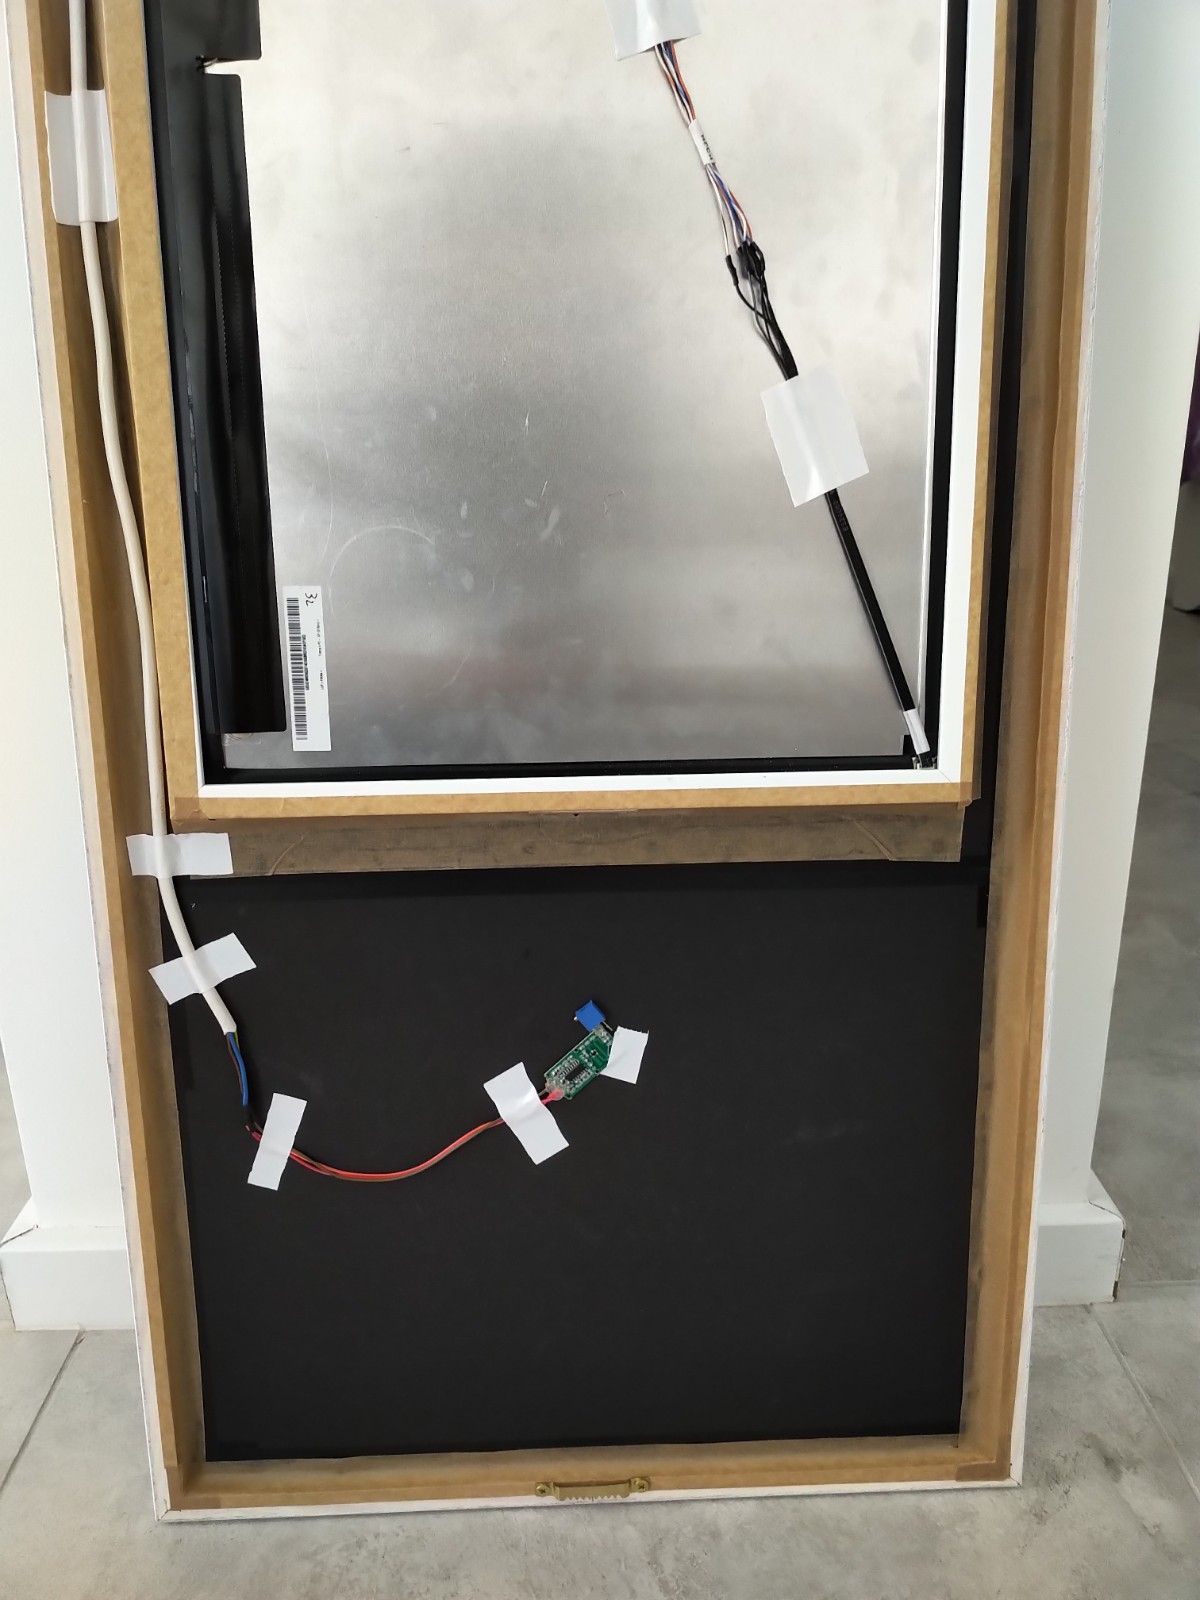
First, I prepared the glass with putting sheets of black A3 format paper and taping it down to the backside. Also, I cut a hole for the screen and taped the edges of the screen.
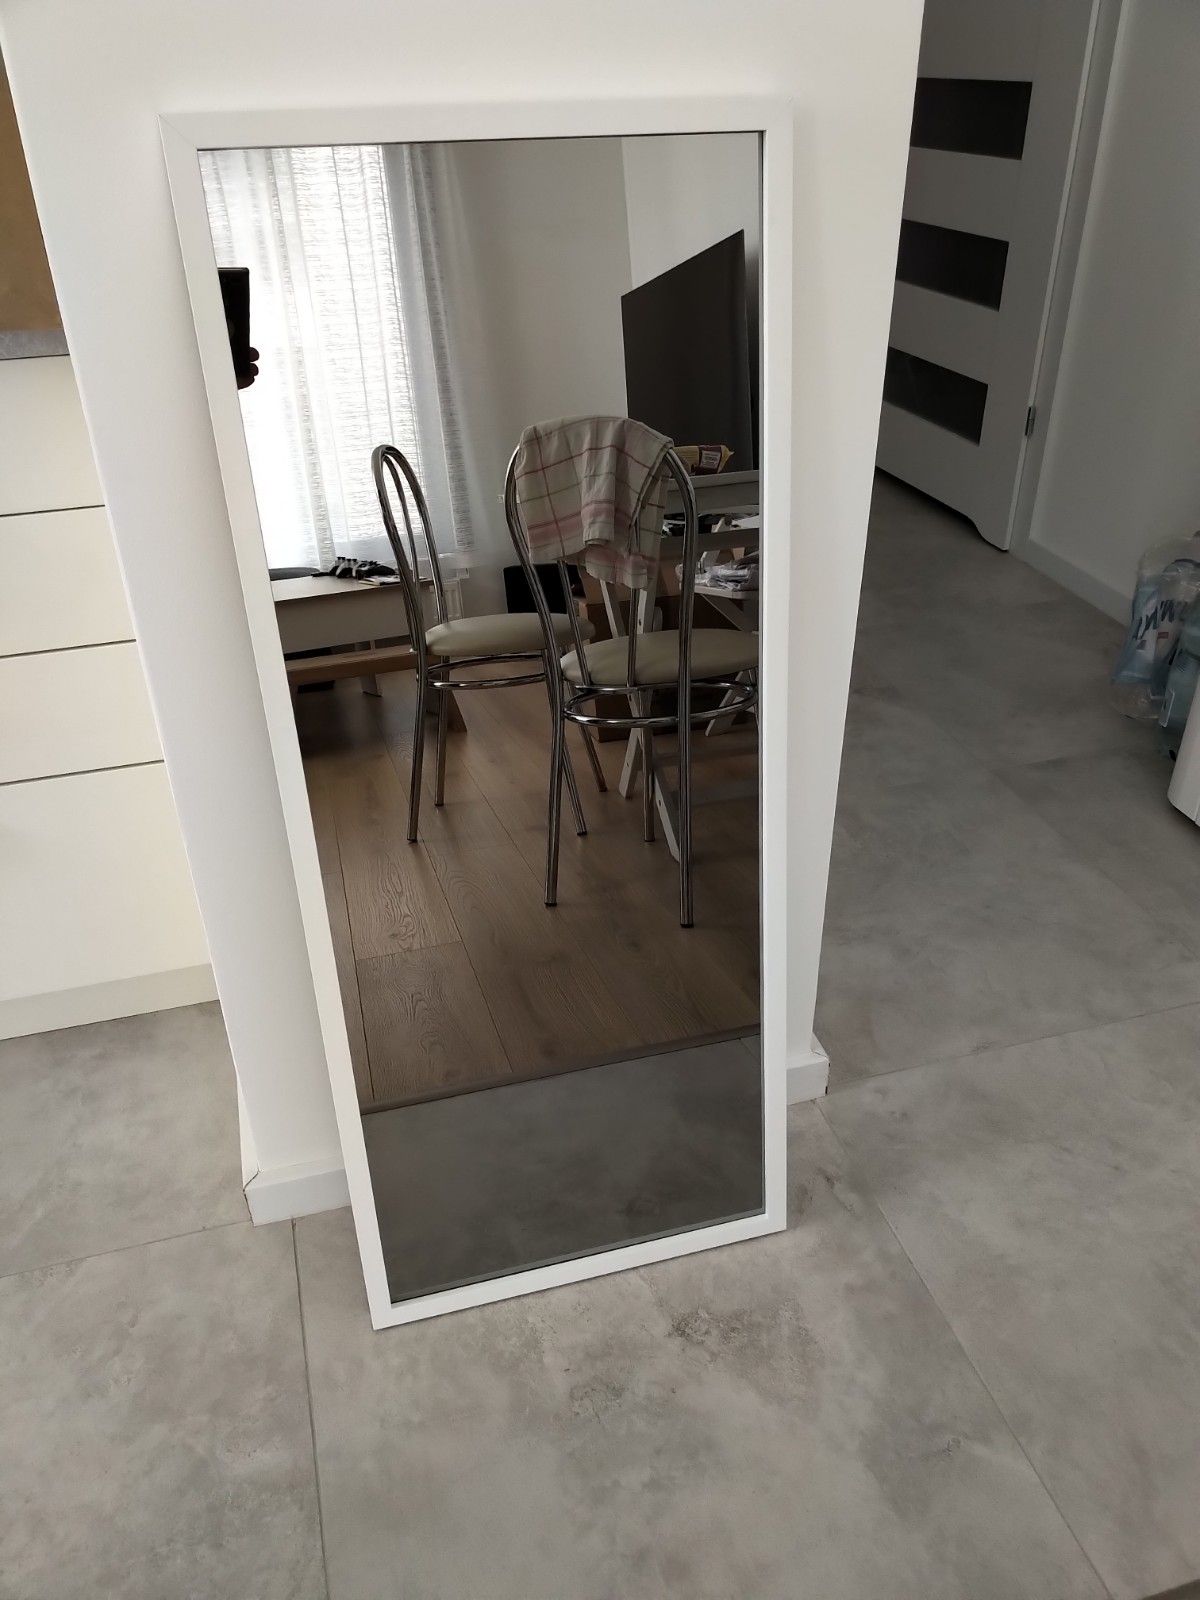
Then I went to local picture framing studio where at first I got weird looks but then guys took it in and did a good job. They did a frame under a frame design. First bigger frame for the glass and under it another smaller frame for screen.
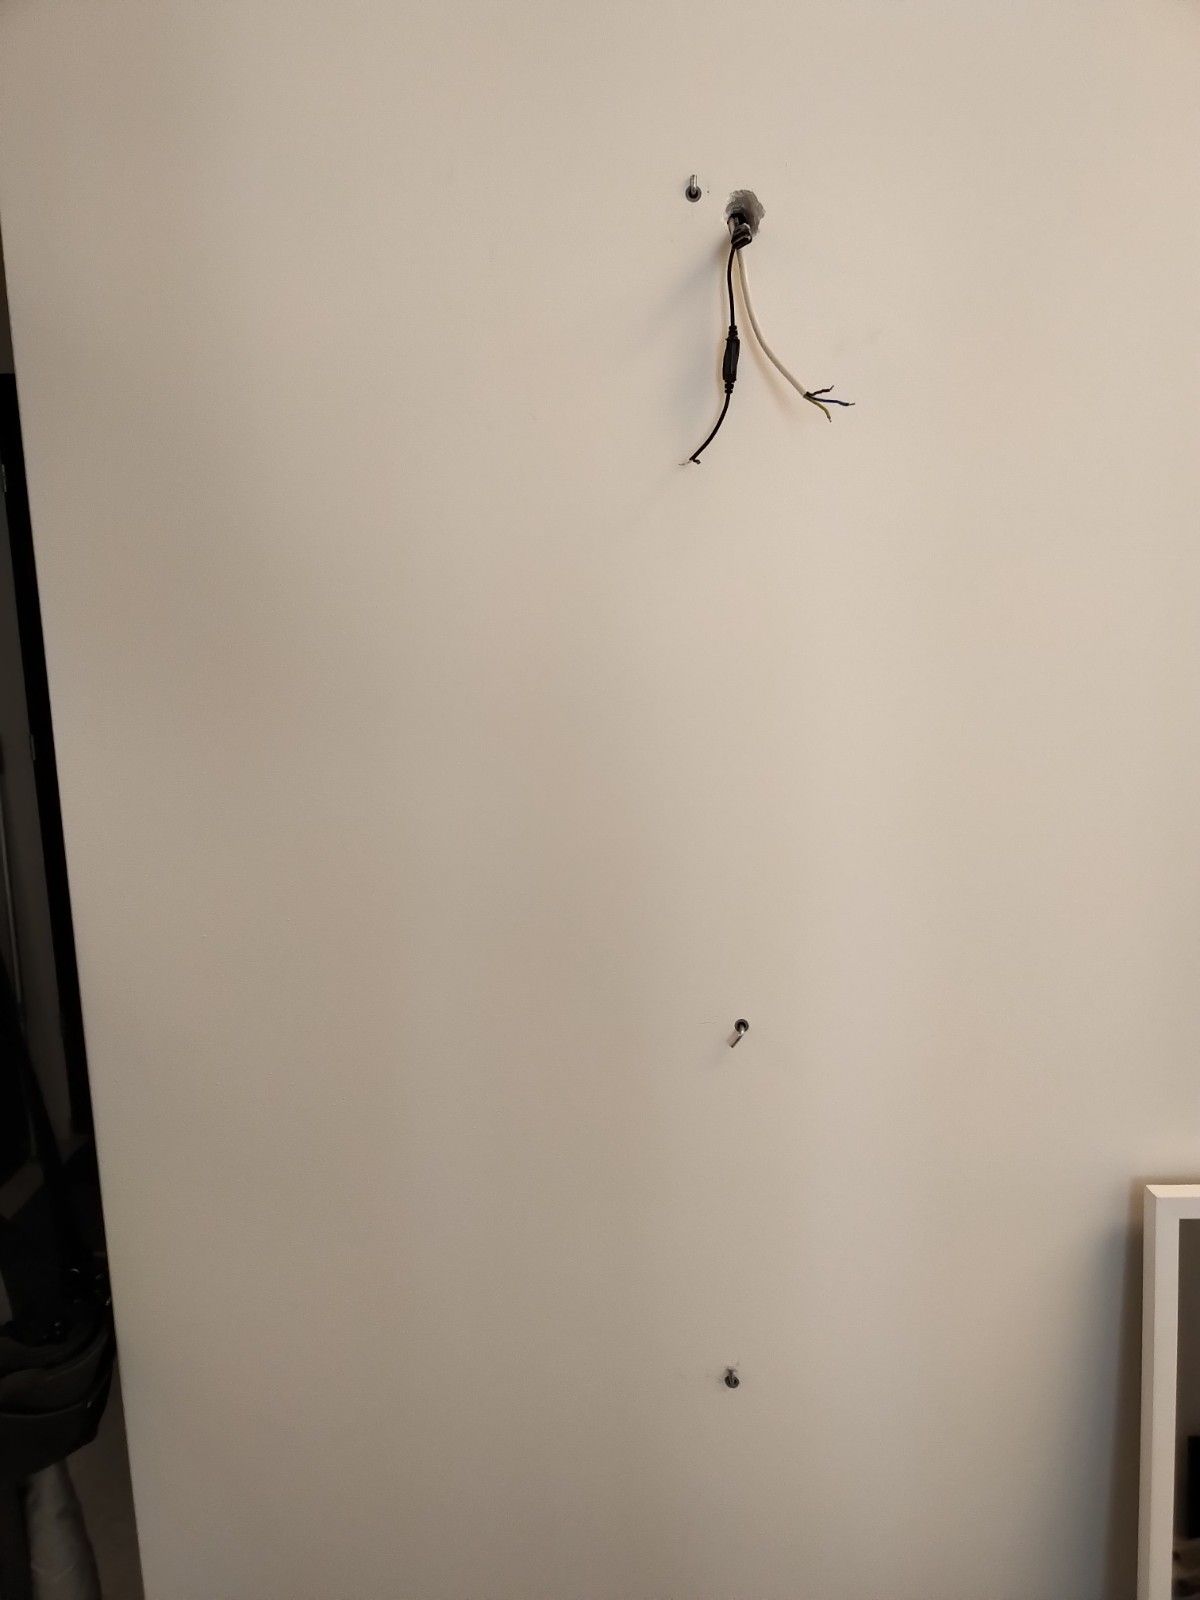
I was positively surprised how good it looked, even my wife changed her mind :D After getting frame done I focused on cables. I tried to minimize connections as much as possible but in the end, I have 3 cables (HDMI, screen power, motion sensor) that need to connect to the mirror. I am looking at cable connector ideas for quicker disassembly when needed.
I was also worried about how to mount it all on a wall. In the end, I drilled 3 mounting holes to the wall with sturdy long hanging screws. Top and bottom screws are for hangers mounted on the frame and I also added a screw to the middle, just under the screen frame to add that extra holding place. There is another bigger hole for routing all cables from the back of wall.
I hope this mounting will be sufficient, the whole mirror is like 7-8kg. If anyone has better ideas of mounting wooden framed mirror pls share.Overall I am happy with this build. The whole frame is max 26mm from the wall and the fact there are no wires anywhere it makes it a true magic mirror ;)
Also, I learned some new things and found another great community of builders!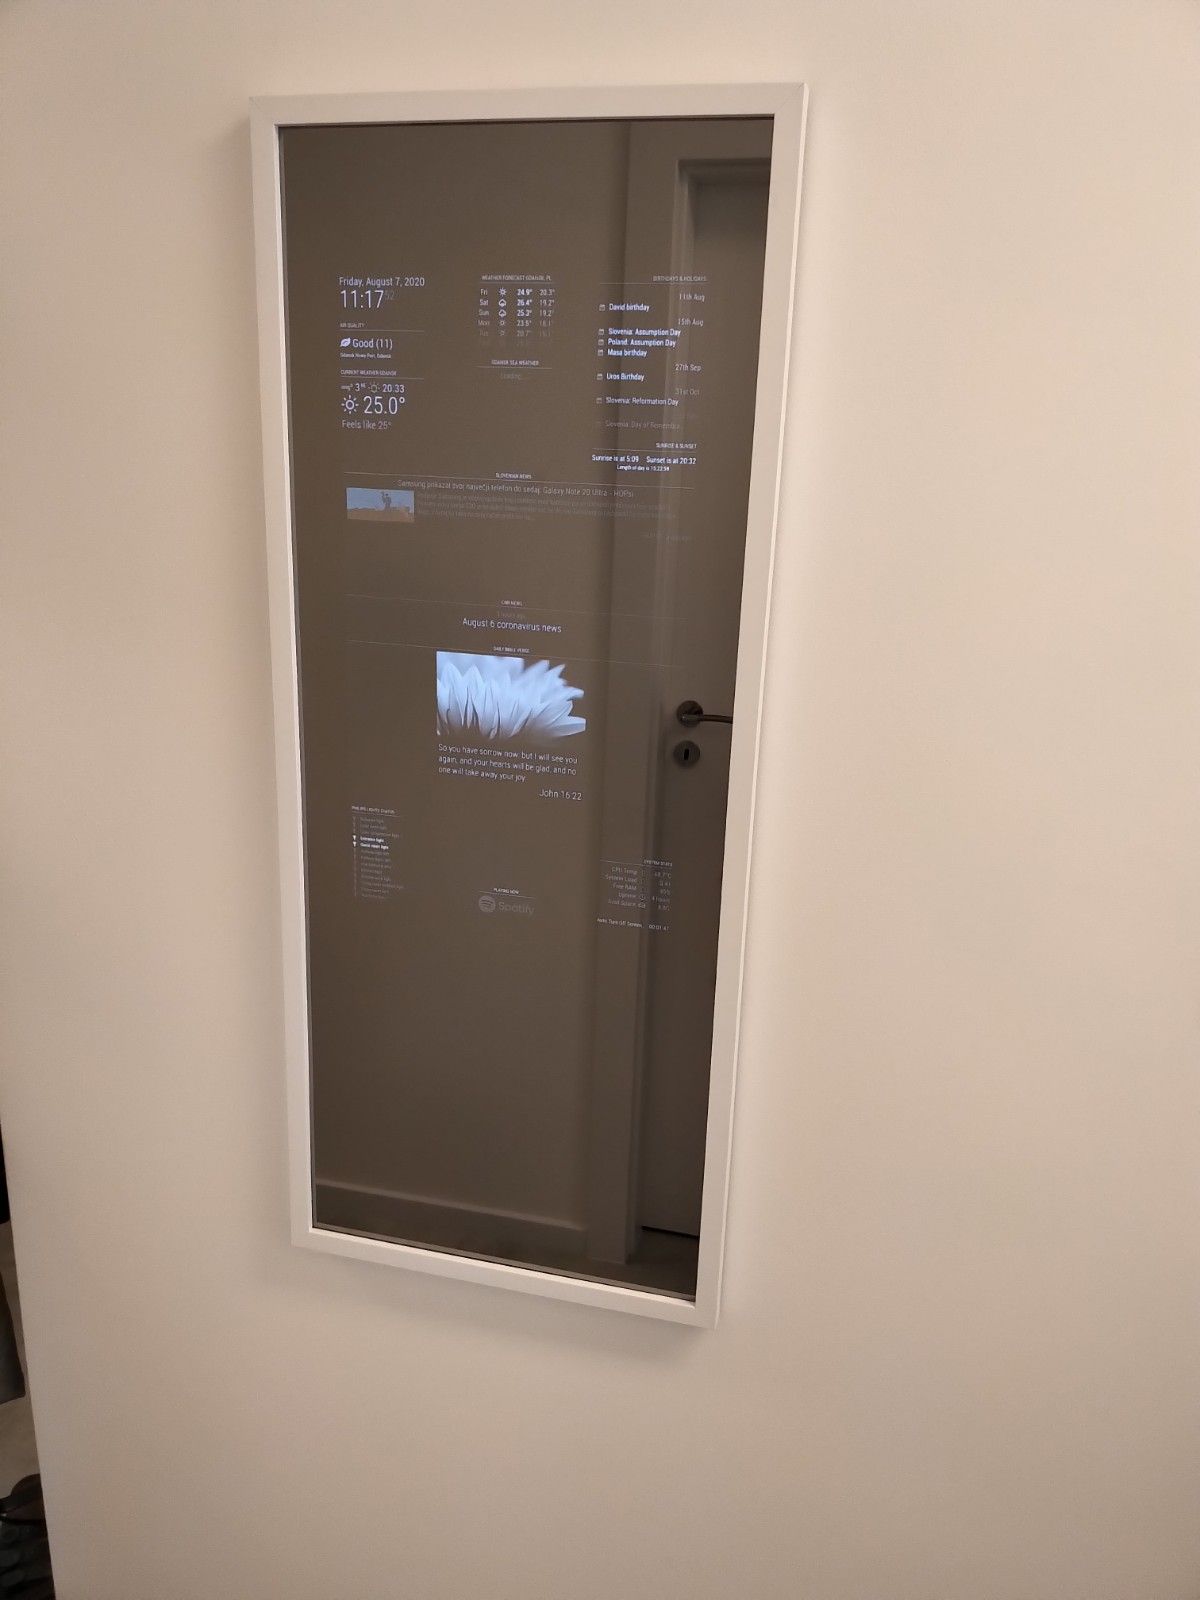
-
RE: *NEW LIST 29.06.2021* Two way community order for mirror glass for all european countries - Open until at least 10 people have entered
@Goldjunge_Chriz said in Two way community order for mirror glass for all european countries - Open until at least 10 people have entered the list:
that’s true. There was no film attached to one of the mirrors at the factory. then that was probably yours :) the film also has no function, but is simply intended to show the correct side.
If you compare both sides with each other and hold them in the light, you should notice a side that is a little lighter and reflects better. this is the coated side, i.e. the side you look into. The other side has a little less mirror effect.
Yaaay lucky lottery winner :D I did it this way and hoped it’s correct. Thanks for confirming it.
I am now waiting for a frame to be built. Then assembly and mounting on wall… -
RE: *NEW LIST 29.06.2021* Two way community order for mirror glass for all european countries - Open until at least 10 people have entered
@fribse said in Two way community order for mirror glass for all european countries - Open until at least 10 people have entered the list:
@uros76 Chris told me that the side with the protective film on is the ‘outside’ of the mirror.
Protective film? Mine did not have any protective film.
@Goldjunge_Chriz can you indicate how do I recognize which side is which? -
RE: *NEW LIST 29.06.2021* Two way community order for mirror glass for all european countries - Open until at least 10 people have entered
I got mine luckily in one piece. But it did have a small chip on one of the edges. Possible damage through process of sanding off edges…
By the way, how to be 100% which side is correct? One looks slightly more reflective than other but I am not sure :/ -
RE: Minimal depth of a frame for the magic mirror
@stepan it really depends on monitor. My 24" Samsung S24D330H screen without mainboard is max depth like 17mm. The screen’s mainboard is connected with 3 cables to the screen. One is for screen data, second for screen lighting inverter, and third for touch buttons panel.
Luckily screen data cable is long enough so I can move the mainboard around. The inverter power cable is not long enough for maneuvering but its only few wires so I will just extend those wires to the desired location. The touch panel cable I don’t care about since I won’t be manipulating with buttons at all.
One more good thing about this monitor is the power supply. It uses an external brick-style power supply which gives only 14V to monitor. I guess that’s why they managed to make monitor so thin, no need for internal power supply electronics. Saying that it will make my life easier to just solder on +/- power wires directly on the mainboard.Anyway, that’s my plan for my first MM. Now I am waiting for the glass mirror to be produced and delivered. Then I plan to summarize complete build.
-
RE: Minimal depth of a frame for the magic mirror
I am planning to go for 2cm depth with the Samsung monitor I took apart. I will need to move monitors mainboard on the side and use angled hdmi cable. Once I receive mirror glass will sum up whole setup.