Read the statement by Michael Teeuw here.
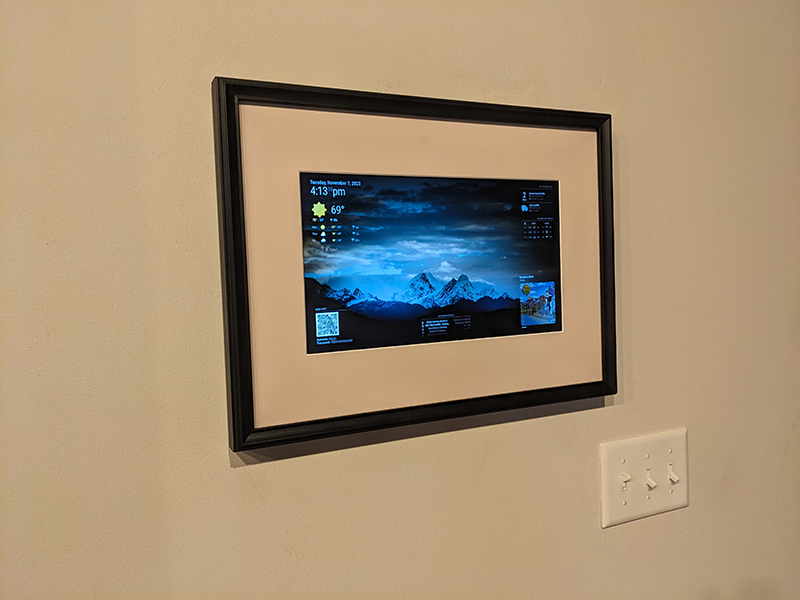
MM digital display hung like a picture
-
I adapted MM to make a digital dashboard for our reception area at work. It runs on RPI3 and works very well.
Ever since I built it, I wanted one for home.
I had 3 requirements:
-
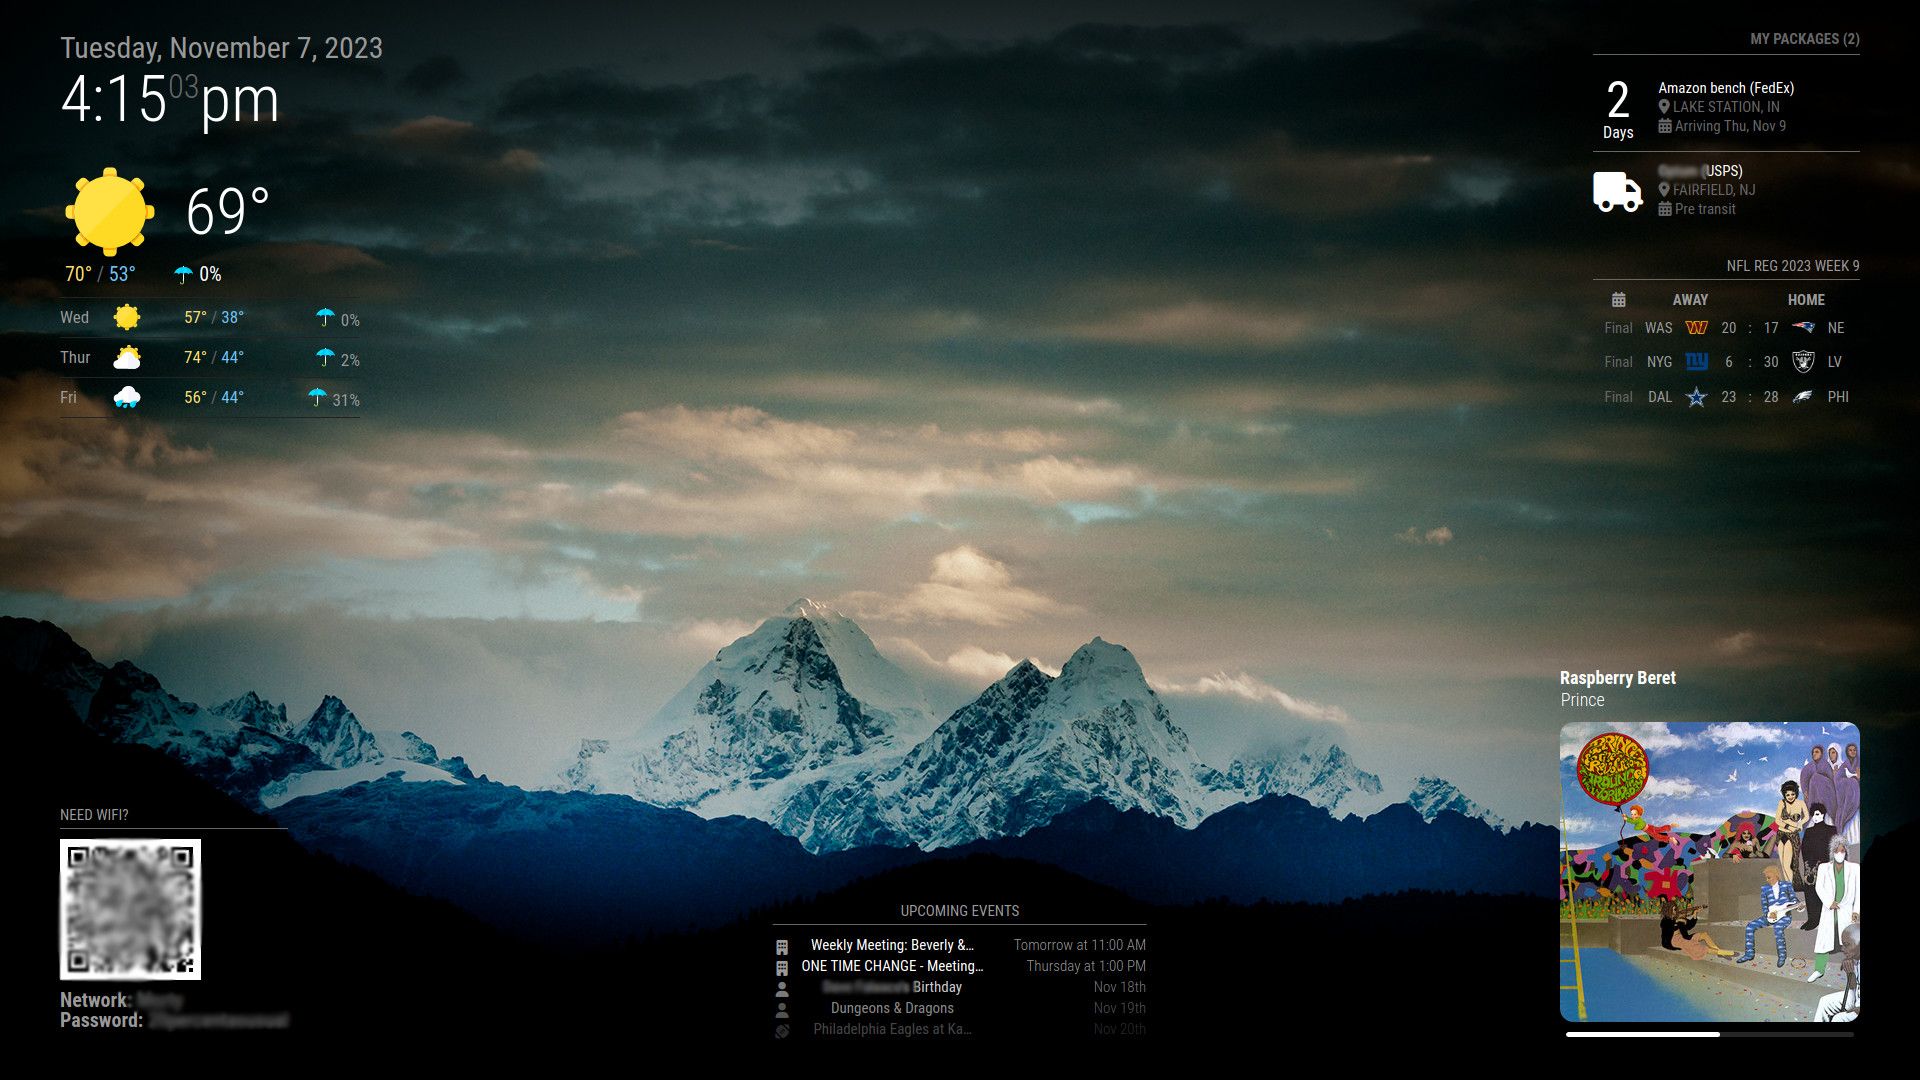
The usual stuff like time and weather is fine, but I wanted some genuinely useful info on it, hence the package tracking and combined work/personal calendar.
-
I want to hang it like a picture in a regular frame, matted out. No 3" deep frames here.
-
NO WIRES.
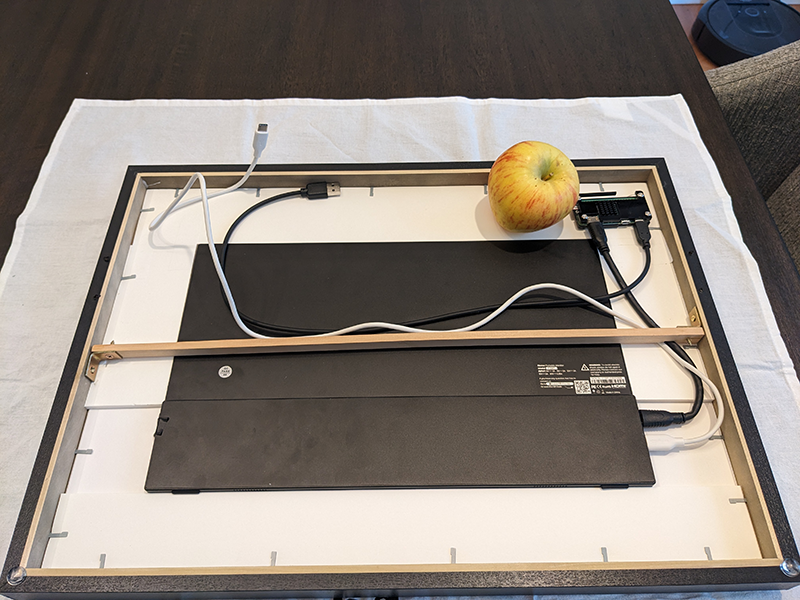
Thanks Pi Zero 2 it’s ended up nice and thin in a regular frame.
Behind the frame I installed a recessed outlet with USB-A and C built-in, so the lack of wall warts let’s it be completely flush (the monitor is a portable 15" that runs off USB-C).
I tinkered with some of the modules java and CSS to get what I wanted; but I’m definitely not a software guy. There was a lot of trial and error.
I’m very, very happy with the results and I can’t thank this community enough. I got to to where I wanted standing on the backs of your forums and module documentation.
-
-
-
-
@rmonkey That is really really nice.
-
@ankonaskiff17 said in MM digital display hung like a picture:
@rmonkey That is really really nice.
Thank you! I’m very proud of the results.
Installing the recessed outlet – the task I was most worried about – turned out to be the easiest part.
And I really can’t stress enough how helpful this forum was during the process.
-
@rmonkey I really like how thin it is.
-
Looks great!
I would love to see a picture of the recessed outlet and hear more about how you did that.
Also, is the monitor one of the portable monitors you can find on Amazon?
-
@UncleRoger said in MM digital display hung like a picture:
I would love to see a picture of the recessed outlet and hear more about how you did that.
Also, is the monitor one of the portable monitors you can find on Amazon?
Yes, the monitor was a $75 Vilva 15" portable monitor from Amazon.
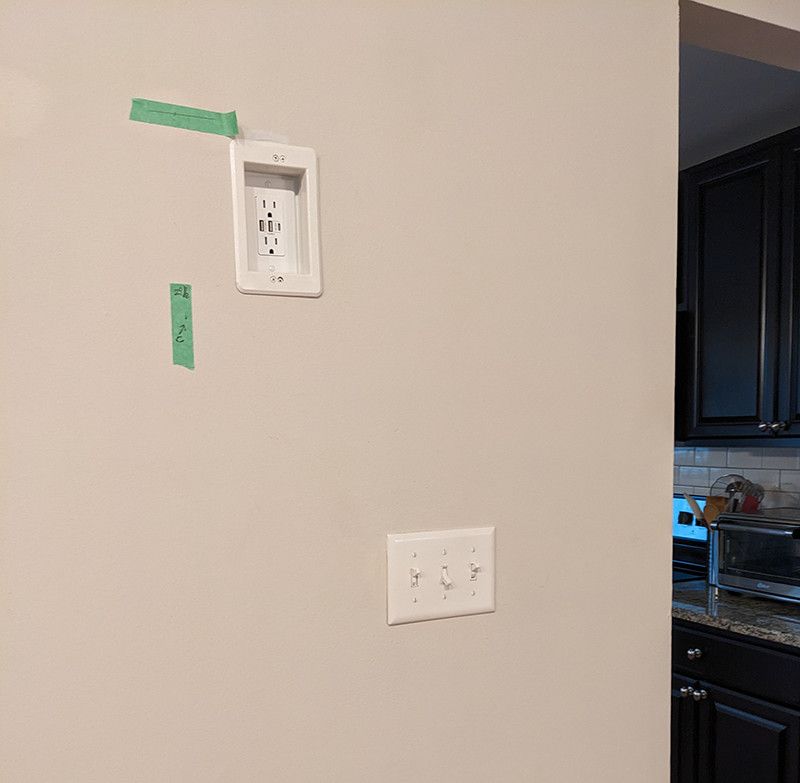
As for the outlet, this was very simple because there is an outlet directly below the spot. Because drywall is (usually) empty, I was able to simply tap the existing outlet. I cut the hole for the recessed old-work box and fished romex straight up to it. Pulled the romex into the box and installed the box. Then installed a recepticle with both USB-A and USB-C.
The biggest hiccup is it didn’t work. Then I remembered I forgot to flip the circuit breaker back on. :face_with_rolling_eyes:
Here’s a pic:
Lastly, I hung the frame with picture wire which wasn’t optimal – it hung away from the wall and you could see the wires behind it. An inexpensive french cleat solved that.
-
That’s awesome. Thanks for the additional info. I may try to do the same thing at some point, if I can get my wife to let me cut into the wall. 8^)
I’m planning on using a french cleat for my board that I’m working on in the kitchen; it seems the best way to go all around.
Great work and thanks!
-
@UncleRoger said in MM digital display hung like a picture:
I may try to do the same thing at some point, if I can get my wife to let me cut into the wall. 8^)
If you don’t already know how to patch drywall wall, learn how. There are tons of great tutorials on YouTube and it’s inexpensive.
That will take the trepidation out of cutting a hole in your wall! I’ve been reparing my own drywall for years and even I’ve never permanantly screwed things up.
Oh, I have the amazon links for the box and receptacle if you decide to take the plunge:
https://www.amazon.com/gp/product/B002W6ZOR4/ref=ppx_yo_dt_b_search_asin_title?ie=UTF8&th=1
https://www.amazon.com/gp/product/B07ZJC751K/ref=ppx_yo_dt_b_search_asin_title?ie=UTF8&th=1
-
@rmonkey nice mm display, would you mind sharing what modules you used?
-
MMM-ModuleScheduler
MMM-BackgroundSlideshow
clock
MMM-OneTracker
calendar
MMM-DarkSkyForecast
MMM-NFL
MMM-WiFiPassword
MMM-OnSpotify -
Nice, really like the clean and slim design. :thumbs_up: Are you planning to install a PIR sensor? Or is your display running 24/7?
-
I’m thinking about a PIR down the road.
I like the idea of only having the background slideshow on and then info modules appear when you walk up to it.
Right now it kills all modules around midnight and comes back on early morning.
-
@rmonkey
I wrote a bash script that will take lat and lon, do an API call to Openweather, and get the sunset and sunrise times. then it will schedule a sunrise program and a sunset program to run via ‘at’. You can have +/- offsets for sunrise/sunset and you can just have a settime. So what I’m doing is doing api calls to MM at 10pm to turn off my background images, and then dim the screen via the remote api. then at 15 min after sunrise it puts it back to normal.I have never published to github, but probably will at some point. Do you think this would be something folks would want? it is not a module. it does require jq and at to be installed on the linux system.
-
Wow, @jbat66 , that sounds amazing and waaayyy more sophisticated than what I’m doing (kill all modules at a set time and reboot in the morning).
Whether there are other people interested in that, I couldn’t say. My take is that I could see 5 people using it, 20 people learning from what you publish and maybe, maybe one person says thanks?
But, if it’s no big deal, share your stuff. I know I learned a lot from people here, although I’m at a much lower level than you!
-
@rmonkey Thanks. I will get it published, don’t know when, but will get it published
-
@jbat66 very nice Mirror, I hadn’t seen the wifi QR code module before.
-
@rmonkey nice option with the French cleat.
-
R rrslssr referenced this topic on
-
One other thing – it looks like @rrslssr is running a similar approach specifically for travel photos – and I want to share a tip.
My mirror runs a combination of some of my own travel photos and places I’ve been from Unsplash.
To make the modules more legible and pop better, I made a photoshop template. The top layer is a very light transparent to black (from the center) radial gradient. My backgrounds are the lower layer.
This applies a very light vignetting that is consistent among all the background images. I experimented until I found the gradient settings for the top layer that were perfect to my eyes.
I’m sure there are easier or smarter ways to add vignetting, but this works for me.
Hello! It looks like you're interested in this conversation, but you don't have an account yet.
Getting fed up of having to scroll through the same posts each visit? When you register for an account, you'll always come back to exactly where you were before, and choose to be notified of new replies (either via email, or push notification). You'll also be able to save bookmarks and upvote posts to show your appreciation to other community members.
With your input, this post could be even better 💗
Register Login