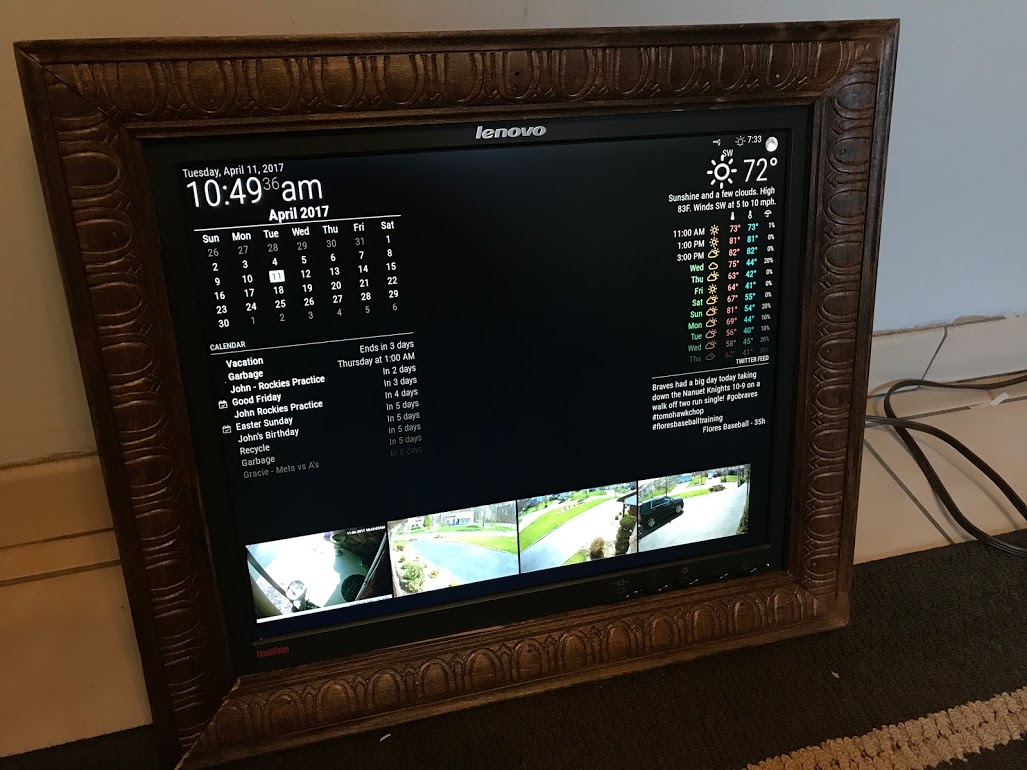
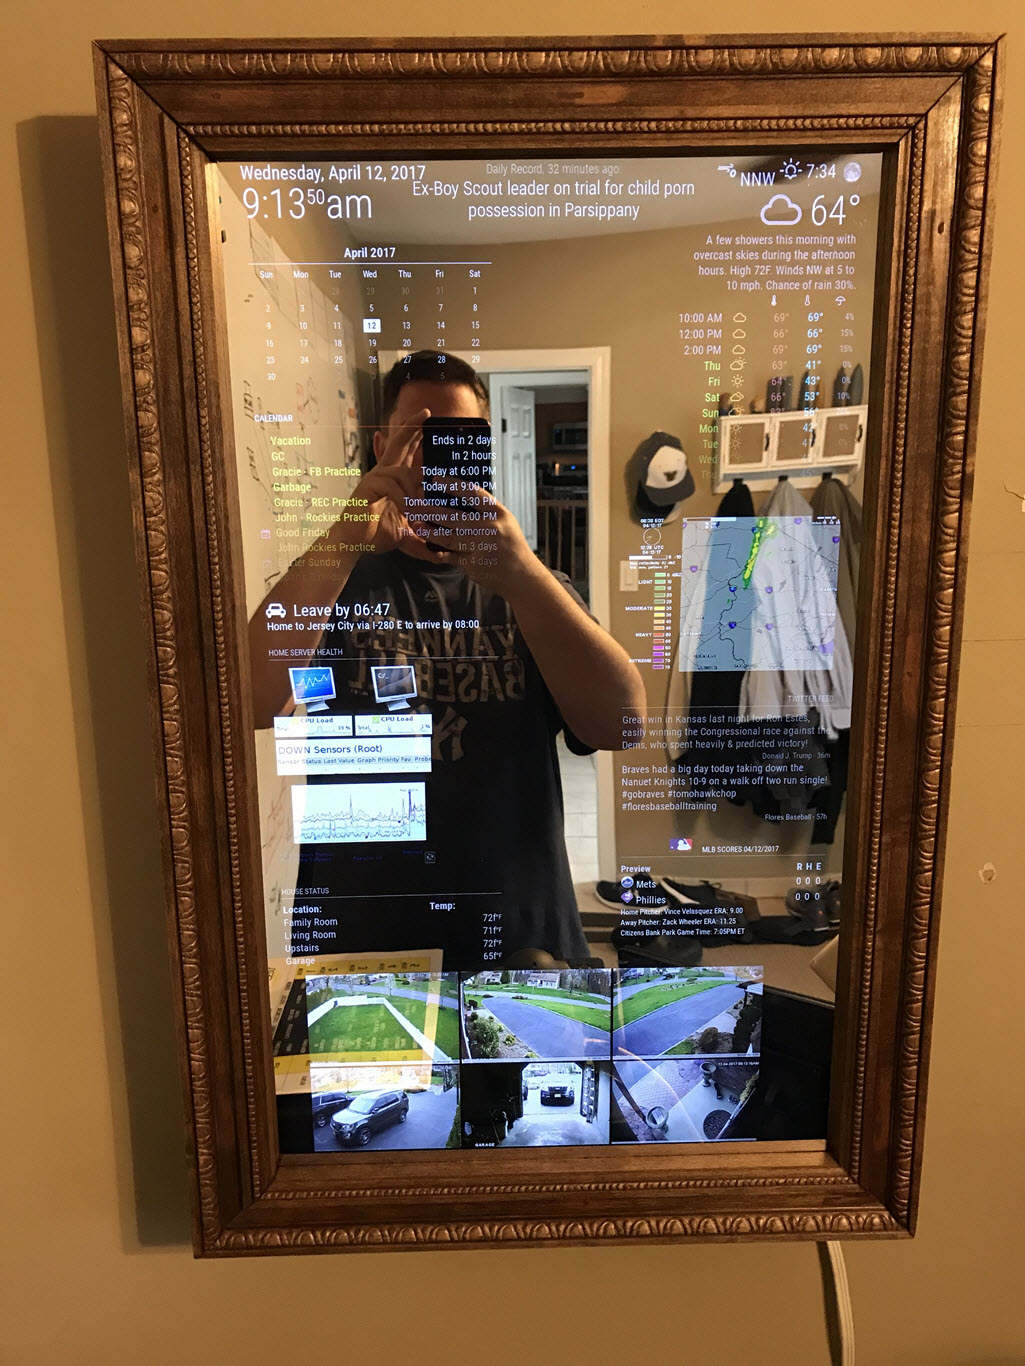
Read the statement by Michael Teeuw here.
27" custom framed magic mirror - fun to get done
-
I’d be interested in how you hooked your security cameras to it…
-
This is how I integrated my security cameras. If you have any questions or want more details let me know.
@iwaldrum said in 27" custom framed magic mirror - fun to get done:
I’m using a program called Netcam Studio on the same pc that I’m running MM in serveronly mode. Netcam Studio allows you to connect to multiple types of cameras, either local or IP based. I’m using it to connect my q-see surveillance system using RSTP connections, as well as several Foscam and PC connected cams.
Once the cameras are connected to netcamstudio, you can then generate a secure token based url for each one. I then took each url and placed them into a single html file and put it on a webserver (same pc). Using the iFrame module I pointed to the html file to display it on my MM. You’ll need to play with the positioning and sizing of the iframe, as well as the webpage layout and image sizes in the html.
I typically get 5-10 fps for each camera. Depending on the # of cameras you will be displaying and the type of system your running MM on will drive the performance of the playback.
I know the setup is a little complex, but I felt it was the best way to get a flexible, integrated look that performed the best.
Let me know if you have any questions.
-
I cant find the little weather icons. Temp hi and lo and the umbrella.

-
@cohron nevermind im a dummy, copied the custom.css without really reading it:
.region.top.right .MMM-WunderGround table th {
display: none; /* removes icons above max-temp, min-temp and % chance of rain */
} -
This mirror looks great! It’s been the inspiration to take a stab at making one as well. I like the idea of running MM on an existing windows server I have in the house and just rely on the Pi3 to load the webpage.
With your mirror do you turn off the screen when no motion is detected or does it display everything constantly? If you do turn off the screen, how are you triggering it on and off? I see there are PIR modules for MM but since you’ve made the decision to simply view the MM page remotely, I was wondering if you had some way to turn off the screen?
Thanks for taking the time to detail this out!
-
Glad I could inspire you. I do like running it centrally. Since I made this one, I’ve setup another one in my son’s room. Different size screen and content. .All I had to do is run another instance on my server - copy and paste folder and change the config file to my liking… done…

I do not turn my screen off. It’s on my todo list… To your point, it might be a little trick to do so since MM isn’t running locally. We’ll need to find an external solution to do so that works on fullpageOS or whatever platform you are running at the endpoint. If I find something Ill post…
-
@iwaldrum your project looks great! It is almost the module configuration I am also aiming for. Could you share how you integrated the surveillance cameras (iframe code)? I have trouble integrating mine. They offer rtsp and also jpegs that you can pull via http request. Which seems to be very similar to your setup. I would be interested in how you used the iframes to do it. Did you simply put the token-url in the iFrame-Module? How did you handle the refresh? Maybe you could share some code.
Thanks very much
Wolf -
@wbleek I achieved the cameras on my mirror pretty easily with Blue Iris. I simply made a custom .HTM file and placed it in the /modules directory of the MagicMirror then using iFrameReload i just call the /modules/custom.htm URL to load the cameras. Below is my custom.htm file I am calling in the iFrameReload module:
<table> <tr> </tr><tr> <td> <img src="http://192.168.1.108:81/mjpg/BackyardCam/video.mjpg?q=25&s=25" alt="BackyardCam" /> </td> <td> <img src="http://192.168.1.108:81/mjpg/FrontDoor/video.mjpg?q=40&s=40" alt="DrivewayCam" /> </td> </tr> <tr> <td> <img src="http://192.168.1.108:81/mjpg/DriveWayCam/video.mjpg?q=25&s=25" alt="FrontdoorCam" /> </td> </tr> </table>In lieu of having blue iris you could possibly simply pull the mjpg streams straight from each cameras individually and slap them in the img tag. That may be a better way actually but it seems to be working fine for me through Blue Iris this way.
Below is the code from my config.js showing how I am calling this custom HTM file:
{
	module: 'MMM-iFrameReload',
	position: 'bottom_bar', // This can be any of the regions.
		config: {
		// See 'Configuration options' for more information.
		url: "http://192.168.1.108:9000/modules/custom.htm",
		width: "100%", // Optional. Default: 400px
		height: "850px", // Optional. Default: 800px
		scrolling:"no",
		refreshInterval: 600, //Optional. Default: 3600 = 1 hour
		animationSpeed: 4000,
		}
	},
My setup is similar to the OP in terms of running the MagicMirror server on a central server and simply running fullpageos on the raspberry pi to call the magicmirror page.
Hope this helps.
-
Hi! Looks awesome! Congrats!
Do you have any photo from the sides and/or back? -
@cmille34 Hey, thanks for your answer. I appreciate that. My NVR only provides still JPEGs or RTSP for pictures. If I use JPEGs I have to reload them in a 200ms interval to achieve acceptable motion.
At this point, I have tried the following:
- uses MMM-iFrame
- do the reload via embedded HTML meta-tag
- strong flickers (approx. half of the time blank)
- works, but not visually accaptable
- does not scale due to the flickering
- use MMM-iFrame
- do the reload via embedded Java-Script function
- almost no flicker, almost fluid motion
- works for 30-60 minutes, then the module stops
- does not scale since it stops earlier with more modules
- use oxmplayer as an overlay
- needs '–avdict rtsp_transport:tcp ’ switches to work without banding
- rtsp with 640x360 works with 30fps
- tested to concurrent streams
I am happy with the omxplayer solution even though it is not integrated in the MagicMirror. But for the user it looks integrated and it delivery a very good video quality.
Cheers
wolf

