Read the statement by Michael Teeuw here.
First MagicMirror
-
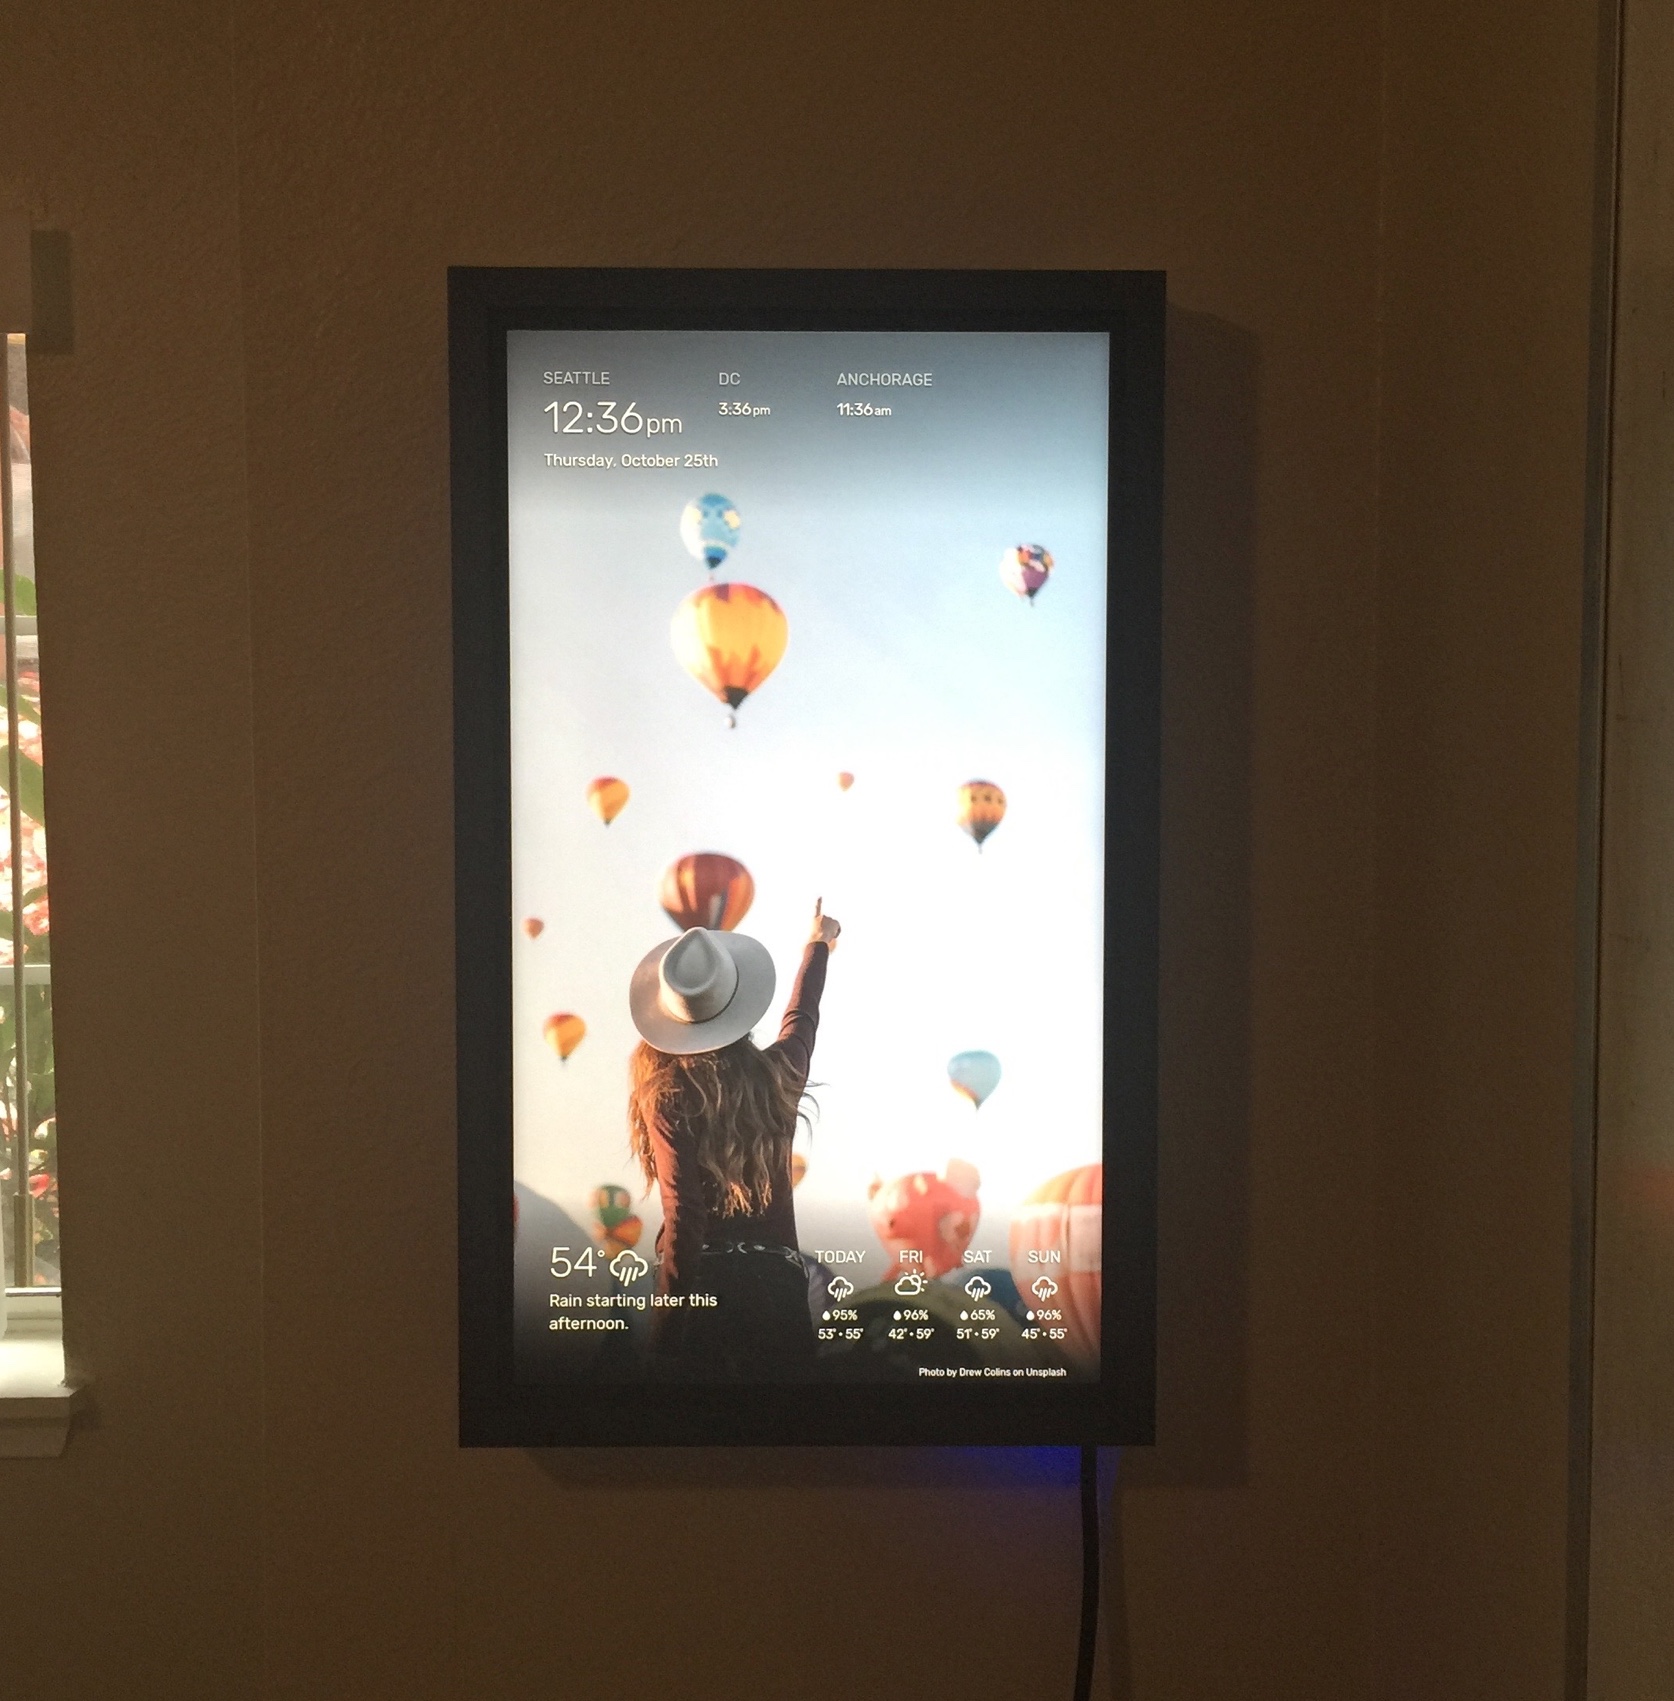
Finally finished my first maker/raspberryPi project :D
Took apart an old 12"x21" monitor and put it in a simple shadowbox frame, and wrote a MagicMirror module to give it a digital photo / wall display feel. I’ll probably add more modules later but I like the simplicity of it so far:
-
Nice mirror!
Can you share the module for the digital photo/wall display feeling ? -
Ignore my post, didn’t saw the link
-
Very nice indeed. Well done!I have to correct myself. This is more than just nice, I really like the look and the simplicity of it. Now imagine this in a very slim case or even embedded in a dry wall :smiling_face_with_heart-eyes:
-
Thanks!! I would LOVE to be able to embed a mirror in drywall (someday the dream will come true lol).
Now that I know what to expect from framing and cable management I’d love to build a super slim version. I’ll be keeping an eye out for deals on laptop screens from now on I think :)
-
Nice Mirror!!
Which Font do you use? -
@philreis Thanks! The font is Rubik.
-
Dear @delightedcrow,
thank you very much for this beautiful theme. I really like using WallberryTheme to beautify the background of my screen.
What strikes me is that the images do not seem to be truly random. I have linked it up to a bigger collection and keep seeing the same images over and over although statistically, this should not be the case. Did you experienced this as well?Thanks!
-
@rudibarani I’m so glad you like it!
I have noticed commonly recurring images with smaller collections, but I’m surprised it would happen so often in huge collections. When I get bored of seeing a certain collection sometimes I’ll leave the collections option blank so it pulls a random site-wide image and I don’t usually see any repeats that way, but maybe I just get lucky?I don’t see anywhere in the unsplash API docs about how it chooses the random images so there’s a good chance it isn’t truly random. I’ll keep an eye out though :D
-
@delightedcrow Thanks for the quick reply.
I will send them an email to check how the random feature is implemented. -
@delightedCrow It looks so incredible! Well done :)
I will try that myself. It looks super cool :)Many greetings from hamburg,
Paul -
@delightedCrow I would really like to know how you got the API. The description is too hard to get for me… I guess.
@Community: Do you guys have any idea?
I am planning to show a collection of pictures from the keyword search of my village. Therefore I would really like to know how to implement the modules as well as configuring the module on how to show only images of a certain keyword.
Hopefully someone can help. :)
Kind regards from hamburg,
Paul
-
for the random, this routine from the MMM-ImagesPhotos module is an example
the images are in an array. the WallberryTheme gets one pic at a time from the server side…randomIndex: function(photos) { if (photos.length === 1) { return 0; } var generate = function() { return Math.floor(Math.random() * photos.length); }; var photoIndex = generate(); this.lastPhotoIndex = photoIndex; return photoIndex; }, -
@paulb Thanks for the kind comments!
As for your question, there are two different ways I can think of to solve your question using the WallberryTheme:Method 1:
Create your own Unsplash collection and add all of the pictures of your village that you want displayed to this collection. Then all you have to do is add this Unsplash collection ID to the module config section for the WallberryTheme (see the module docs here for an example of how to set up the config file with collections).
Doing it this way means you’d have to curate your own photos instead of doing a keyword search, but you wouldn’t have to edit the WallberryTheme module code.
Method 2:
Edit the WallberryTheme module code so that when it sends a photo request to Unsplash it uses the
queryparameter to filter random photos by your search term. So at about the line of code here you’d probably want to change it to something like:"&query=mysearchkeyword".I haven’t tested this method and the Unsplash docs are light on details, so you’d probably have to do some tinkering to figure out if it’ll work the way you want.
Hope one of these helps :)
-
@delightedCrow Thank you for your fast response. :)
I will try Method 1 as suggested.Seriously, this module enables you to have your own art gallery at home. How awesome is that?! :)
-
@delightedCrow seriously… this is the most awesome module I 've come across until now.
I installed it this morning and it brings me so much joy.
delightedCrow thank you very much for sharing this. It’s super cool :)
-
@community I would like to recommend black&white pictures or slidly darker pictures. Otherwise you will have some difficulties with the original font. The standard MM font throws shadows on light wallpapers.
Kind regards from hamburg :)
-
Hello !
Your theme is so beautiful and minimalistic, i love that !
I want to know how can I change css files to have colored icons for the current weather and forecast weather ?I use this custom.css code with the weather an forecast modules
.currentweather .wi-sunrise { color: #ffd700; } .currentweather .wi-sunset { color: #ffa500; } .currentweather .wi-day-sunny { color: #ffff00; } .currentweather .wi-night-showers { color: #55acee; } .currentweather .wi-degrees { color: #415; } .currentweather .wi-rain { color: #55acee; } .currentweather .wi-showers { color: #55acee; } .currentweather .wi-night-showers { color: #55acee; } .currentweather .wi-night-alt-cloudy-windy { color: #aaa; } .currentweather .wi-night-cloudy { color: #aaa; } .currentweather .wi-cloudy { color: #aaa; } .currentweather .wi-day-cloudy { color: #aaa; } .currentweather .wi-cloudy { color: #aaa; } .currentweather .wi-cloudy-windy { color: #aaa; } .currentweather .wi-showers { color: #55acee; } .currentweather .wi-thunderstorm { color: #ff00ff; } .currentweather .wi-snow { color: #fff; } .currentweather .wi-fog { color: #999; } .currentweather .wi-night-clear { color: #fff; } .currentweather .wi-night-rain { color: #55acee; } .currentweather .wi-night-thunderstorm { color: #ff00ff; } .currentweather .wi-night-snow { color: #fff; } .weatherforecast .wi-sunrise { color: #ffd700; } .weatherforecast .wi-sunset { color: #ffa500; } .weatherforecast .wi-day-sunny { color: #ffff00; } .weatherforecast .wi-night-showers { color: #55acee; } .weatherforecast .wi-degrees { color: #415; } .weatherforecast .wi-rain { color: #55acee; } .weatherforecast .wi-showers { color: #55acee; } .weatherforecast .wi-night-showers { color: #55acee; } .weatherforecast .wi-night-alt-cloudy-windy { color: #aaa; } .weatherforecast .wi-night-cloudy { color: #aaa; } .weatherforecast .wi-cloudy { color: #aaa; } .weatherforecast .wi-day-cloudy { color: #aaa; } .weatherforecast .wi-cloudy { color: #aaa; } .weatherforecast .wi-cloudy-windy { color: #aaa; } .weatherforecast .wi-showers { color: #55acee; } .weatherforecast .wi-thunderstorm { color: #ff00ff; } .weatherforecast .wi-snow { color: #fff; } .weatherforecast .wi-fog { color: #999; } .weatherforecast .wi-night-clear { color: #fff; } .weatherforecast .wi-night-rain { color: #55acee; } .weatherforecast .wi-night-thunderstorm { color: #ff00ff; } -
Please use the markdown features of the board when posting code.
-
@bhepler
thank you for this reminder :smiling_face_with_open_mouth_cold_sweat:
i’ve edited my post !
Hello! It looks like you're interested in this conversation, but you don't have an account yet.
Getting fed up of having to scroll through the same posts each visit? When you register for an account, you'll always come back to exactly where you were before, and choose to be notified of new replies (either via email, or push notification). You'll also be able to save bookmarks and upvote posts to show your appreciation to other community members.
With your input, this post could be even better 💗
Register Login