Intro
I’ve been messing around with the MagicMirror concept for about 6 months and had previously set up a single monitor on a wall in the living room as a proof of concept. My wife and I liked the idea of an intelligent display, and had seen some excellent examples of Mirrors on here, but there was little to no chance of me being able to build any of them. I’m what you might call more a technology geek than a DIY expert :)
So the monitor just sat there on the wall until about a year ago when my wife and I decided to have some renovation work done. The layout of our open plan apartment meant there was some “dead” space off the dining room area which we figured we could turn into a reasonable sized storage area / utility room without making the dining area too small. We’d contracted a builder to do the work for us (not a DIY person, remember!) and that was when we discussed the Magic Mirror idea. As the builder was going to have to put up a new wall for us, why not get them to create a space in the wall and have the mirror built into the wall itself ? Access to the back of the mirror could be from inside the new utility room but from the outside it would look like a mirror sitting flush with the dining room wall.
Given this was going to be something that would be embedded in the wall, and I couldn’t just change it at will, I decided to buy most of the equipment I needed as “new”. At that point I then had free reign to shop around for the ideal size monitor and glass. Once I’d established the size of the mirror I wanted, by diligently checking monitor sizes, I realised could get 2 x 24" monitors into a frame, and it not look out of place.
The builder and I discussed various mounting options, and eventually decided on a very unusual approach. Instead of putting the glass in the frame, we decided to sandwich the glass between the plasterboard and the stud wall, then mount the frame housing all the components partly inside the partition wall. Whilst that meant the construction would be slightly more difficult, it would mean an ultra-minimalist look from the mirror side.
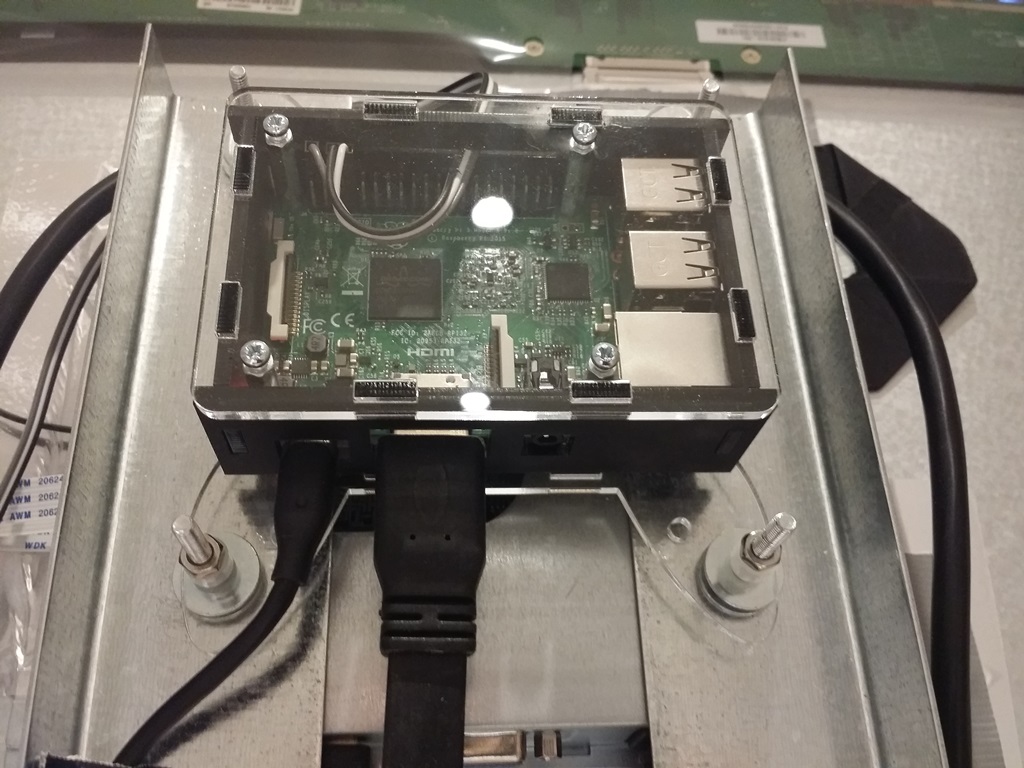
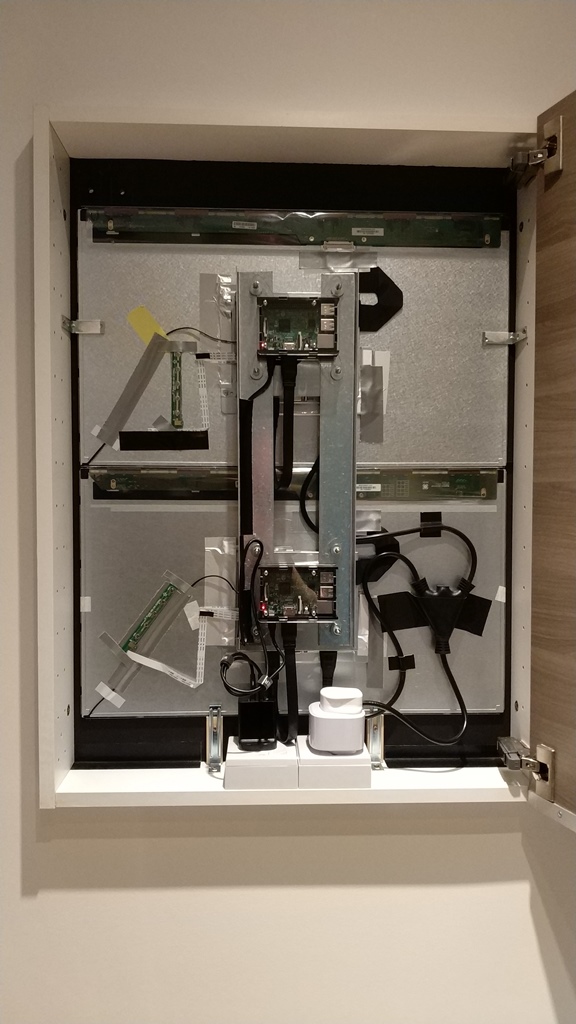
Because the glass and frame would already be on the wall, to avoid having to build anything in-situ, I constructed a lightweight chassis to hold the monitors together then mounted the Pi’s on the monitor VESA brackets. This kept the back relatively tidy and meant the actual install would only require lifting the completed “Magic” part of the mirror into the frame, levelling it up, and securing it in place.
Finally, because I’m using consumer grade monitors, I knew that having them on permanently would likely shorten their useful life, so I wanted a way to have the mirror turn on and off easily. Initially I’d thought about having some form of motion sensors, however PIR’s wouldn’t work due to the glass, and my testing of various Microwave sensors gave very mixed results. I eventually settled on using a smart plug (controllable by any mobile device), and coupled with an Amazon Echo Dot so it can be voice controlled as well.
Modules and layout
Modules used
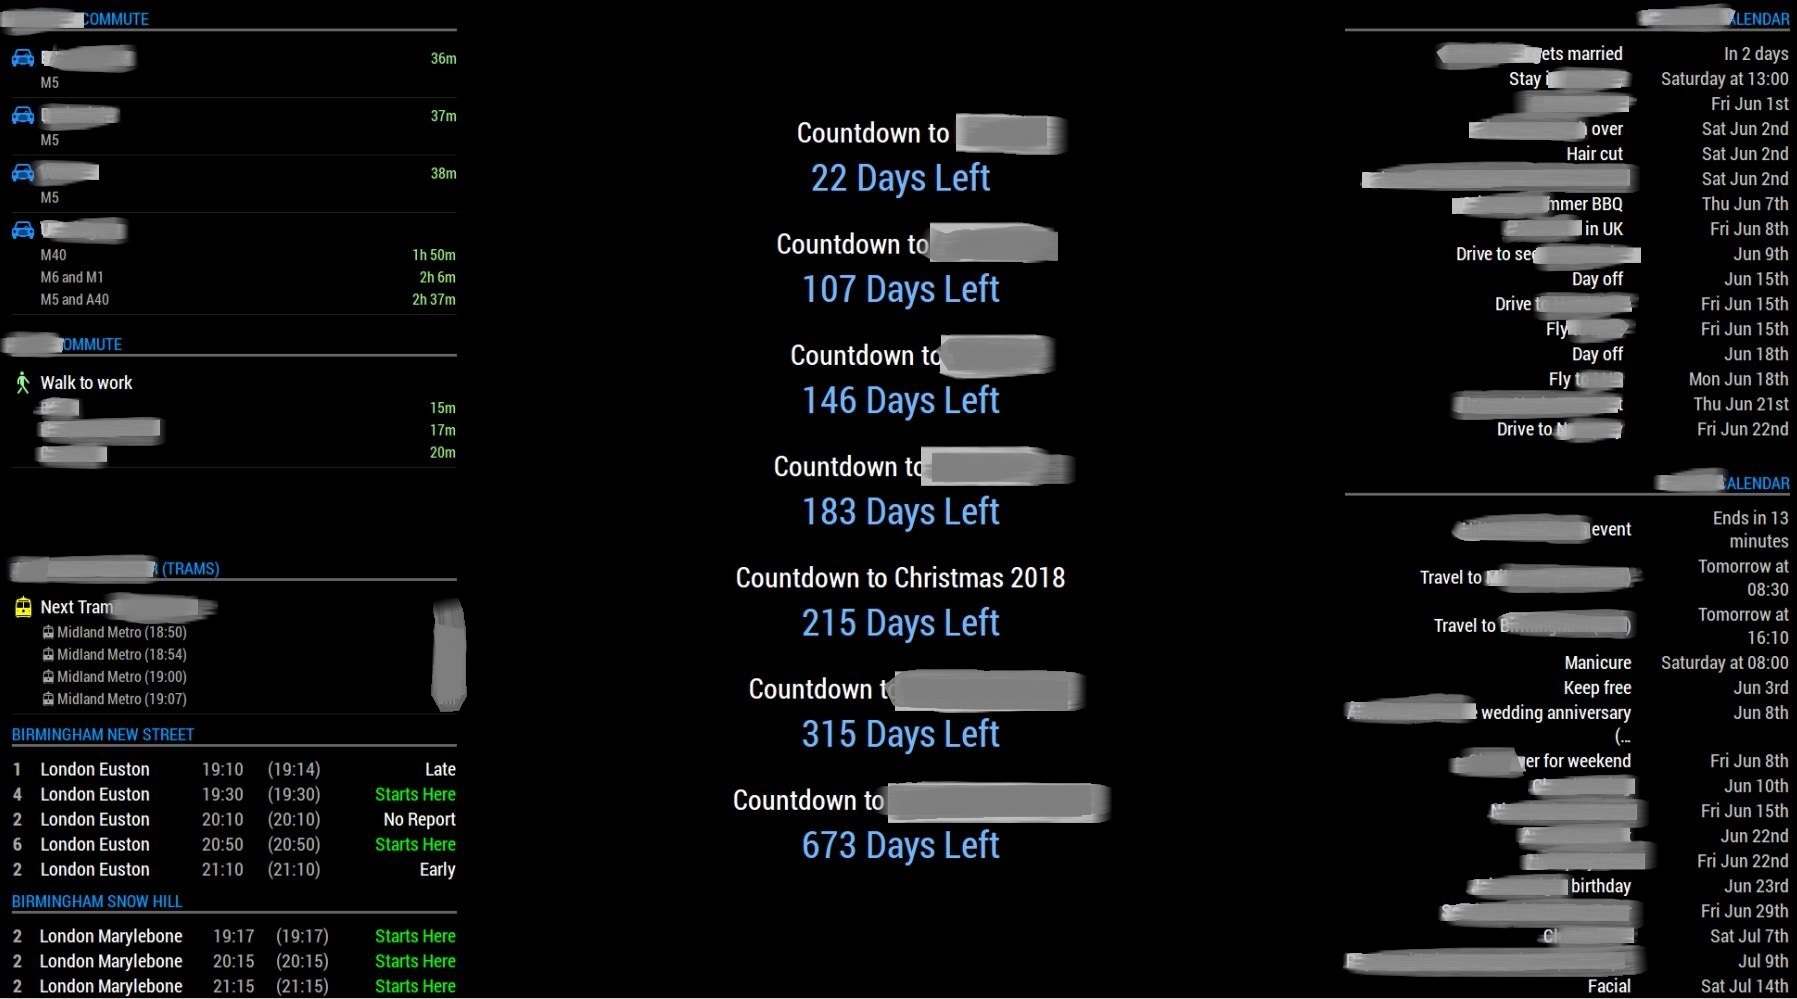
Top screen
• 3 x MMM-MyCommute (One each for mine/my wife’s commute plus one additional for tram times from closest tram stop)
• 2 x MMM-UKNationalRail (for the two major rail stations near where we live)
• 2 x Default calendar (one for my wife, and one for me)
• 7 (and counting) MMM-Doomsday modules for countdowns to important dates
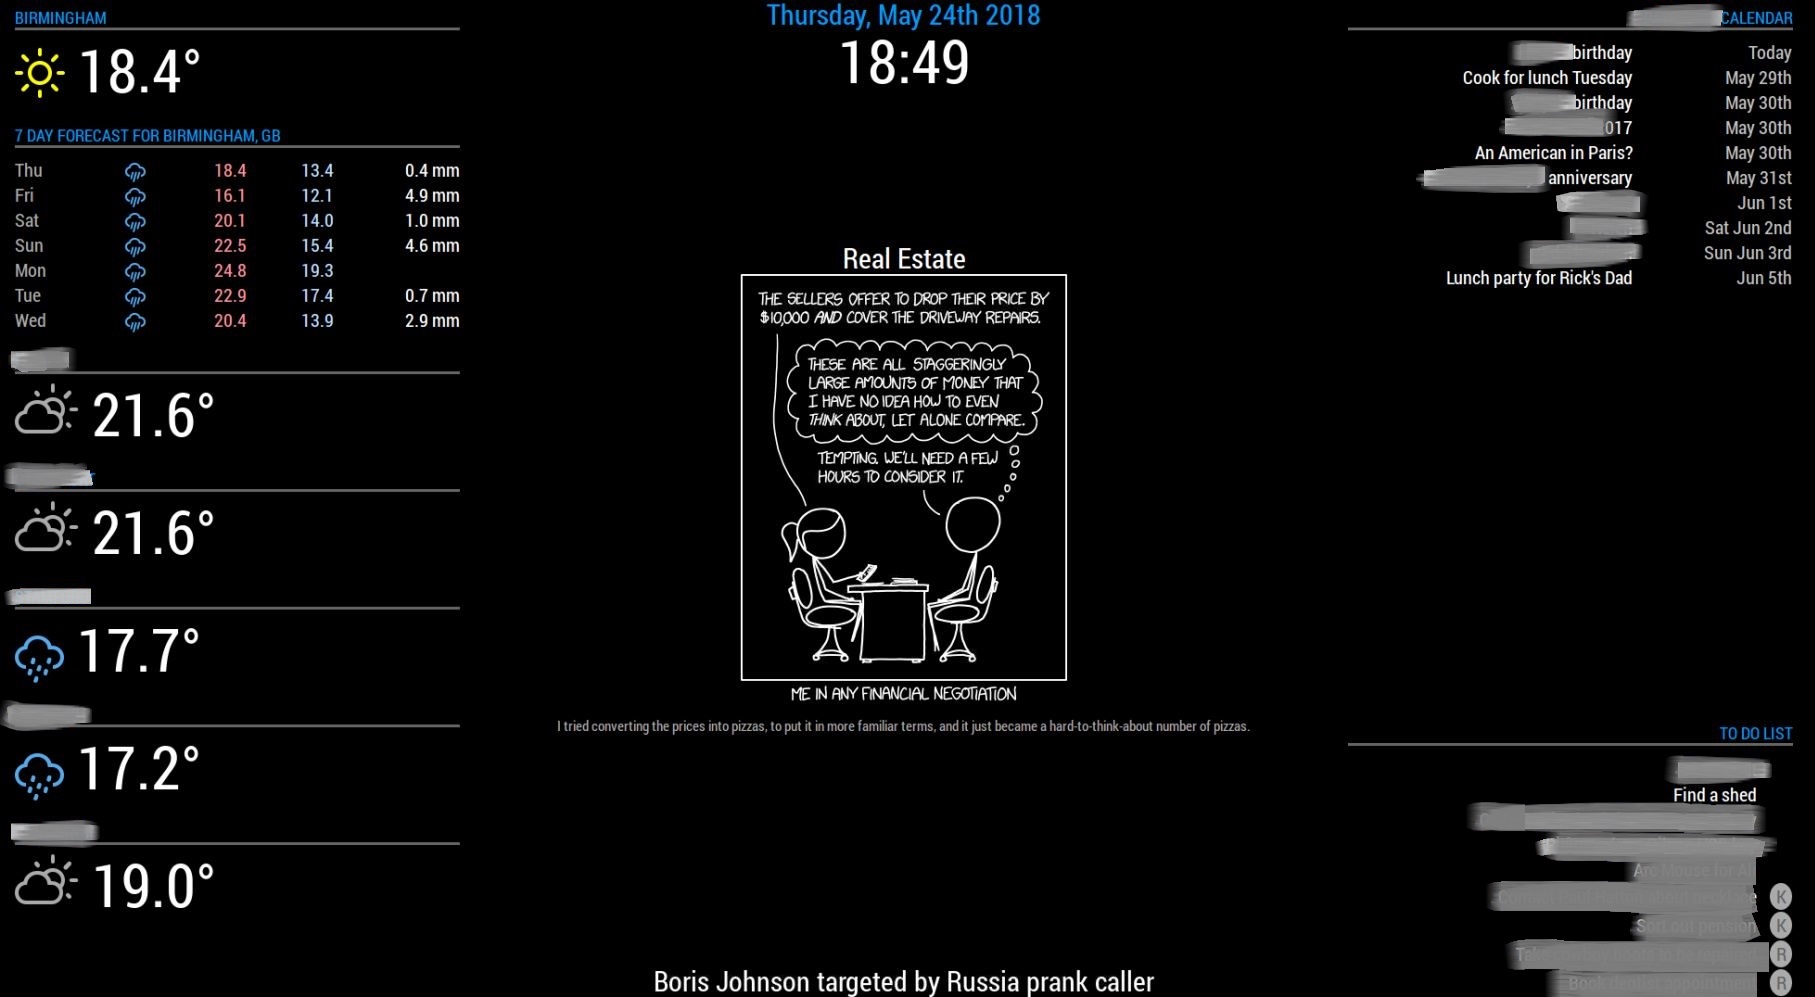
Bottom screen
• 1 x Default Clock module
• 7 x Default Weather module (for us, and the locations of all our family members)
• 1 x Default News feed module
• 1 x DailyXKCD
• 1 x MMM-Wunderlist
• 1 x Default calendar (for my mother’s diary, as she likes us to know what she’s up to :) )
Other random bits of info
VNC installed for remote access
Bind IP to MAC via router to ensure static IP’s for the Pi’s (makes using VNC much easier)
Echo Dot and Smart plug configured on a separate isolated wireless VLAN (because I’m paranoid :) )
Modified custom.css for colours and layout
Added Cron job to restart MM process at midnight in case of a module crash
Hardware Components
• 50/50 mirrored glass (6mm x 660mm x 860mm)
• “Reused” 600mm x 800mm Ikea kitchen cupboard and door (for internal frame)
• 2.4m x 15mm aluminium shower corner edging (for external frame)
• 2 x Raspberry Pi3’s with 16Gb Toshiba SD cards
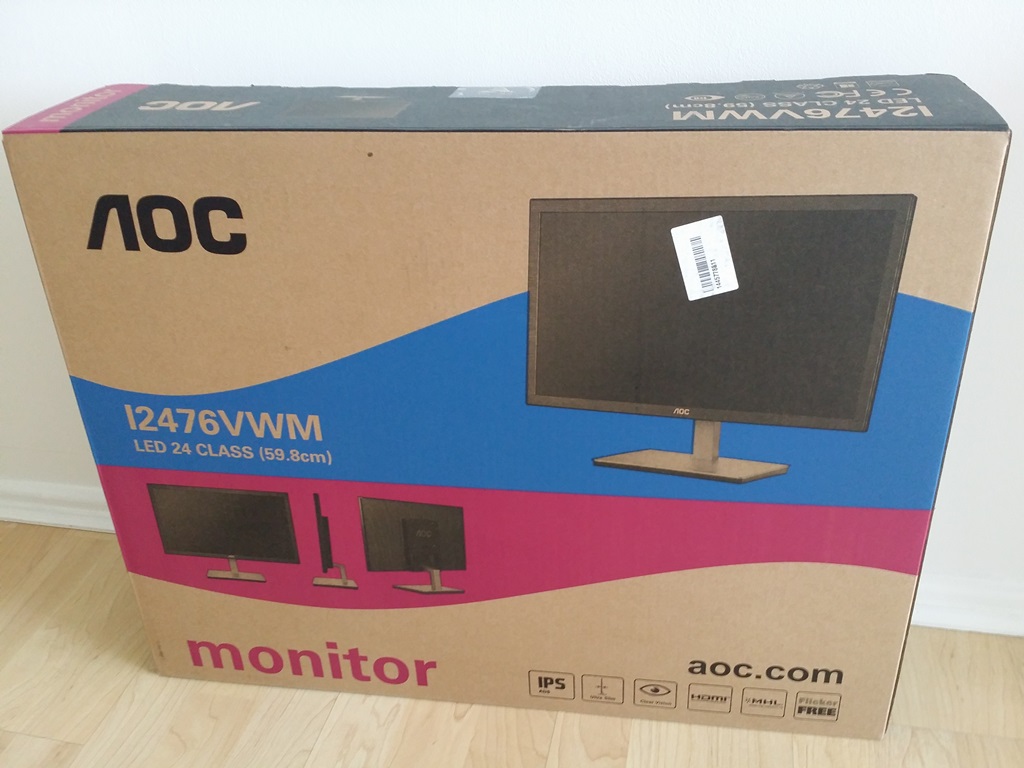
• 2 x AOC 24” LED monitors
• 2 x 1ft Flat HDMI cables
• 2 x ‘VESA-Pi+’ cases to mount Pi’s to the monitor
• 2 x 13Amp sockets for power
• 1 x C5/C5 Y-cable (to power monitors)
• 1 x Anker 2 port 24W USB charger, with 3ft and 1ft USB cables (to power Pi’s)
• 1 x Meross MSS210 smart plug (to control Anker PSU)
• 1 x Amazon Echo Dot for voice control
• Sheet of A1 300gsm black card (for masking the mirror)
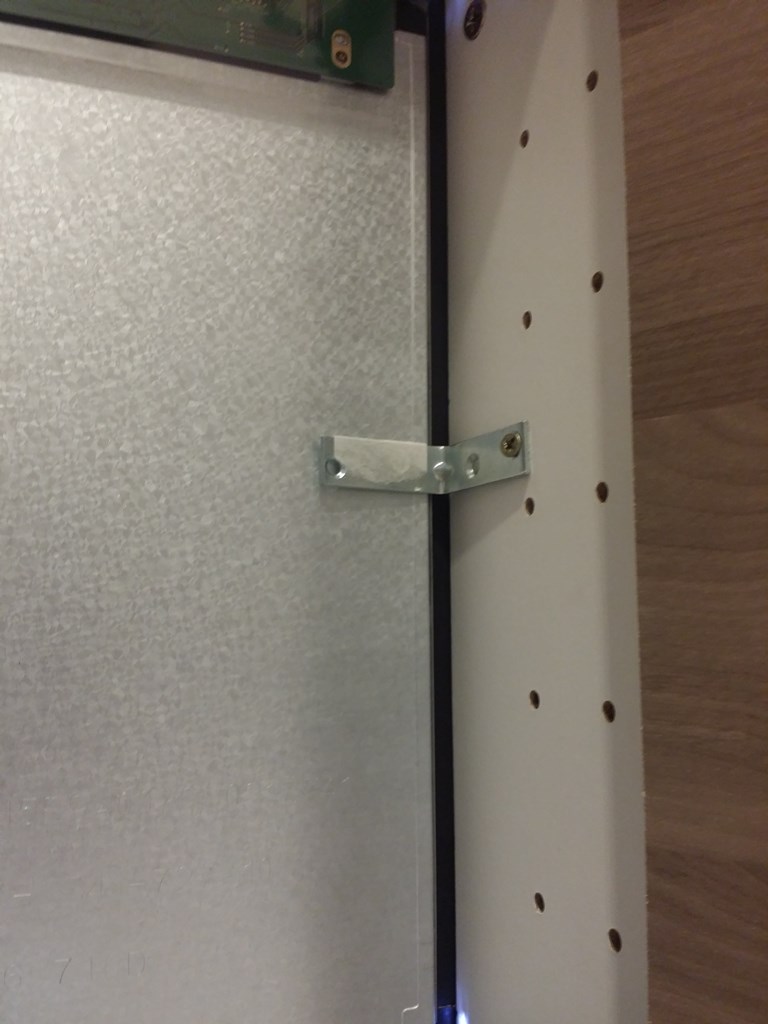
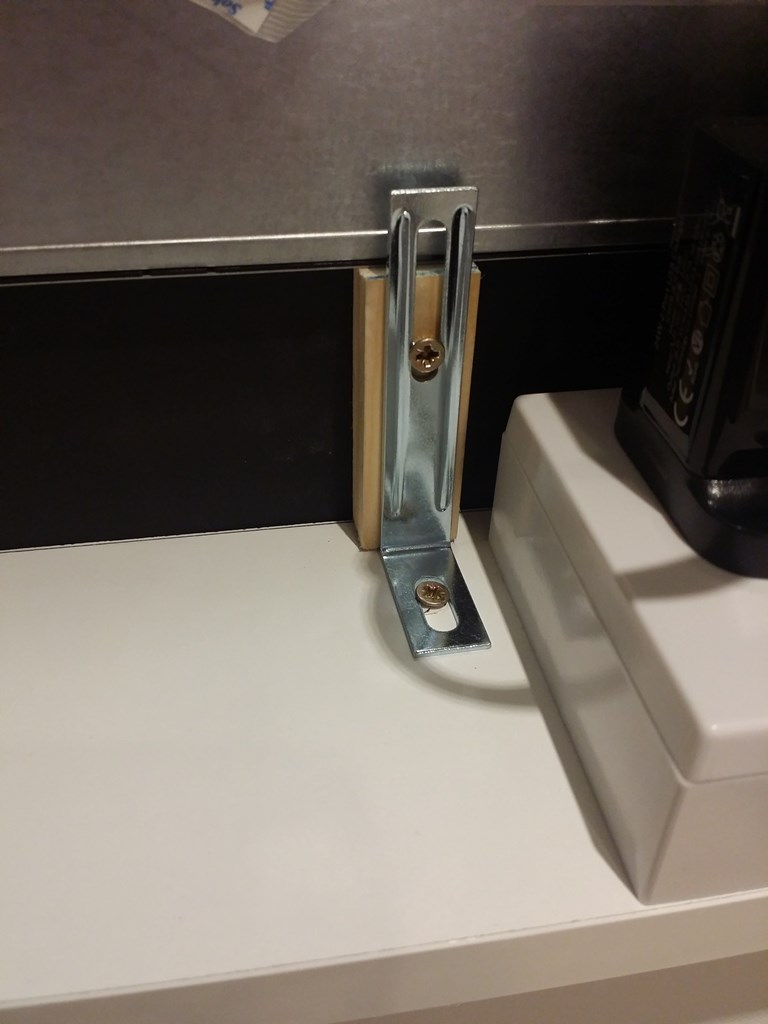
• Miscellaneous nuts, bolts, jumper wire, heatshrink, cable ties, a steel L-bracket, and the always essential Gorilla tape :D
Construction Pictures
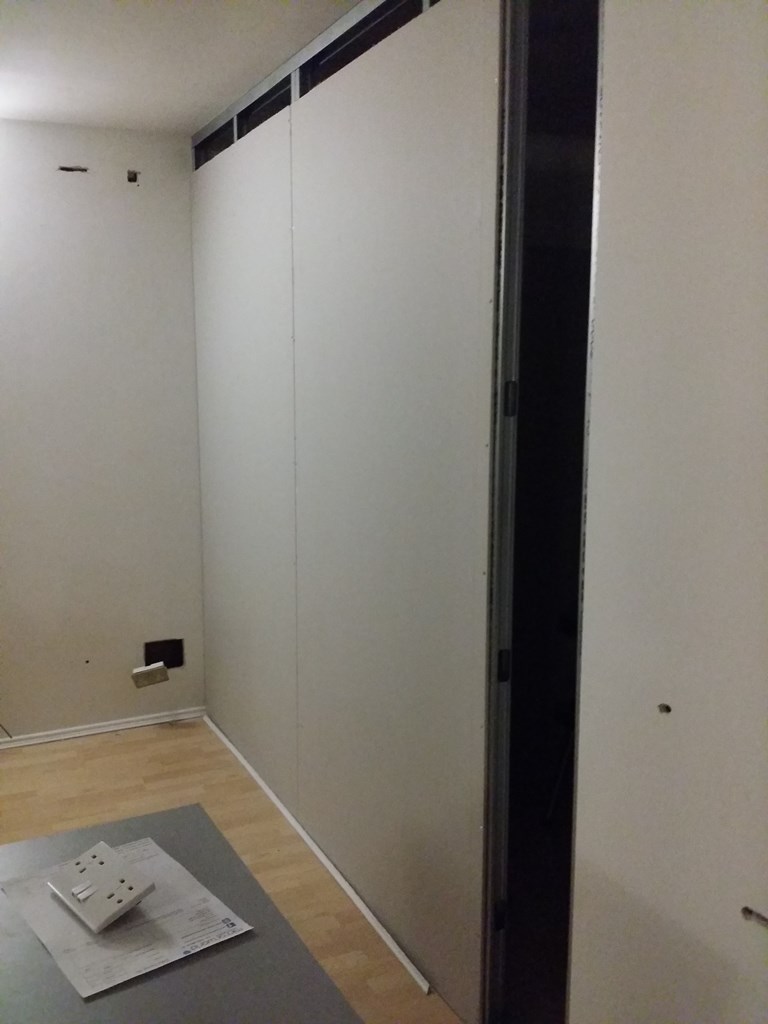
The new stud wall being constructed
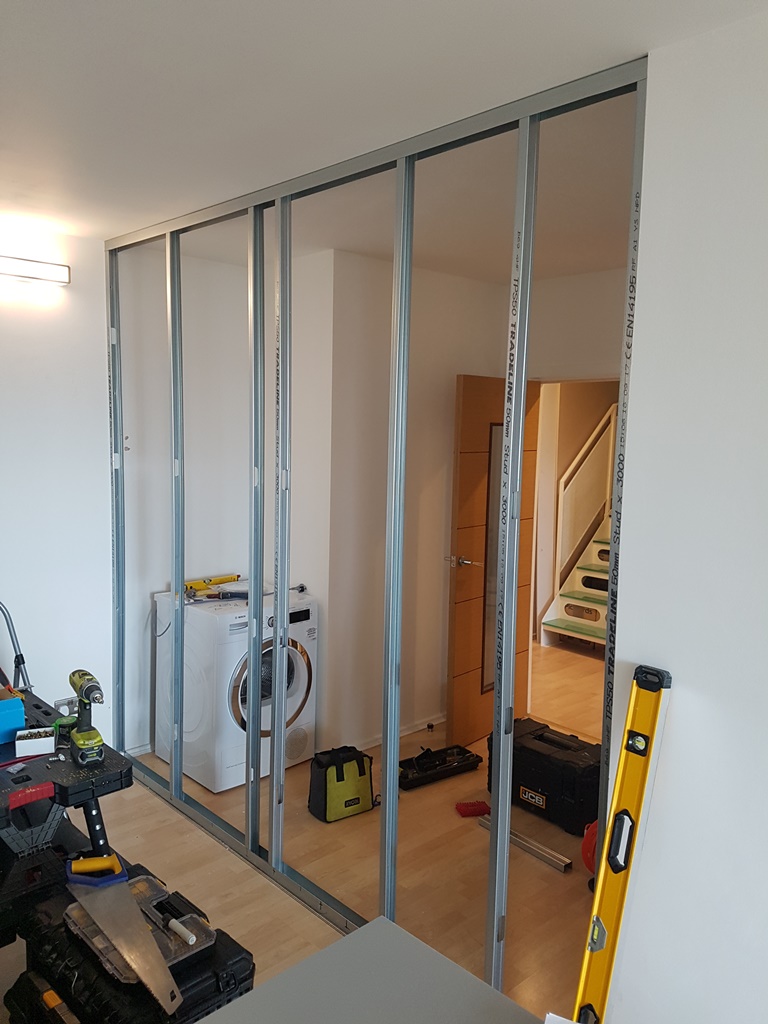
Plasterboarding going up
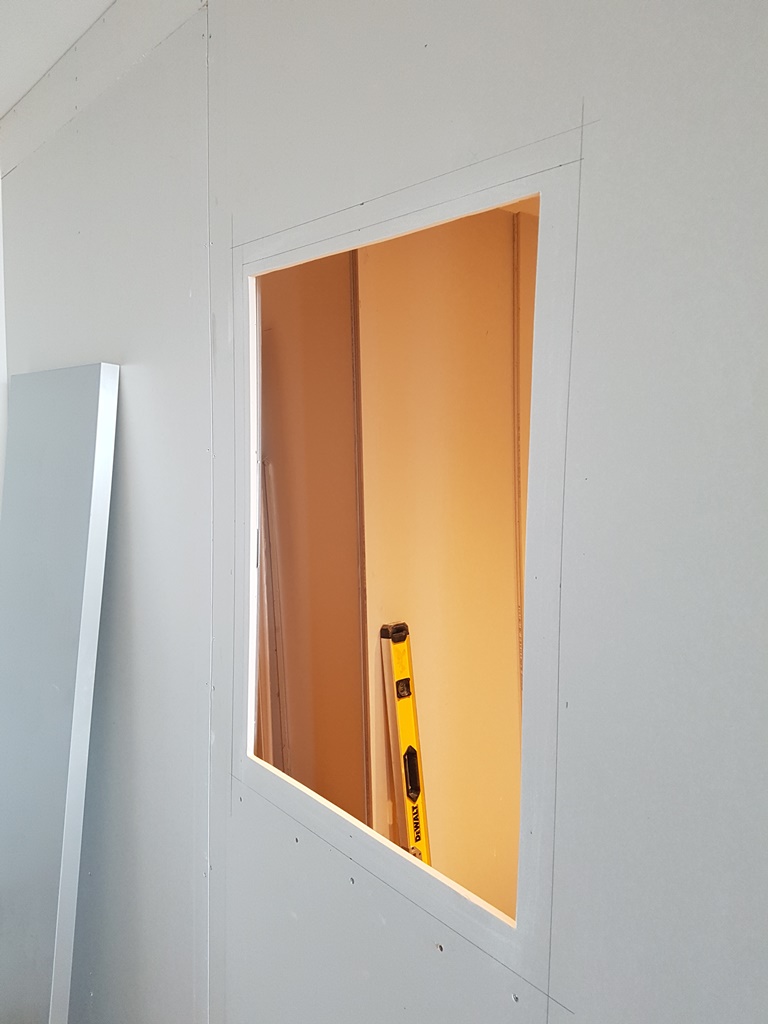
Plasterboard all on, time to cut out the hole for the mirror
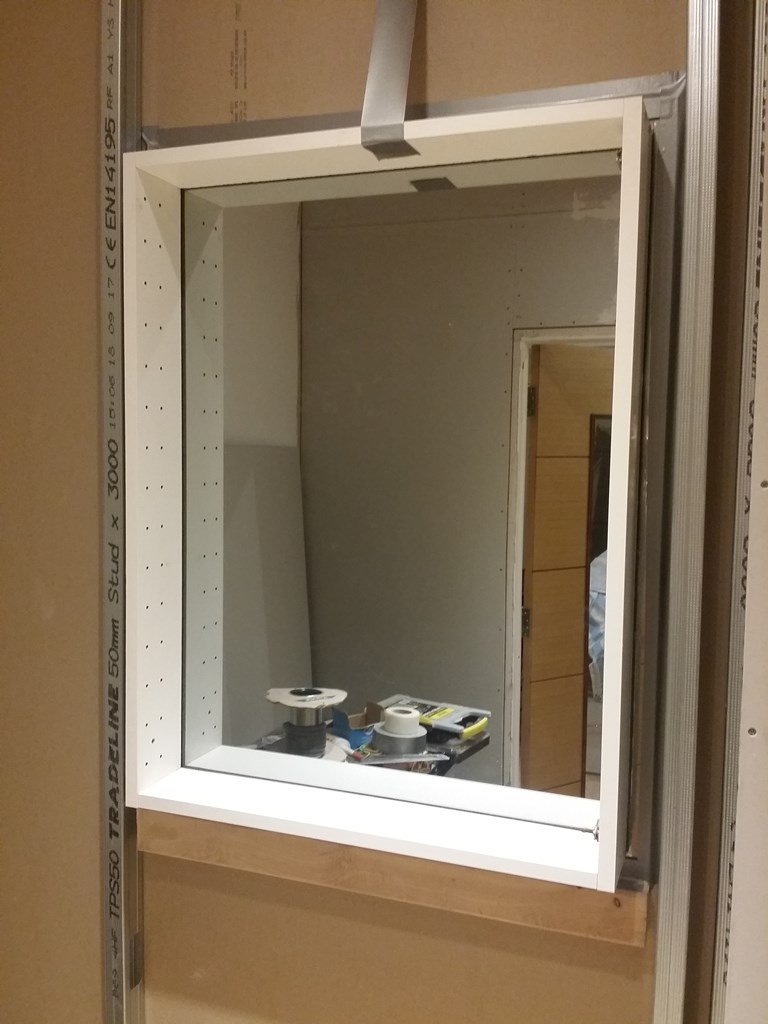
The reused Ikea kitchen cupboard, cut down to form the frame

Glass sandwiched in the wall, frame on, waiting for the glue to dry
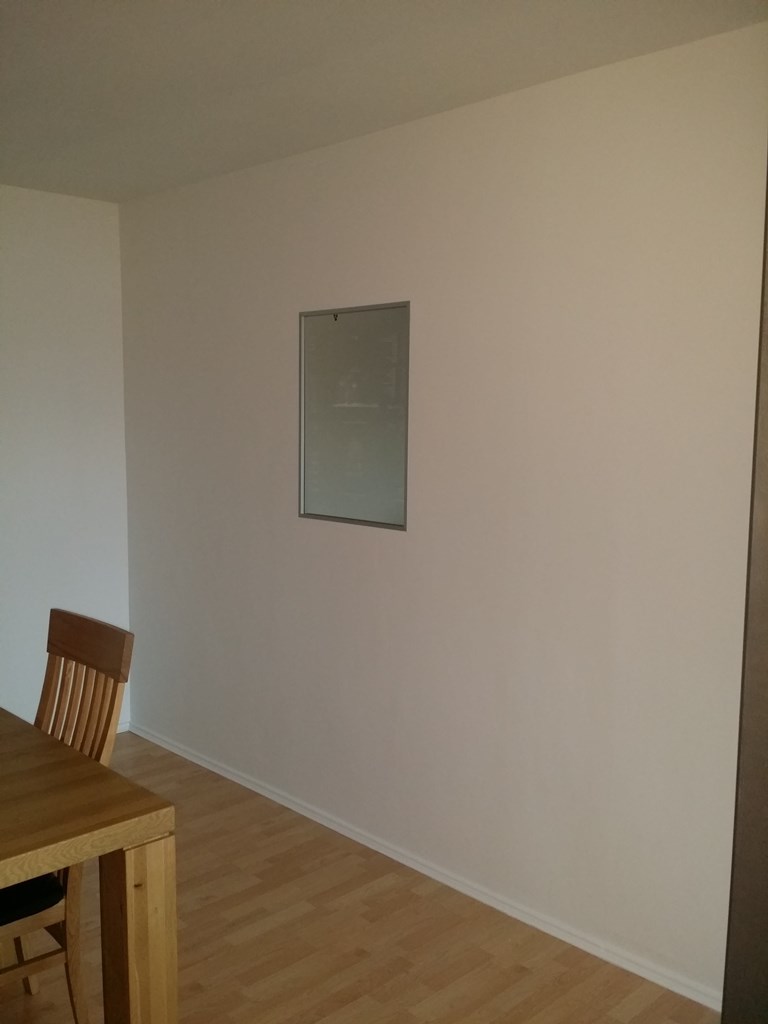
Minimalistic look from the front
AOC monitors before I took them apart
Frames removed, and waiting to have the custom chassis measured
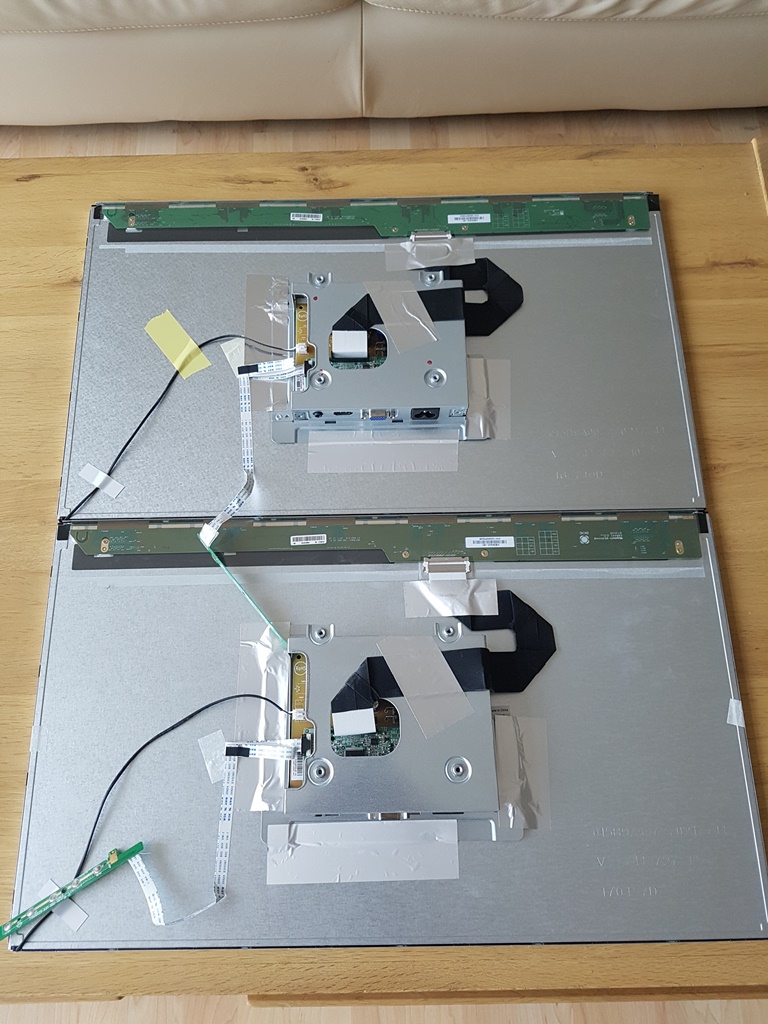
The monitor masking laid out, with a fairly small amount of wasted space

Pi connected up, mounted on the new chassis in the VESA case (GPIO cable is where I was testing the PIR’s)
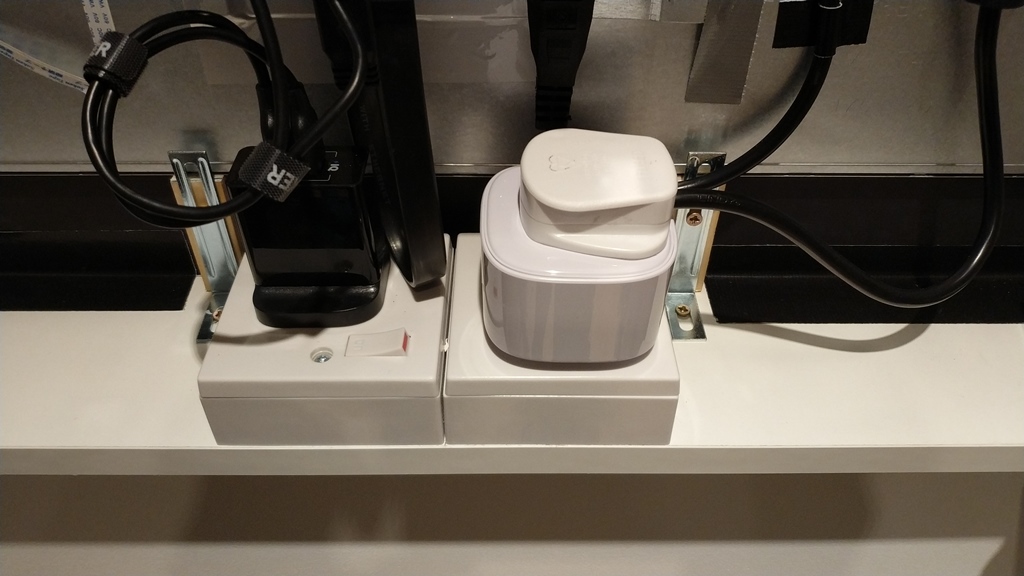
Anker plug for the Pi’s, Smart plug and Y cable for the monitors
Side mounts to hold the monitors in place
Base mounts for the monitors to rest on
Completed mirror from the back
All closed up and concealed from prying eyes.