Read the statement by Michael Teeuw here.
Small 'Picture frame' MagicMirror (first attempt)
-
Scrolling down on Pintrest a Magic Mirror got my interest. After a small conversation at home we decided to first make a small one. When we like it, we could build a bigger one later on.
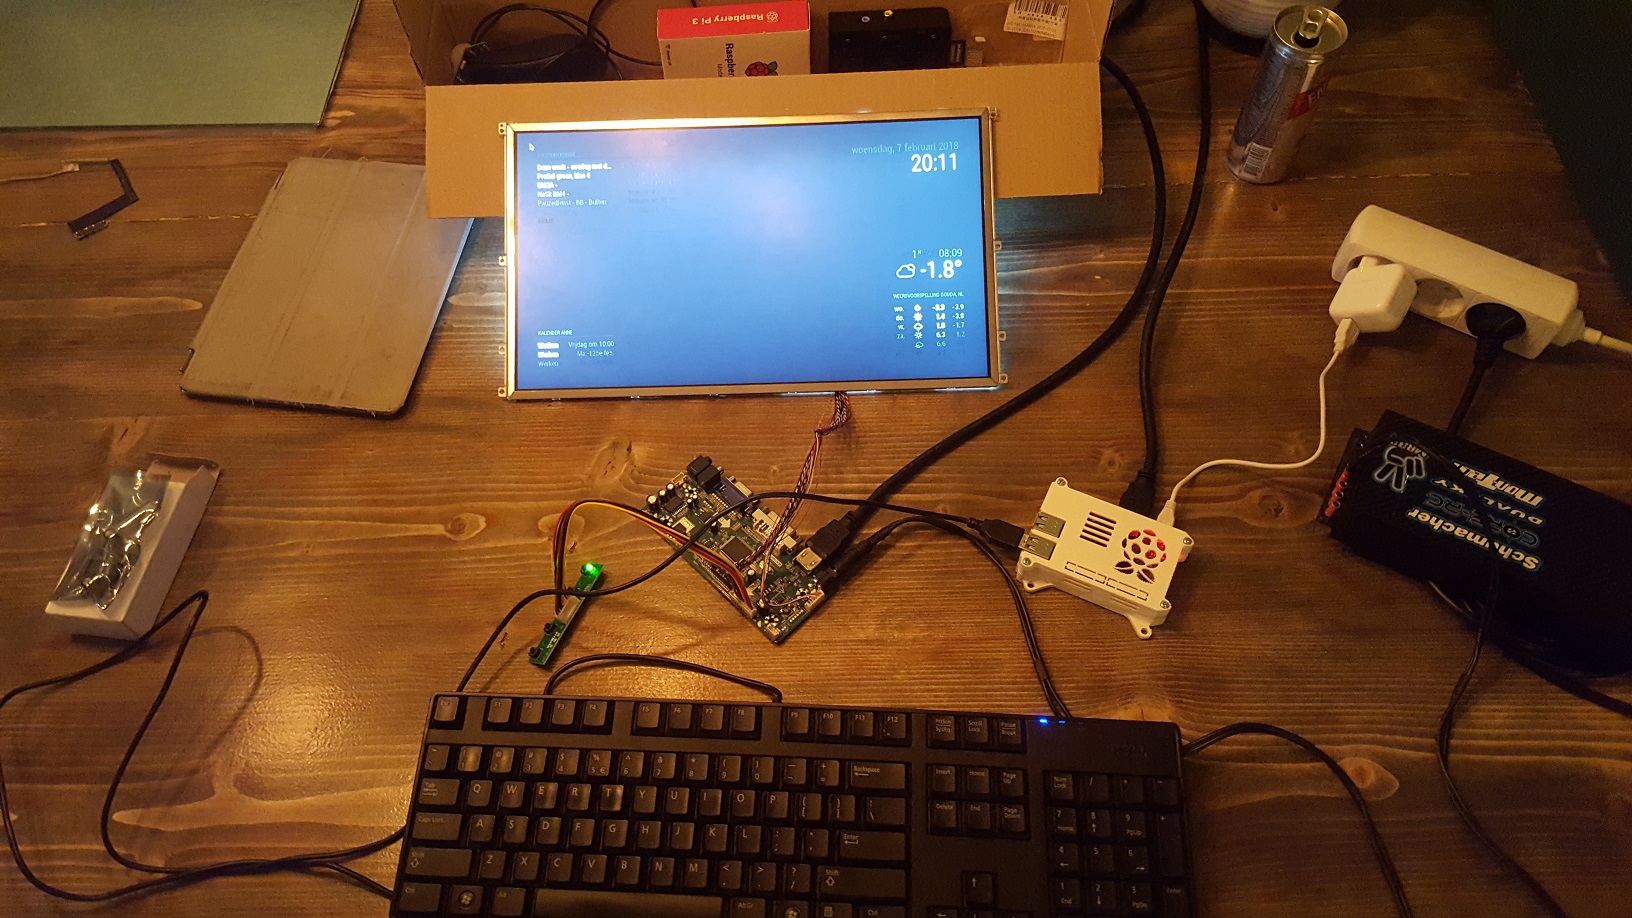
So a old 15.6” laptop would provide me with a small ‘picture frame size’ screen. A Raspberry Pi (3) was found on a national trading website (www.marktplaats.nl). Only the electronic parts remained, so Ebay/BangGood/Aliexpress served me well.The RPI was in first so I could start programming right away. I have an electrical background, so programming wasn’t the easiest thing to do. Then again I must say there is a lot documented, which was a huge help. After a friend showed me to use PuTTY and WinSCP it all went a lot easier.
I wanted to make a small and clean mirror with a frame made out of wood, yet thin. I made most of my furniture at home, so wood would fit in quite easy. Also I wanted to have no cables other than the power cable.
Parts used:
- Rasperry Pi3 – Model B
- 230V -> 12V – 3A AC-DC converter
- 12V -> 5V – 5A DC-DC converter
- HC-SR510 PIR-Sensor
- 15cm HDMI cable
- HDMI – LCD Controller board
- 3mm thick two-way mirror acrylic
Build Process:
Programming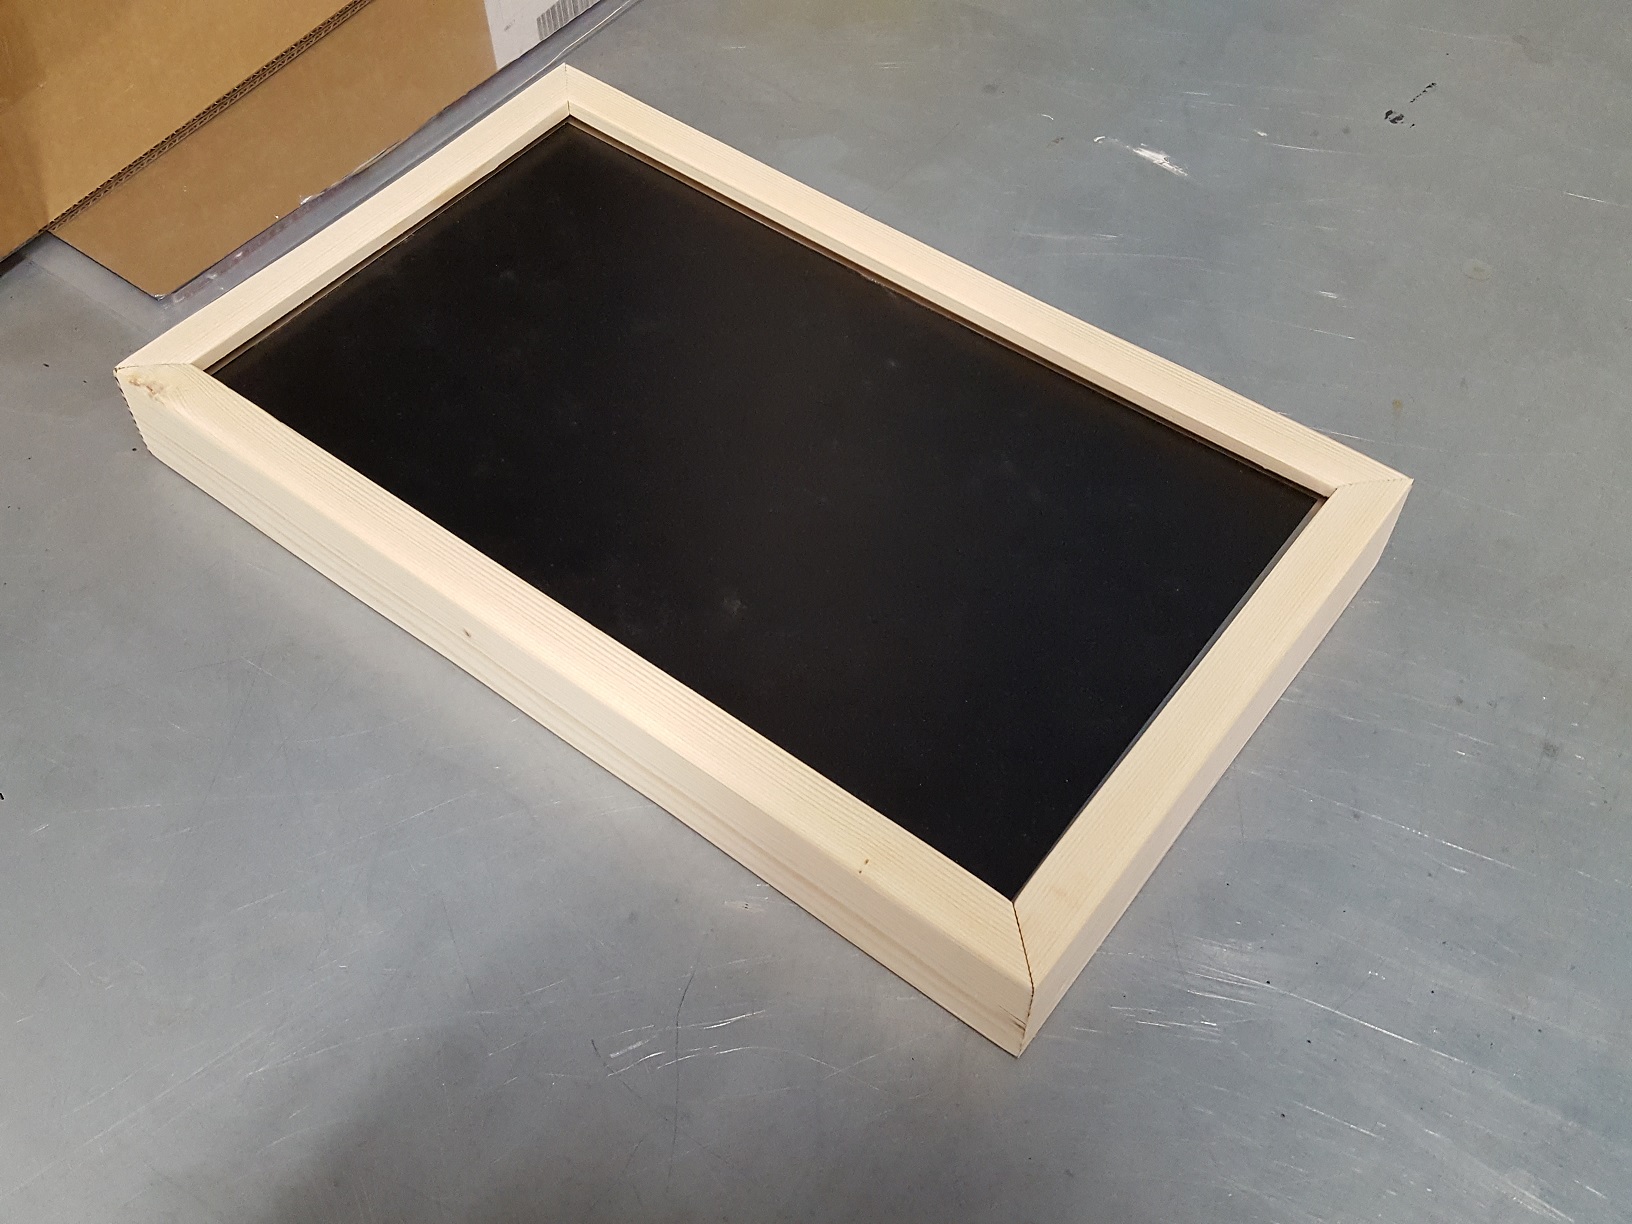
Made a wooden frame. 120cm x 31cm x 5cm - beam is 2cm thick
It does shimmer like crazy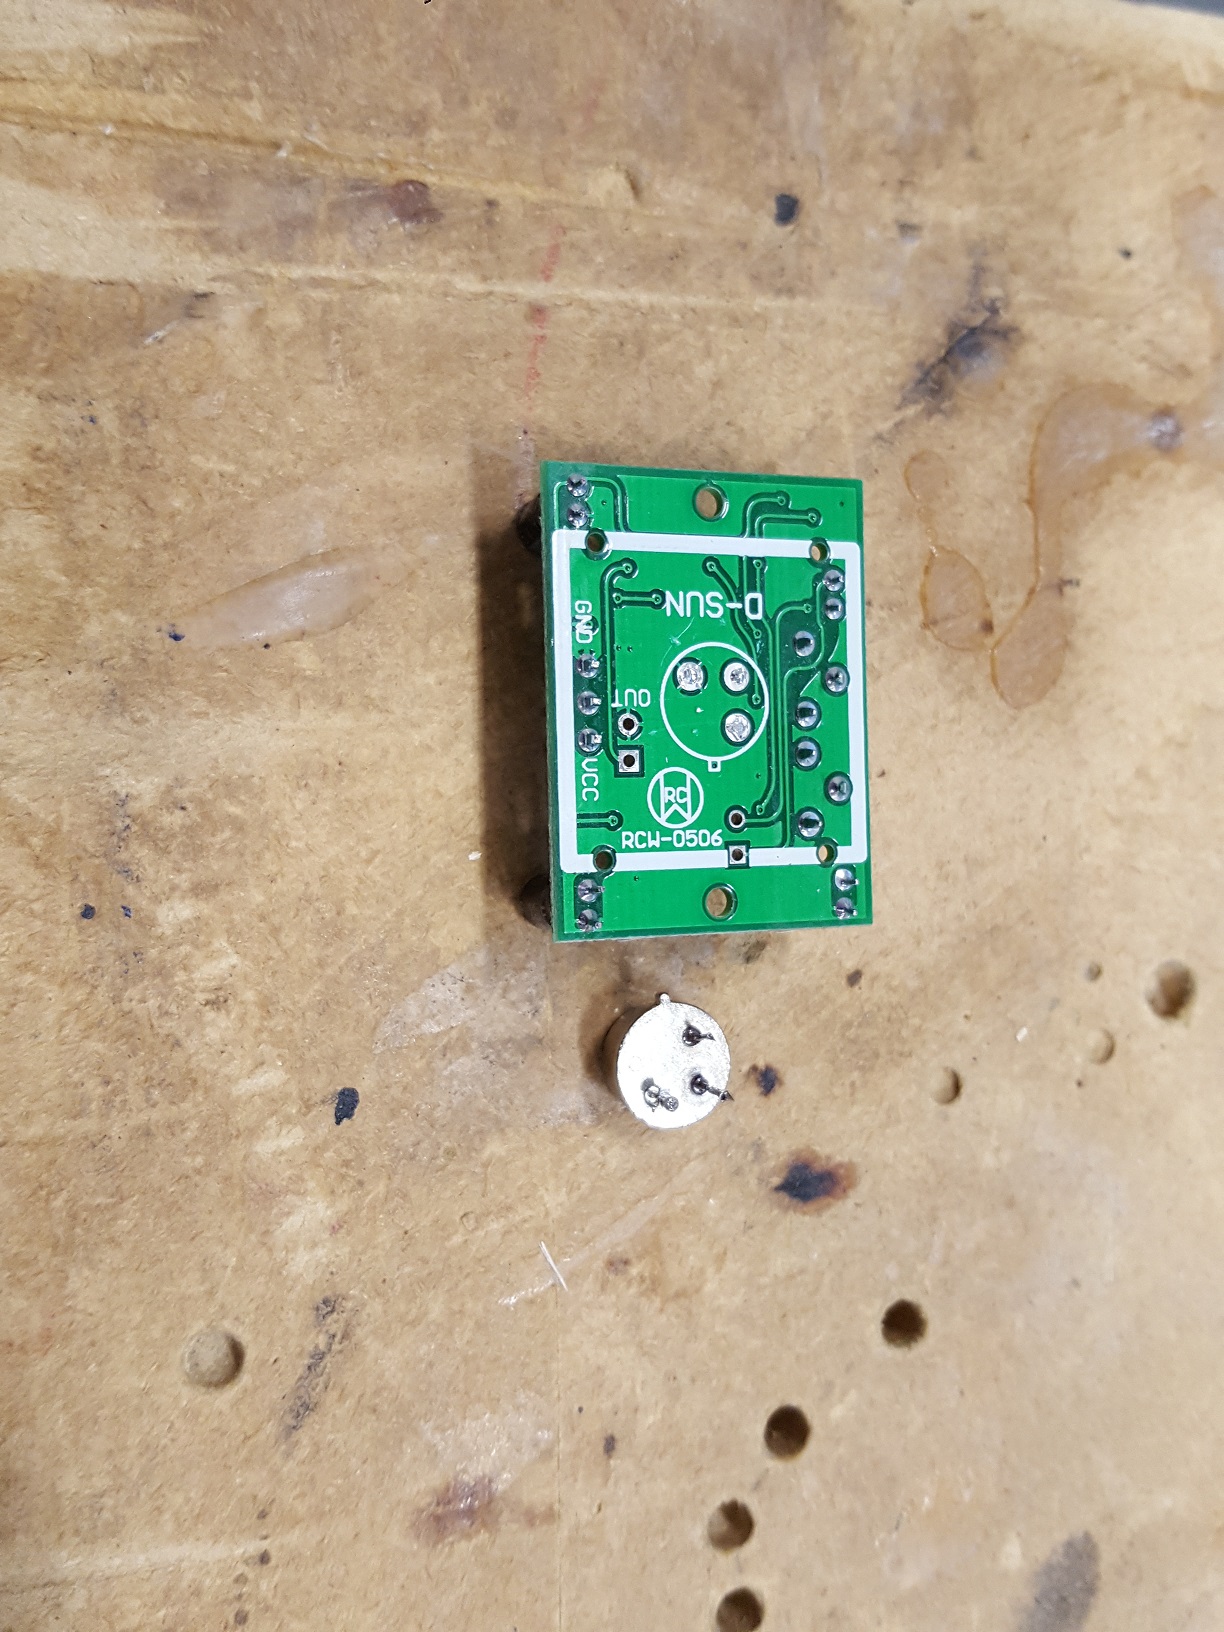
I had to change the PIR sensor to make it fit in the 5cm high, 2cm thick frame. Soldered the sensor off and put some wires in between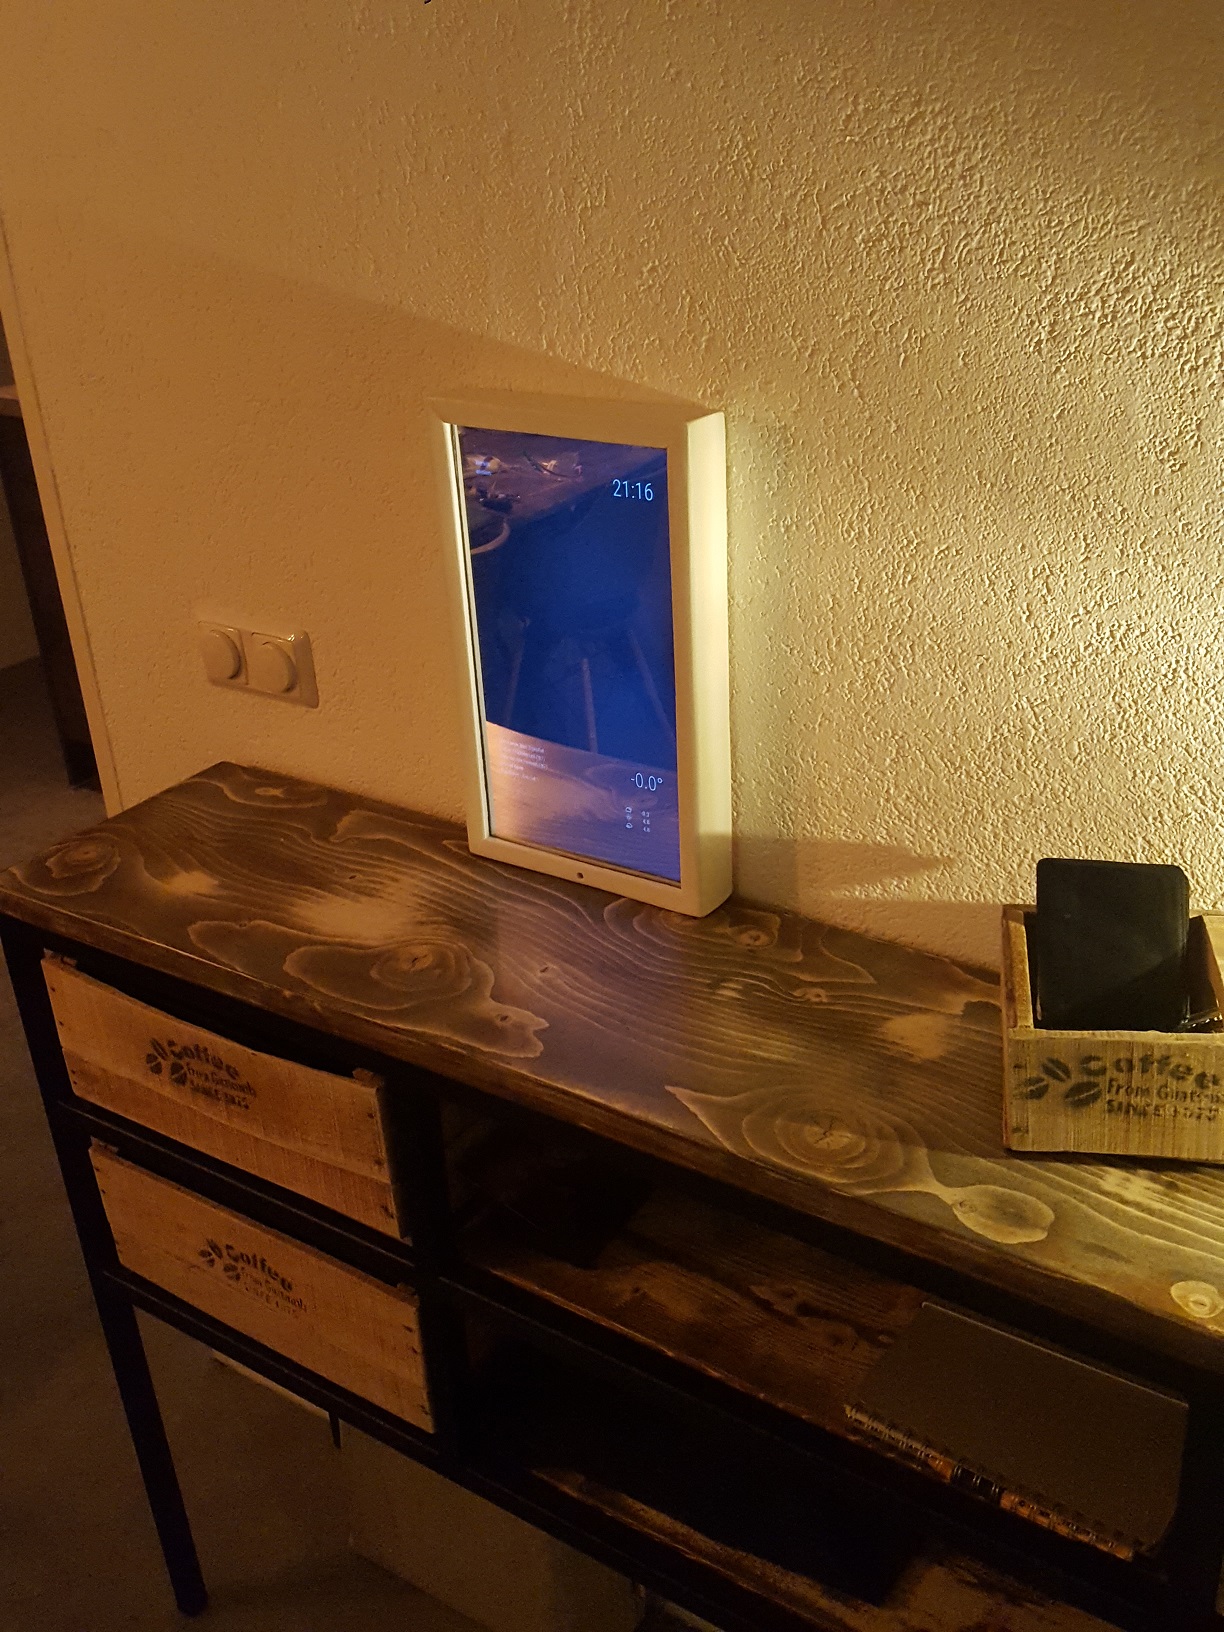
Finished product: “the mirror”. Quit small. Not quite sure if we let it ‘sit’ there or we will hang it.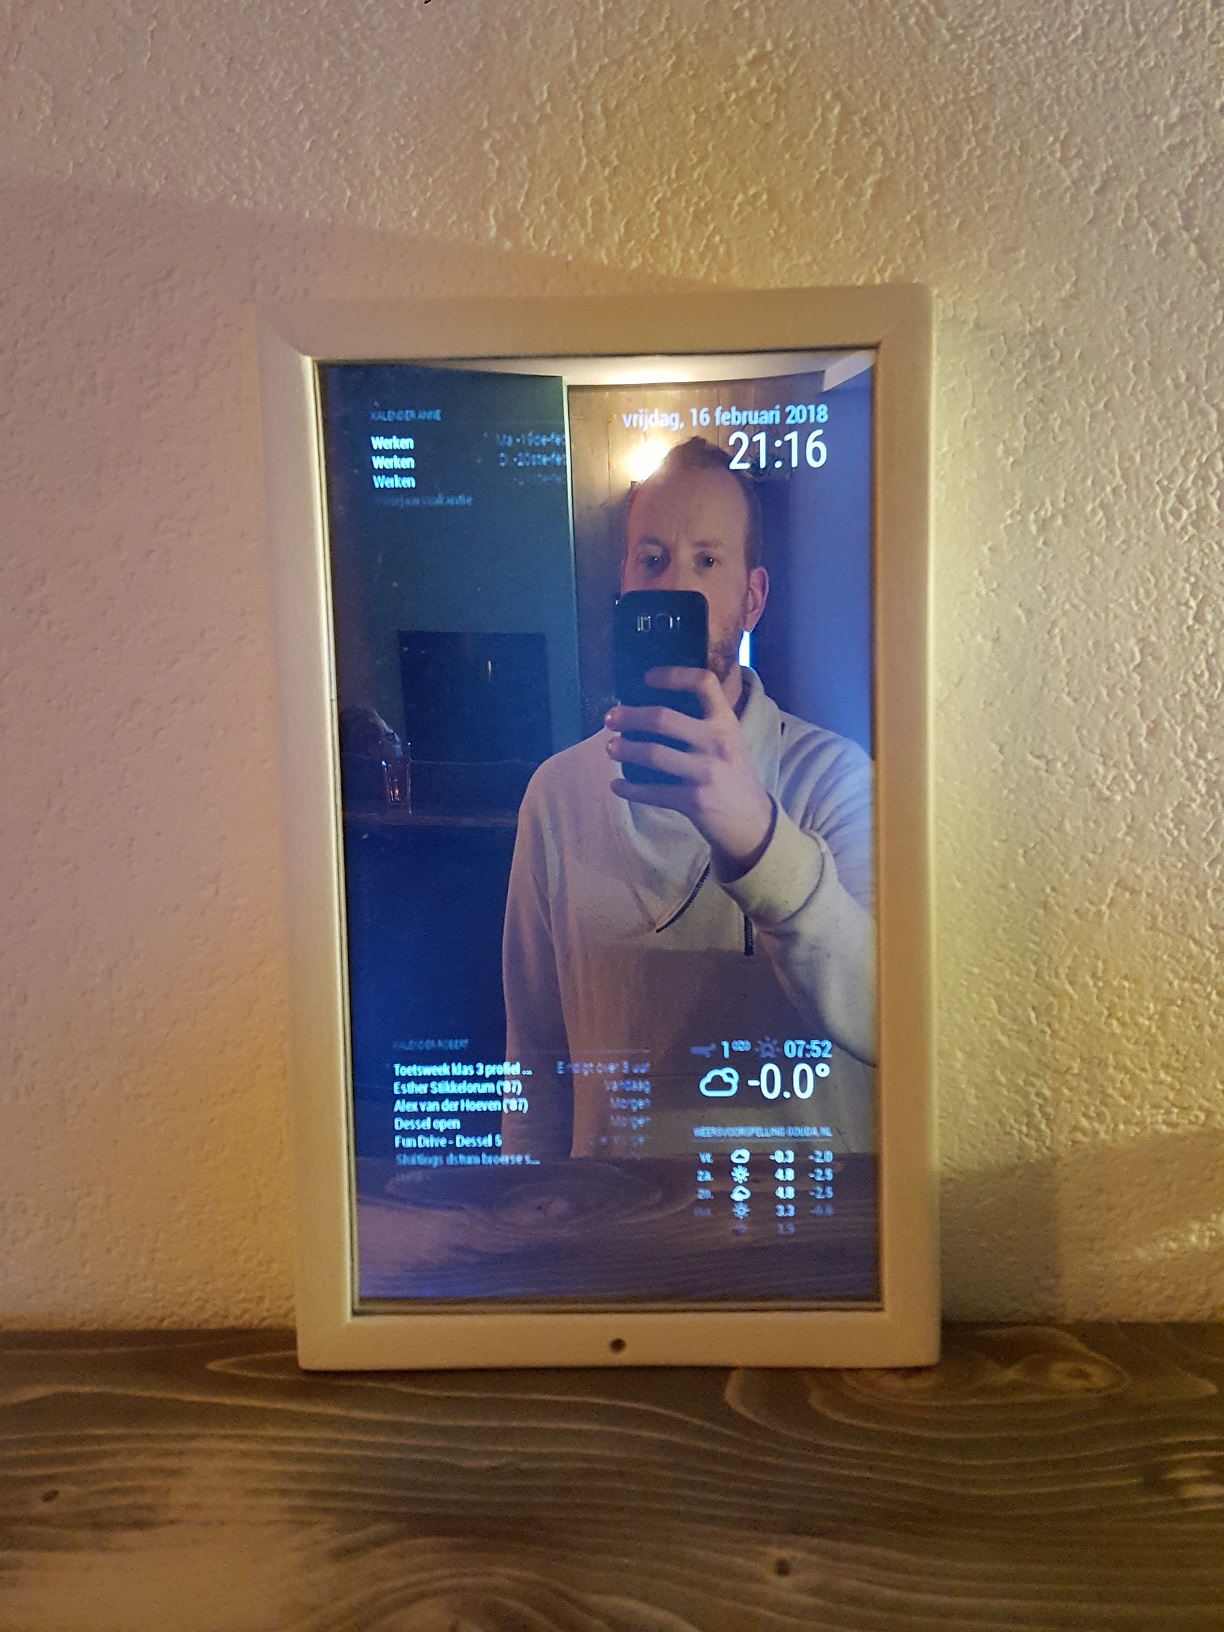
Finished product: “the magic”. Doesn’t shimmer that much, but that’s due to the mobile phone pic by night and low light.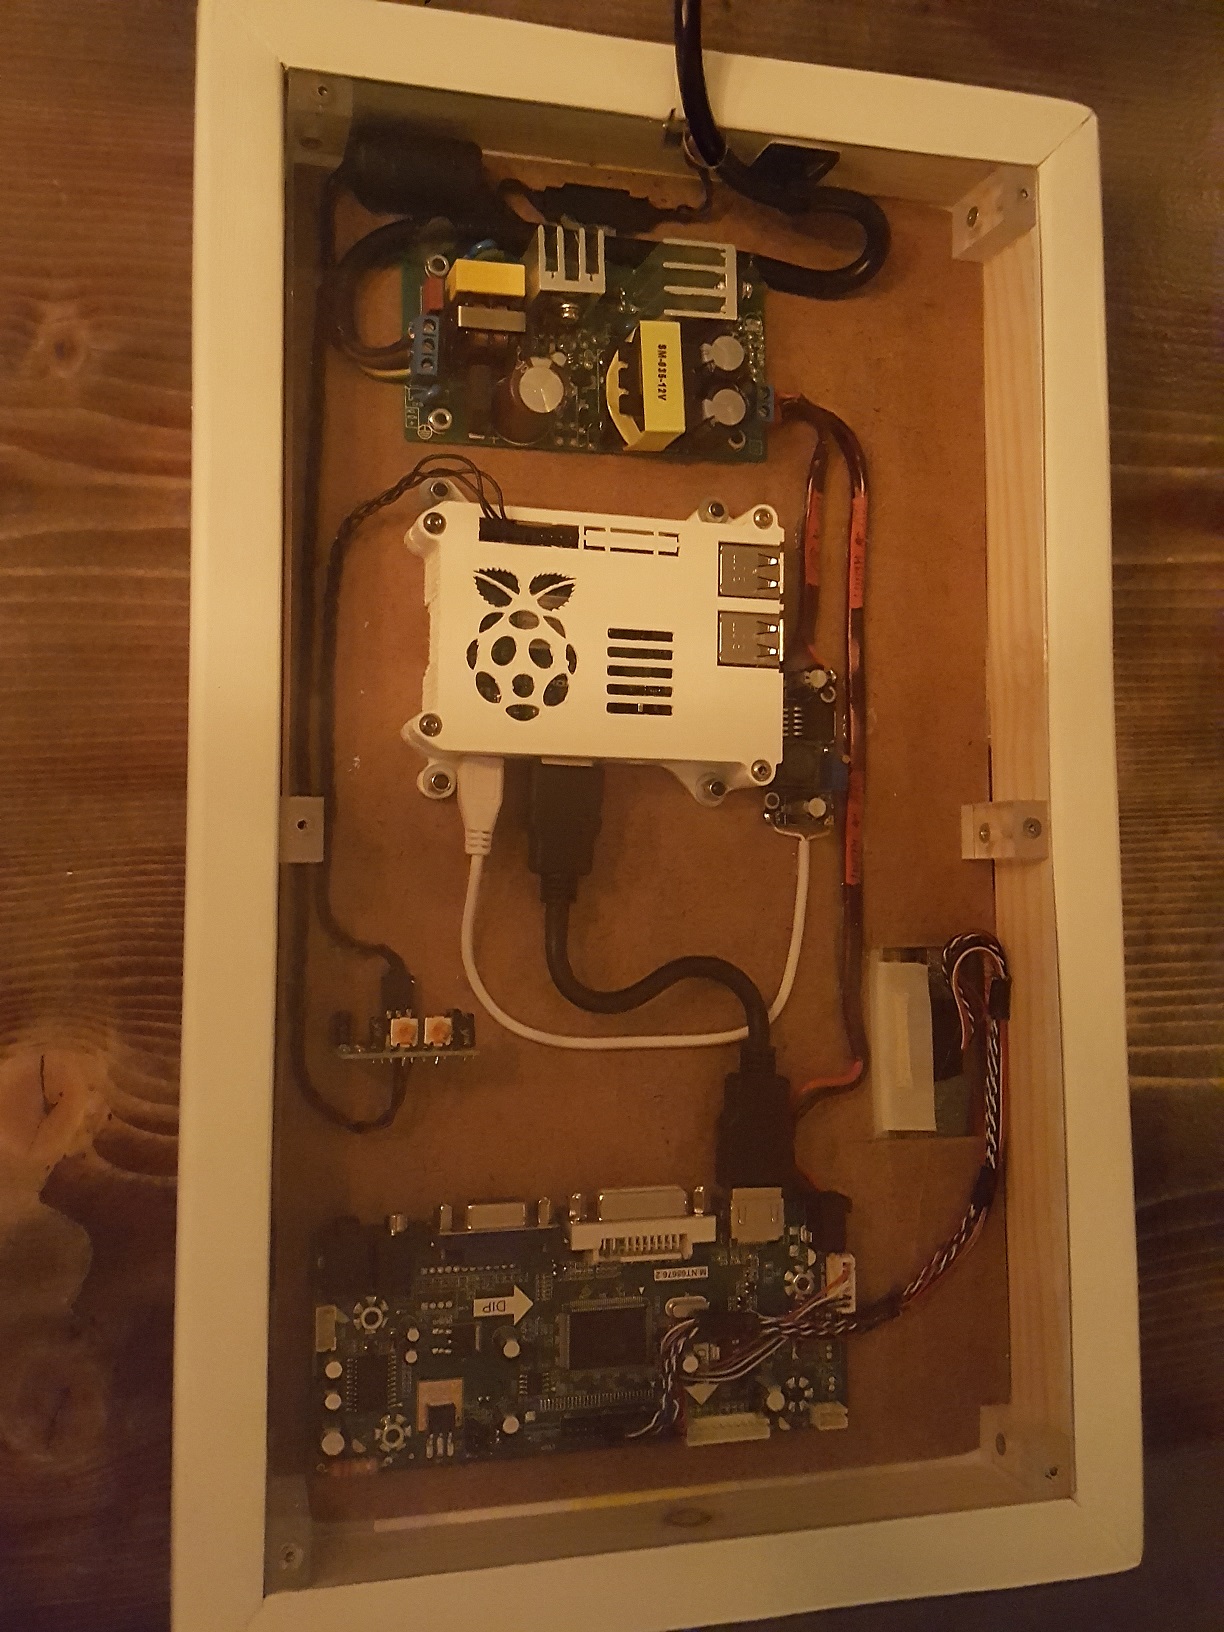
Finished product: “the brains”. Made an acrylic top plate. Doesn’t do anything more than looking nice.Best Regards,
Robert
-
Very nice work! And the neatest I’ve ever seen. :-)
-
@Robert_K said in Small ‘Picture frame’ MagicMirror (first attempt):
Made an acrylic top plate. Doesn’t do anything more than looking nice.
The acrylic top plate does look nice, giving it a professional, finished look. One suggestion, and this is just one old man’s opinion. Keep an eye on the temperature, now that you’ve closed the back of the frame.
-
Nice work, I did something very similar. Using apple first gen iPad screen :-)
MY CLOCK
MY 10" inch MagicMirror

-
I like what you did with the power, nice and clean. FYI, a number of the LCD driver boards have 5v outputs and I’ve successfully powered an rpi3 from the output from the board itself.
(http://www.panelook.com/upload/201511/MNT686762A_12516-Specification_A2_(1)_201511187301.pdf)
Supplies 5v on the CN3 pins (probably headless on the board, but 5v is there)
This guy says it’s good up to 1.5 amps (https://www.raspberrypi.org/forums/viewtopic.php?t=67312)
I wired it to a USB cable rather than directly to the GPIO
-Earle
-
The Raspberry Pi 3 is powered by a +5.1V and 2.5A
small lcd screen takes about 3.3v. -
@Mykle1 said in Small ‘Picture frame’ MagicMirror (first attempt):
The acrylic top plate does look nice, giving it a professional, finished look. One suggestion, and this is just one old man’s opinion. Keep an eye on the temperature, now that you’ve closed the back of the frame.
I’ve been thinking about that too. So I started with a closed plate, monitored the temperature and was thinking about making ventilator holes. Then again the temperature isn’t raising above 40degC. So I think it will be okay. I’ll keep it in mind with a hot summer day, thanks!
Regards Robert
-
Wow, beautiful inside!
How did you make the cables stay so nicely squared? With hot-glue?“Everything I do (here) is for free – altruism is the way!”
MMM-FlightsAbove, MMM-Tabulator, MMM-Assistant (co-maintainer) -
@E3V3A said in Small ‘Picture frame’ MagicMirror (first attempt):
Wow, beautiful inside!
How did you make the cables stay so nicely squared? With hot-glue?Yes, hot glue indeed.
Regards Robert
-
@Robert_K
leave back of mirror open.that will help -
@E3V3A
In my mm-clock, all 3d printed. No hot glue. -
For me when I started to decorate my house it was very important to have original and matching picture frames.
-
@lupearn hmm
-
 R Robert_K referenced this topic on
Hello! It looks like you're interested in this conversation, but you don't have an account yet.
Getting fed up of having to scroll through the same posts each visit? When you register for an account, you'll always come back to exactly where you were before, and choose to be notified of new replies (either via email, or push notification). You'll also be able to save bookmarks and upvote posts to show your appreciation to other community members.
With your input, this post could be even better 💗
Register Login