Hello fellow MagicMirror makers!
It is with a huge sense of self-satisfaction that I present my build of MagicMirror. Looking at the builds that came before mine was extremely helpful and the people that have assisted me here should all be commended. Without your help I may not have completed my project. Thank you all, for your time, patience and effort on my behalf. I think you are nothing short of brilliant and I wish you all every success. And a special shout out to Michael Teeuw for making this all possible. Feel free to comment, Michael, so I can tell my son that the creator of MagicMirror actually contacted me about my build. (fingers crossed)
My reason for building: (Yes, I’m going to tell a short, boring story)
My son is a senior at Steven’s Institute of Technology. He majors in Computer Programming and Engineering. While he was home for Christmas break he suggested I take an old PC and install uBuntu on it as a project. (I like projects). It took me a few days, but when I was done I thought, “Well now what do I do with it?” He suggested a few online sites that teach you Python and Java but I have no practical use for learning that at my age. Then he suggested I check out this thing called a Raspberry Pi. He said people were doing all sorts of cool things with them. Then he went back to school.
First, I did some Google searching for what a Raspberry Pi actually was. Seriously, I had no idea. Another Google search for what people were doing with them. BLAM! There it was! A Magic Mirror, but I was unsure of my ability to do this. My solution? See if I could get it up and running on a PC. Once I was able to successfully install and actually get MagicMirror running I was totally into it, hard core. I ordered my Pi and the 2-way mirror. When my son comes home for his next break, I will present him with a Magic Mirror, and thank him for the best suggestion, ever.
(End of boring “short?” story).
In the future, it is my intention to add a USB webcam, a microphone and speakers so that I can have facial recognition, some sort of voice activation with response and sound. Might as well dream big.


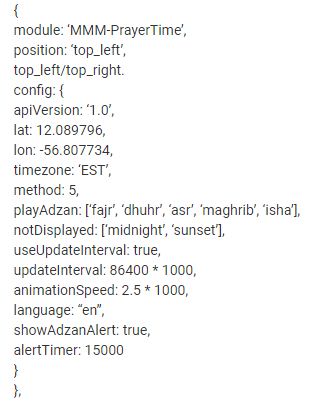
 !
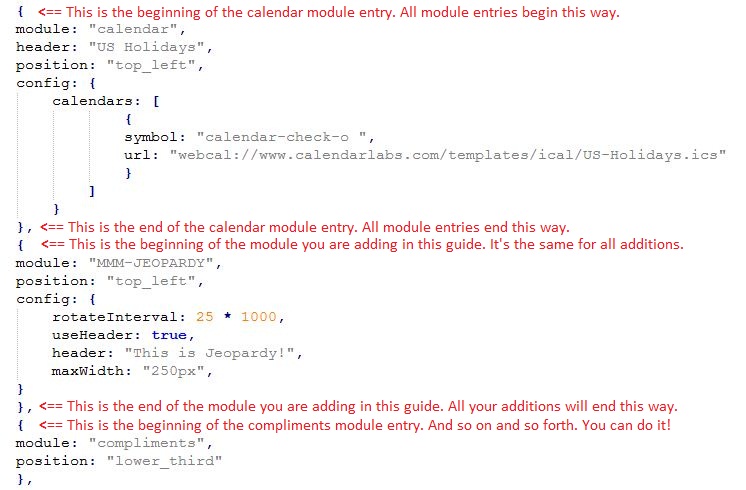
!