@bkeyport Hi, I use an aluminum Dibond plate with a cut in the monitor size. This has the advantage that it is really dark behind the spy mirror. On the other hand, the plate in my large frame (100 x 54 cm) is also there to stiffen the frame. And finally, everything on the plate (controller, Raspberry, junction boxes, cables …) can be very nicely mounted / glued.
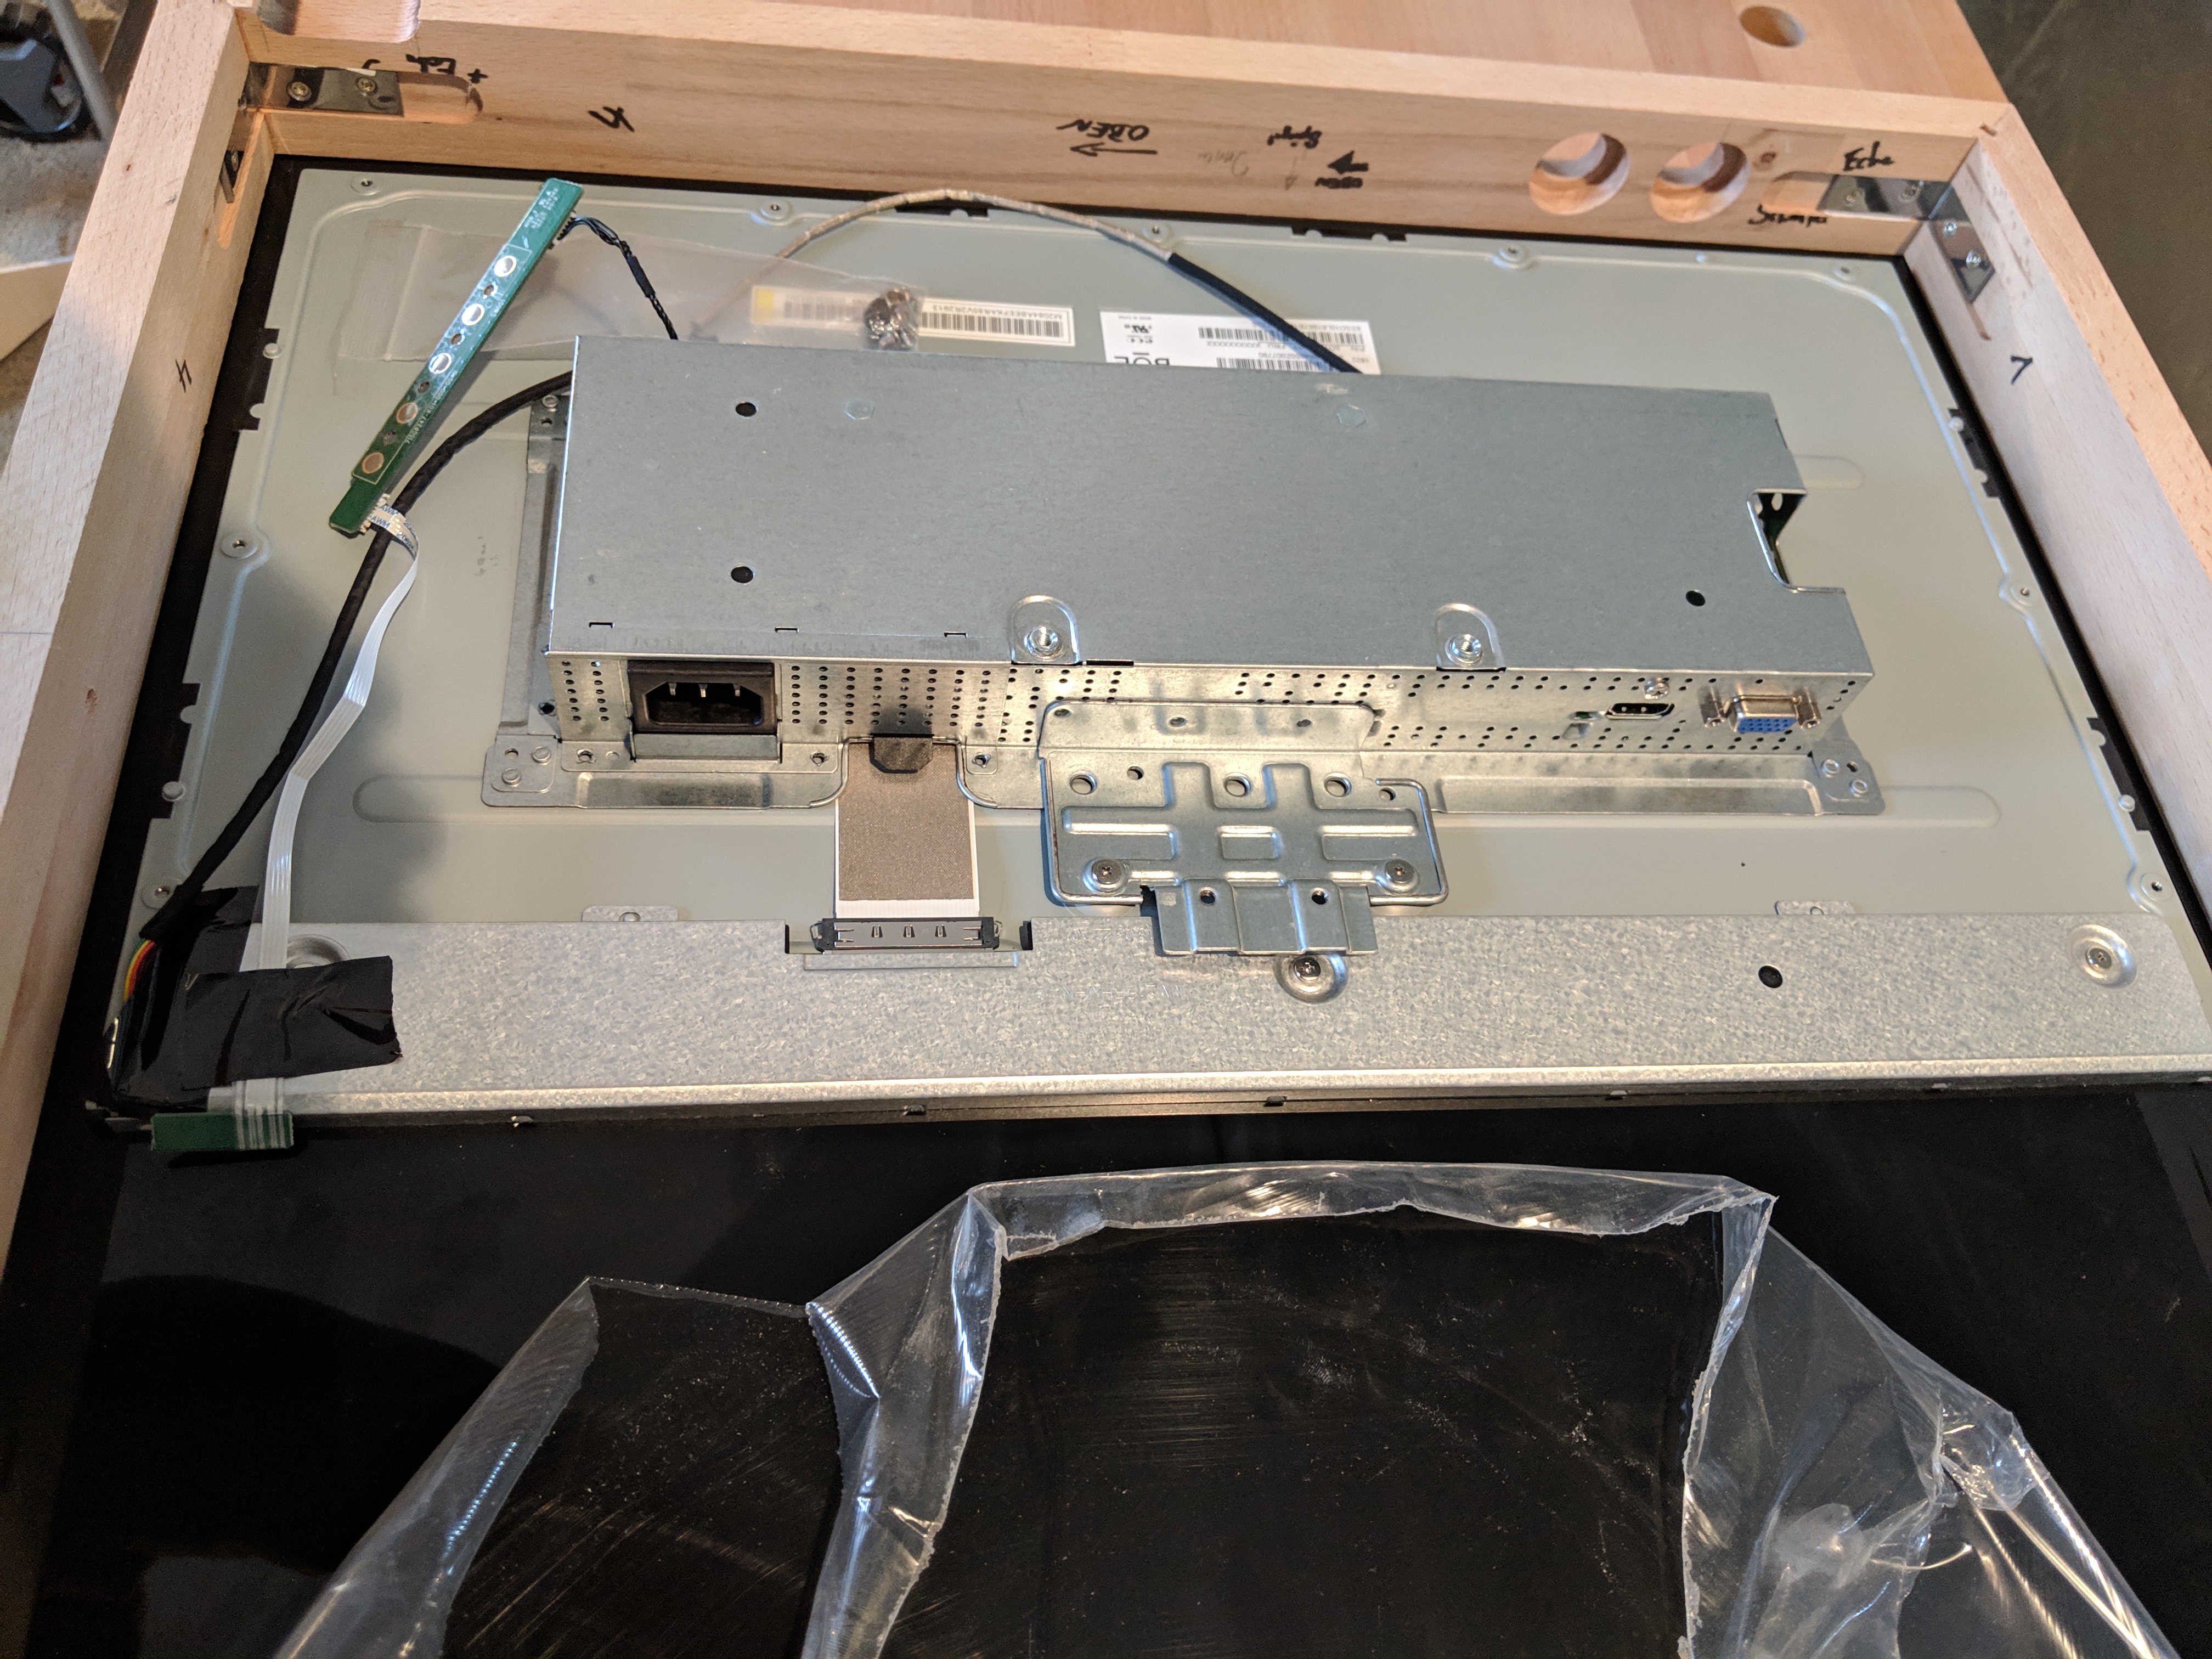
In this frame, the monitor then simply holds with a few tapes and two metal angles.
see here: https://forum.magicmirror.builders/topic/9154/bathroom-magic-mirror
A New Chapter for MagicMirror: The Community Takes the Lead
Read the statement by Michael Teeuw here.
Read the statement by Michael Teeuw here.
Posts
-
RE: Help mounting monitor.
-
RE: Bathroom Magic Mirror
@qu1que Thanks a lot for your post.
The bottom button boots the Raspberry in a safe way (without simply turning off the power)
The top button controls the lights in the bathroom via a homematic webservice.
-
Bathroom Magic Mirror
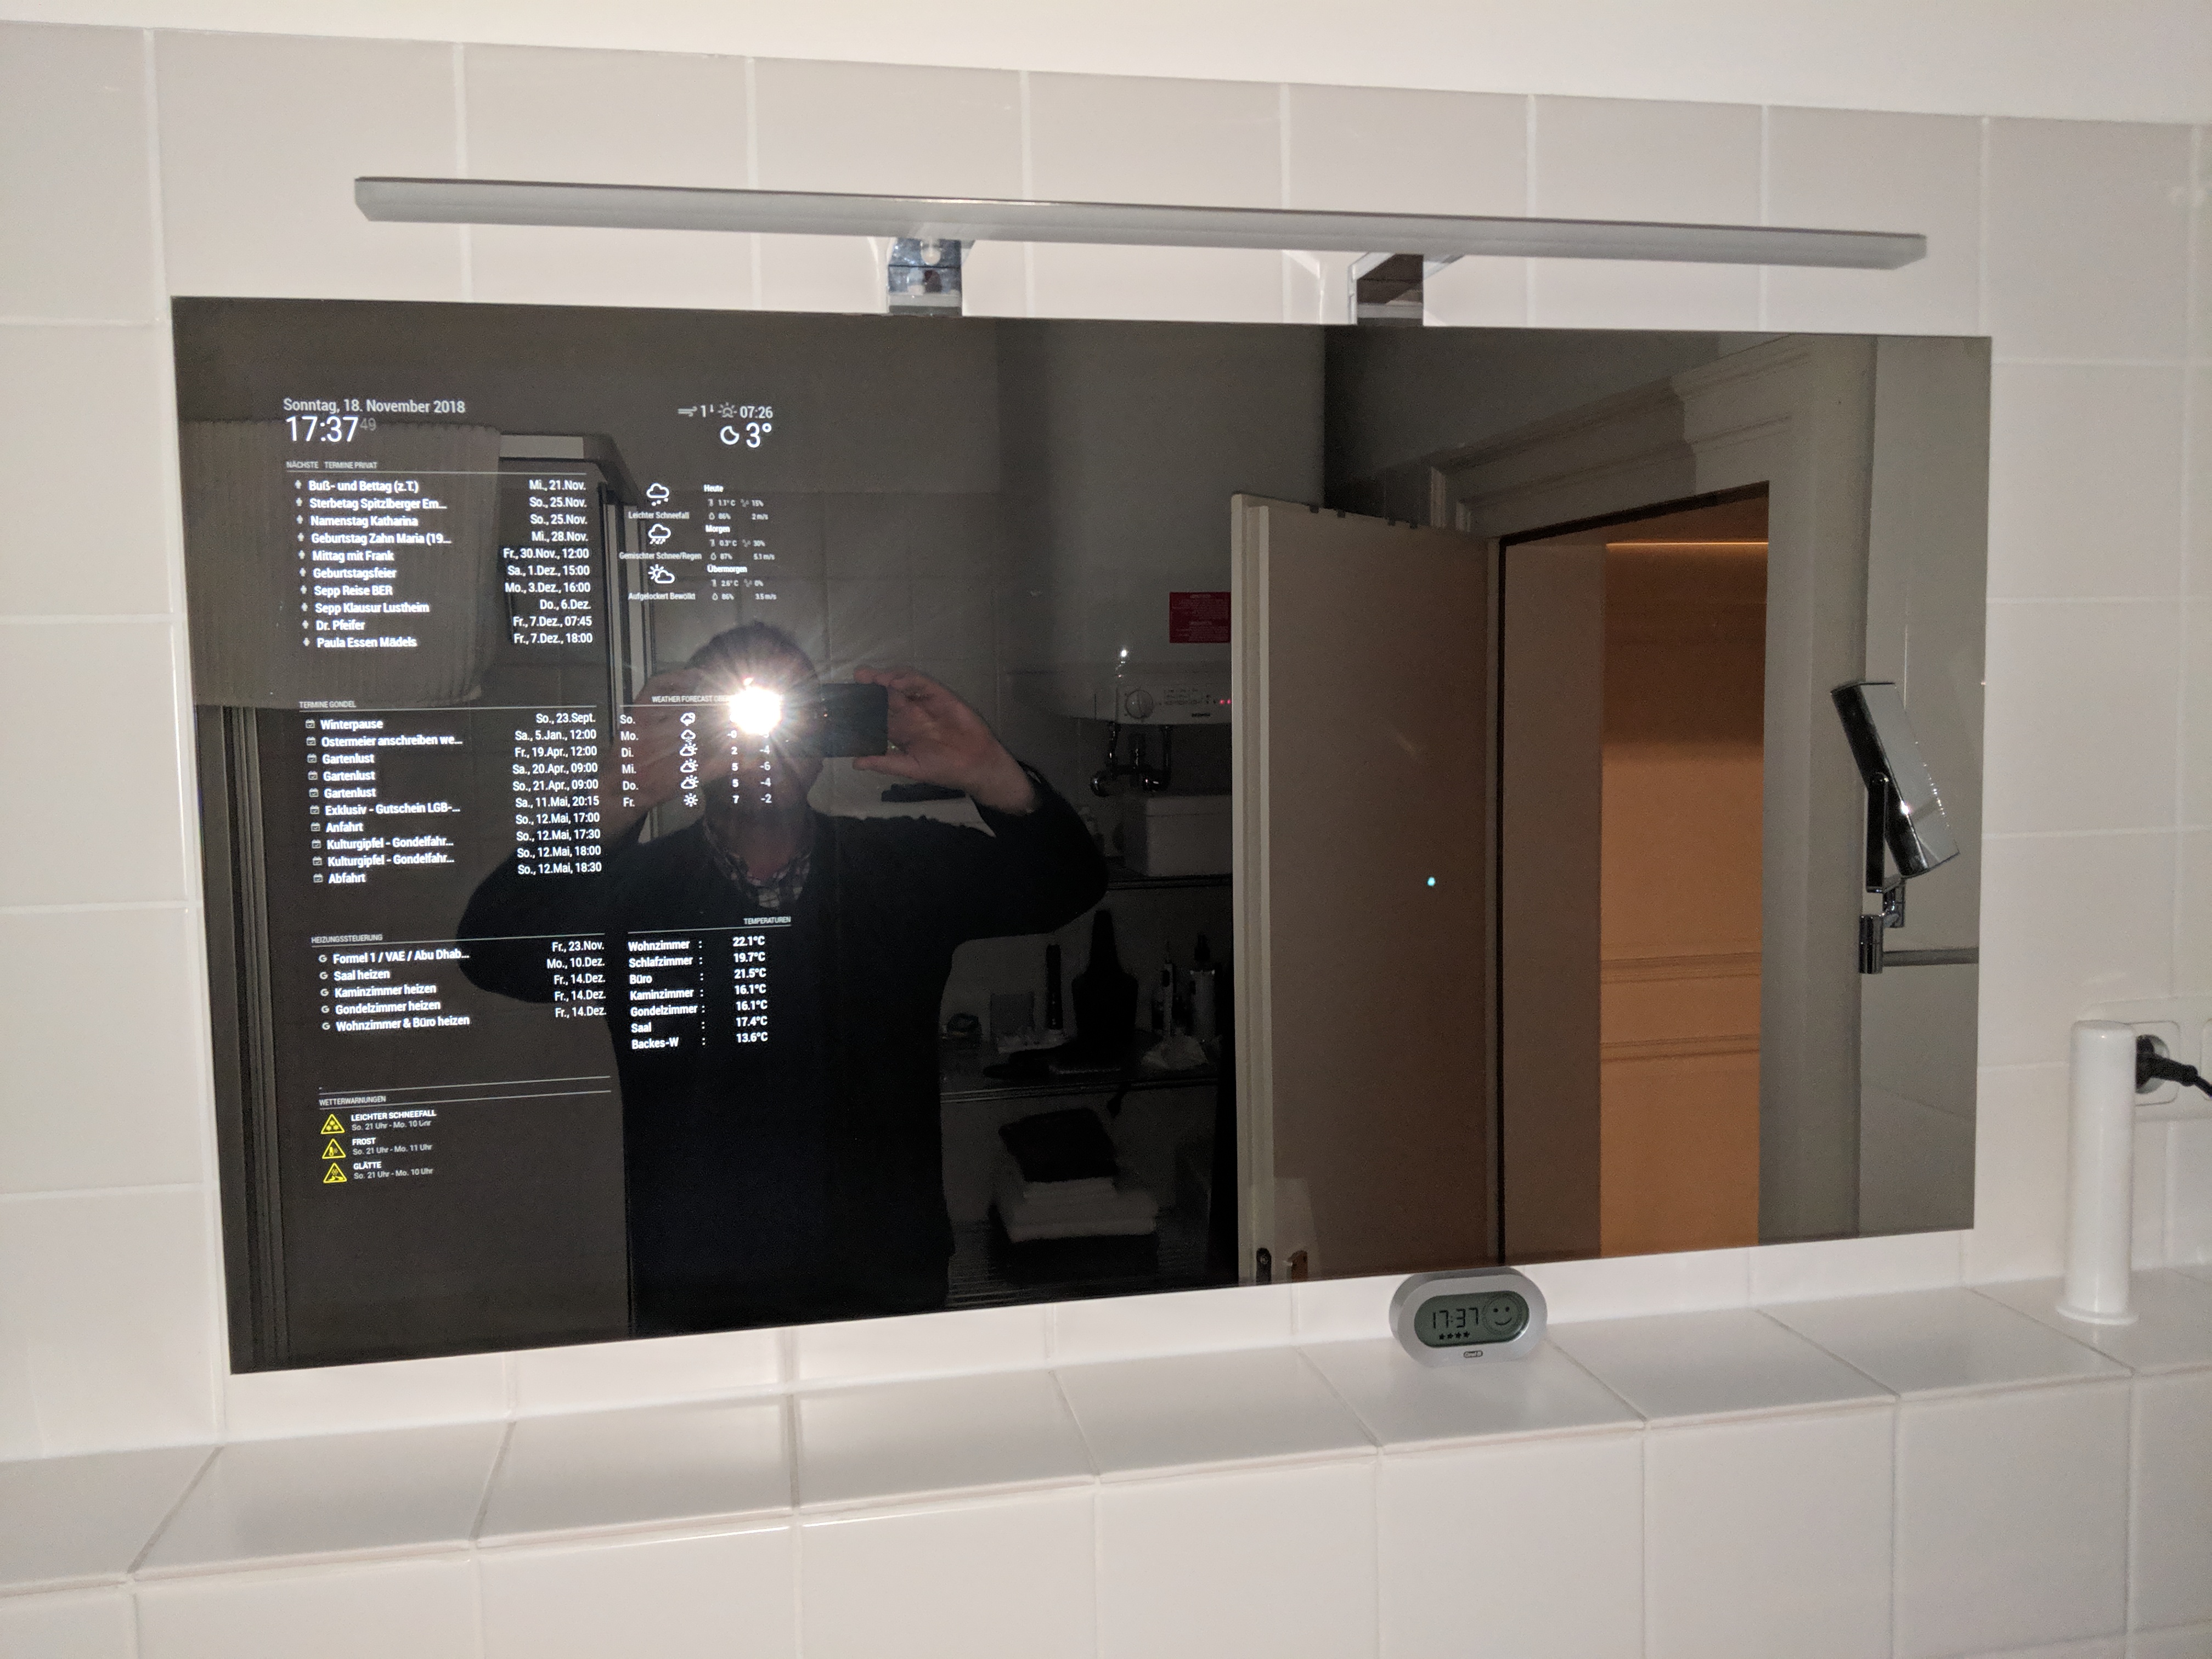
My first MagicMirror is now finished and mounted in our bathroom.
The following requirements had to be fulfilled:
- maximum woman acceptance factor
- minimum depth
- rimless mirror
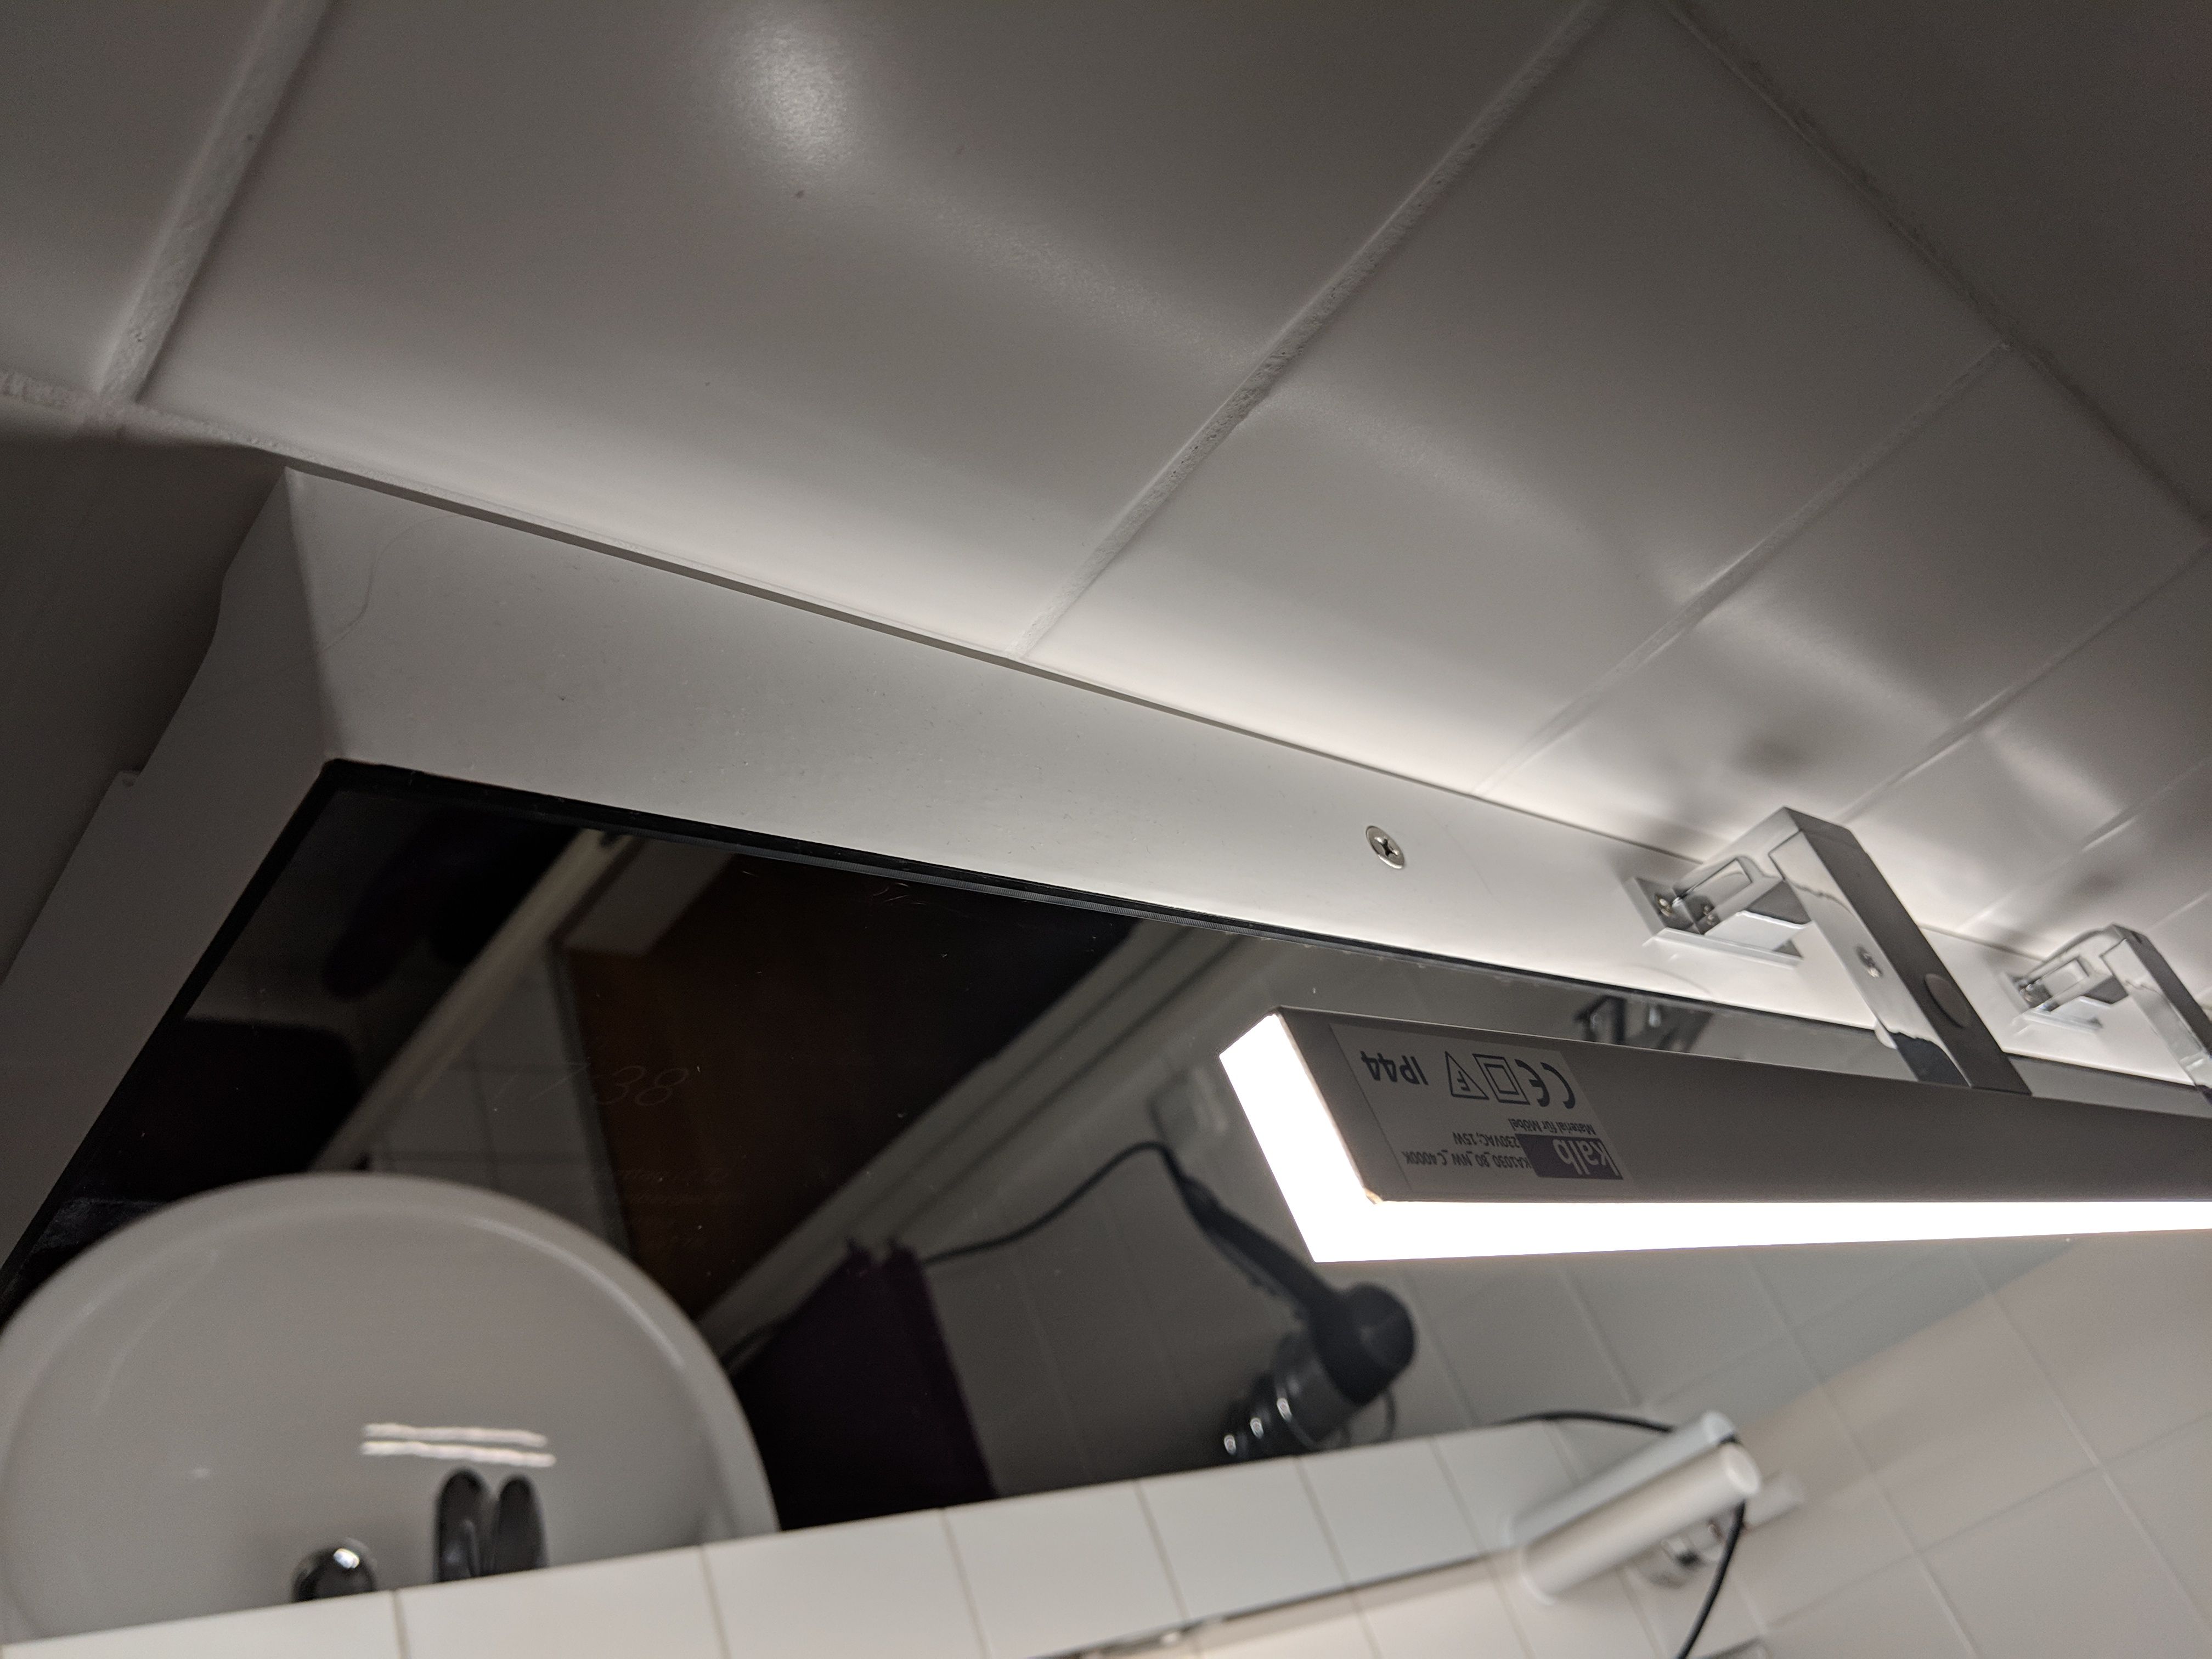
- Mounting a LED light bar
- Integration into my Homematic installation
- Button to reboot the Raspberry pi
- Button for further control tasks
- Motion control
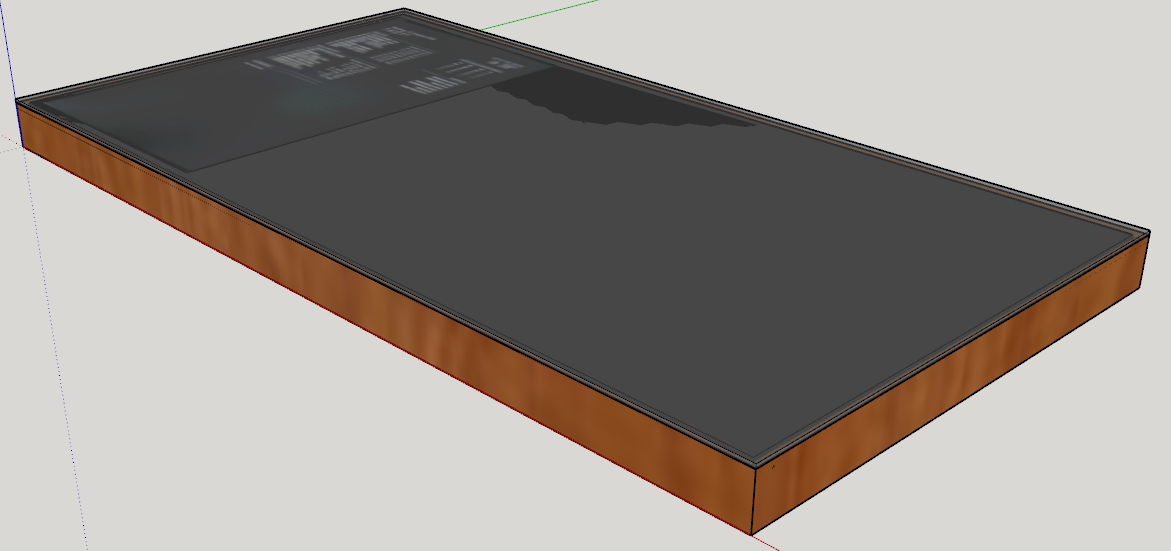
I have planned the mirror with SketchUp:
Picture 1:
Picture 2:

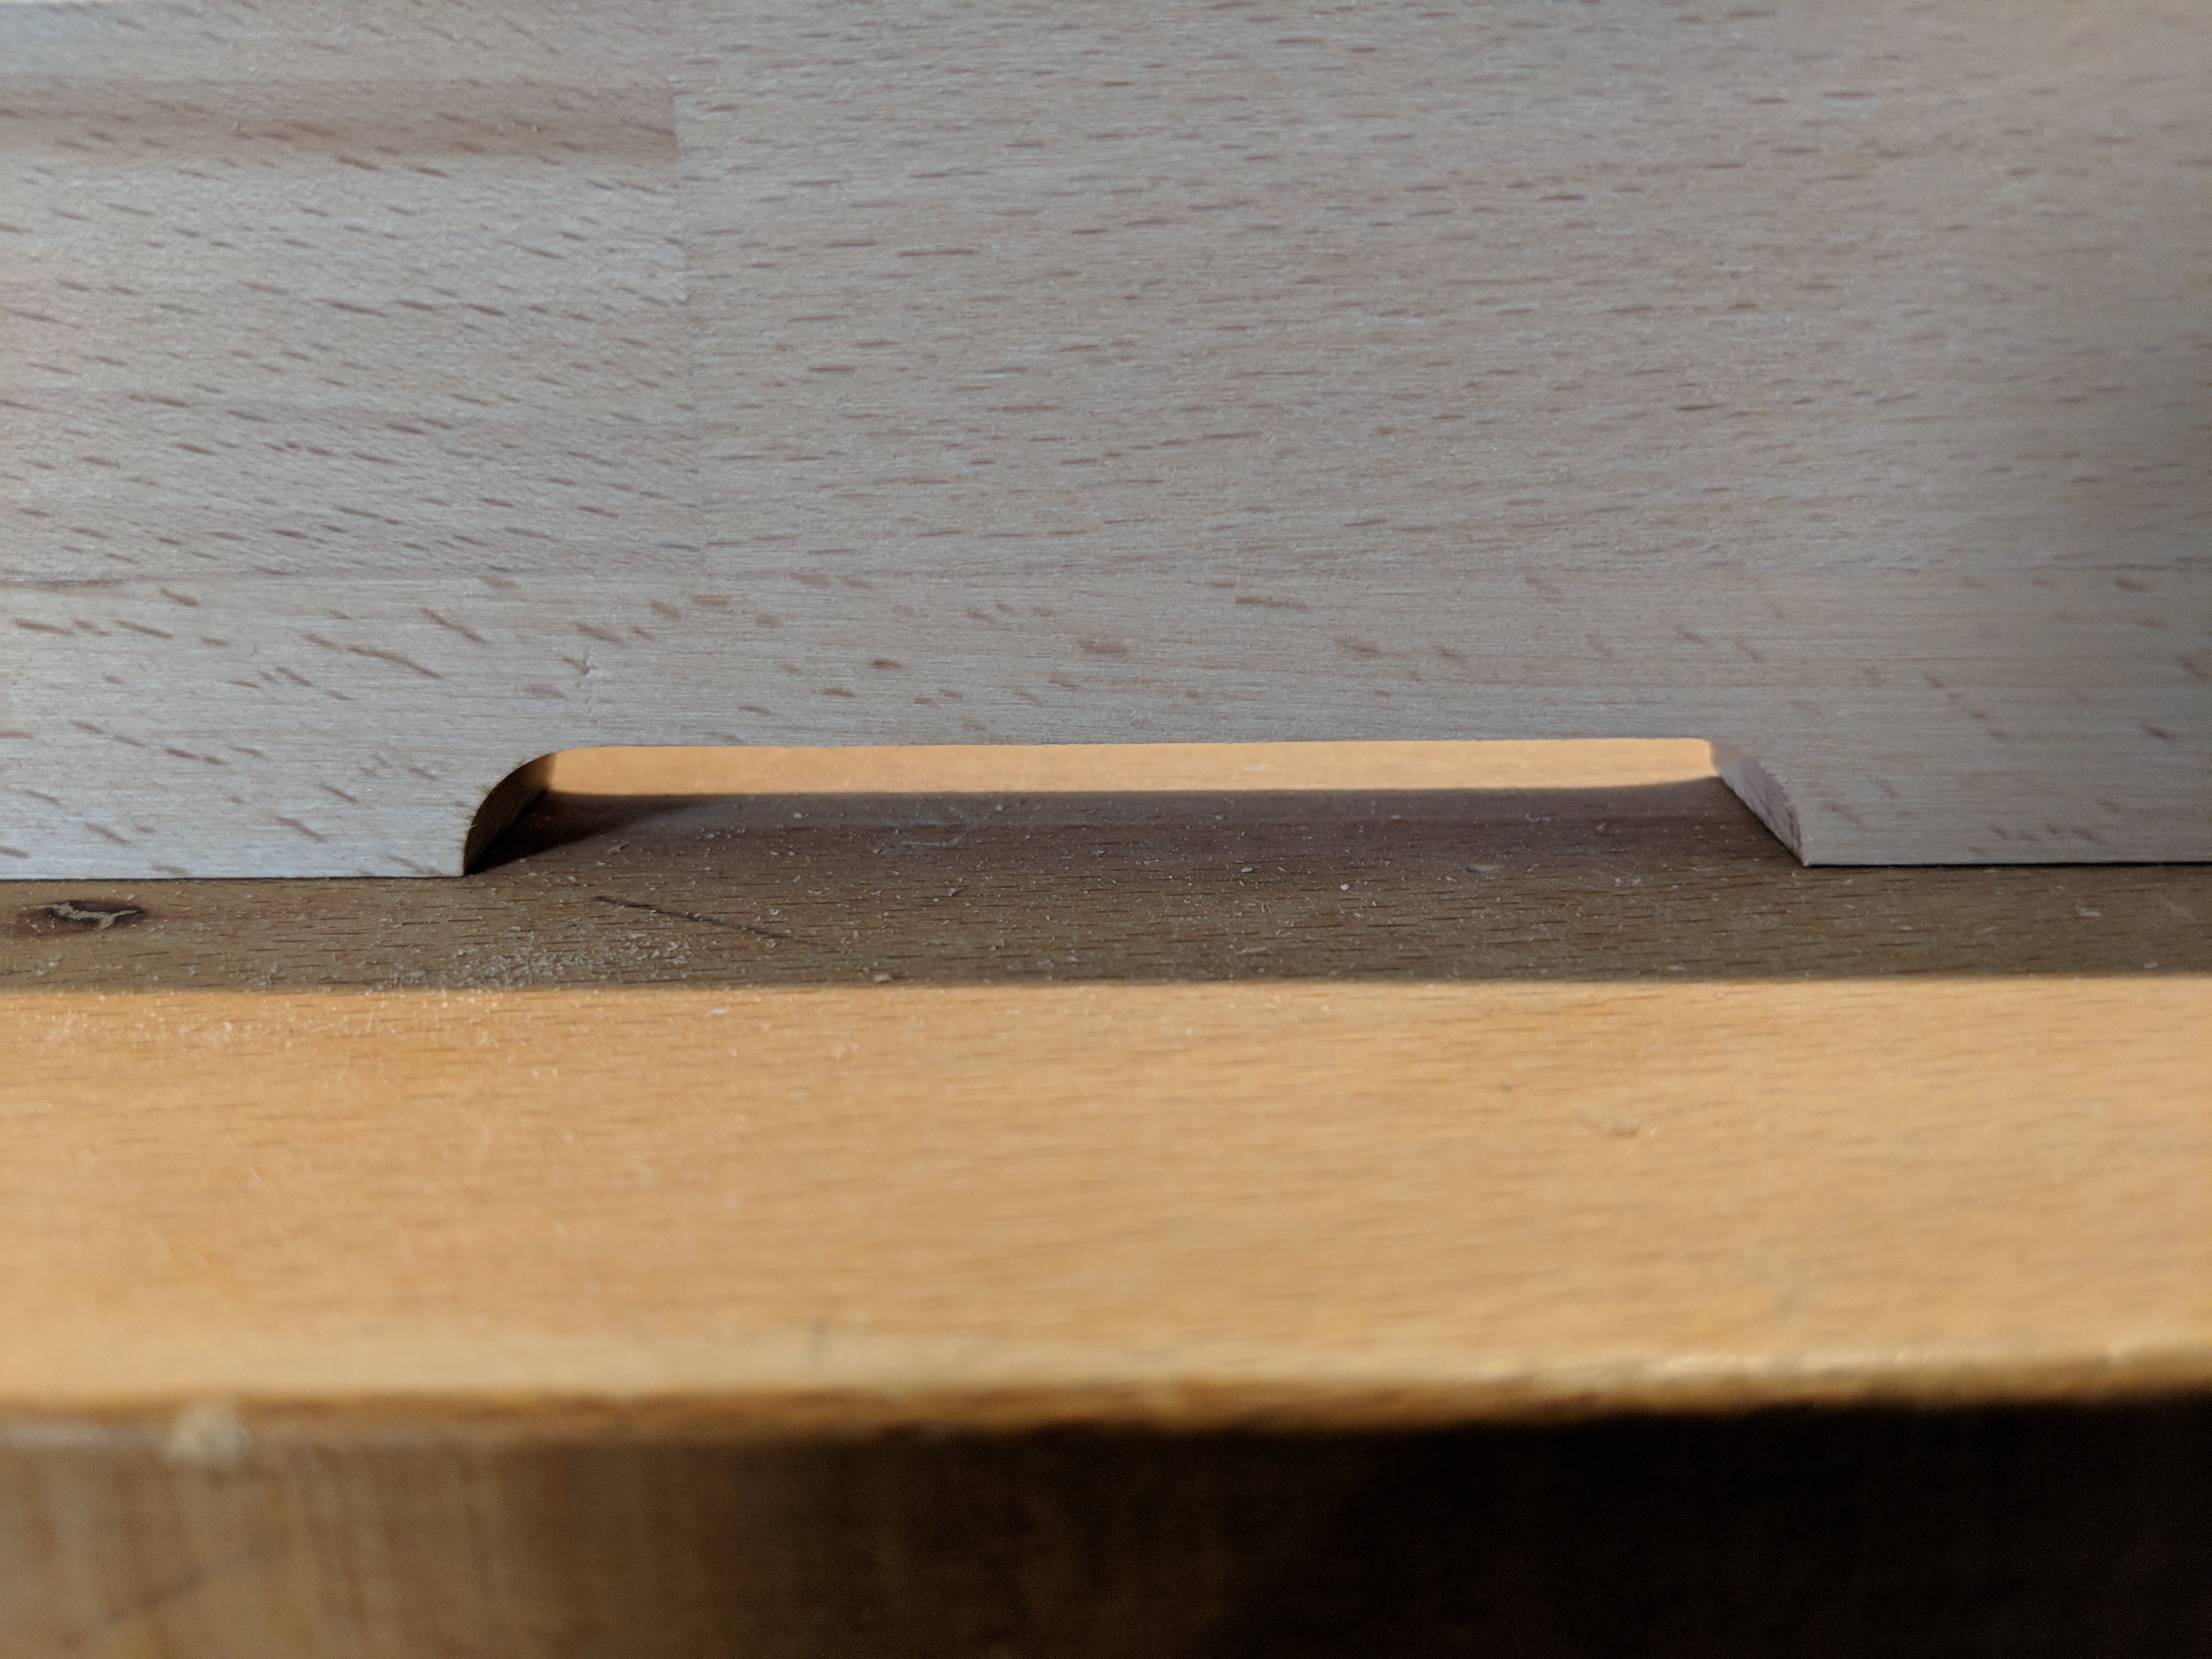
Picture 3:
Fräsung für Silikonfuge/Milling groove for silicone joint

Picture 4:

Picture 5:

Picture 6:

Picture 7: (wall mount)

I used beechwood
Picture 8:

Picture 9:

Picture 10:
Picture 11:

Picture 12:

Photos of the assembly
Picture 13:

Picture 14:

Picture 15:
Picture 16:

Picture 17:

Picture 18:

Picture 19:

Picture 20:

Picture 21:

To connect the mirror to the power, I use a “cold device plug” (C13/C14 coupler). I split the former extension cable in the middle.
And that’s how the mirror looks finished
Picture 22:
Picture 23:

Picture 24:
The following websites helped me with the construction and the configuration
https://www.heise.de/ct/hotline/Ein-Ausschalter-fuer-Raspberry-Pi-und-Raspi-Zero-3892620.html?wt_mc=print.ct.2017.25.150
https://webnist.de/python-script-auf-dem-raspberry-pi-automatisch-starten/
https://pi-buch.info/hdmi-ausgang-unkompliziert-ein-und-ausschalten/
https://www.nils-snake.de/archives/magic-mirror-bewegungssensor-einbauen-teil-5I have used:
- Raspberry pi 3
- Beech wood from the hardware store
- Aluminium composite panel (ACP) with cutout (https://www.plattenzuschnitt24.de/ - german: Alu Dibond Platte)
- Spy mirror (https://www.glas-star.de/spionspiegelnachmass/chrome-spy-spiegel/)
- Silicone (PCI Silcofern S) Color: black (Important! Never use transparent silicone. Otherwise you will see it and regret it!)
- Screen (HP 22w (1CA83AA) 54.6 cm (21.5 inch) monitor (IPS, Full HD, HDMI) https://smile.amazon.de/gp/product/B0732RBR3J/ref=oh_aui_detailpage_o01_s01?ie=UTF8&psc = 1)
- Radar motion detector (Amazon Haljia 5 RCWL-0516)
To fix the frame to the wall I use fittings as they are also used in the assembly of kitchen wall cabinets (see also picture 7). These are height-adjustable and depth-adjustable. The frame is fastened there over a vertical screw from above by the frame at the substructure. (see picture 24). I used these parts:
rail: https://www.amazon.de/gp/product/B01MPZM5ER/ref=oh_aui_detailpage_o03_s00?ie=UTF8&psc=1
fitting left: https://www.amazon.de/gp/product/B01BDR8JV0/ref=oh_aui_detailpage_o03_s00?ie=UTF8&psc=1
fittign right: https://www.amazon.de/gp/product/B01BDR8K32/ref=oh_aui_detailpage_o03_s00?ie=UTF8&psc=1Addendum to the motion detector - radar detector:
In addition to the cutout for the monitor, I would now have an additional small cutout for the radar board (20 x 40 mm) made. The radar detector works perfectly, but unfortunately not through the Dibond plate. I had to fix it at the bottom of the frame. That’s OK, but it would have been perfect behind the mirror glass. -
default calendar - change date format for today/tomorrow events
Hi
beforehand - I am a python beginner. Be nice ;-)I want to change the display format of the date. My MagicMirror runs in German.
Instead of “today at xx.xx clock” or in German “Heute um xx.xx Uhr” only “xx.xx” should be displayed, as with later events in a few days. And instead of “Morgen um xx.xx Uhr” you should also see “xx.xx”.
In the translations, I first tried to set the translation of “today” and “tomorrow” to “”. Apparently, translation is not used by the calendar module. It was already clear to me that there must be something else because a translation of “at” or “um” did not occur.
So it’s probably a formatting function in python. But I fail.
Can someone help me?
And then another question, since I am also a github freshman. Should / can I make such a new version of Calendar available to all and if so, how do I do that.
thank you very much
greetings
Sepp -
RE: MMM-PIR-Sensor (black screen)
Hi,
I’ve a similar Problem with MMM-PIR-Sensor. However, my MagicMirror already starts with a black screen as soon as I insert the module. The config is almost identical.