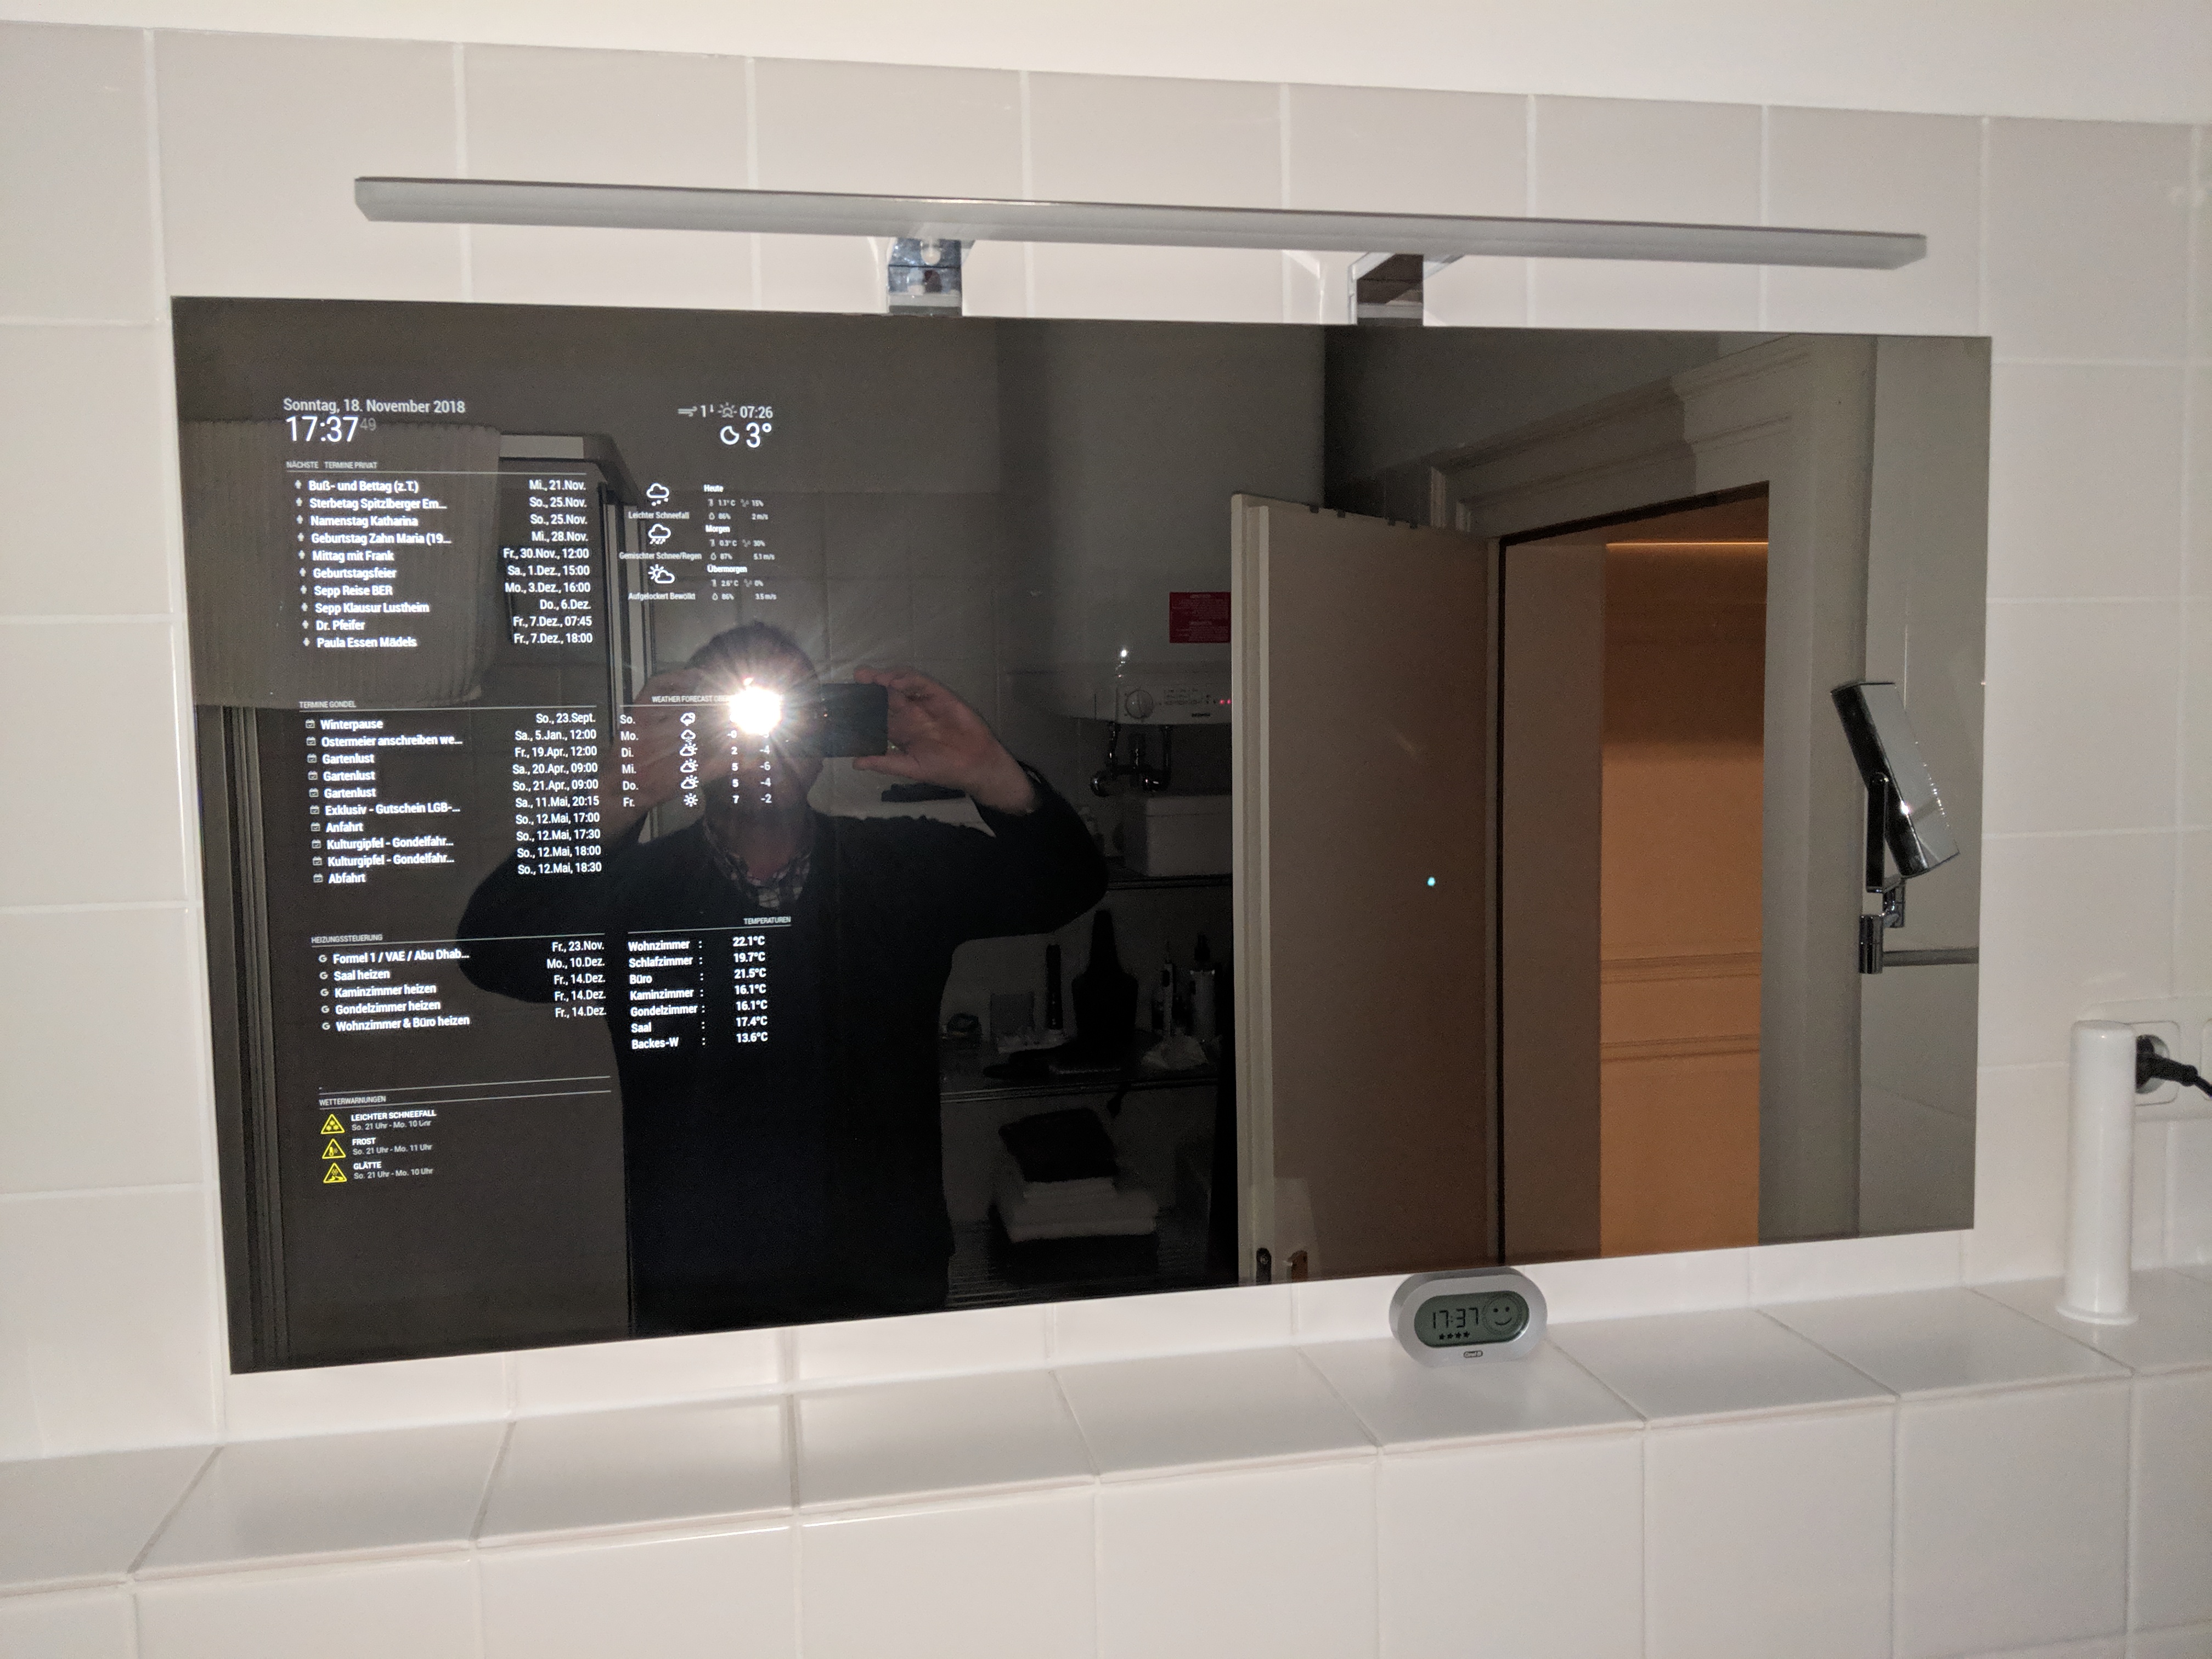
My first MagicMirror is now finished and mounted in our bathroom.
The following requirements had to be fulfilled:
- maximum woman acceptance factor
- minimum depth
- rimless mirror
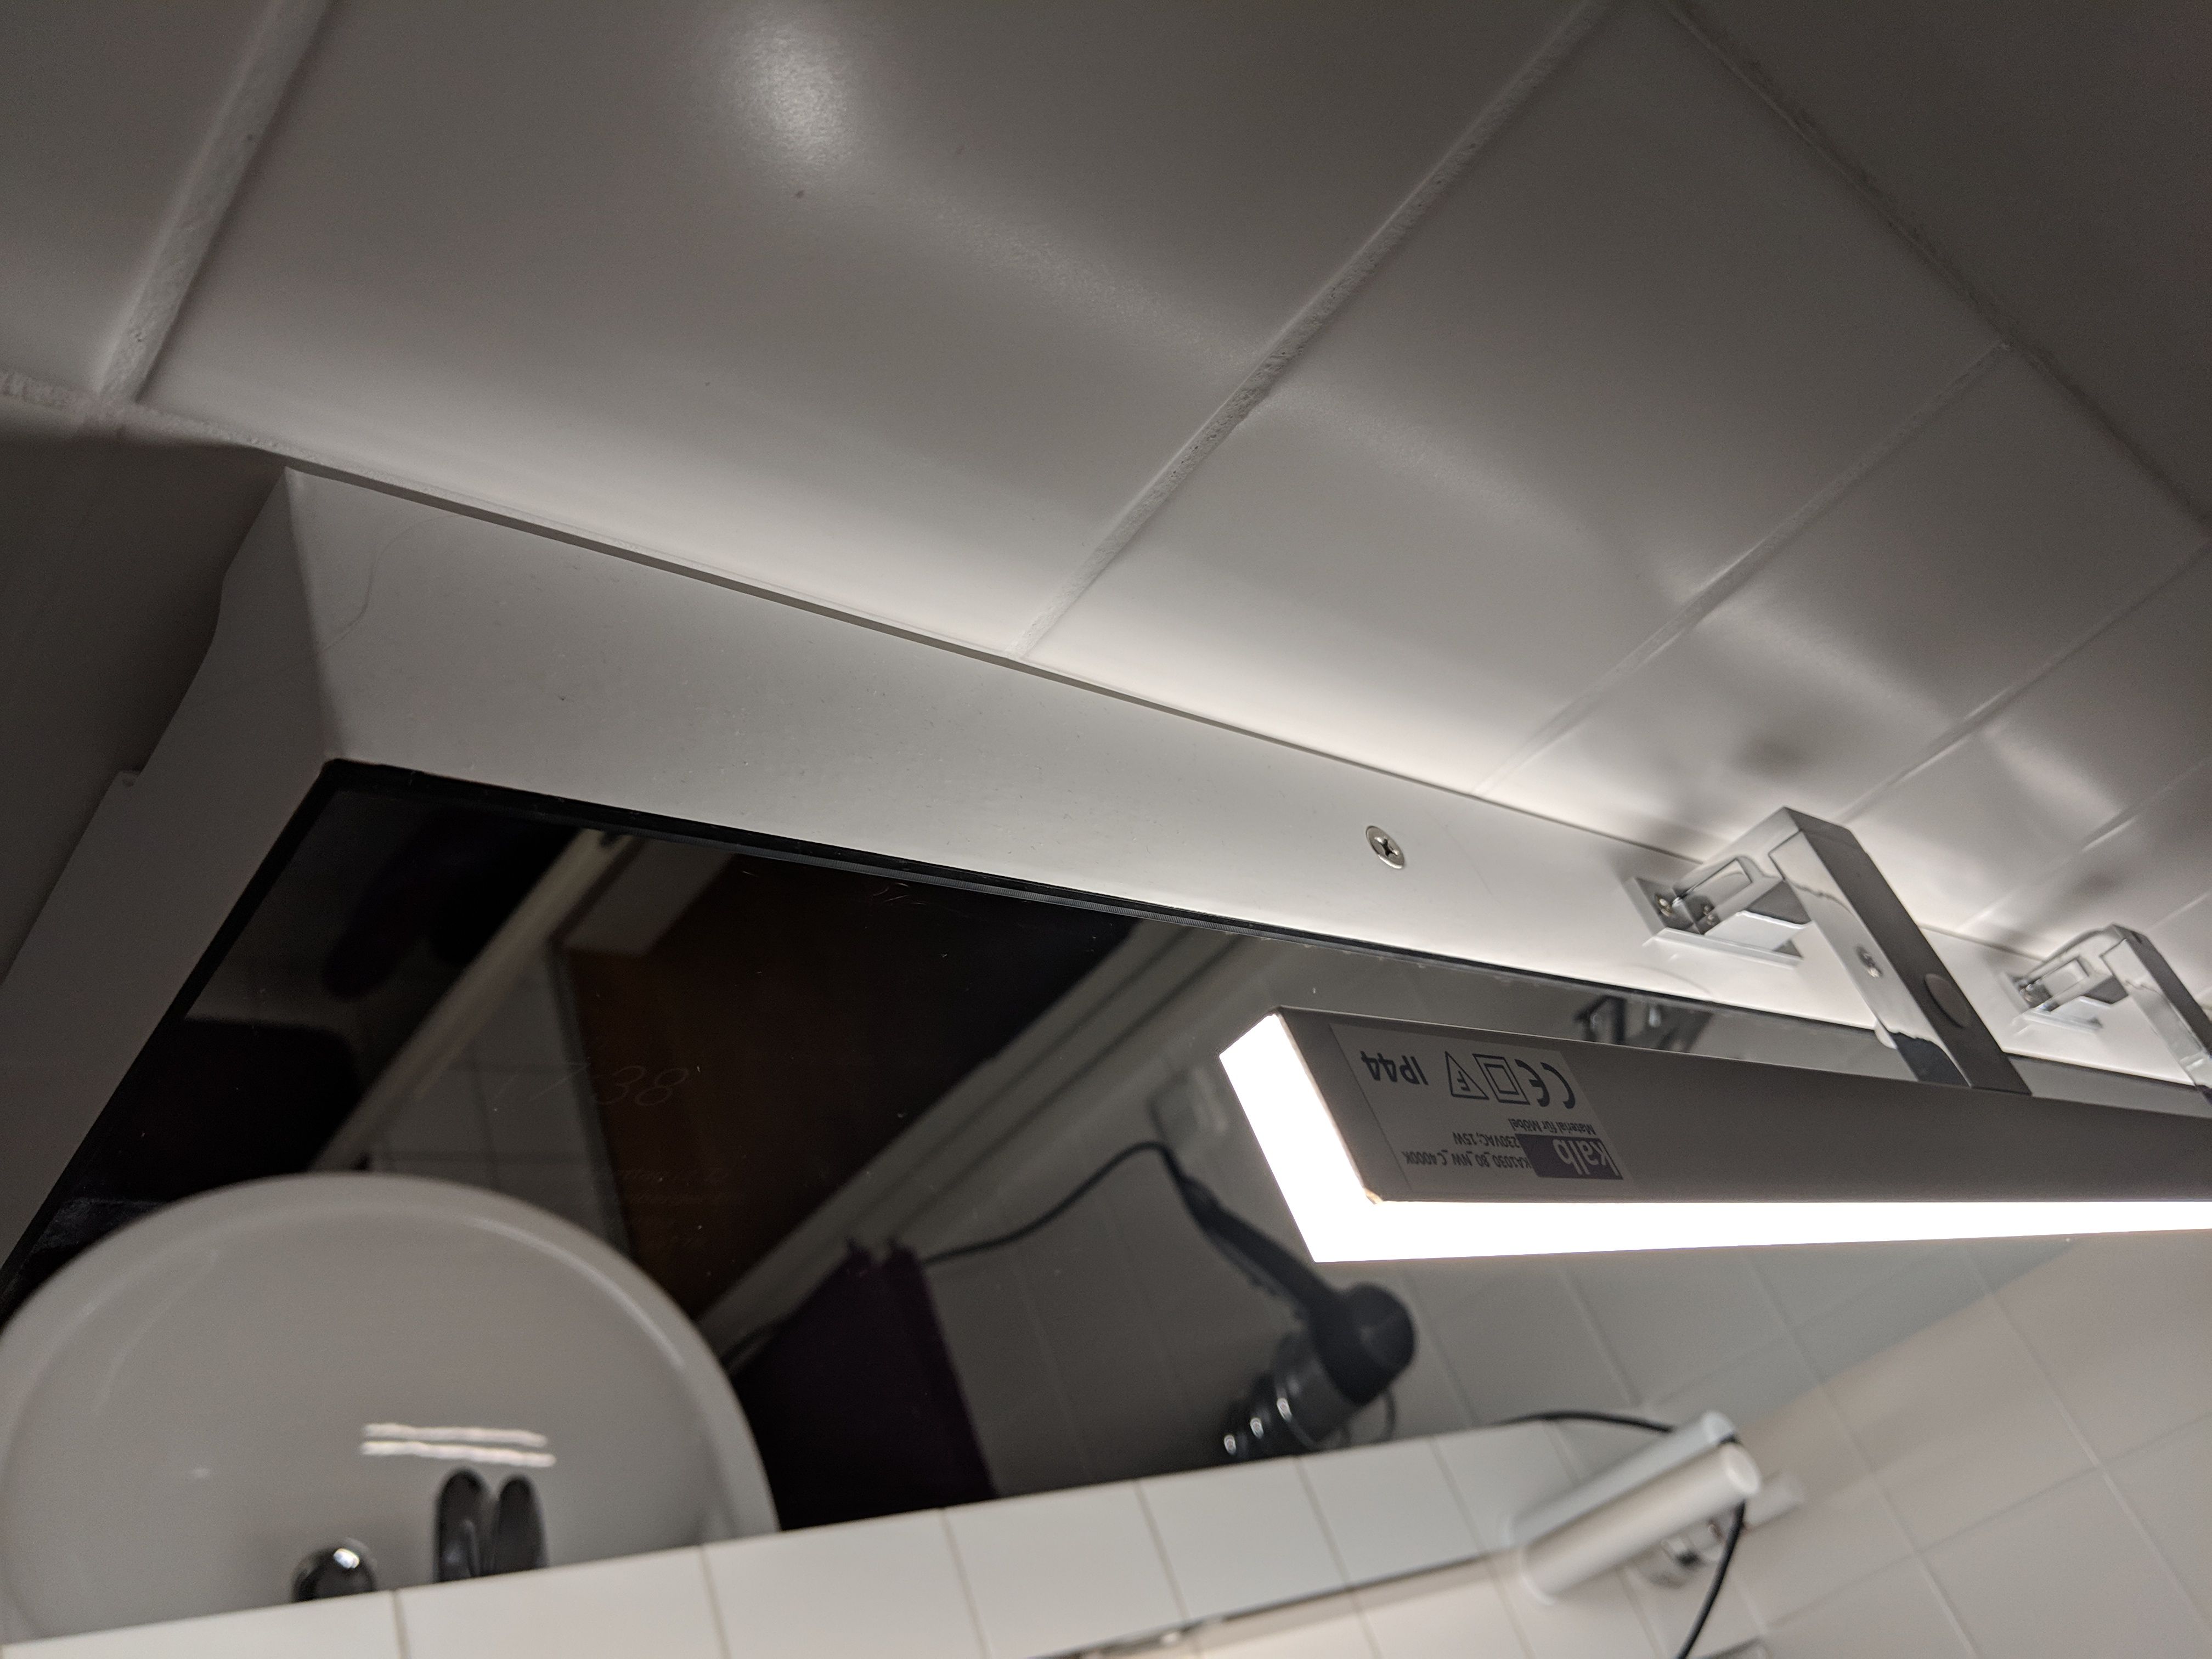
- Mounting a LED light bar
- Integration into my Homematic installation
- Button to reboot the Raspberry pi
- Button for further control tasks
- Motion control
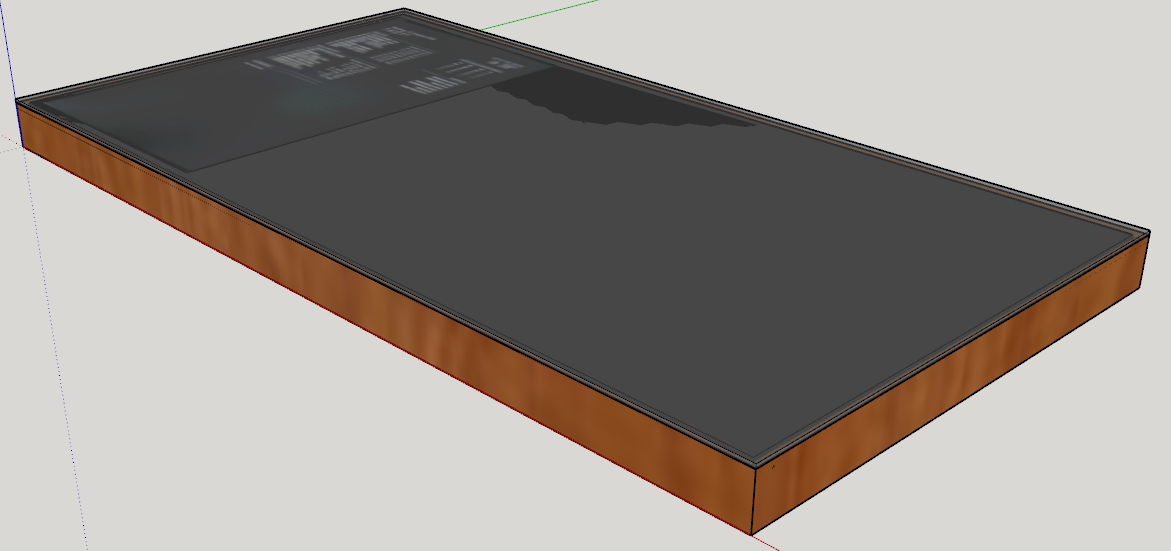
I have planned the mirror with SketchUp:
Picture 1:
Picture 2:

Picture 3:
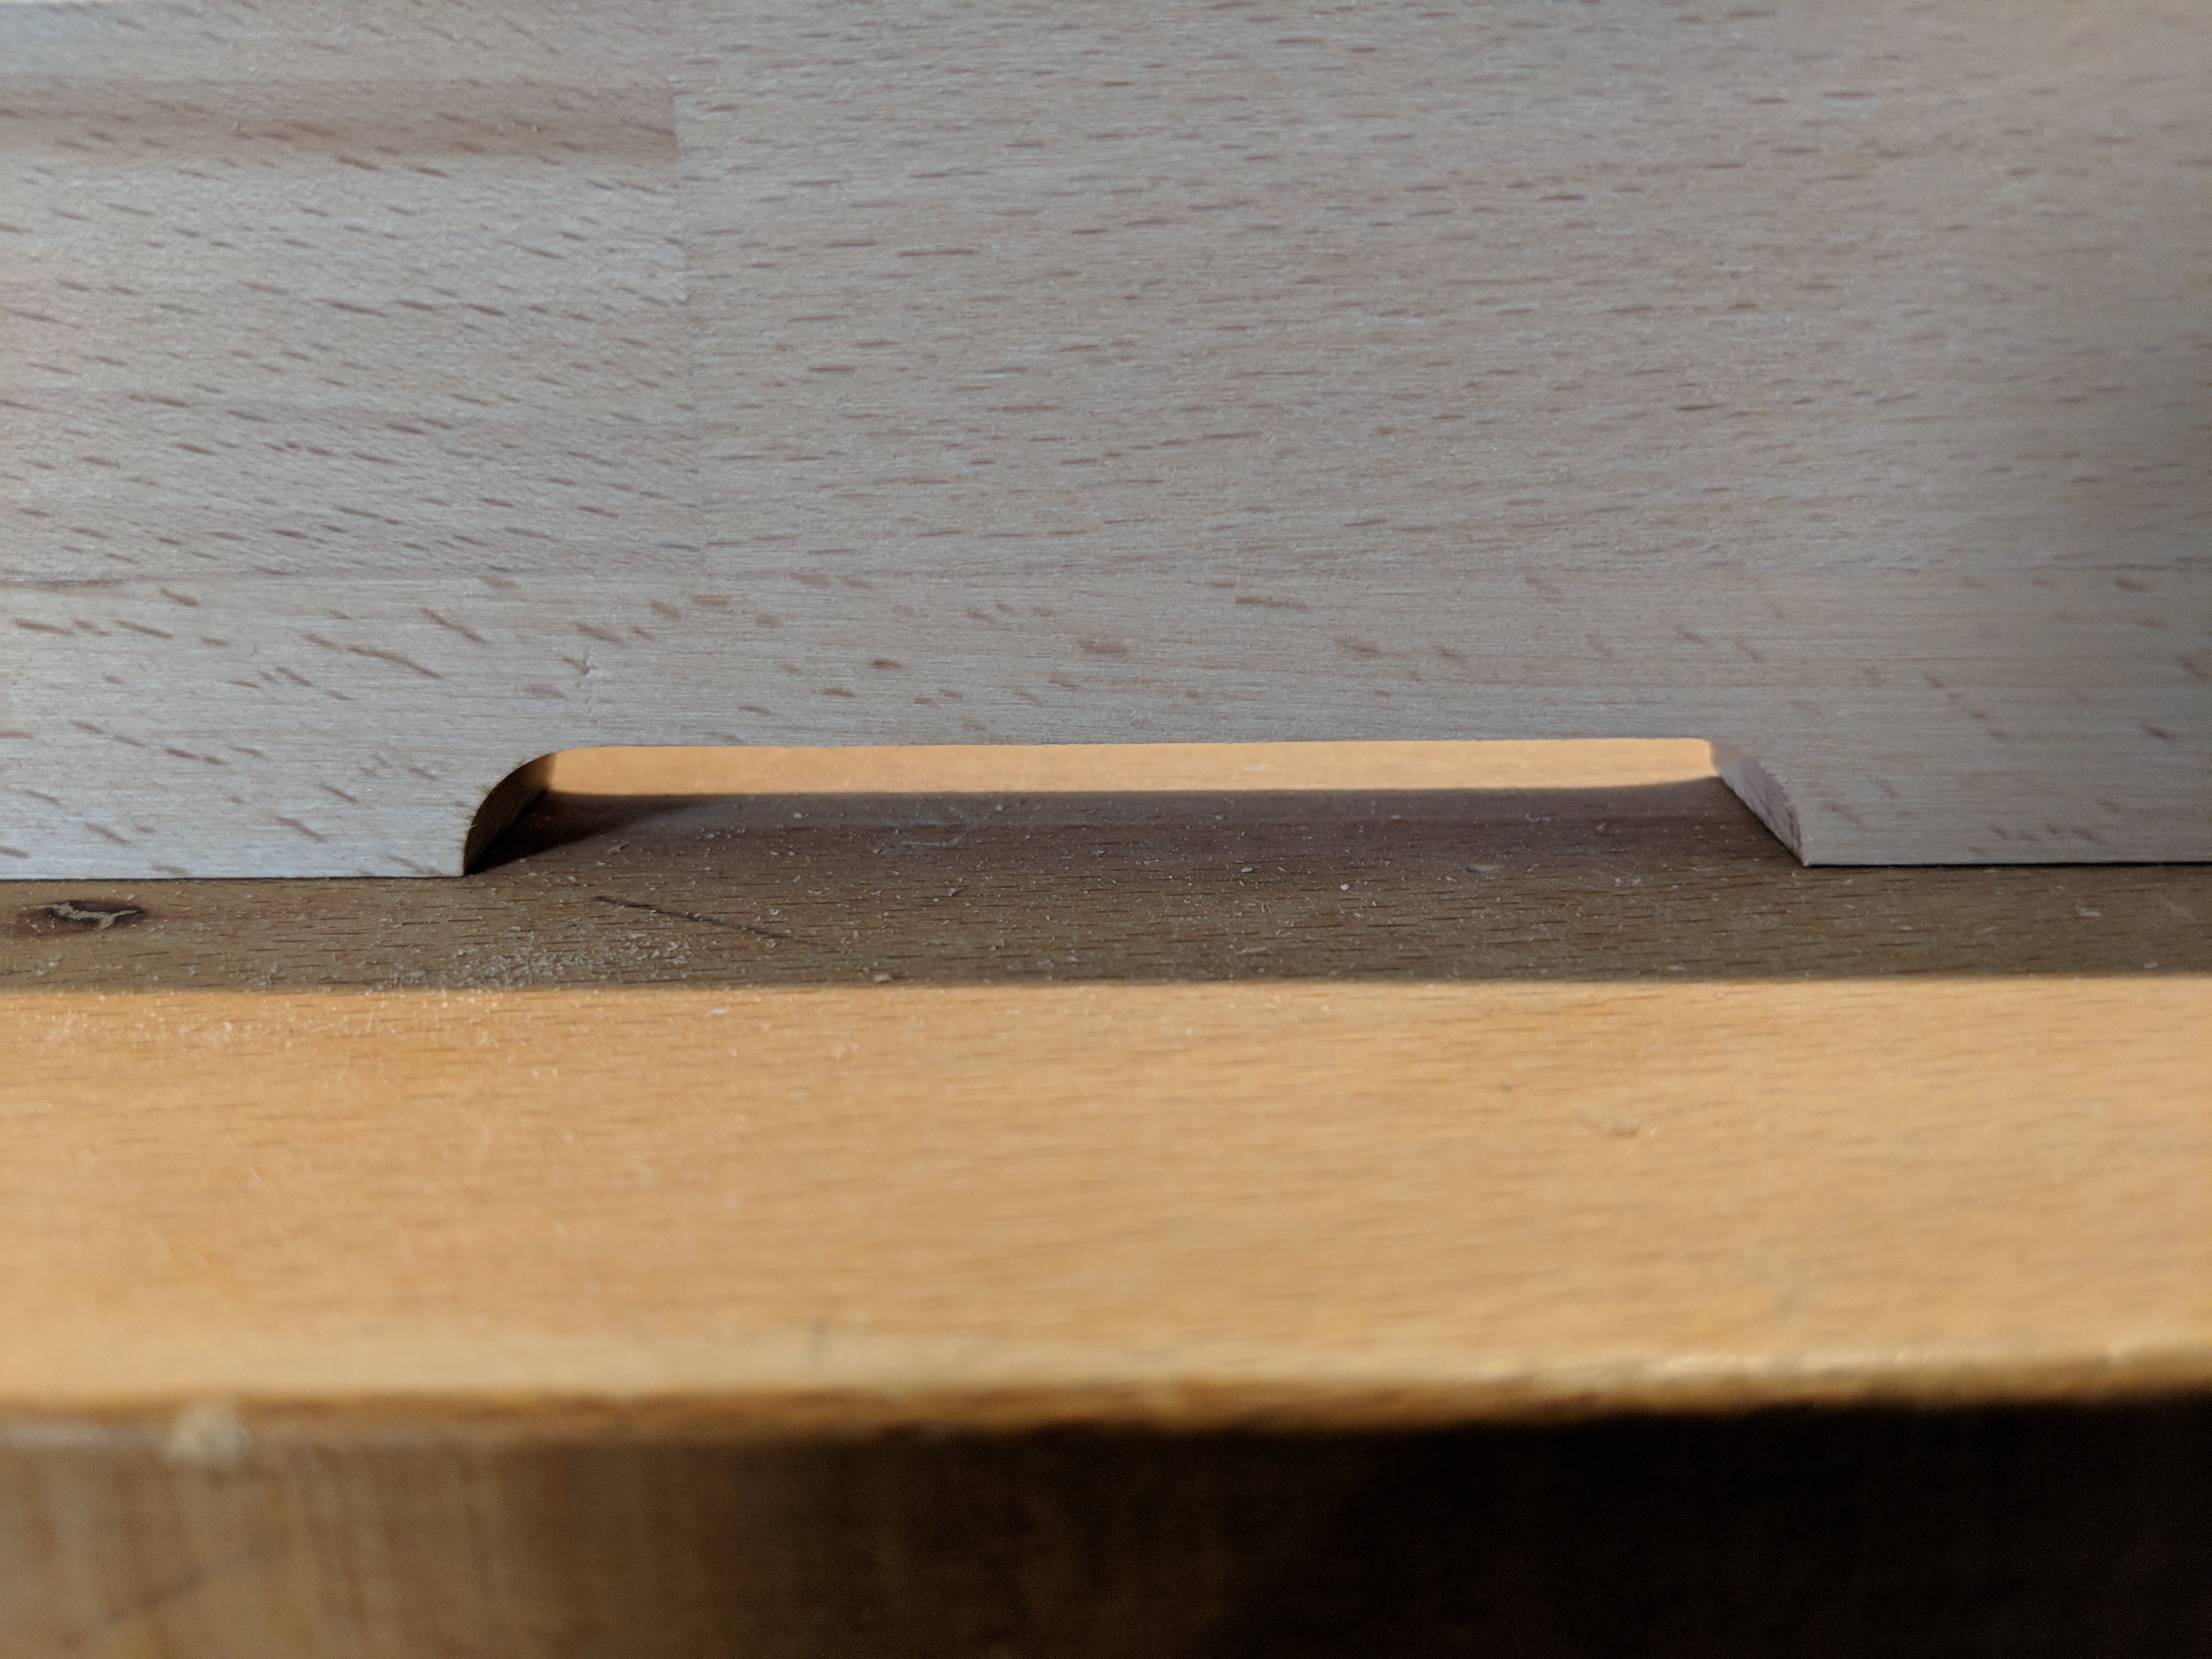
Fräsung für Silikonfuge/Milling groove for silicone joint

Picture 4:

Picture 5:

Picture 6:

Picture 7: (wall mount)

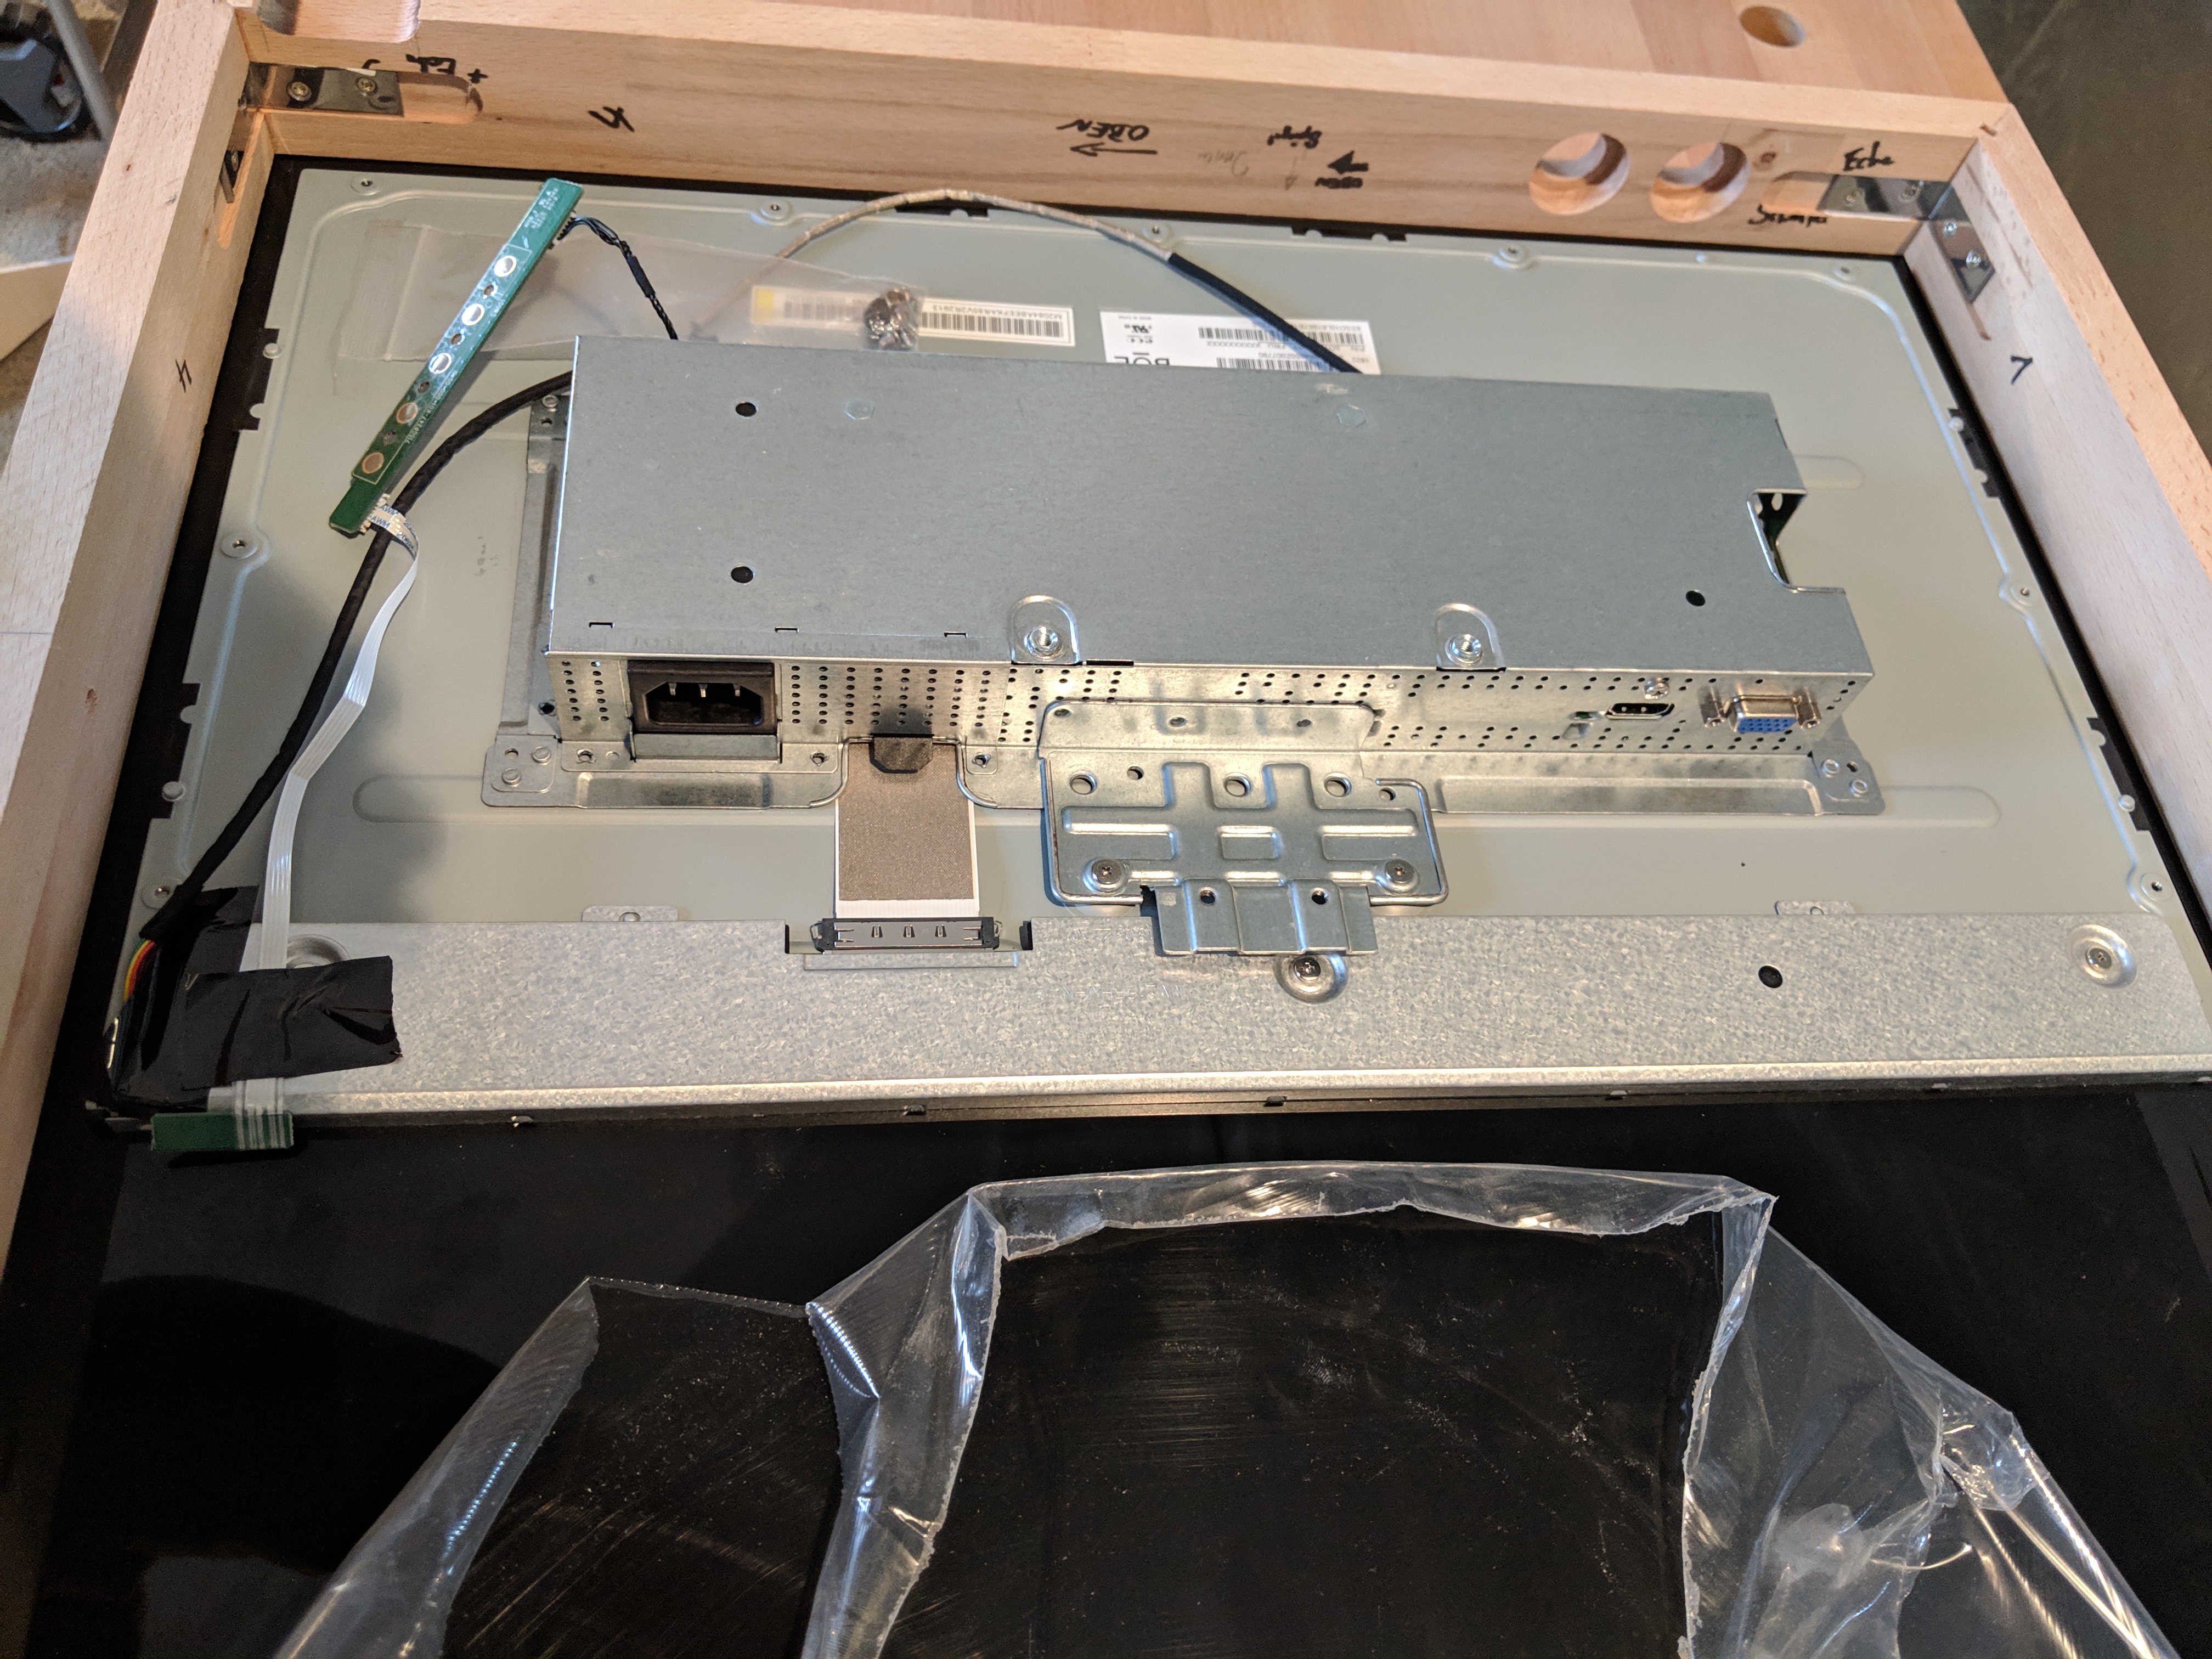
I used beechwood
Picture 8:

Picture 9:

Picture 10:
Picture 11:

Picture 12:

Photos of the assembly
Picture 13:

Picture 14:

Picture 15:
Picture 16:

Picture 17:

Picture 18:

Picture 19:

Picture 20:

Picture 21:

To connect the mirror to the power, I use a “cold device plug” (C13/C14 coupler). I split the former extension cable in the middle.
And that’s how the mirror looks finished
Picture 22:
Picture 23:

Picture 24:
The following websites helped me with the construction and the configuration
https://www.heise.de/ct/hotline/Ein-Ausschalter-fuer-Raspberry-Pi-und-Raspi-Zero-3892620.html?wt_mc=print.ct.2017.25.150
https://webnist.de/python-script-auf-dem-raspberry-pi-automatisch-starten/
https://pi-buch.info/hdmi-ausgang-unkompliziert-ein-und-ausschalten/
https://www.nils-snake.de/archives/magic-mirror-bewegungssensor-einbauen-teil-5
I have used:
- Raspberry pi 3
- Beech wood from the hardware store
- Aluminium composite panel (ACP) with cutout (https://www.plattenzuschnitt24.de/ - german: Alu Dibond Platte)
- Spy mirror (https://www.glas-star.de/spionspiegelnachmass/chrome-spy-spiegel/)
- Silicone (PCI Silcofern S) Color: black (Important! Never use transparent silicone. Otherwise you will see it and regret it!)
- Screen (HP 22w (1CA83AA) 54.6 cm (21.5 inch) monitor (IPS, Full HD, HDMI) https://smile.amazon.de/gp/product/B0732RBR3J/ref=oh_aui_detailpage_o01_s01?ie=UTF8&psc = 1)
- Radar motion detector (Amazon Haljia 5 RCWL-0516)
To fix the frame to the wall I use fittings as they are also used in the assembly of kitchen wall cabinets (see also picture 7). These are height-adjustable and depth-adjustable. The frame is fastened there over a vertical screw from above by the frame at the substructure. (see picture 24). I used these parts:
rail: https://www.amazon.de/gp/product/B01MPZM5ER/ref=oh_aui_detailpage_o03_s00?ie=UTF8&psc=1
fitting left: https://www.amazon.de/gp/product/B01BDR8JV0/ref=oh_aui_detailpage_o03_s00?ie=UTF8&psc=1
fittign right: https://www.amazon.de/gp/product/B01BDR8K32/ref=oh_aui_detailpage_o03_s00?ie=UTF8&psc=1
Addendum to the motion detector - radar detector:
In addition to the cutout for the monitor, I would now have an additional small cutout for the radar board (20 x 40 mm) made. The radar detector works perfectly, but unfortunately not through the Dibond plate. I had to fix it at the bottom of the frame. That’s OK, but it would have been perfect behind the mirror glass.