Navigation

    MagicMirror Forum

    • Register
    • Login
    • Search
    • Recent
    • Tags
    • Unsolved
    • Solved
    • MagicMirror² Repository
    • Documentation
    • Donate
    • Discord
    1. Home
    2. qu1que
    • Profile
    • Following
    • Followers
    • Topics
    • Posts
    • Best
    • Groups

    qu1que

    @qu1que

    Project Sponsor

    26
    Reputation
    115
    Posts
    1961
    Profile views
    2
    Followers
    0
    Following
    Joined Last Online

    qu1que Follow
    Project Sponsor

    Best posts made by qu1que

    • My bathroom smart mirror.

      Hi!

      First of all I would like to thanks to @goldjunge_chriz for the opportunity to acquire a 2-way mirror. It is impressive, much better than the acrylic sheet. And, I’d like to thanks to @MichMich too for the Magic Mirror software.

      Here I leave some pictures of the montage that I was doing this last summer, at leisure. I have been quite happy with the result. I hope you like it!

      I am going to try not to extend myself too much with the explanations, if someone has any doubts, I will kindly answer him.


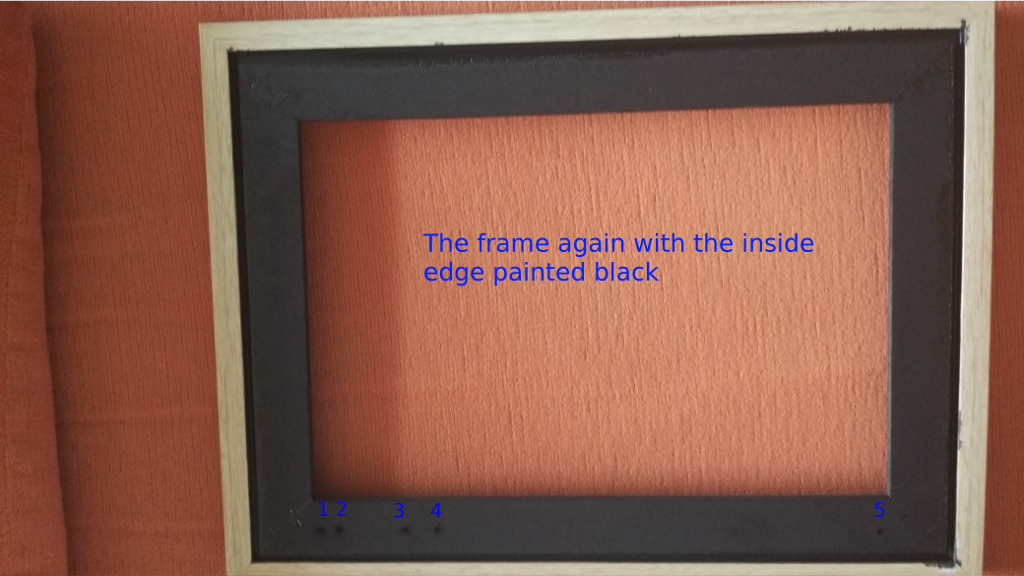
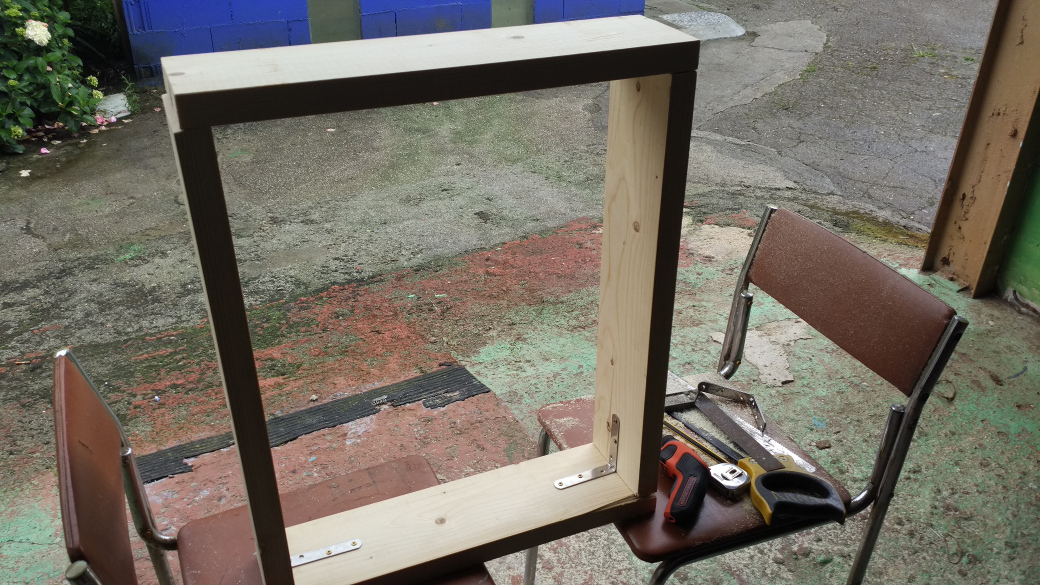
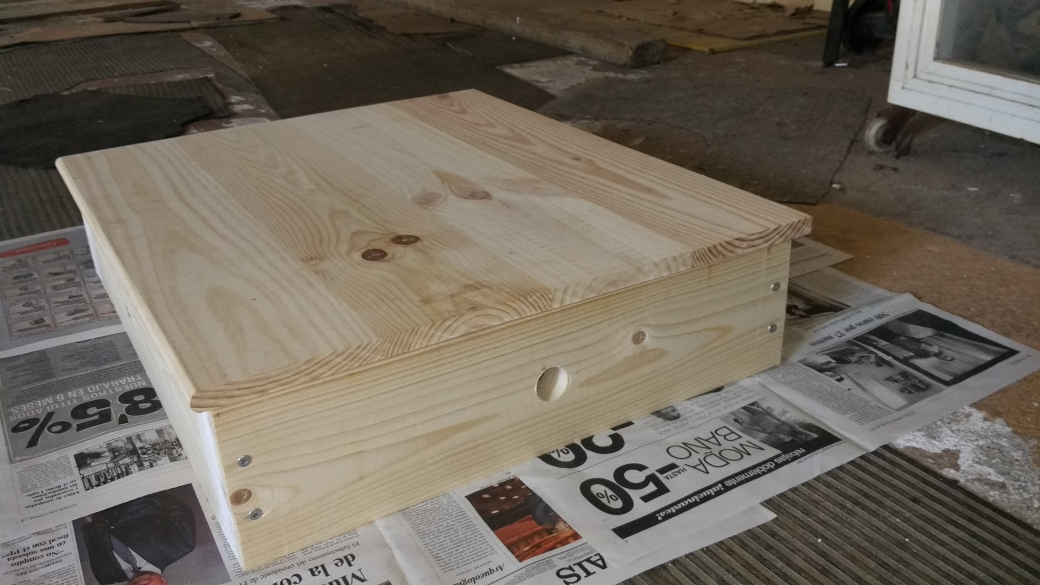
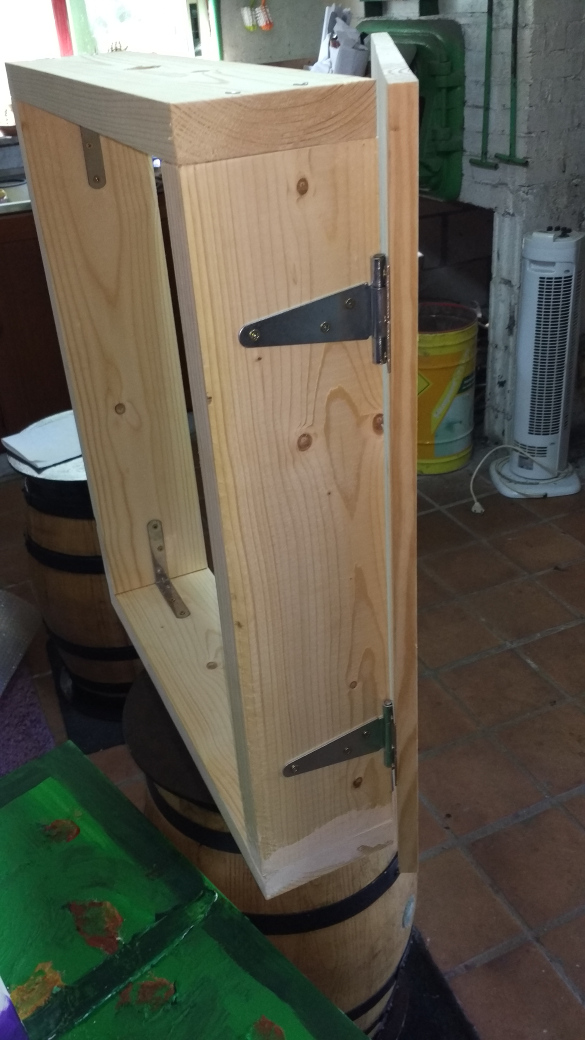
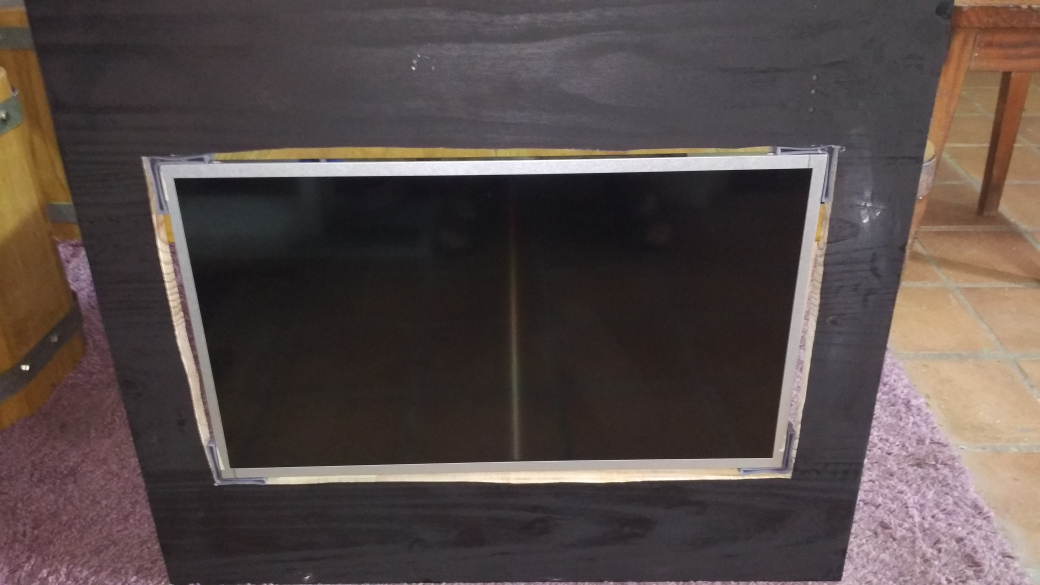
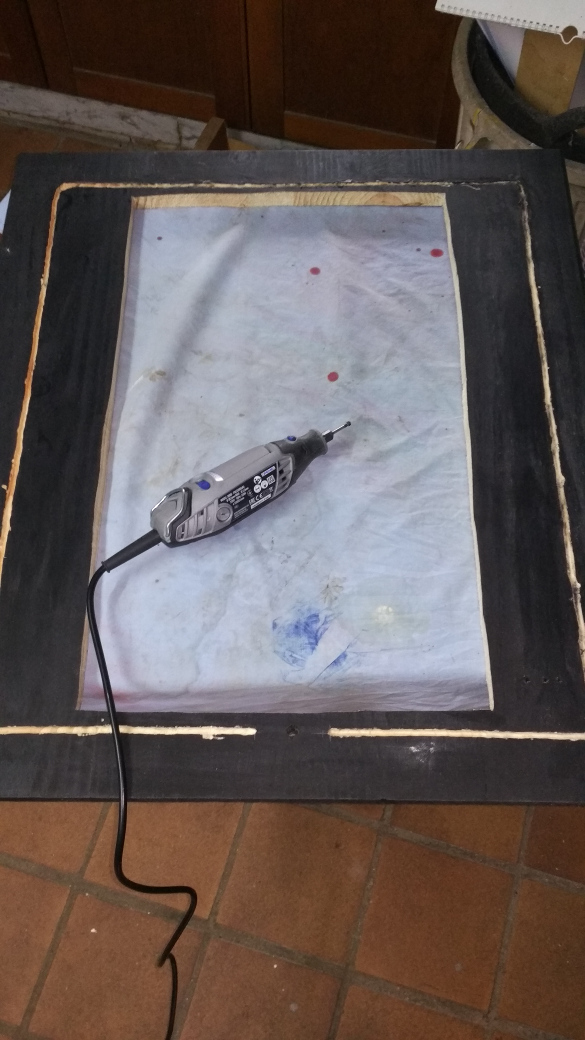
      The bathroom cabinet consists of 2 pieces: a frame and a door:
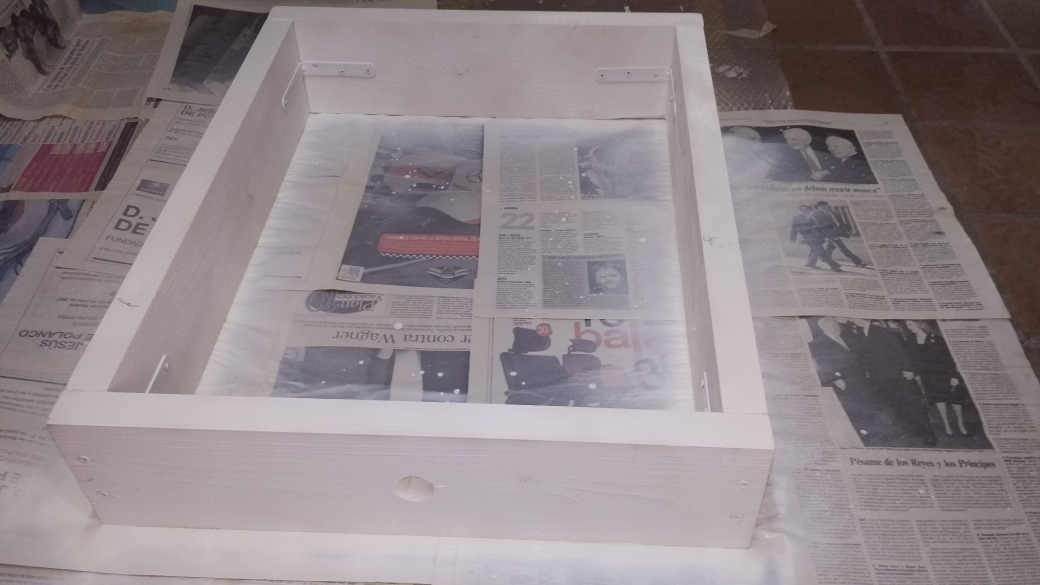
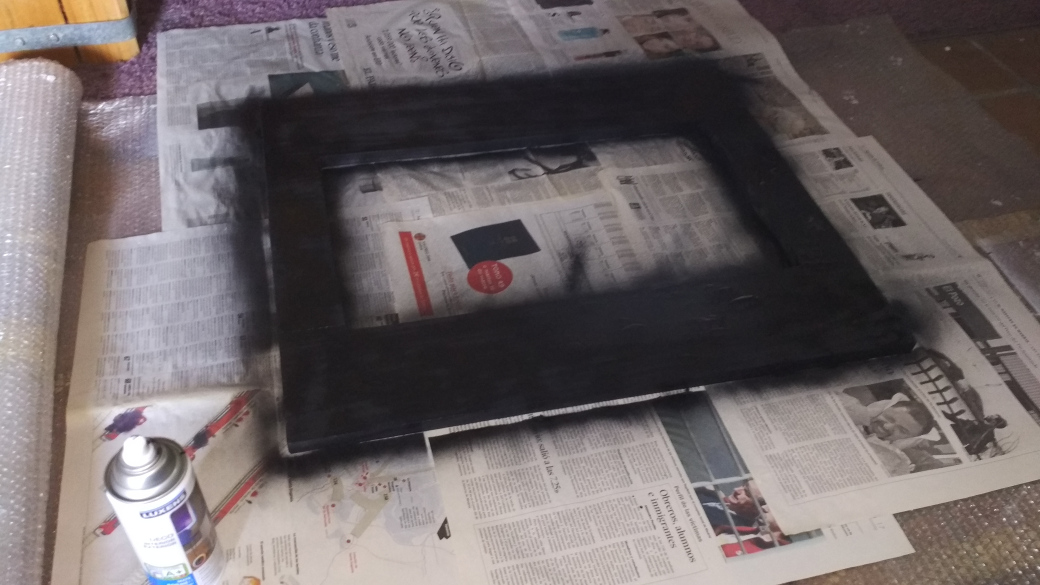
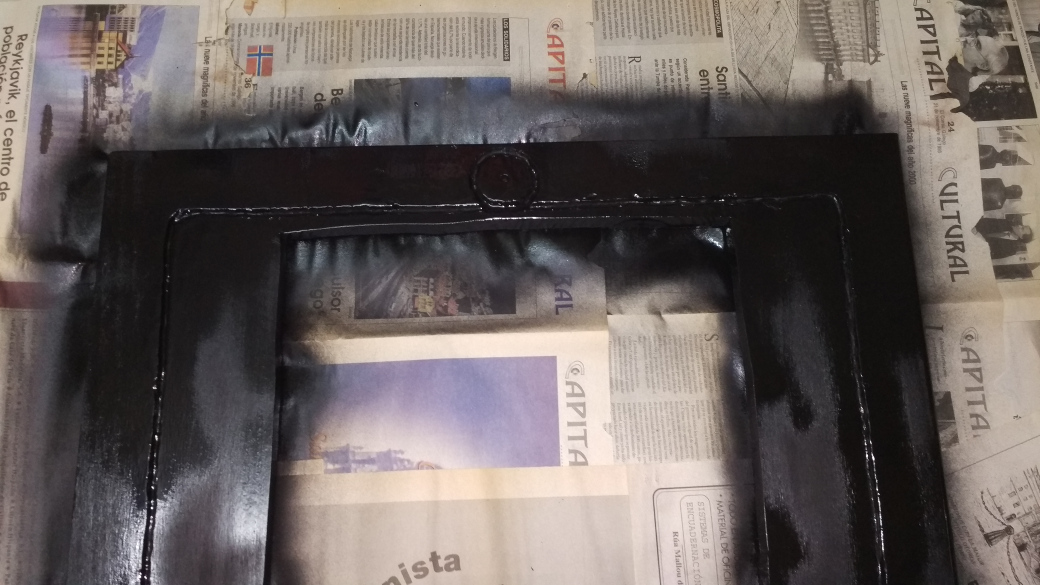
      0_1537986196178_0607_173319.jpg

      0_1537986208894_0614_164110.jpg

      0_1537986224219_0616_113111.jpg


      A coat of paint…

      0_1537986286535_0616_115341.jpg

      0_1537986328433_0725_130451.jpg


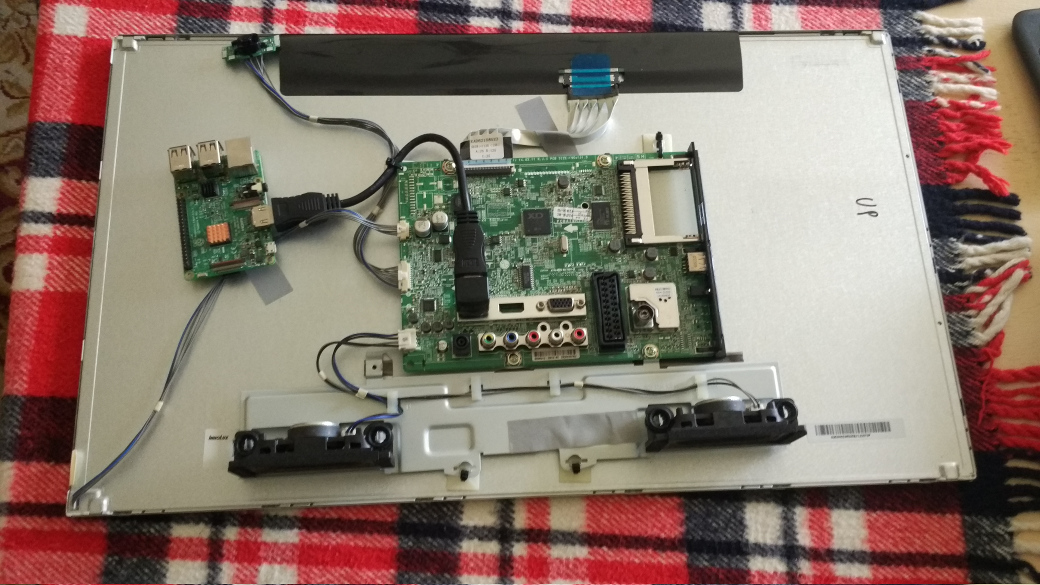
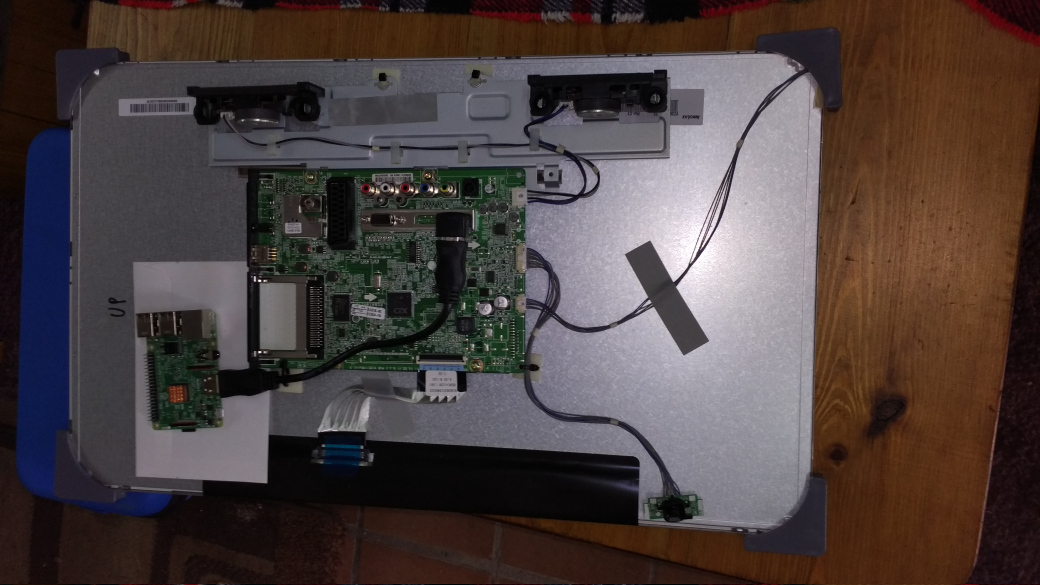
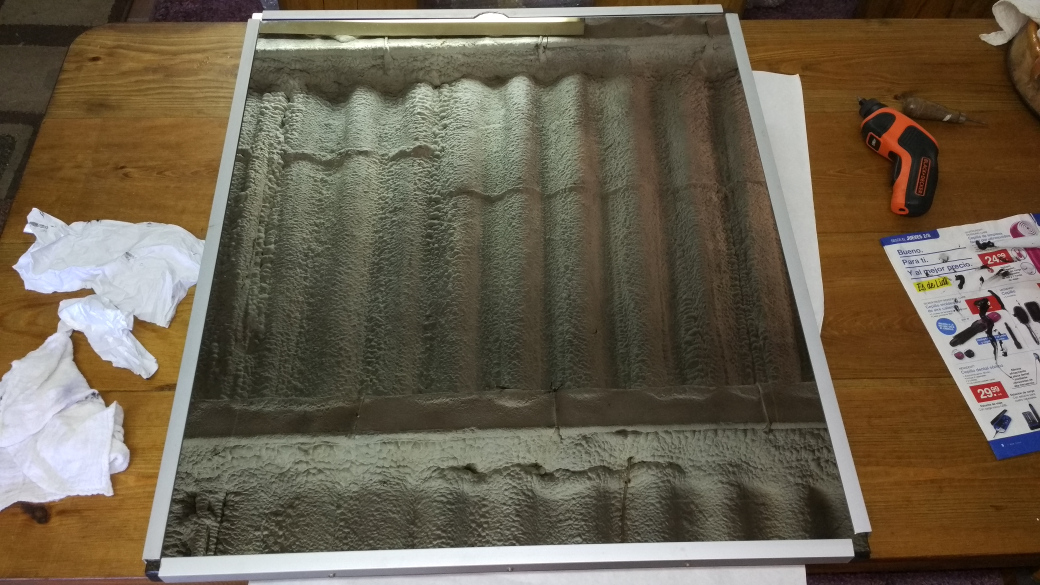
      The screen of a second-hand 24-inch LCD TV

      0_1537986410698_0725_125051.jpg

      0_1537986418743_0725_124752.jpg

      0_1537986432842_0725_124820.jpg

      0_1537986637705_0727_185026.jpg

      0_1537986651261_0727_202409.jpg


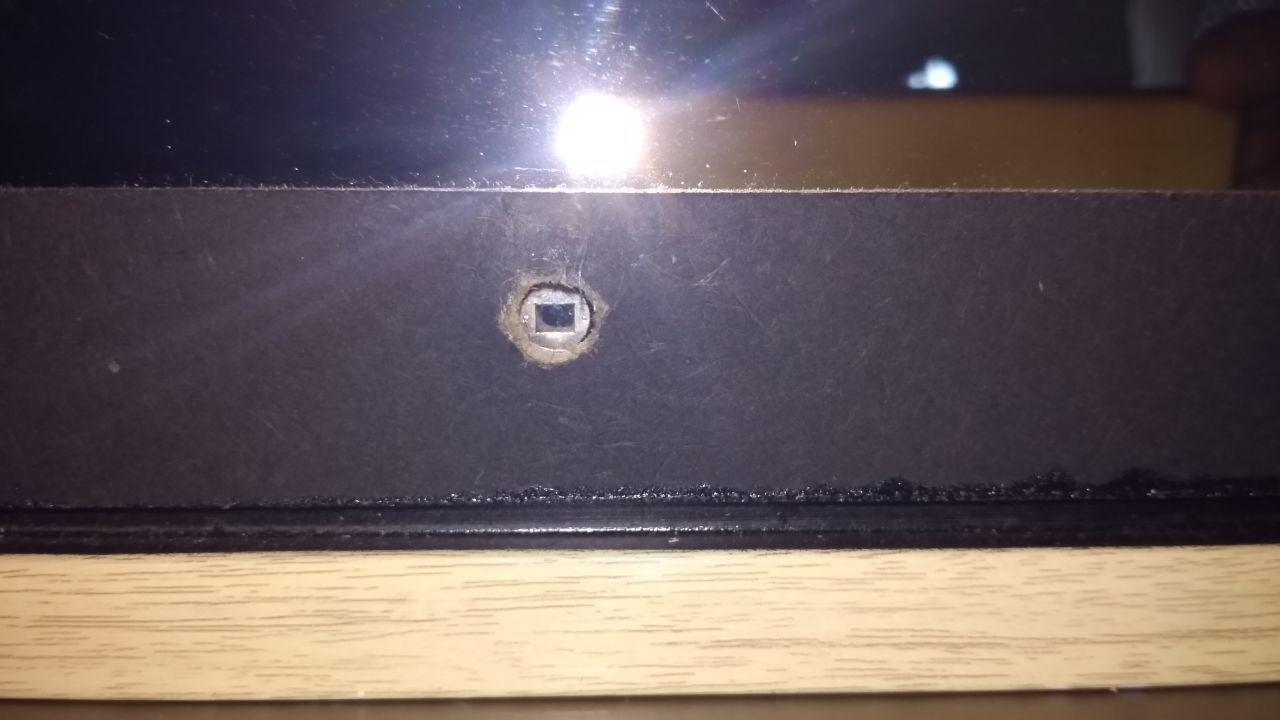
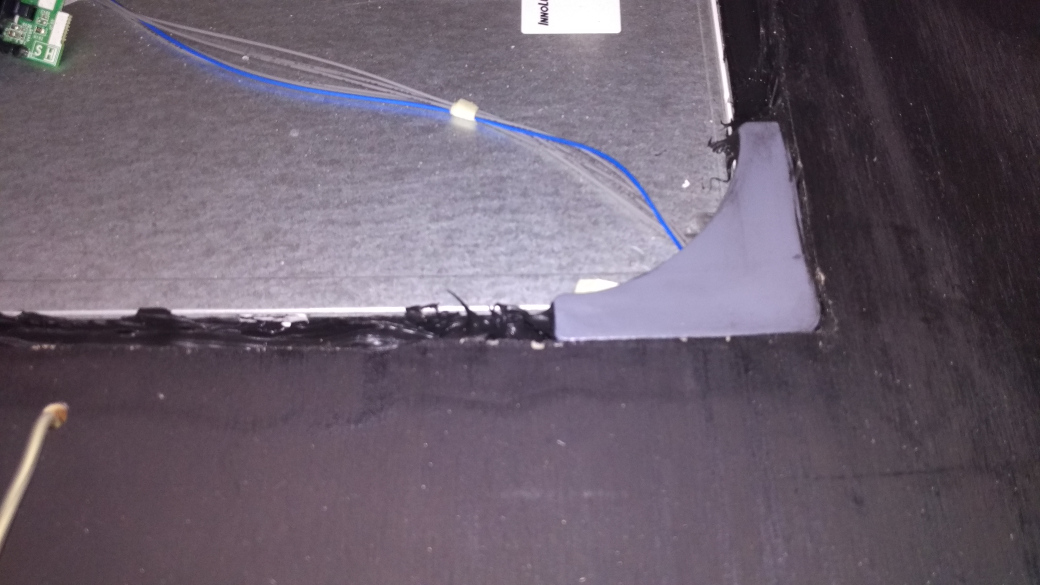
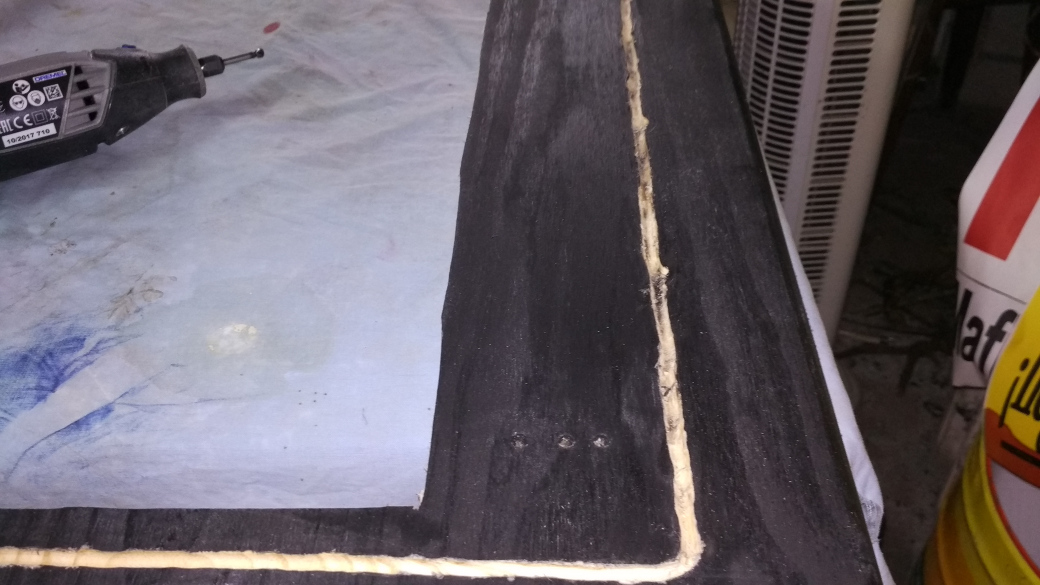
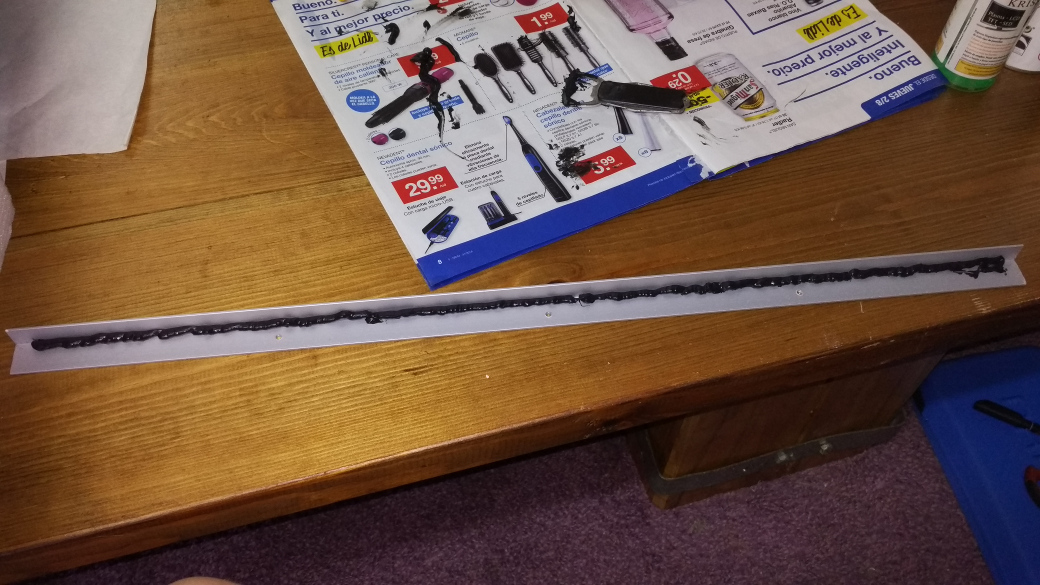
      To correct these errors in the cut with the electric saw, I have put some plastic corners and black silicone. This is the result:

      0_1537986808768_0728_170120.jpg

      0_1537986820628_0728_170147.jpg


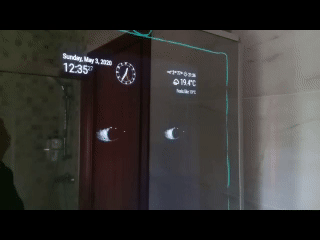
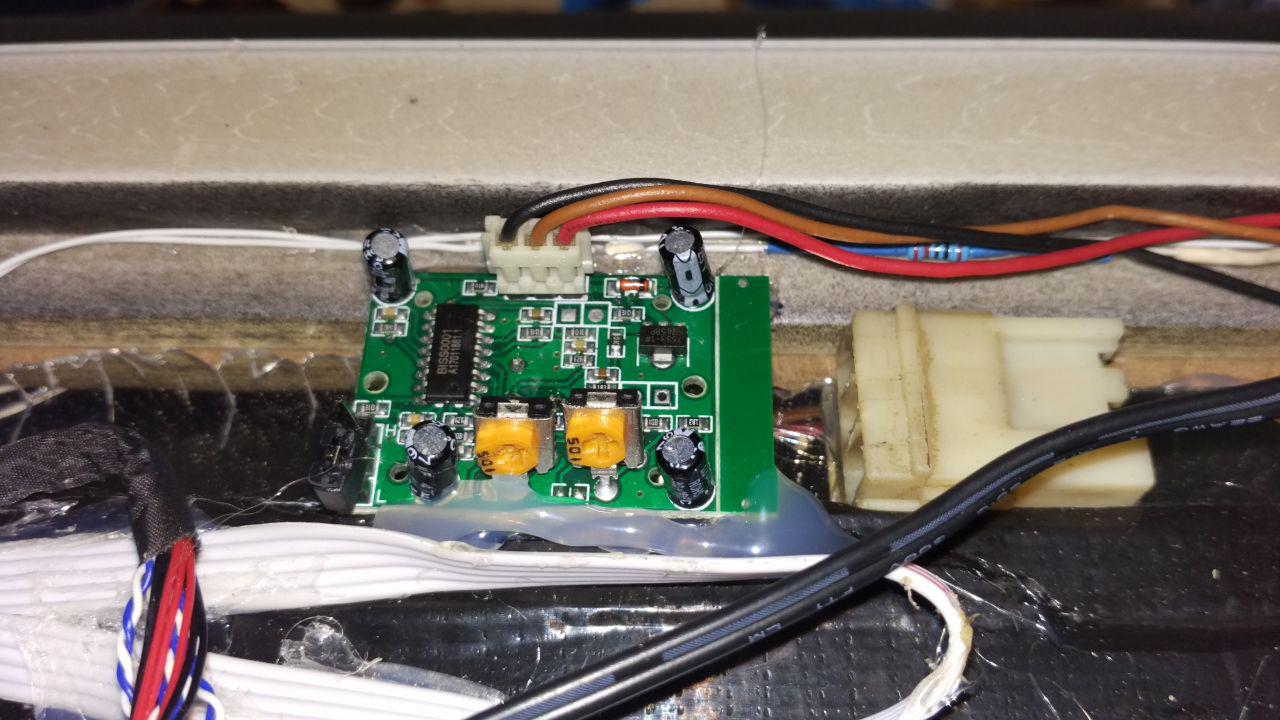
      E.L. wire installation:

      0_1537986939909_0728_133140.jpg

      0_1537986957196_0728_133150.jpg

      0_1537986967216_0728_133156.jpg

      0_1537987056166_0728_140218.jpg

      0_1537987141279_0728_163211.jpg

      0_1537987187134_0728_170120.jpg

      0_1537987445903_0729_113651.jpg

      0_1537987490033_0729_113659.jpg


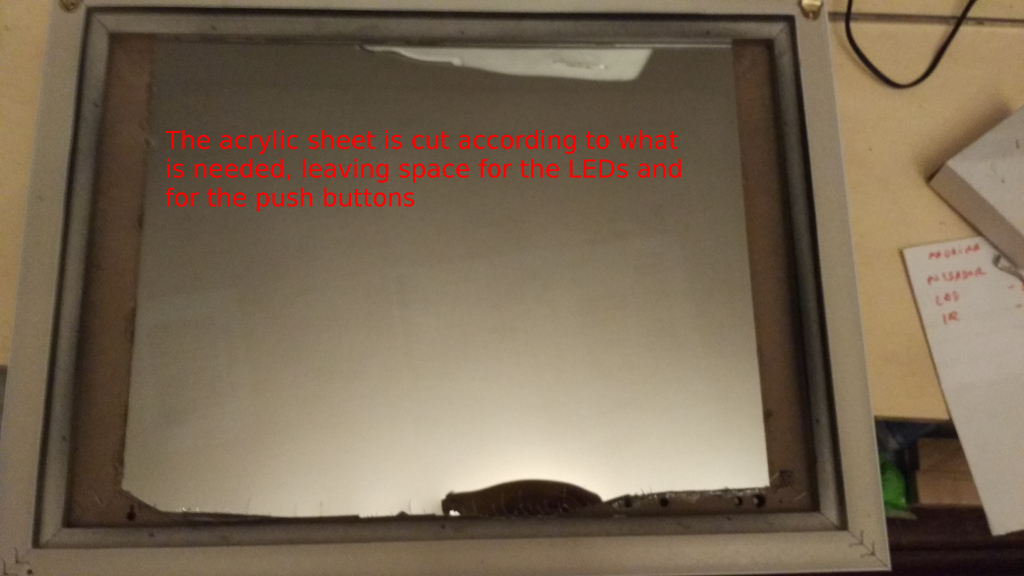
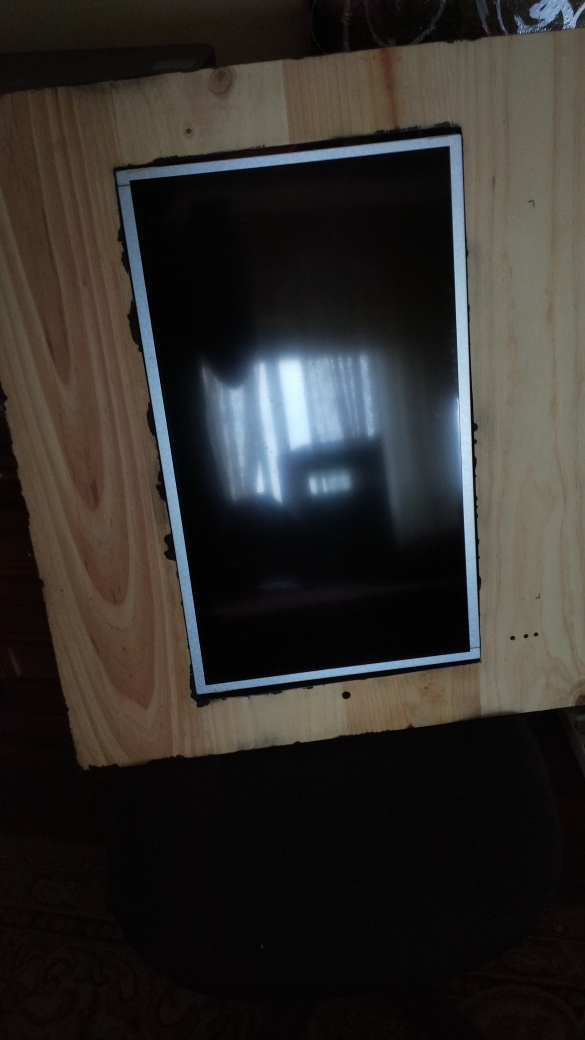
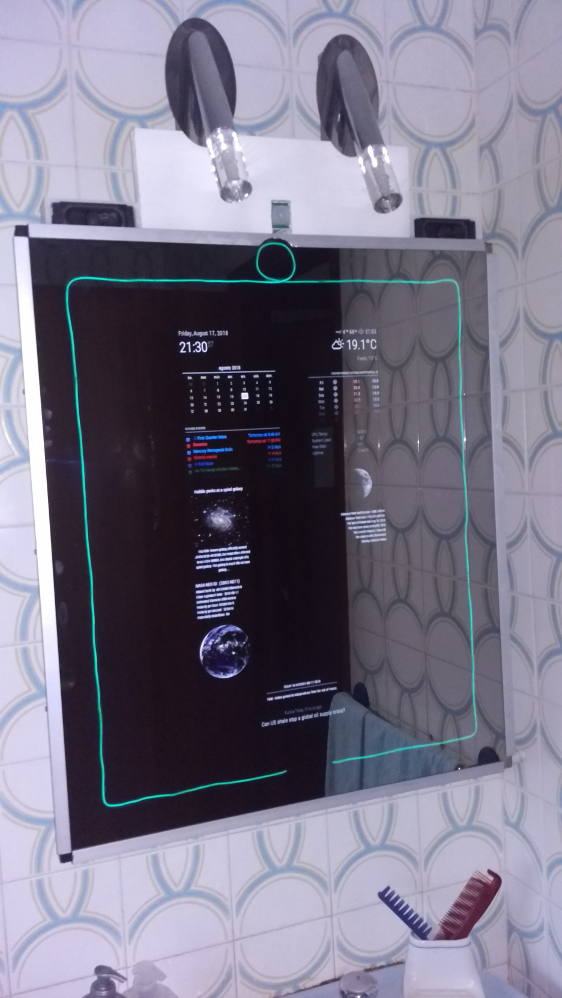
      Mirror installation:

      0_1537987257410_0802_211332.jpg

      0_1537987268275_0811_142230.jpg
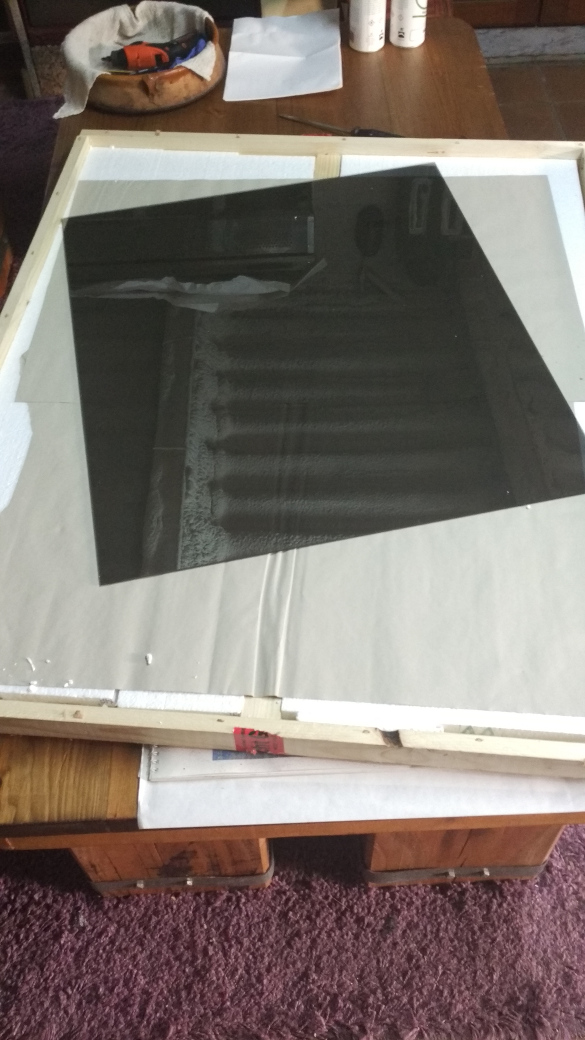
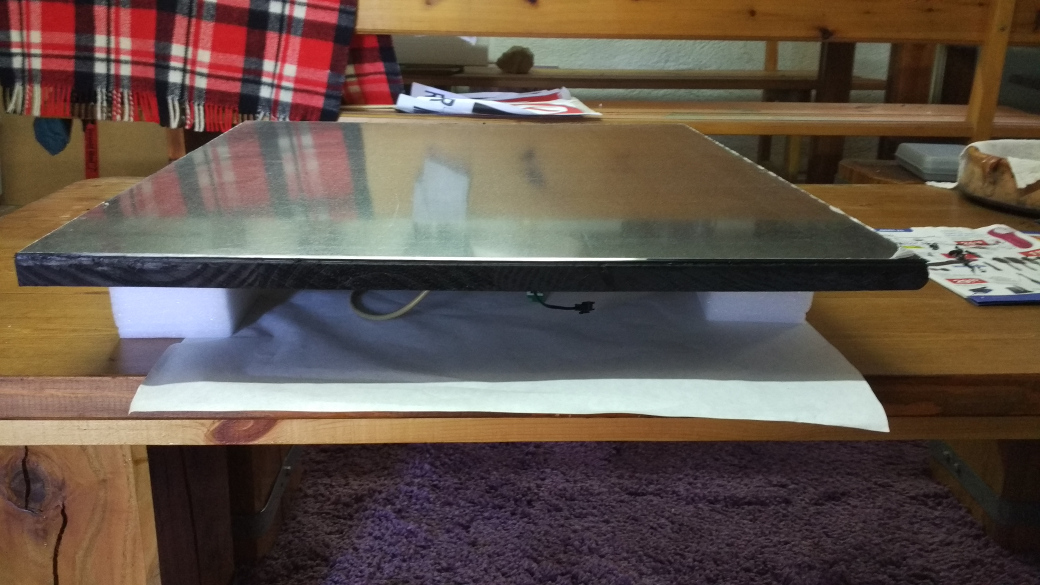
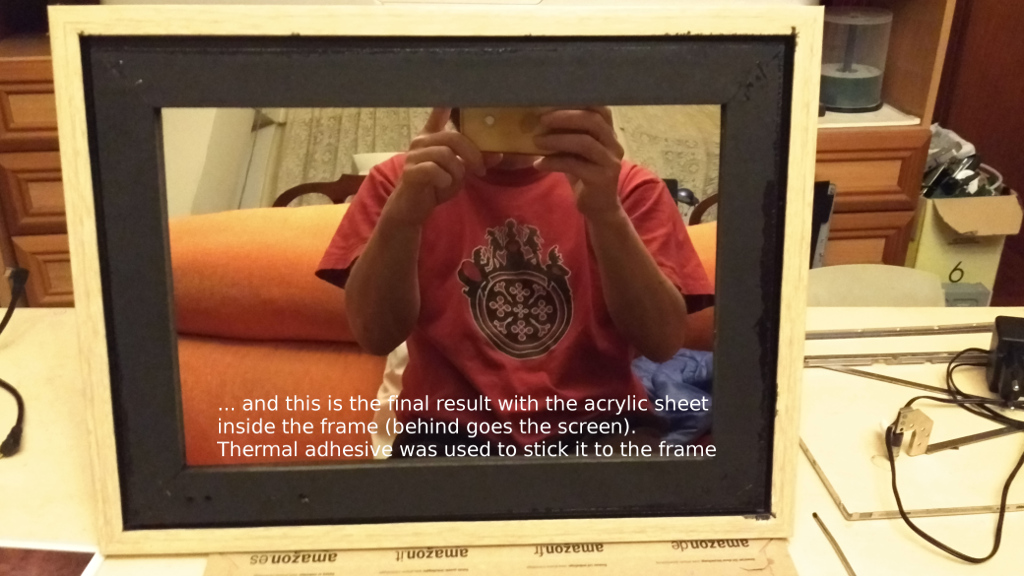
      The mirror was glued with black silicone too

      0_1537987324216_0811_143332.jpg

      0_1537987333126_0811_144935.jpg


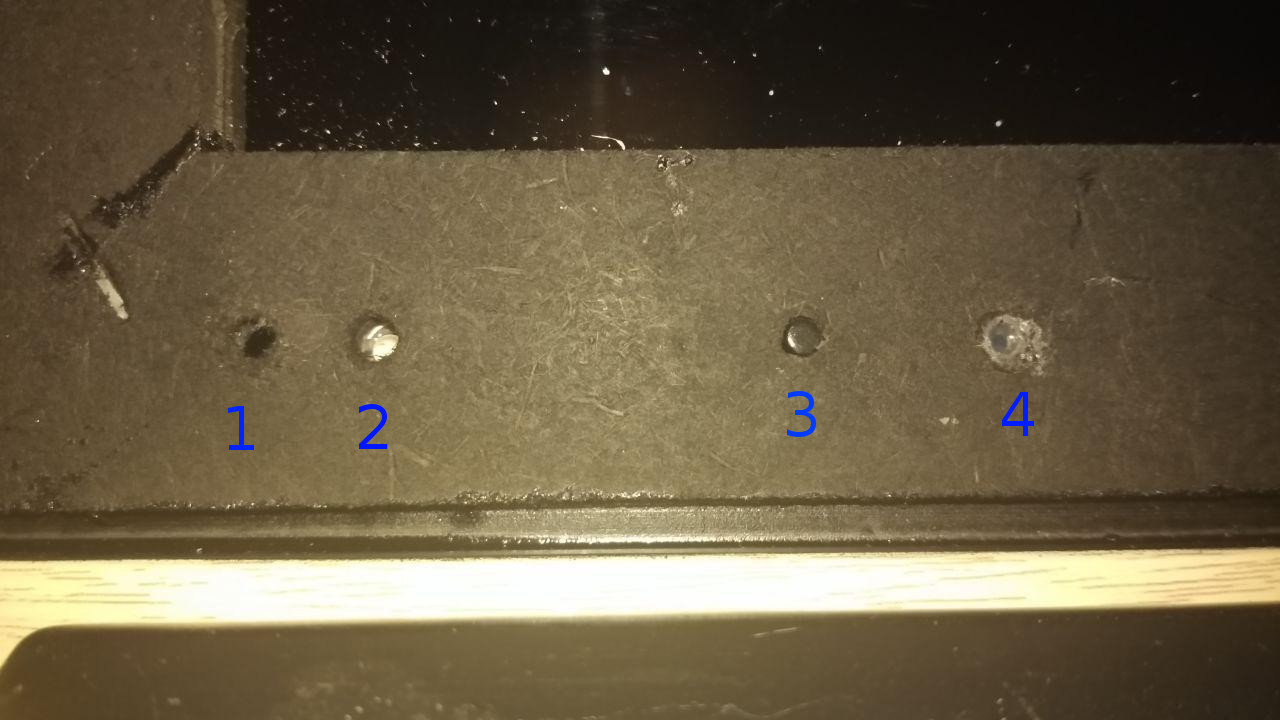
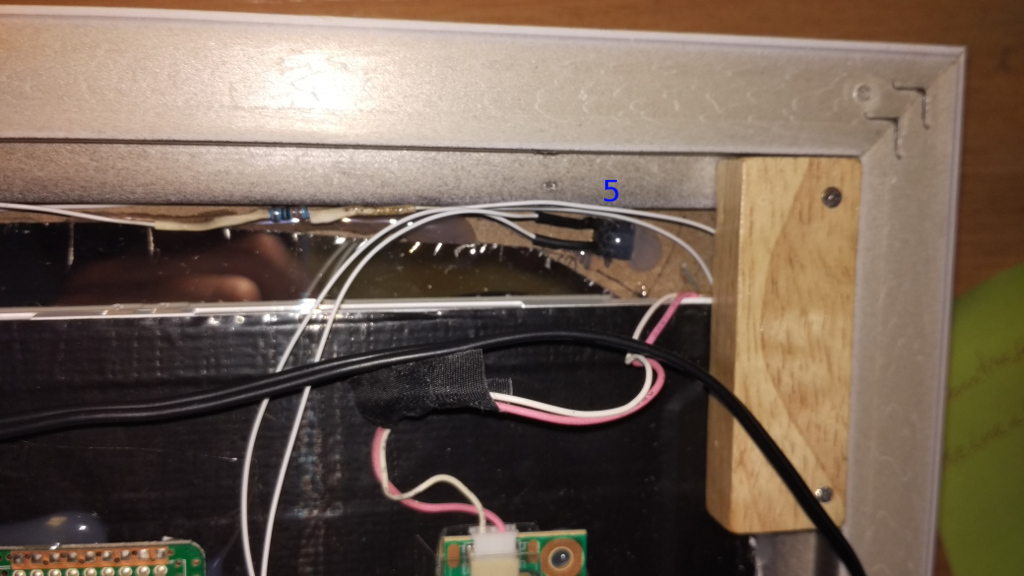
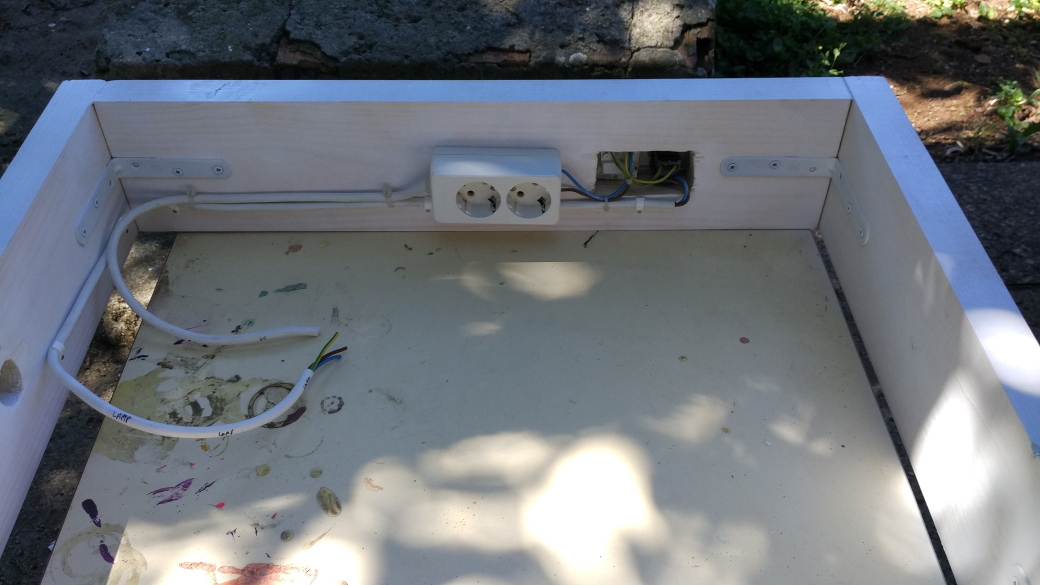
      Preparation of the electrical wiring in the frame…

      0_1537987416196_0811_141000.jpg

      0_1537987742317_0811_150336.jpg

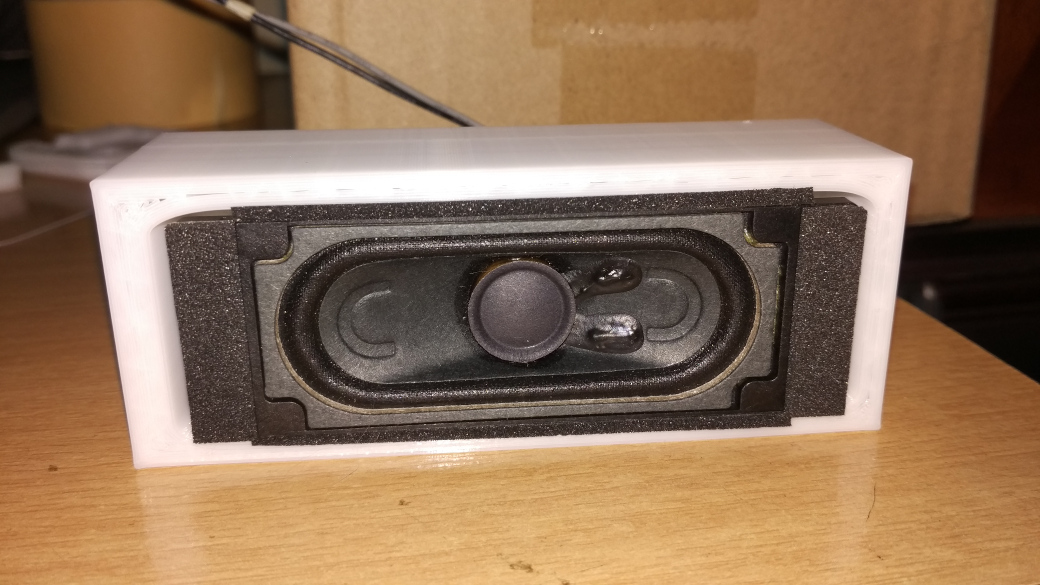
      … and the TV speakers. I designed a simple piece in 3D to put them inside (they are available in thingiverse in case someone is interested).
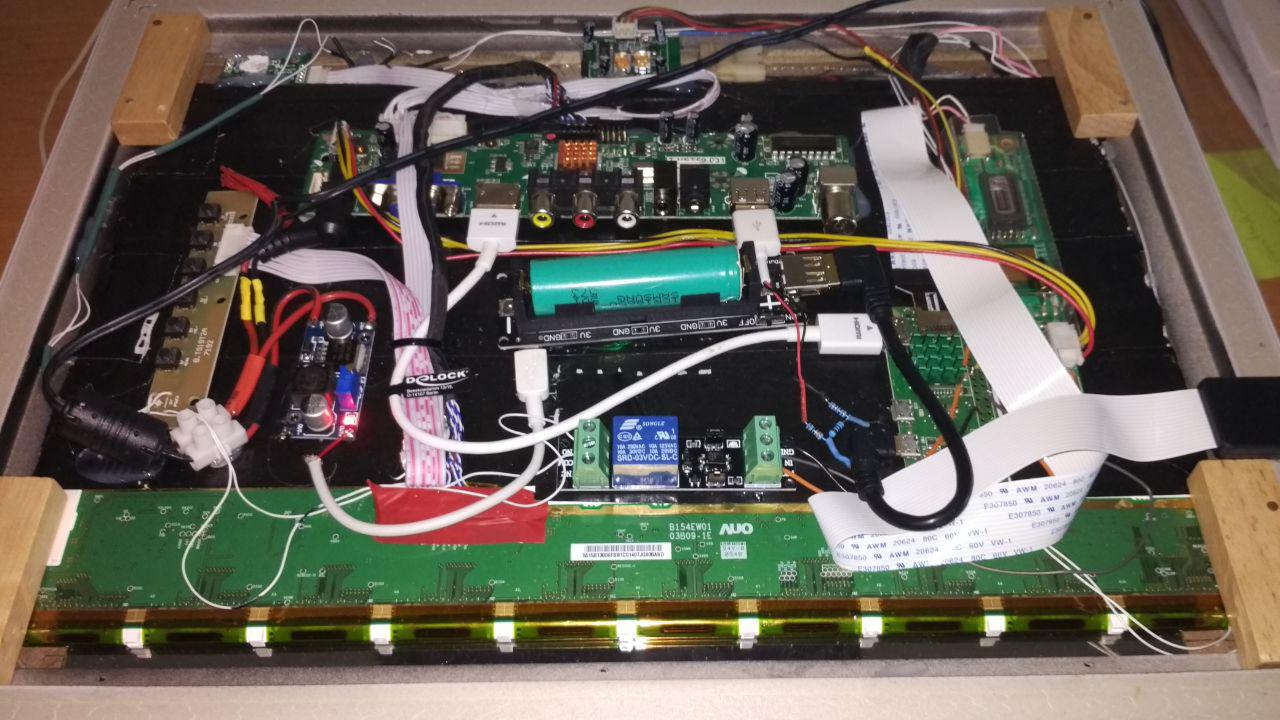
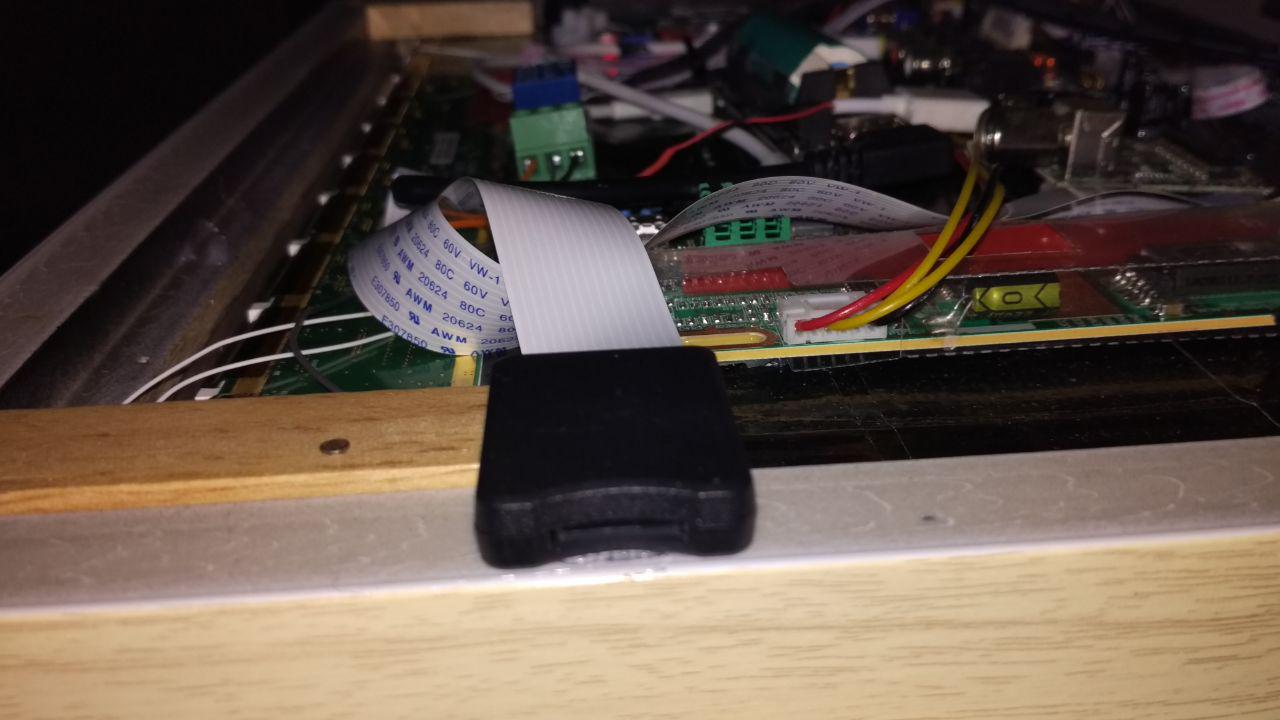
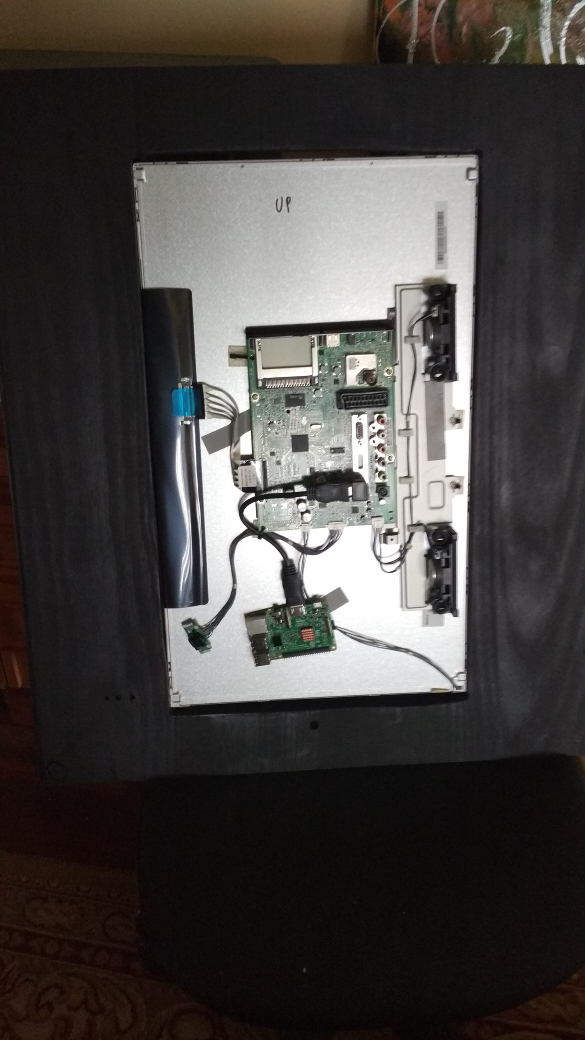
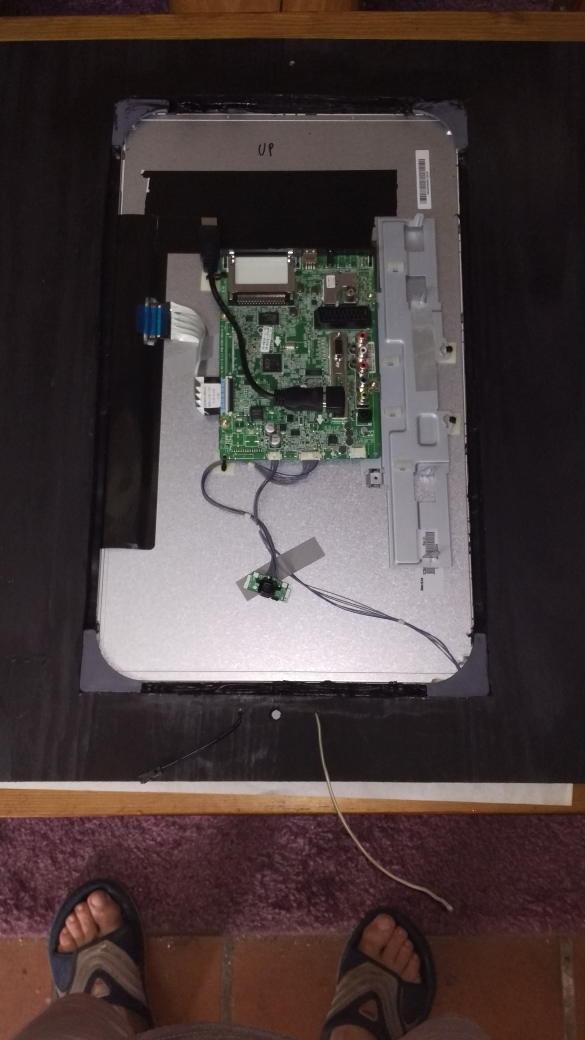
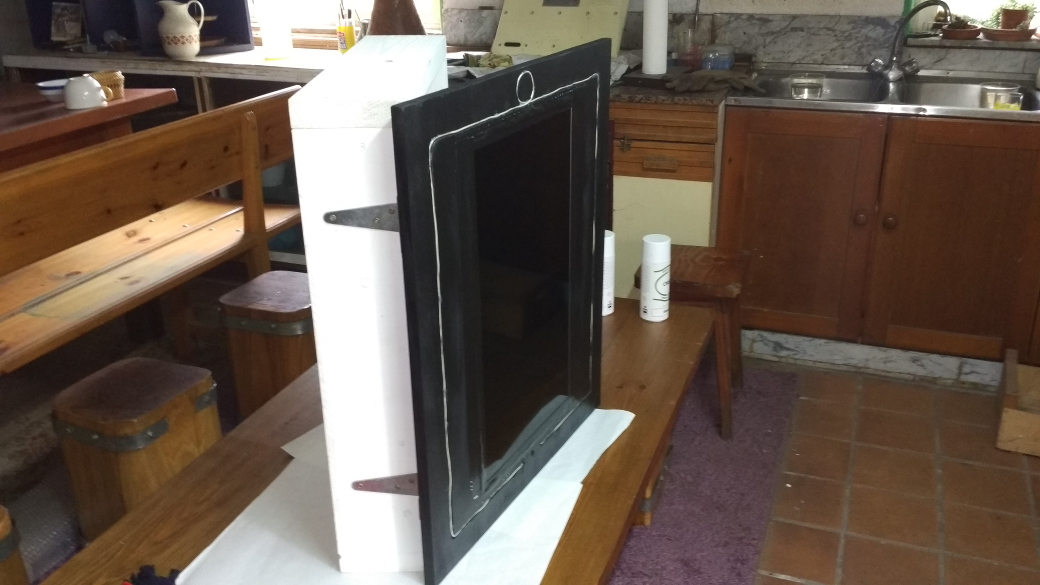
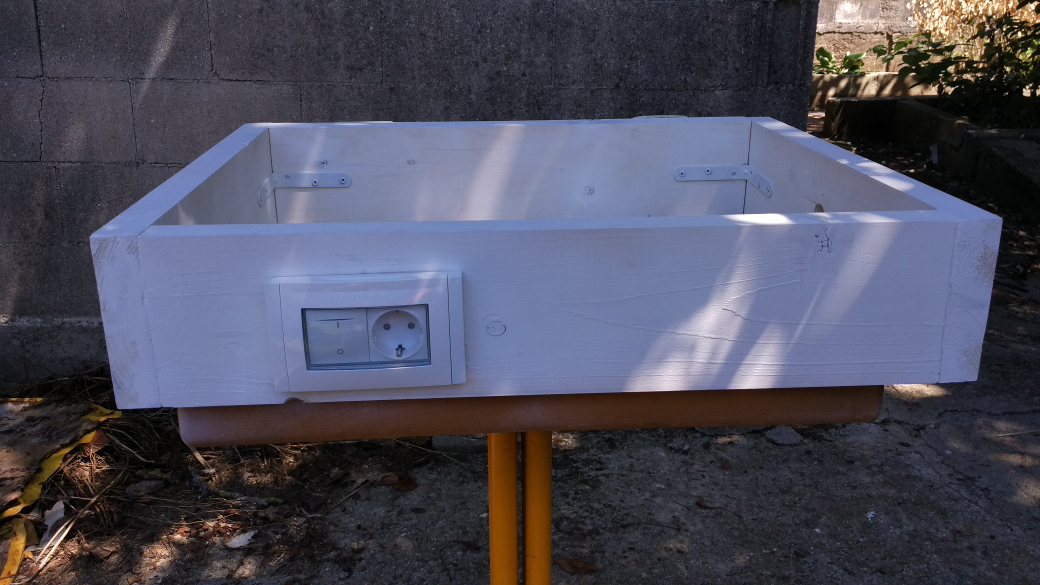
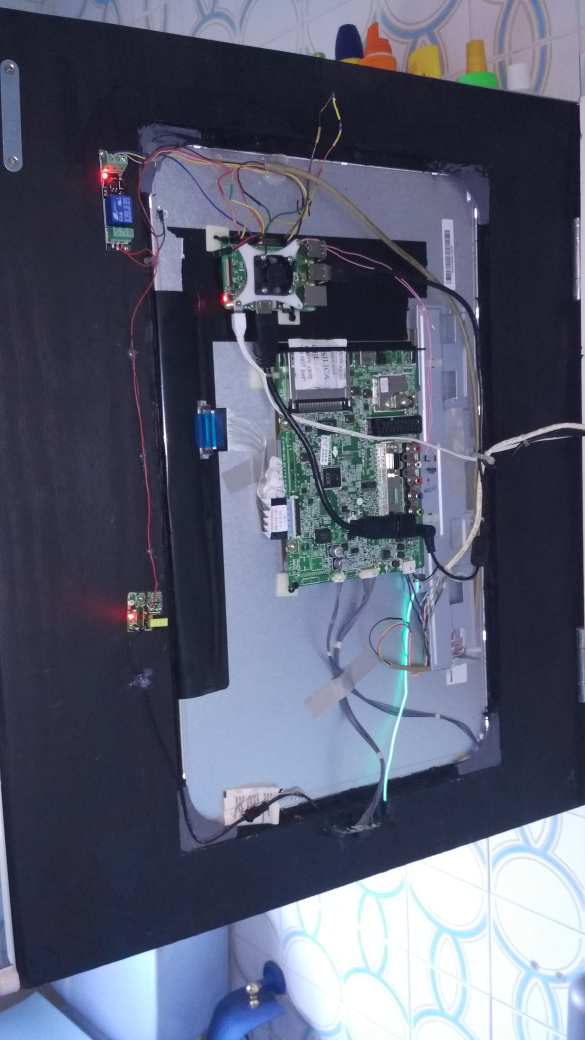
      0_1537987619280_0805_133050.jpg


      Final assembly:

      0_1537987691163_0815_185507.jpg

      0_1537987705865_0816_195158.jpg

      0_1537987788665_0816_194842.jpg

      0_1537987849650_0816_205618.jpg
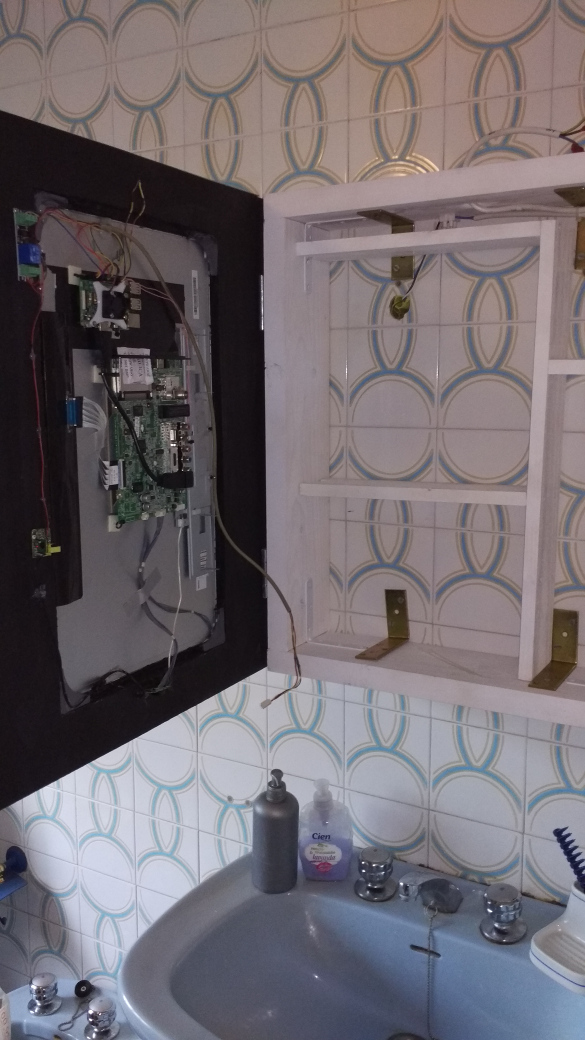
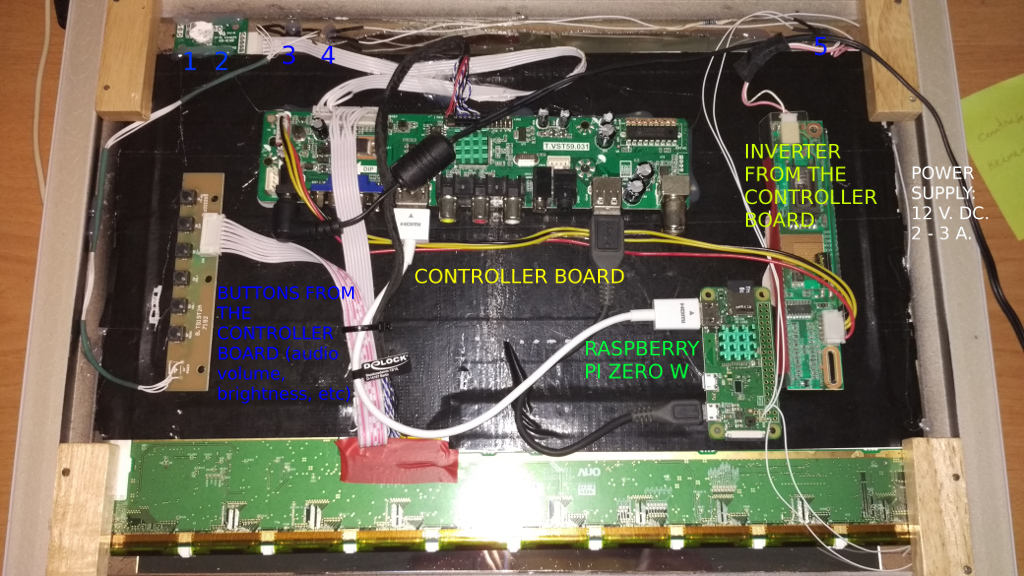
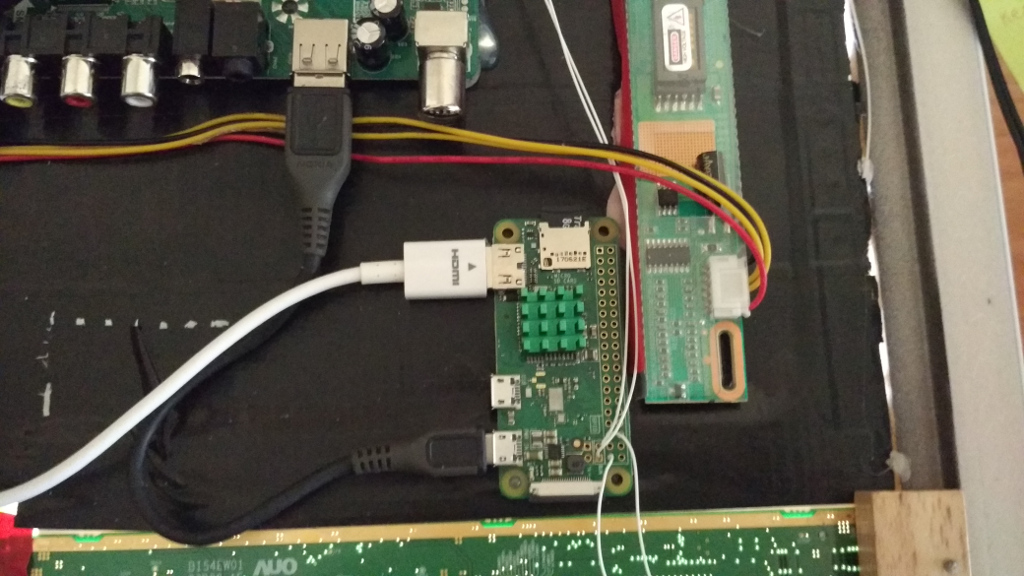
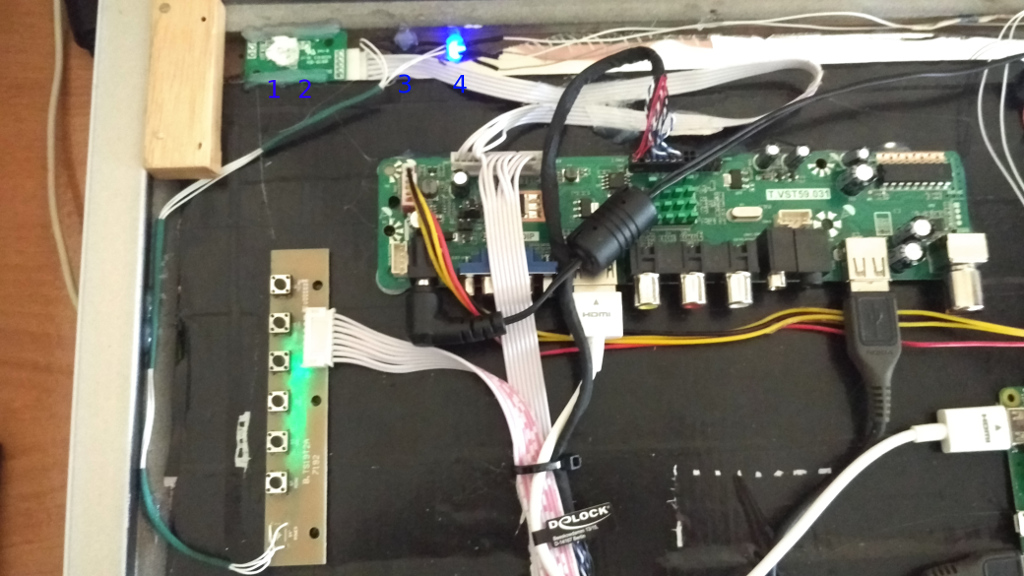
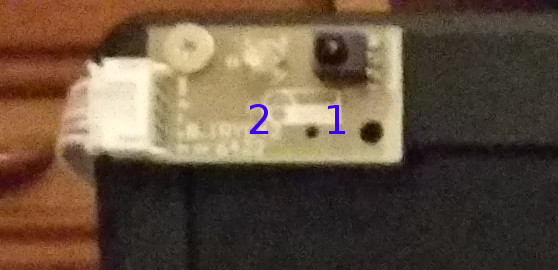
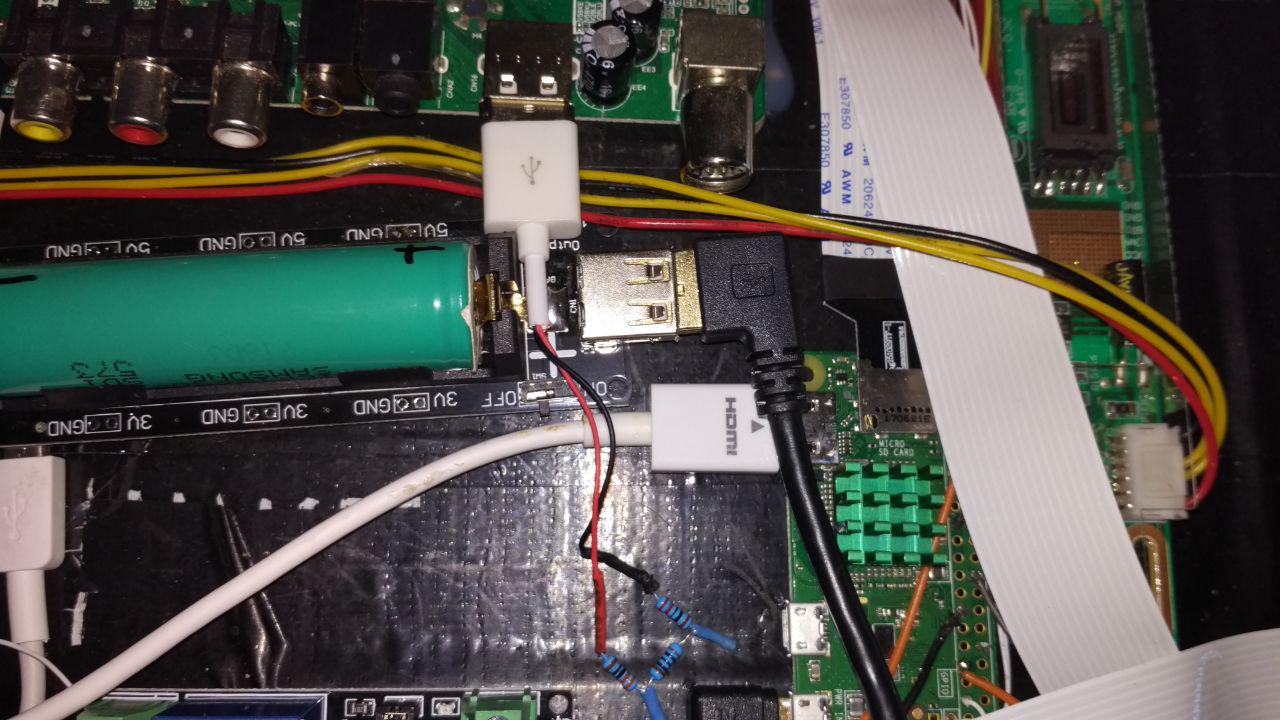
      Detail of Raspberry Pi 3B


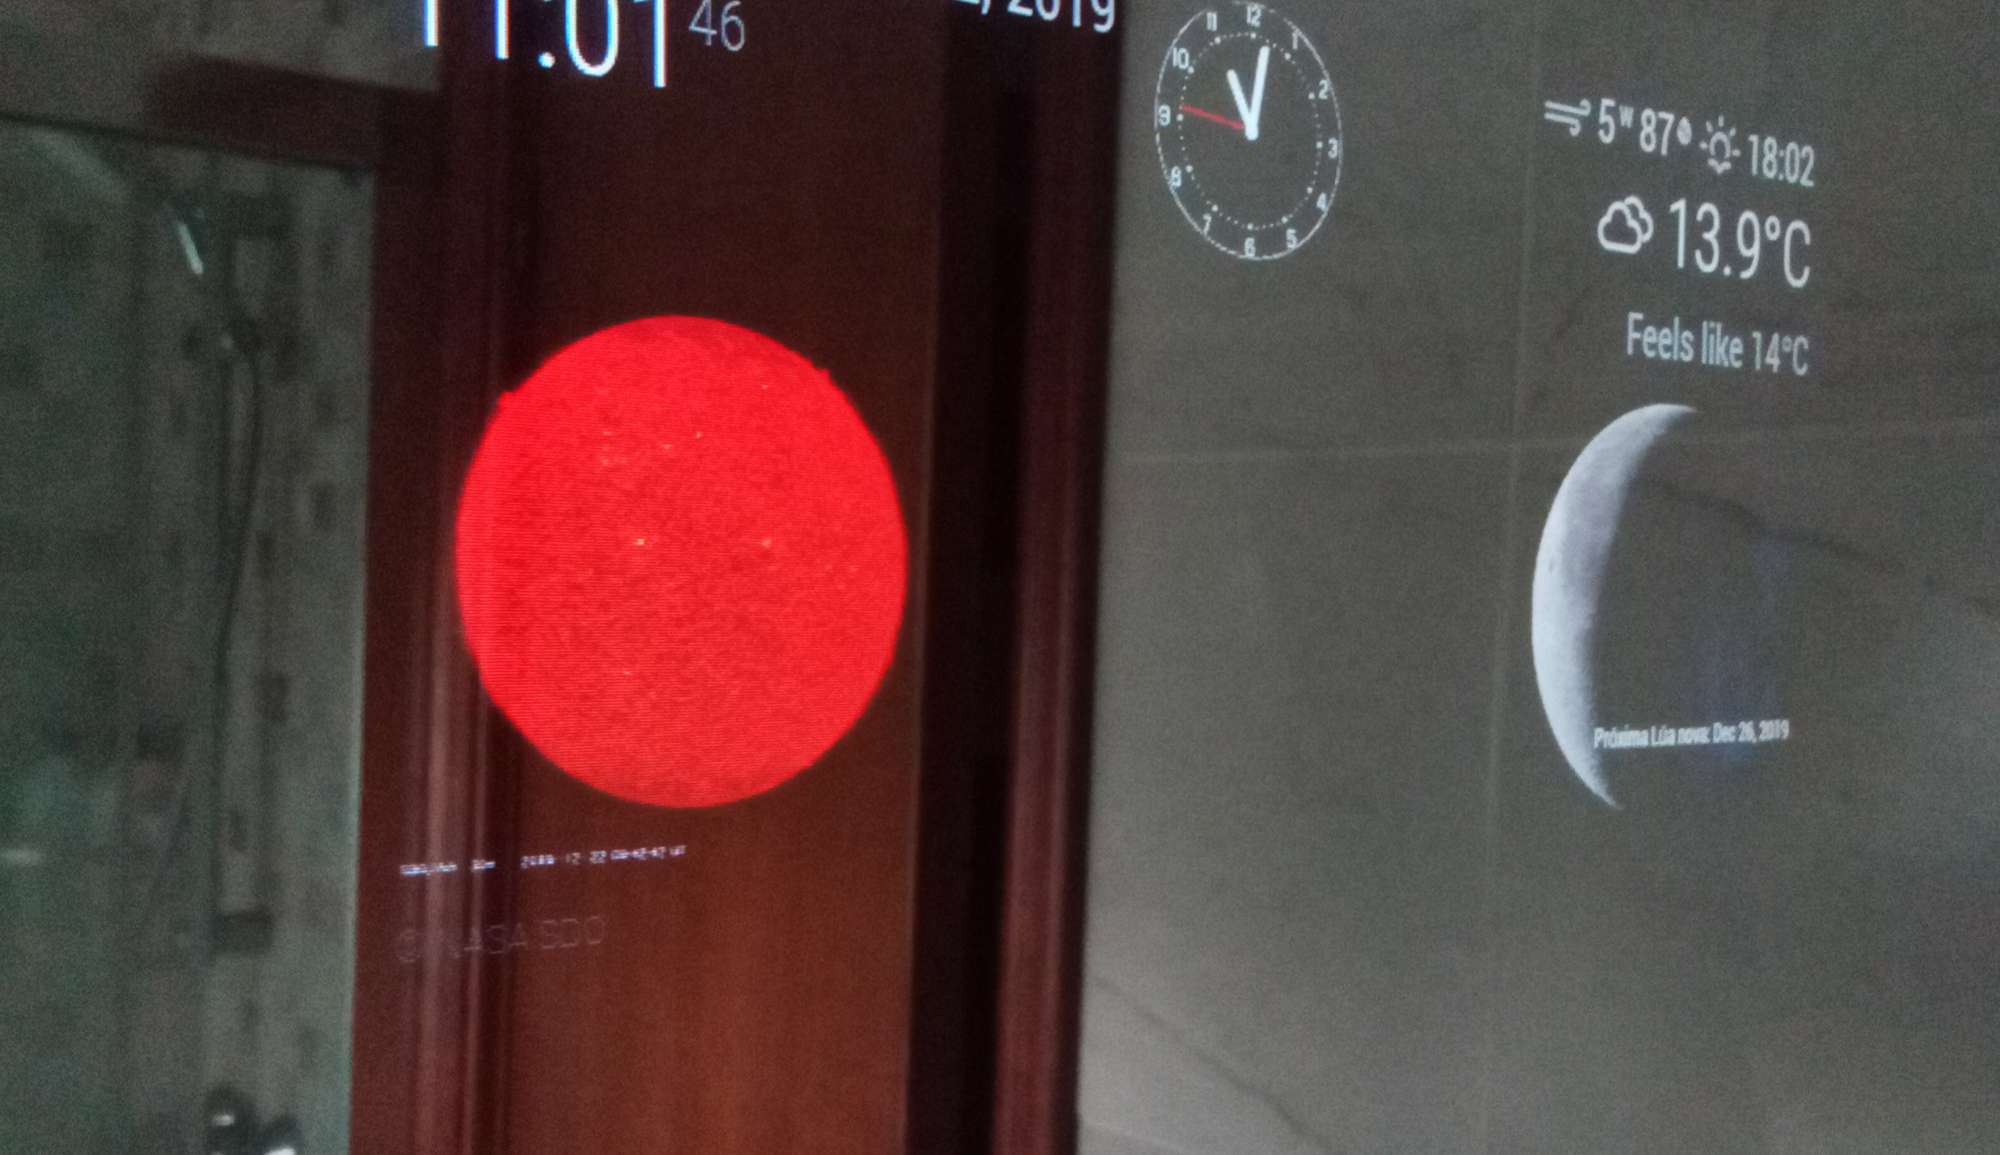
      Last adjustments and … It works !!!

      0_1537987914503_0817_185839.jpg

      0_1537987944995_213058.jpg


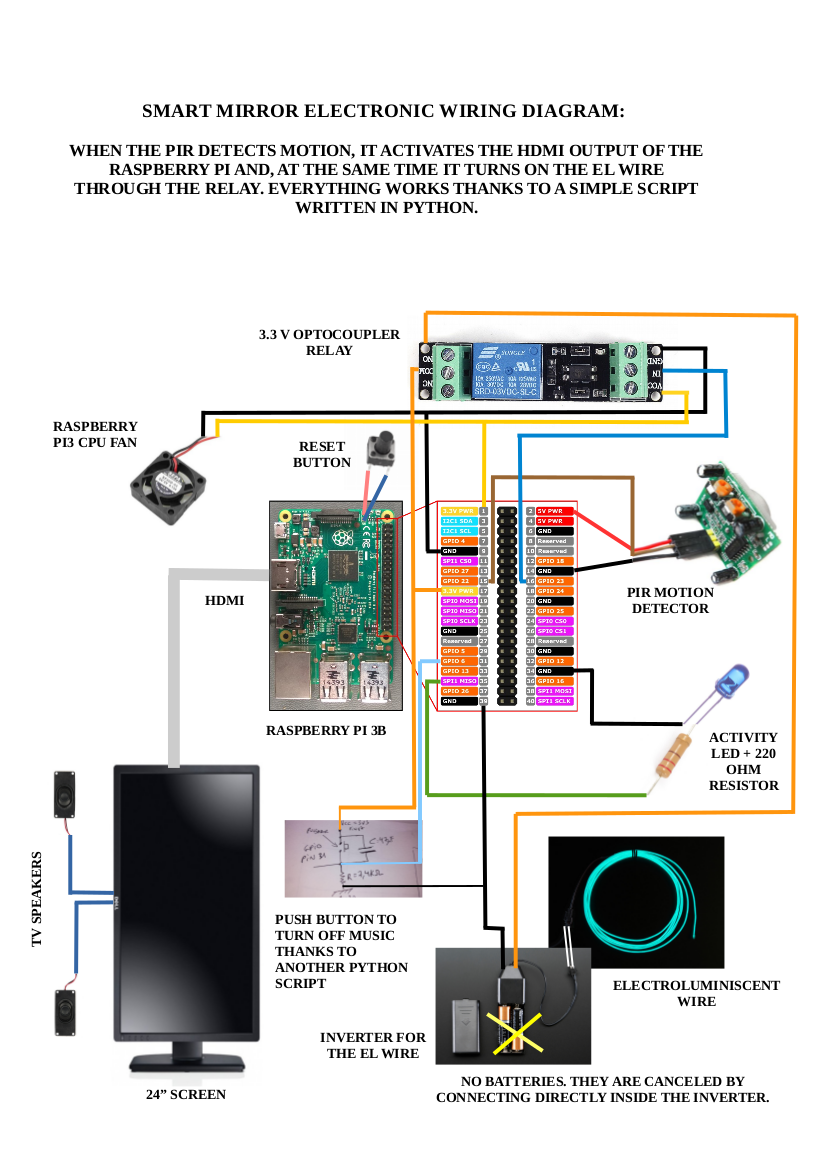
      I have made a pdf with the connection scheme of all the electronic part that you can see here (I’ve had to convert to png previously to put it here):

      0_1537988735274_esquema_instalacion.png

      And here is the python3 script to make it all works:

      #!/usr/bin/python3
      # Para que funcione correctamente, hay que instalar los siguientes
      # paquetes:   sudo apt install python3 python3-rpi.gpio
      
      # Script que activa la pantalla y el EL wire cuando detecta movimiento
      # a través del sensor de presencia PIR
      
      import RPi.GPIO as GPIO
      import time
      import os
      
      GPIO.setmode(GPIO.BCM)
      GPIO.setup(22, GPIO.IN)						# SALIDA DEL PIR (PIR OUTPUT)
      GPIO.setup(23, GPIO.OUT)					# EL WIRE (CABLE ELECTROLUMINISCENTE)
      GPIO.setwarnings(False)
      
      time.sleep(120)
      os.system('vcgencmd display_power 0')
      
      while True:
          if (GPIO.input(22) == 1):		                # SI DETECTA PRESENCIA (IF MOTION IS DETECTED)
              os.system('ogg123 -qz /media/pi/MUSICA/ &')	# ACTIVA LA MÚSICA (TURN MUSIC ON)
              os.system('vcgencmd display_power 1')	        # ACTIVA HDMI --> ACTIVA PANTALLA (TURN ON SCREEN)
              GPIO.output(23, GPIO.HIGH)			# ENCIENDE EL ELWIRE (TURN ON EL WIRE)
              time.sleep(600)					# "DUERME" 10 MINUTOS (SLEEP 10 MINUTES)
              os.system('vcgencmd display_power 0')		# APAGA SALIDA HDMI --> APAGA PANTALLA (TURN OFF SCREEN)
              GPIO.output(23, GPIO.LOW)			# APAGA EL WIRE (TURN OFF EL WIRE)
              os.system('sudo pkill ogg123')			# MATA PROCESO MÚSICA (TURN OFF MUSIC)
      

      And you can watch a video here:

      https://www.youtube.com/watch?v=WOjyTtQLJ6w


      I hope you like it as much as I do!!

      So far I have not managed to make the music stop when the push button is pressed, but I will end up getting it …

      posted in Show your Mirror
      qu1que
      qu1que
    • RE: Starting a new project: Magic Mirror on a small 2.2 inches screen

      One step more on this project

      photo_2020-07-28_22-30-23.jpg

      posted in Show your Mirror
      qu1que
      qu1que
    • RE: Considering taking donations to support the MagicMirror project. Interested in your thoughts!

      I think it is a good idea to make donations voluntarily so that the project continues to grow or at least to be maintained and, if possible, without advertisements.

      It could be chosen by the person who makes the donation if they want to make a punctual or periodic donation.

      As for the payment method, I could not advise you much, since I only know paypal.

      Another idea could be that from time to time there will be a draw where interested people pay a small amount for each number (for example, numbers from 00 to 99). And the prize could be a raspberry, a screen, even a complete magic mirror. With the idea of financing the project. I do not know, it’s just an idea.

      Regards!

      posted in MagicMirror
      qu1que
      qu1que
    • RE: MMM-SolarPicture

      Very nice module!! I just tested it and it looks great next to the MMM-Lunartic module.

      0_1577009374696_IMG_20191222_110145_8.jpg

      I wonder if it will be possible to show all the images from the SDO website one after the other, setting the time between one and another, so you can see them all consecutively.

      Great work. Thanks for sharing!

      Greetings, Quique.

      posted in Entertainment
      qu1que
      qu1que
    • RE: Do you use a PIR sensor? How do you hide it?

      I’ve made an 8 mm hole, as you can see here:

      https://forum.magicmirror.builders/topic/7263/my-first-smart-mirror-in-a-frame-of-40-x-30-cm-with-raspberry-pi-zero-w/2

      posted in Hardware
      qu1que
      qu1que
    • My first smart mirror in a frame of 40 x 30 cm with Raspberry Pi Zero W

      At the moment I only have the modules by default and some simple ones from third parties. In the future I hope to add some more, such as a presence detector to turn on the monitor when it detects movement. I’d like to show you some pictures of the project.

      If you prefer, you can watch a video on youtube about my mirror in this link:
      https://www.youtube.com/watch?v=JmT4wroDmCY (WITHOUT THE PIR AND THE RELAY)

      https://www.youtube.com/watch?v=a5RfCQVqrJo&t=6s (WITH THE PIR, RELAY AND SCRIPT WORKING)


      0_1527600294590_2013-11-26 15.32.28.jpg

      0_1527600460622_IMG_20180514_232826_pequeña.jpg

      0_1527600527366_IMG_20180527_201828_pequeña.jpg

      These little holes are for, from left to right:
      1 - infrared receiver for the remote control of the controller board.
      2 - led status of the screen, also included with the controller (on: green / off: red).
      3 - pushbutton to turn on / off the screen (for now also the rpi zero is turned off, since it is connected to a usb of the controller, in the future I hope that the screen can be turned off independently).
      4 - Activity LED of the raspberry (you have to follow these simple steps: https://sudomod.com/forum/viewtopic.php?t=1113).
      5- RESET button (if the raspberry is hanging, it is a hard reset).

      0_1527601092486_IMG_20180528_232838_pequeña.jpg

      0_1527601353326_IMG_20180528_234543_HHT_pequeña.jpg


      HARDWARE:


      0_1527602707788_IMG_20180529_125530_pequeña.jpg

      The Power Supply I’m using is a 12 V DC 2 A and works great for the controller board + raspberry Pi Zero W.


      DETAILED VIEW


      0_1527602929892_IMG_20180529_125422_pequeña.jpg

      0_1527603200284_IMG_20180529_125441_HHT_pequeña.jpg

      0_1527603364352_infrarrojo.jpg

      0_1527812996812_photo_2018-06-01_02-23-22.jpg

      0_1527603524750_IMG_20180529_125626_pequeña.jpg


      FINAL RESULT


      0_1527604682494_IMG_20180529_162004.jpg


      NEW UPDATE (2018-07-09): INSTALATION OF THE PIR AND RELAY TO SWITCH ON/OFF SCREEN AUTOMAGICALLY


      Well, I’ve finished my mirror installing the motion detector (PIR) and the relay. I’ve installed too one 18650 battery in case there is a blackout.

      The basic idea of the motion detector is that when nobody are near the mirror, it turns off the scree, but the raspberry is still running. When somebody aproax the mirror, it turns on the screen. The PIR output goes into an input GPIO of the raspberry (22, BCM), then, on pin 25 (BCM) goes the input to the relay (output from the raspberry GPIO). And finally, the screen detector as an input to the GPIO (pin 6 BCM). It’s a simple circuit from the USB port of the controller board of the screen that is on level HIGH (3v) when screen is on, and level LOW (0v) when is off.

      Here you can take a look at the script written in python for this purpose:

      #!/usr/bin/python3
      
      # PACKAGES NEEDED TO WORK:  sudo apt install python3 python3-rpi.gpio
      
      # My screen has an USB port, that turns on when screen is on, and off when screen is off.
      # So, I made a voltage divider with a few resistors to get 3 volts, to activate pin 6 (BCM) 
      # on the raspberry Pi. In this way, the script can 'know' if Screen is ON or OFF.
      
      import RPi.GPIO as GPIO
      import time
      import subprocess
      from subprocess import call
      
      GPIO.setmode(GPIO.BCM)
      GPIO.setup(22, GPIO.IN)		                  # PIR's output
      GPIO.setup(6, GPIO.IN)                            # Screen power detector
      GPIO.setup(25, GPIO.OUT)	                  # Relay Input
      GPIO.setwarnings(False)
      
      while (GPIO.input(6) == 0):                       # IF SCREEN IS ON
          if (GPIO.input(22) == 1):                     # PIR DETECTS MOTION
              call(('/opt/vc/bin/vcgencmd', ' display_power', '1'))
              GPIO.output(25, GPIO.HIGH)                # RELAY ACTIVATION
              time.sleep(3)
              GPIO.output(25, GPIO.LOW)
              time.sleep(60)                            # THE TIME WE WANT THE SCREEN TO STAY ON
              if (GPIO.input(22) == 1):                 # IF PIR DETECTS A NEW MOVEMENT, 
                  time.sleep(60)                        # ACTIVATES THE MIRROR ANOTHER AMOUNT OF SECONDS
              else:
                  GPIO.output(25, GPIO.HIGH)           # WITH THIS LINE, THE SCREEN POWERS OFF TO SAVE ENERGY
                  time.sleep(3)
                  GPIO.output(25, GPIO.LOW)	
          else:
              GPIO.output(25, GPIO.LOW)
      
      while (GPIO.input(6) == 1):                       # IF SCREEN IS OFF
          if (GPIO.input(22) == 1):                     # PIR DETECTS MOTION
              call(('/opt/vc/bin/vcgencmd', ' display_power', '1'))
              GPIO.output(25, GPIO.LOW)               # SAME AS ABOVE, BUT THIS TIME DON'T ACTIVATE THE RELAY
              time.sleep(60)
              if (GPIO.input(22) == 1):
                  time.sleep(60)
              else:
                  GPIO.output(25, GPIO.HIGH)      # WITH THIS LINE, THE SCREEN POWERS OFF TO SAVE ENERGY, AGAIN
                  time.sleep(3)
                  GPIO.output(25, GPIO.LOW)
          else:
              GPIO.output(25, GPIO.LOW)
      
      call(('/usr/bin/python3', '/home/pi/SCRIPTS/pir.py'))
      

      Here are some pictures of the back face of the mirror:

      0_1531143321488_photo_2018-07-09_15-34-52.jpg

      0_1531143349822_photo_2018-07-09_15-34-41.jpg

      Detail of the PIR on the back face of the mirror…

      0_1531143427906_photo_2018-07-09_15-34-27.jpg

      … and on the front face. I’ve made an 8 mm hole for the PIR detector (I think is a phototransistor, but I’m not sure)

      0_1531143483954_photo_2018-07-09_15-34-49.jpg

      Detail of the micro SD Extender to easily extract te micro sd card.

      0_1531143561440_photo_2018-07-09_15-34-45.jpg

      I’ve made a voltage divider with a few resistors to get 3 volts from the USB port of the screen. When the screen is on, the USB is on too, and vice versa. The 3 volts output of this voltage divider goes to pin 6 (BCM) of the raspberry.

      MATERIAL’S LIST


      • Laptop screen from a 10 years old Airis laptop (owned, not buyed).

      • Controller board for that screen:
        https://www.amazon.es/gp/product/B0722Q7HX3/ref=oh_aui_detailpage_o01_s00?ie=UTF8&psc=1

      • One power supply 12 V - 2 A (owned, not buyed).

      • A cheap frame (not exactly this model, but similar):
        http://www.leroymerlin.es/fp/320202_milo1z1haya1z1marco/milo-haya-marco-milo-haya-marco

      • A raspberry pi zero W:
        https://uk.pi-supply.com/products/raspberry-pi-zero-w

      • 12" x 12" Acrylic mirror:
        https://www.amazon.com/gp/product/B017ONH3EG/ref=oh_aui_detailpage_o00_s00?ie=UTF8&psc=1

      OPTIONAL:

      • One 3mm blue LED and two switches like these:
        https://www.amazon.es/gp/product/B072TSNZJ1/ref=oh_aui_detailpage_o03_s00?ie=UTF8&psc=1

      • Micro sd card extender
        https://es.aliexpress.com/item/48CM-60CM-TF-Male-to-micro-SD-card-Female-Flexible-Card-Extension-cable-Extender-Adapter-reader/32811147746.html?spm=a2g0s.9042311.0.0.3c4d63c06dnylM

      • 18650 Battery Shield USB Port with USB to Micro-USB Cable for Raspberry Pi and Arduino
        https://www.amazon.es/gp/product/B07B2JSXQG/ref=oh_aui_detailpage_o08_s00?ie=UTF8&psc=1

      • One 18650 battery cell from the same laptop than the screen.

      • One Step down to get 5 volts from the 12 v of the screen power supply:
        https://www.amazon.es/gp/product/B07142WLXT/ref=oh_aui_detailpage_o05_s00?ie=UTF8&psc=1

      MATERIALS FOR THE MOTION DETECTOR

      • One PIR for motion detection:
        https://es.aliexpress.com/item/Free-shipping-1PCS-LOT-HC-SR501-HCSR501-SR501-human-infrared-sensor-module-Pyroelectric-infrared-sensor-imports/32730387155.html?spm=a2g0s.9042311.0.0.2a4063c02jBYAy

      • One 3v3 Optocoupled relay module:
        https://www.ebay.es/itm/3V-3-3V-Relay-High-Level-Driver-Module-optocouple-Relay-Module-for-Arduino/351748538371?ssPageName=STRK%3AMEBIDX%3AIT&_trksid=p2060353.m1438.l2649

      posted in Show your Mirror
      qu1que
      qu1que
    • RE: How to start smart mirror

      @Mykle1

      Yes, always is a good idea to make a backup of a file before modified it 😉

      posted in Tutorials
      qu1que
      qu1que
    • RE: Contribute to a module. Volunteers wanted! Easy!

      n681 - A Coruña - Spain
      n3334 - Lugo - Spain
      n4529 - Vigo - Spain
      n141- Madrid - Spain
      n327 - Bilbao - Spain
      n31 - Barcelona - Spain
      n326 - Zaragoza - Spain
      n321- Sevilla - Spain
      n325 - Valencia - Spain
      n683 - Santa Cruz de Tenerife - Spain
      n3751 - Valladolid - Spain

      posted in Troubleshooting
      qu1que
      qu1que
    • RE: MMM-Lunartic

      @mykle1

      Hahaha, I’ve heard it two or three days days ago, on last full moon. Awesome!! My sister heard it and she was scared with the wolf sound, hahaha.

      posted in Education
      qu1que
      qu1que
    • RE: My first smart mirror in a frame of 40 x 30 cm with Raspberry Pi Zero W

      I’ve just follow this tutorial:

      http://emmanuelcontreras.com/how-to/how-to-create-a-magic-mirror-2-with-pi-zero-w/

      And there are an image of all the software to burn and just configure with your choices/modules. The problem is that I can’t update it, always give me some error. So I decided not to update it. I hope it helps you!

      Here yo have a link directly to download the image for raspberry pi zero:

      https://mega.nz/#!J2xChCrD!I3lUEsfQP2NoZ91uxlYznIynC_KxyxVp0R68I6yqR4k

      posted in Show your Mirror
      qu1que
      qu1que

    Latest posts made by qu1que

    • RE: 3.5inch Display

      @dgregory19

      3.5" is a too big screen size (just kidding, hehe).

      I’m with a 2.2" screen project. Right now I have it a bit abandoned, but I’m counting on taking it up again soon. I can’t say exactly which file/s I modified but I can check it at any time in case it helps you.

      In the end, what I did was that, using the MMM-pages module , only one module is shown on each page.

      This is my project (unfinished for now) if you want to take a look:

      https://forum.magicmirror.builders/topic/13333/starting-a-new-project-magic-mirror-on-a-small-2-2-inches-screen/5?_=1605305832928

      I hope it helps u.

      Translated with www.DeepL.com/Translator (free version)

      posted in Hardware
      qu1que
      qu1que
    • RE: MMM-Lunartic

      @Mykle1

      I already feel a little sorry for the coronavirus. It always takes the blame for many things that cannot be done. [It’s a joke 😜 ]

      posted in Education
      qu1que
      qu1que
    • RE: Starting a new project: Magic Mirror on a small 2.2 inches screen

      More progress, now with music and 2 buttons to control it. You can see a video on this link:

      My project on Reddit

      Enjoy!

      posted in Show your Mirror
      qu1que
      qu1que
    • RE: Starting a new project: Magic Mirror on a small 2.2 inches screen

      One step more on this project

      photo_2020-07-28_22-30-23.jpg

      posted in Show your Mirror
      qu1que
      qu1que
    • RE: Starting a new project: Magic Mirror on a small 2.2 inches screen

      @sdetweil

      Yeah, that’s my idea, to show several modules, but only one at a time on different pages

      posted in Show your Mirror
      qu1que
      qu1que
    • Starting a new project: Magic Mirror on a small 2.2 inches screen

      Hi,

      I’ve had an idea for the past few months and I’m starting to implement it. It’s about using the MagicMirror software on a 2.2 inch screen, with the idea of showing elementary things, like the time, the calendar, news, the weather, etc. In this case I won’t need a two-way mirror

      Here is a picture of the first steps with the project.

      photo_2020-07-22_21-27-31.jpg

      I hope you like the idea as much as I do.

      Greetings

      posted in Show your Mirror
      qu1que
      qu1que
    • RE: No numbers in analog watch face

      Same happens to me, after 2.12.0 MM update, only the clock hands are shown.

      posted in Troubleshooting
      qu1que
      qu1que
    • RE: Installing on a Pi Zero

      @naked-head

      I think electron is discontinued for raspberry pi zero, a few months ago I see a post in this forum talking about that. Now I can’t find that post.

      posted in Troubleshooting
      qu1que
      qu1que
    • RE: 1 old noob + 1 rPi = I can't believe I did it! (revisited)

      @Mykle1

      Yes, Raspberry Pi 3B+

      posted in Show your Mirror
      qu1que
      qu1que
    • RE: 1 old noob + 1 rPi = I can't believe I did it! (revisited)

      @Mykle1

      I’ve just discovered Eyecandy module, it’s great!! Thanks for your job!

      Anyway, two eyes see better than one 😛

      ezgif.com-video-to-gif.gif

      posted in Show your Mirror
      qu1que
      qu1que