@Adam - I confess, I had never considered the possibility of a rotating mirror.
A New Chapter for MagicMirror: The Community Takes the Lead
Read the statement by Michael Teeuw here.
Read the statement by Michael Teeuw here.
B
Offline
Posts
-
RE: Gyroscopic Capability Module
-
RE: Portrait Mode
@johnnyboy - In the latest version of Raspbian Buster, you can rotate it through the UI. But you have to do a full OS update so as to include the latest version of the desktop.
On the pi, open a terminal window (
ctrl+t) and update everything:sudo apt update && sudo apt upgrade -yThat step will take a while to complete. Depending on your model of Pi, expect 30 minutes or so. It will require a reboot at the end, so reboot your Pi.
Once the Pi is back up, you’ll be at the desktop. If you’ve already installed Magic Mirror, you’ll want to stop it by opening a terminal window and entering
pm2 stop all. Go to the Raspberry button followRaspberry -> Preferences -> Screen Configuration. The configuration dialog will appear. Follow the menu like so:Configure -> Screens -> HDMI1 -> Orientationand make your selection to rotate the screen. It will enable the green check mark which will apply your selection.Select whichever orientation makes sense for you. Just so you know, the descriptions describe the bottom of the monitor. So the “left” entry puts the bottom of the monitor on the left in portrait mode.
-
RE: MMM-Awesome-Alexa Problems
Please use the Markdown features of the forum when posting error messages and code.
Are they the same errors? Specifically, look for
/usr/bin/ld: cannot find -lcblasinfo lifecycle snowboy@1.3.1~install: Failed to exec install scriptand see if that error message is still coming back. If it’s a different error, copy it and let us know. -
RE: OMXPlayer not working any more?
Just an FYI - I tried it today and it played the video first time, with no issues on an RPI 4. It would appear that something has changed in the default Buster installation.
-
RE: MMM-RemoteCompliments does not appear
@sdetweil Good point. It really should specify the google API as a dependency and tell you to install the module with npm.
-
RE: Minimal depth of a frame for the magic mirror
Some users have created fairly thin magic mirrors by using laptop screens and driver boards. The laptop screens are thinner than conventional LCD monitors.
The downside is that you’re limited to the display size of a laptop screen.
-
RE: MMM-RemoteCompliments does not appear
@justtrying - Are any of the other modules appearing? The clock, for example?
The easiest way to check for errors is to check the logs. If you’re using PM2 to auto-start your mirror, then you can just enter
pm2 log 0and look for messages that contain “error”.If you don’t see anything there, you can check the front-end logs by stopping your mirror (
pm2 stop 0, changing to the install directory (cd /home/pi/MagicMirror) and displaying the developer console:npm start dev. That will show you any errors that may be preventing your module from displaying.Let’s check on where you did install it. Get a terminal connection to your Pi (SSH into it, open a terminal on the pi itself, whatever). Once there, type
ls /home/pi/MagicMirror/modulesand see if the module is among the results. If it is not present, then you’ll have to clone it into the proper location.To do so, it’s just a handful of commands. Do this as the pi user, do not do this as root. One at a time:
- change to the proper directory:
cd /home/pi/MagicMirror/modules - clone the module from GitHub:
git clone https://github.com/mitchelltmarino/MMM-RemoteCompliments.git - restart your mirror process:
pm2 restart all
Give these a try and report back. Remember to use the markdown features of the forum!
- change to the proper directory:
-
RE: My completed Magic mirror project
Good stuff! Congratulations on completing your project.
-
RE: Magic Mirror Wires
The mirror in the office has an electrical outlet behind it. It makes for a very clean installation. I put a hardware switch on the outside of the frame to turn the system on & off. I think this is how I’m going to go from now on. Having a switch on the mirror with an external plug is convenient and lets you swap out various lengths of power cord.
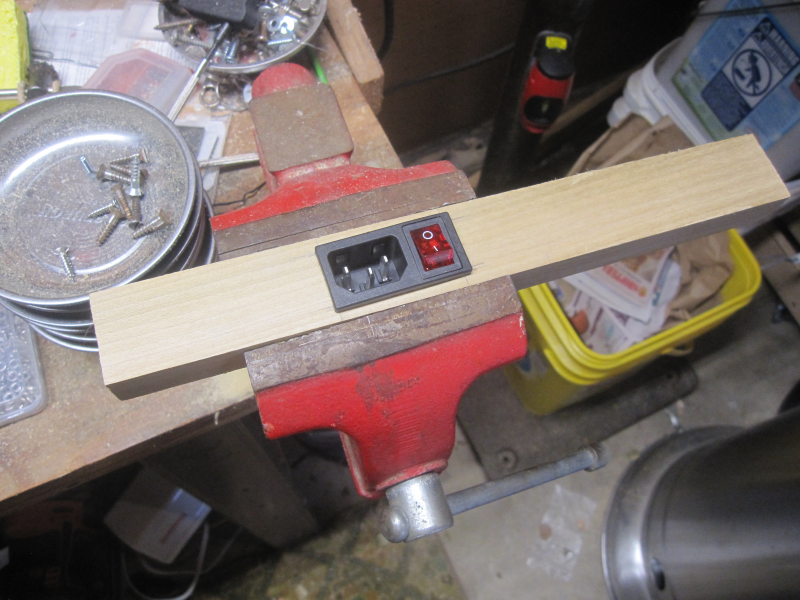
All of my mirrors have a power strip inside the frame. It gives me multiple outlets, surge protection and enough juice to power the Pi. Wire the power strip to the power socket, leave the power strip turned on, control the power via external switch.
-
RE: My mirror finally finished and installed
@supersook - There are a few tools that can do this. I would recommend a router with a flush trim bit.
Pull the acrylic out and very carefully lay it along the edge of a scrap piece of wood (a sheet of something would be ideal). The amount you want to remove from the acrylic should overhand the support sheet. Clamp it down good & hard.
Set the depth so that the bearing rides along the support sheet and the bit trims the acrylic. Go fairly briskly as acrylic likes quick cuts. Slow cuts will have the bit rub against the acrylic and melt it. You may wish to practice on scrap a couple times first.
-
RE: My mirror finally finished and installed
@supersook - Your mirror looks great! Nice work.
In my experience, the wood tends to expand a bit after you cut it, so it tends to push on the outside of the acrylic. While glass would be a better choice, you may wish to try opening up your tolerance by a hair. If you can get the acrylic to rest easily in the mirror, you may eliminate most of your distortion.
Although it looks like you don’t have a lot of distortion going on. You’re most of the way there.
-
RE: Building dashboard with touch controls
@Lucker25 said in Building dashboard with touch controls:
If I don´t find a matching display + case the alternative would be integrating this into the door of my hanging cabinet.
That sounds like a very simple solution. You would just need to pull the cabinet door off the hinges, cut out a hole for the display, run a router along the inside edges if you’re feeling fancy, fabricate a bracket for the monitor and then attach the Pi & power to the inside of the door. If you’re feeling like you can make cuts within a 1/2 centimetre or so, you won’t even need a case for the monitor - just cut the opening slightly smaller than the screen size.
Although you may wish to mount the Pi on the inside wall of the cabinet. Up to you.
-
RE: Building dashboard with touch controls
Most of the enclosures for the mirrors here are custom made by their creators. You might be able to get away with a pre-made touch screen monitor w/case that was designed for an embedded app (similar to a mall kiosk). I think www.adafruit.com sells the monitors and a handful come with cases.
For a kitchen dashboard, perhaps mounting a slim monitor underneath a cabinet. If you can find the right mount for it, it could swing up & away when you’re not using it. The wires can either be run along the back inside edge of the cabinet or put all the electronics deep in the cabinet and poke a hole through the bottom.
That would keep the woodworking down to a minimum.
-
RE: Full Body Mirror Glass Question
Yes, I have and yes, it’s expensive. @twowaymirrors sold me a custom sheet of mirror glass that was 13" x 84" x 1/4". They had to build a custom crate for it too. But if anyone can do it, they can.
-
RE: Newbie - Build Smart Mirror
@xxLulaBelle - None of my mirrors have touch capability. Personally, I don’t understand why people want it. It will collect fingerprints and smears. But several people have built it and they seem happy with it.
A touchscreen monitor will work if you’re not building a mirror but instead are building a display with the framework. The reason is that the glass/acrylic that provides the mirror finish will interfere with the touch signals. In order to get touch capability, you’ll want a touch overlay that you can place on top of the mirror (with a regular monitor behind it).
-
RE: Newbie - Build Smart Mirror
More advice for you:
- Whatever monitor you purchase/acquire, be sure the HDMI ports face down.
- Use @sdetweil’s installation scripts when it comes to installing the Magic Mirror framework. (we’re both recommending this. That should be a hint)
- No shame in doing the software part long before building the mirror part. If you’ve never run a table saw, this is a good way to get an early success in.
- Mirror glass is better than mirror acrylic is better than mirror film on glass. With an accompanying difference in price. But it all works. Don’t get too hung up on the hardware aspect.
- Do not power your Pi off of the monitor’s USB ports.
-
RE: Help please. Module doesn't show up
@blacter - Okay, a couple things.
First, it’s best to use the markdown features of the board when posting code, rather than screenshots.
Second, you should obfuscate or hide your API keys, lest someone “borrow” them for their own use.
Third, the line
obtained from https://iexcloud.io/console/tokensappears to be on its own line without a comment prefix (the//characters) so it is being evaluated by the interpreter. And because it’s a comment and not a setting, it’s probably barfing on that line.Fourth, the code you quoted is missing a closing
}symbol. You have one opened for theconfig: {line and another open for the{ module: 'MMM-SingleStock',portion… but you only have one closing}.I hope that gets you on your way.
Edited to add: Dammit, @Mykle1 beat me to it.
-
RE: MagicMirror with Google Assistant from Korea Republic of.(Language translated)
Wow! Great job on your mirror!
-
RE: Saint of the day module
The first step is to see if someone has a web API you can use to find out the Saint of the Day. Do you know of one?